Vegetable Soup Recipe has been my go-to when I want something simple, nourishing, and full of color. I remember the first time I made this Vegetable Soup Recipe for a friend who was recovering from an illness; the warmth of the bowl and the aroma did more than any medicine. I cook this soup year round, swapping whatever vegetables are in season while keeping the base the same. It feels like a small act of care every time I stir the pot.
What makes this Vegetable Soup Recipe special is how approachable it is: you can use pantry staples and frozen veggies and still end up with bright, layered flavors. The tomato-broth base gives body without heaviness, and a squeeze of lemon at the end wakes everything up. If you like vegetables that keep a little bite, this recipe rewards patience and gentle timing more than fancy ingredients.
How This Recipe Became My Rainy-Day Favorite
I can still picture the rainy afternoon that turned this into my comfort staple. The sky was a flat, pewter gray, and a bowl of this Vegetable Soup Recipe sat between two steaming mugs of tea, filling the apartment with a warm, tomato-scented air. I remember the sound of the rain against the window, the gentle simmering, and the tiny, hopeful pop when frozen corn met hot broth. My roommate that week had a sore throat, so I added a touch more lemon and a little extra parsley; she ate two bowls and declared she already felt better. The textures mattered then more than anything: soft Yukon Gold potatoes balanced against snapper green beans and silky zucchini. That afternoon taught me to lean into simple, deliberate cooking when the weather or life feels heavy. The ritual of chopping, stirring, tasting, and sharing turned a soggy day into something comforting and bright. Even now, when I make it, I recall the light through the window and the way warmth seemed to stitch the room back together.
The Main Ingredients and What They Bring
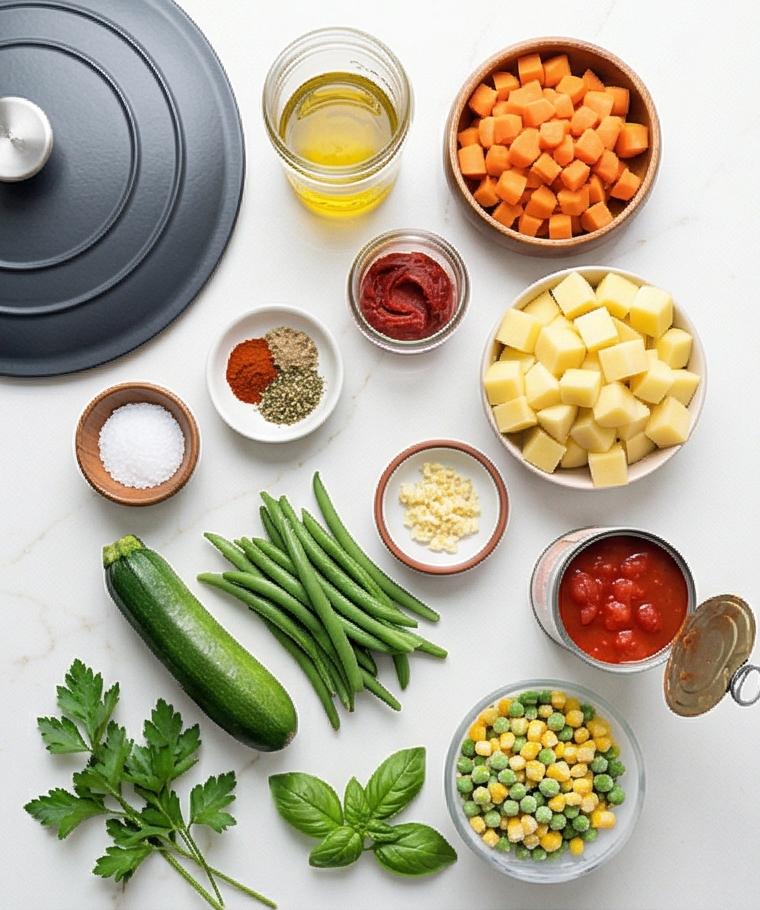
- Extra-virgin olive oil: Provides the fat for sauteing and a glossy finish. Substitute with avocado oil or light olive oil if you need a milder taste; choose cold-pressed for aroma.
- Yellow onion: The savory backbone. Pick firm, dry onions with papery skins for better flavor.
- Carrots and celery: Build sweetness and texture; swap with parsnips or fennel for a different aroma.
- Leek (optional): Adds a gentle oniony-sweetness. Clean thoroughly between the layers.
- Garlic and herbs (oregano, thyme): Layer the aromatic profile; fresh herbs can replace dried at a 3:1 ratio.
- Tomato paste and diced tomatoes: Give depth and acidity. Use fire-roasted tomatoes for a smokier note.
- Vegetable broth: The liquid base; low-sodium lets you control salt.
- Yukon Gold potatoes: Provide body and slight creaminess; russets will break down more, red potatoes hold shape.
- Green beans, zucchini, corn, peas: The colorful medley. Use fresh when in season or frozen for convenience.
- Lemon, parsley, basil: Bright finishing notes. Fresh lemon is best; bottled will be flatter.
Essential Kitchen Tools and Why They Matter
A few good tools make this recipe effortless and help you get consistent results. A sturdy, heavy-bottomed pot distributes heat evenly so the tomato paste caramelizes without burning. A sharp chef’s knife speeds prep and keeps vegetable pieces uniform, which means even cooking. A wooden spoon or heatproof spatula is gentle on the pot and great for scraping up fond when you deglaze with broth.
- Heavy-bottomed soup pot or Dutch oven: Prevents hot spots and helps develop flavor.
- Chef’s knife: For fast, uniform chopping; a paring knife handles small tasks.
- Cutting board: A stable surface keeps cuts safe and even.
- Wooden spoon or silicone spatula: For gentle stirring and scraping.
- Ladle and tongs: For serving and checking doneness.
If you don’t have a Dutch oven, a wide, deep sauté pan with a lid will work. For knives, a well-maintained economy knife is better than a dull high-end one.
Step-by-Step Preparation Guide
Step 1: Prepare all vegetables and aromatics
Begin by finely chopping the yellow onion, peeling and dicing the carrots and Yukon Gold potatoes into uniform 1/2-inch (1.25 cm) cubes, and dicing the celery and zucchini to the same size. Trim and cut the green beans into 1-inch (2.5 cm) pieces, halve and thinly slice the white and light-green parts of the leek (if using), and finely mince the garlic. Having everything neatly prepped and portioned ensures even cooking, uniform texture in the soup, and a calm, efficient rhythm once you start cooking.
Step 2: Warm the oil and soften the aromatics
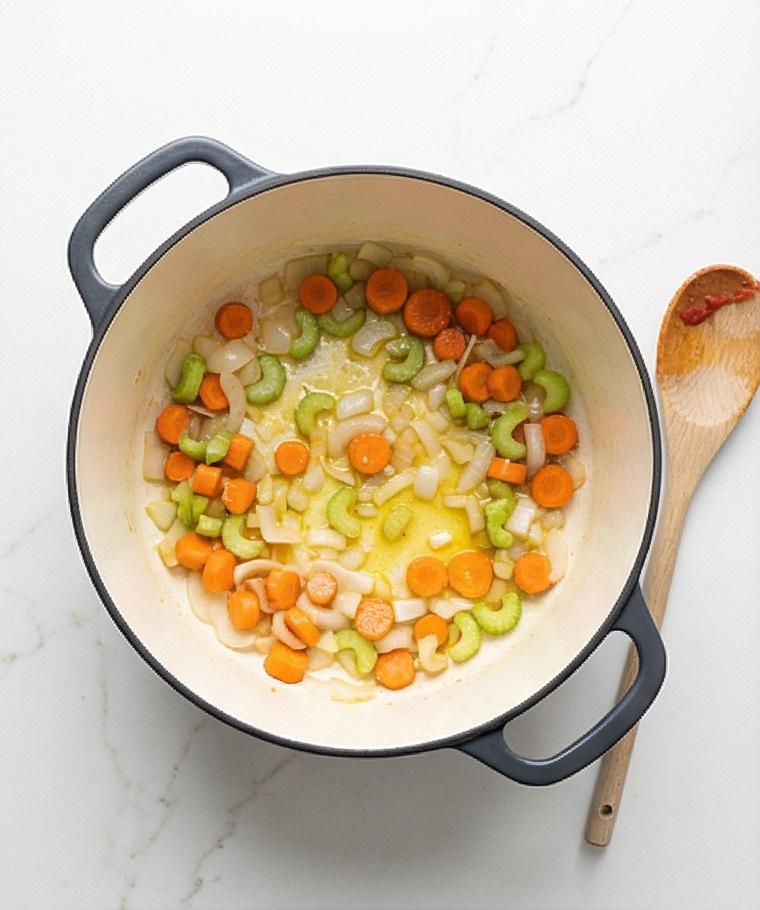
Heat two tablespoons of extra-virgin olive oil until shimmering, then add the chopped onion, diced carrots, diced celery, and the sliced leek. Sprinkle with a portion of the kosher salt to help draw moisture and encourage the vegetables to soften. Cook gently over moderate heat, stirring occasionally, until the onion is translucent and the vegetables are tender but not browned – a soft, glossy mirepoix with a faint sweetness and silky texture.
Step 3: Bloom the garlic and dried herbs
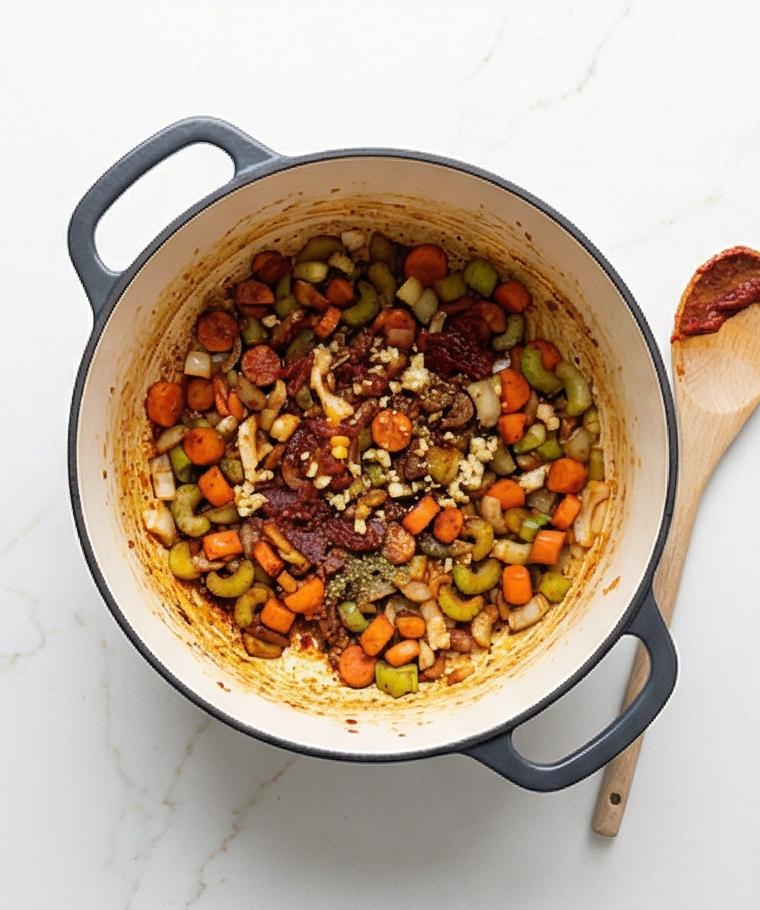
Add the minced garlic along with black pepper, dried oregano, dried thyme, sweet paprika, and the optional red pepper flakes. Stir constantly for about a minute until the garlic becomes fragrant and the spices look damp and slightly glossy – the mixture should smell aromatic and rounded, the surface of the vegetables flecked with rust-orange paprika and herb fragments.
Step 4: Deepen flavor with tomato paste
Stir in the tomato paste and continue cooking, stirring frequently for 2–3 minutes until the paste darkens slightly and begins to cling to the pan. This concentrated, caramelized tomato paste develops savory depth; visually the paste turns from bright brick-red to a richer, mahogany-red sheen that glazes the vegetables and leaves behind tiny browned fond on the pot surface.
Step 5: Add tomatoes, broth, and water
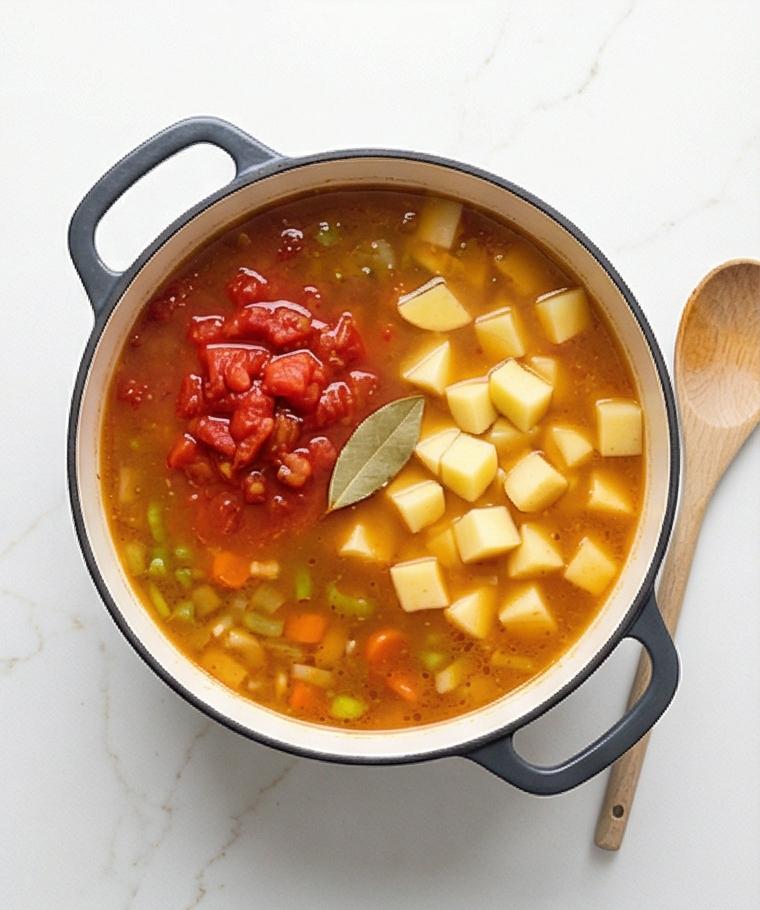
Pour in the diced tomatoes with their juices, then add the low-sodium vegetable broth and water. Stir deliberately, scraping up any browned bits so the deep tomato-scented fond dissolves into the liquid. The pot should now contain a glossy, slightly thickened tomato-broth base studded with softened vegetable pieces – a reddish-gold, gently shimmering broth that promises body and warmth.
Step 6: Add potatoes, bay leaf, and season
Add the diced Yukon Gold potatoes and the bay leaf, and season with the remaining kosher salt. Bring the pot just to a boil, then reduce to a gentle simmer. The potatoes should begin to poach through the warm broth, their edges softening while the centers remain intact. The broth will begin to pick up potato starch, turning from thin to a faintly velvety suspension.
Step 7: Simmer until potatoes are tender
Maintain a gentle simmer for 15–20 minutes, uncovered, checking for doneness by piercing the potato cubes with the tip of a knife – tender but intact. The broth should look lightly thickened and slightly clouded from released starches, and the overall mixture will smell mellow, rounded, and cohesive, with the individual vegetable shapes still defined.
Step 8: Add green beans and zucchini
Stir in the trimmed green beans and diced zucchini, and continue simmering 10–12 minutes until the beans are tender-crisp and bright green and the zucchini is softened but retains form. This stage is about contrast: the firm, slightly snappy green beans and the yielding, translucent zucchini cubes create textural interplay within the warm, tomato-scented broth.
Step 9: Finish with frozen corn and peas
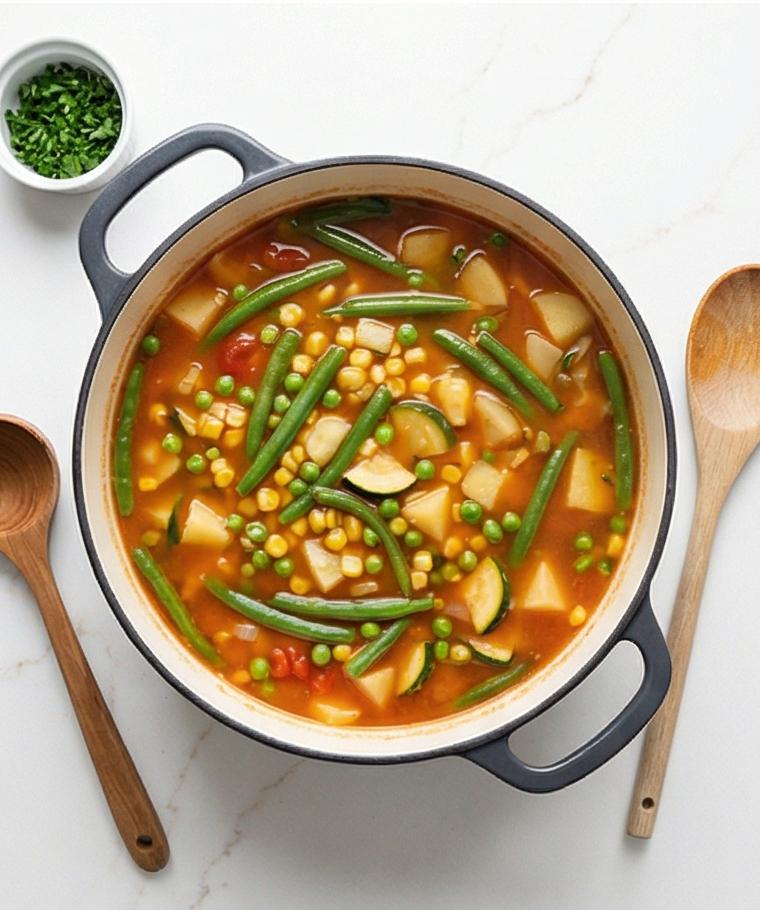
Add the frozen corn kernels and frozen green peas, stirring to distribute them evenly. Simmer another 5–7 minutes until both are heated through and the soup reads as vibrant and fresh – pops of yellow and green scattered across the reddish-golden broth, each vegetable piece distinct and glossy from the gentle cooking.
Step 10: Brighten with lemon and fresh herbs
Remove the bay leaf and turn off the heat, then stir in fresh lemon juice, chopped flat-leaf parsley, and optional basil. Taste and adjust seasoning with kosher salt and freshly ground black pepper; if needed, add another teaspoon or two of lemon juice to brighten. The finishing herbs should look verdant and wet, the lemon adding a glint of acidity that lifts the broth.
Step 11: Rest briefly
Let the soup rest off the heat for five minutes so the flavors settle and the temperature becomes comfortable for eating. The surface will calm, small bubbles subside, and the vegetables will relax into the broth, maintaining shape while the flavors continue to harmonize.
Step 12: Serve with optional olive oil, cheese, and bread
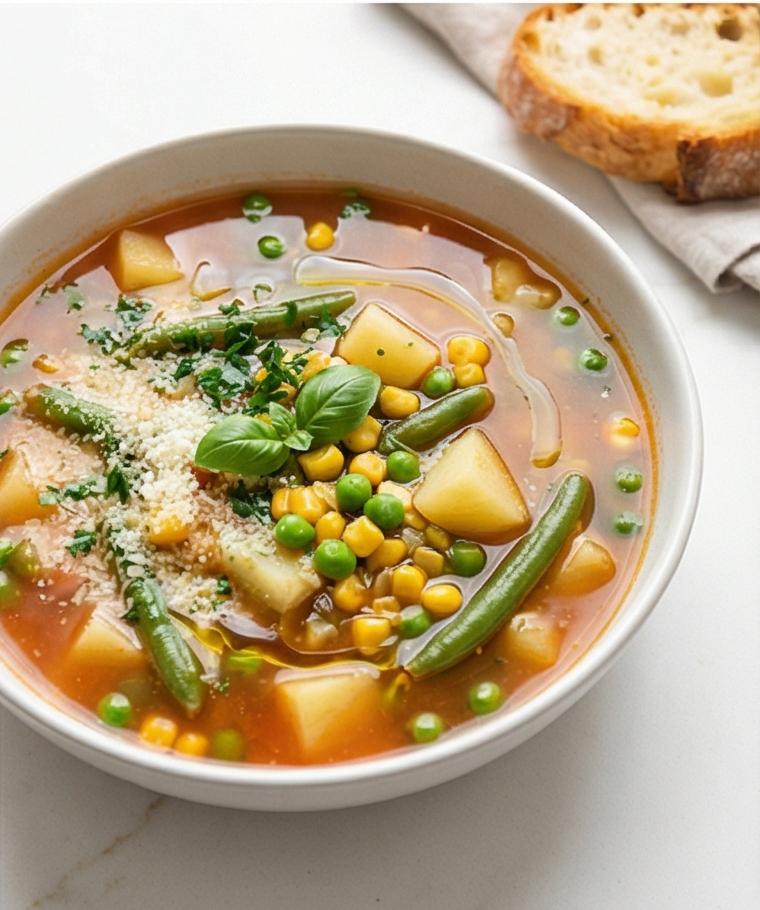
Ladle the vegetable soup into warm bowls and finish each serving with a light drizzle of extra-virgin olive oil and an optional sprinkling of finely grated Parmesan for richness (omit for vegan). Present with warm crusty bread on the side. The served bowls should look inviting: glossy broth, clearly defined vegetable pieces, a gentle oil sheen, and a scattering of bright herbs.
Step 13: Refrigerate for best next-day texture
For best texture, cool the soup completely before refrigerating in an airtight container for up to 4 days. The vegetables will maintain a pleasant bite if cooled promptly and stored properly; when ready, reheat gently over medium-low heat until steaming but not boiling, preserving texture.
Step 14: Freezing instructions
This soup freezes well: cool fully, transfer to freezer-safe containers leaving headspace, and freeze up to three months. Thaw overnight in the refrigerator, then reheat gently on the stovetop until hot and steaming before serving to protect vegetable texture.
Step 15: Final presentation note
When plating for guests, choose shallow warm bowls so the colorful vegetable medley spreads evenly across the surface, showing the contrast between golden tomato-broth and vivid vegetables. Garnish with the reserved parsley and a final tiny drizzle of olive oil for a fresh, glossy finish.
Making It Your Own
I like to experiment with this base depending on the season. In early fall I add roasted squash and a pinch of smoked paprika to give the soup a cozy, woodsy note. In summer I use garden-fresh tomatoes and swap peas for edamame for a protein bump. For a heartier meal, stir in cooked short pasta or cannelini beans near the end.
For a spicy regional twist, add a spoonful of harissa or smoked chipotle in adobo. For a lighter, spring version, double the zucchini and add citrus zest. These small swaps keep the core identity of the Vegetable Soup Recipe while letting you make it feel new.
How to Serve
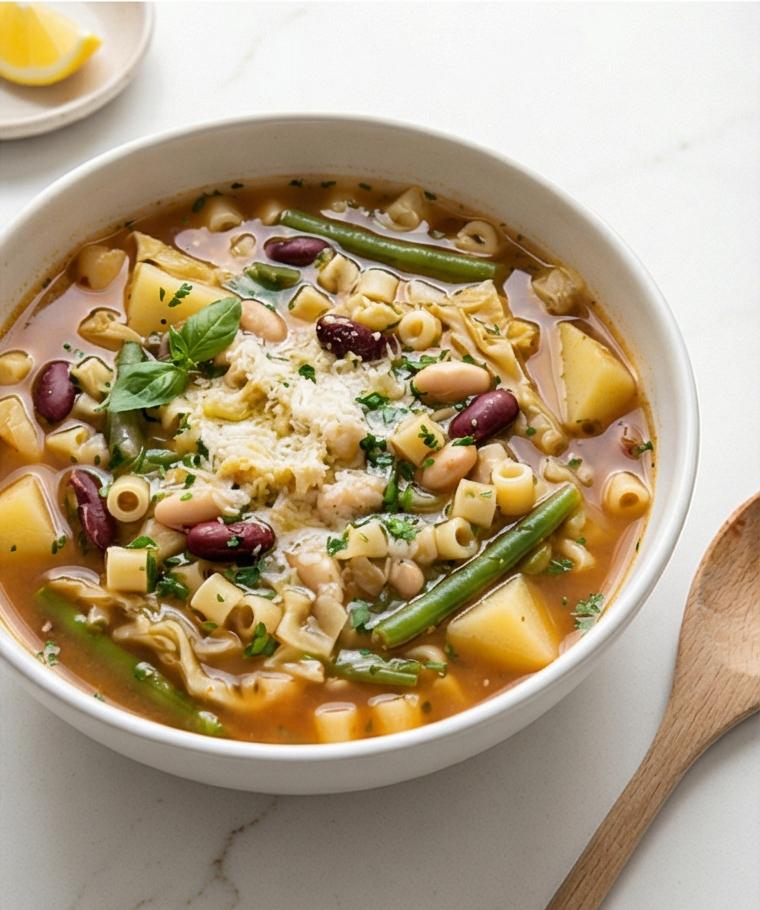
When I host, I serve this Vegetable Soup Recipe in shallow bowls so guests can see the colorful mix of vegetables. For a small gathering of 4, ladle 1 1/2 to 2 cups per person and provide warm crusty bread and a small dish of grated Parmesan. For a buffet, keep the soup in a covered slow cooker set to warm so guests can help themselves.
To stretch the recipe for a crowd, add cooked rice, tiny pasta, or an extra can of diced tomatoes and a few more cups of broth. For a vegan spread, omit the Parmesan and offer toasted garlic bread on the side. Little finishing touches like a drizzle of olive oil or a scattering of chopped parsley make each bowl feel thoughtful and pulled together.
Storage and Reheating Tips
Cool the soup quickly and refrigerate in airtight containers for up to 4 days. I like to portion into individual containers so reheating is fast and portions are ready to go. The texture stays best if you avoid prolonged boiling when reheating.
For freezing, leave some headspace in the container because liquids expand. Thaw overnight in the refrigerator, then reheat gently on the stovetop over medium-low heat until steaming; this protects the vegetables from turning mushy. If the broth thickens after chilling, thin with a splash of water or broth and finish with a fresh squeeze of lemon.
Oops-Free Cooking: Common Mistakes and How to Avoid Them
One common misstep is adding delicate vegetables too early. Green beans, zucchini, corn, and peas should go in later so they keep color and texture. If you want uniformly soft vegetables, cook longer, but remember you lose some snap and brightness.
Another mistake is underseasoning or over-relying on salted broth. Start with low-sodium broth and add kosher salt gradually, tasting as you go. The finishing lemon juice lifts the whole pot, so don’t skip it – it brightens flavors without adding salt.
A Warm Send-Off
This Vegetable Soup Recipe is forgiving, bright, and endlessly adaptable. If you try it, chop a bit extra parsley to scatter on top and take a moment to taste as you go. It’s a small ritual that makes the soup feel like something you made just for you.
Frequently Asked Questions
-
Can I use other types of potatoes in this Vegetable Soup Recipe?
Yes, you can. Yukon Golds keep a creamy texture; russets will fall apart more and thicken the broth; red potatoes hold their shape best. -
Can I make this soup in advance?
Absolutely. It actually tastes great the next day. Cool promptly, refrigerate, and reheat gently to preserve texture. -
Is this Vegetable Soup Recipe vegan-friendly?
The base recipe is vegan if you omit the Parmesan. Use vegetable broth and skip any dairy toppings. -
How do I adjust the soup for a larger crowd?
Double the vegetables and broth, or add cooked pasta, beans, or rice to stretch servings. Keep seasoning proportional and taste as you go. -
Can I freeze this soup?
Yes. Freeze in airtight containers for up to three months. Thaw in the refrigerator overnight and reheat gently.
Vegetable Soup Recipe
Make Vegetable Soup Recipe for a cozy, veggie-packed bowl in about 60 minutes with simple pantry ingredients.
Ingredients
Instructions
Step 1: Prepare all vegetables and aromatics
Begin by finely chopping the yellow onion, peeling and dicing the carrots and Yukon Gold potatoes into uniform 1/2-inch (1.25 cm) cubes, and dicing the celery and zucchini to the same size. Trim and cut the green beans into 1-inch (2.5 cm) pieces, halve and thinly slice the white and light-green parts of the leek (if using), and finely mince the garlic. Having everything neatly prepped and portioned ensures even cooking, uniform texture in the soup, and a calm, efficient rhythm once you start cooking.
Step 2: Warm the oil and soften the aromatics
Heat two tablespoons of extra-virgin olive oil until shimmering, then add the chopped onion, diced carrots, diced celery, and the sliced leek. Sprinkle with a portion of the kosher salt to help draw moisture and encourage the vegetables to soften. Cook gently over moderate heat, stirring occasionally, until the onion is translucent and the vegetables are tender but not browned — a soft, glossy mirepoix with a faint sweetness and silky texture.
Step 3: Bloom the garlic and dried herbs
Add the minced garlic along with black pepper, dried oregano, dried thyme, sweet paprika, and the optional red pepper flakes. Stir constantly for about a minute until the garlic becomes fragrant and the spices look damp and slightly glossy — the mixture should smell aromatic and rounded, the surface of the vegetables flecked with rust-orange paprika and herb fragments.
Step 4: Deepen flavor with tomato paste
Stir in the tomato paste and continue cooking, stirring frequently for 2–3 minutes until the paste darkens slightly and begins to cling to the pan. This concentrated, caramelized tomato paste develops savory depth; visually the paste turns from bright brick-red to a richer, mahogany-red sheen that glazes the vegetables and leaves behind tiny browned fond on the pot surface.
Step 5: Add tomatoes, broth, and water
Pour in the diced tomatoes with their juices, then add the low-sodium vegetable broth and water. Stir deliberately, scraping up any browned bits so the deep tomato-scented fond dissolves into the liquid. The pot should now contain a glossy, slightly thickened tomato-broth base studded with softened vegetable pieces — a reddish-gold, gently shimmering broth that promises body and warmth.
Step 6: Add potatoes, bay leaf, and season
Add the diced Yukon Gold potatoes and the bay leaf, and season with the remaining kosher salt. Bring the pot just to a boil, then reduce to a gentle simmer. The potatoes should begin to poach through the warm broth, their edges softening while the centers remain intact. The broth will begin to pick up potato starch, turning from thin to a faintly velvety suspension.
Step 7: Simmer until potatoes are tender
Maintain a gentle simmer for 15–20 minutes, uncovered, checking for doneness by piercing the potato cubes with the tip of a knife — tender but intact. The broth should look lightly thickened and slightly clouded from released starches, and the overall mixture will smell mellow, rounded, and cohesive, with the individual vegetable shapes still defined.
Step 8: Add green beans and zucchini
Stir in the trimmed green beans and diced zucchini, and continue simmering 10–12 minutes until the beans are tender-crisp and bright green and the zucchini is softened but retains form. This stage is about contrast: the firm, slightly snappy green beans and the yielding, translucent zucchini cubes create textural interplay within the warm, tomato-scented broth.
Step 9: Finish with frozen corn and peas
Add the frozen corn kernels and frozen green peas, stirring to distribute them evenly. Simmer another 5–7 minutes until both are heated through and the soup reads as vibrant and fresh — pops of yellow and green scattered across the reddish-golden broth, each vegetable piece distinct and glossy from the gentle cooking.
Step 10: Brighten with lemon and fresh herbs
Remove the bay leaf and turn off the heat, then stir in fresh lemon juice, chopped flat-leaf parsley, and optional basil. Taste and adjust seasoning with kosher salt and freshly ground black pepper; if needed, add another teaspoon or two of lemon juice to brighten. The finishing herbs should look verdant and wet, the lemon adding a glint of acidity that lifts the broth.
Step 11: Rest briefly
Let the soup rest off the heat for five minutes so the flavors settle and the temperature becomes comfortable for eating. The surface will calm, small bubbles subside, and the vegetables will relax into the broth, maintaining shape while the flavors continue to harmonize.
Step 12: Serve with optional olive oil, cheese, and bread
Ladle the vegetable soup into warm bowls and finish each serving with a light drizzle of extra-virgin olive oil and an optional sprinkling of finely grated Parmesan for richness (omit for vegan). Present with warm crusty bread on the side. The served bowls should look inviting: glossy broth, clearly defined vegetable pieces, a gentle oil sheen, and a scattering of bright herbs.
Step 13: Refrigerate for best next-day texture
For best texture, cool the soup completely before refrigerating in an airtight container for up to 4 days. The vegetables will maintain a pleasant bite if cooled promptly and stored properly; when ready, reheat gently over medium-low heat until steaming but not boiling, preserving texture.
Step 14: Freezing instructions
This soup freezes well: cool fully, transfer to freezer-safe containers leaving headspace, and freeze up to three months. Thaw overnight in the refrigerator, then reheat gently on the stovetop until hot and steaming before serving to protect vegetable texture.
Step 15: Final presentation note
When plating for guests, choose shallow warm bowls so the colorful vegetable medley spreads evenly across the surface, showing the contrast between golden tomato-broth and vivid vegetables. Garnish with the reserved parsley and a final tiny drizzle of olive oil for a fresh, glossy finish.
Notes
- Use low-sodium broth so you can control seasoning.
- For firmer vegetables, add them later in the cooking process.
- Cool completely before freezing and leave headspace in containers.
- Reheat gently over medium-low heat to preserve texture.