The BEST Deviled Eggs are the kind of thing you make when you want people to smile the moment they see the platter. I first learned this recipe in a sunlit kitchen, testing textures and tasting for the perfect balance of tang and cream. It uses simple pantry staples but delivers a classic party bite that always disappears first. Whether you bring them to a picnic or a potluck, these deviled eggs feel like comfort and celebration in one small bite.
What makes The BEST Deviled Eggs worth trying is how reliably they hit the right notes: bright lemon, a whisper of Dijon, and a velvety filling that holds its shape when piped. The technique is forgiving, so even if you are new to making deviled eggs, you can get impressive results. I love how the toppings—smoked paprika and chives—turn plain halves into something stunning with almost no effort.
How These Eggs Became My Hostess Shortcut
I remember the first time I served The BEST Deviled Eggs to a mixed crowd of friends and neighbors. It was midsummer and there was a last-minute request to bring something shareable to a backyard get-together. I had dozen hard boiled eggs and a jar of mayo, but I still spent the morning fussing over textures and tasting until the filling felt just creamy enough. When I put the platter down, someone took a bite, closed their eyes, and said, “This is exactly what I needed.” The sound of kids laughing, the warmth of late afternoon sun on my shoulders, and the way the eggs looked with their little chive confetti made me realize how small, well-made food can anchor a memory. Now they’re my go-to when I want to show up with something that looks thoughtful but is truly simple.
Pantry Stars: A Closer Look at Main Ingredients
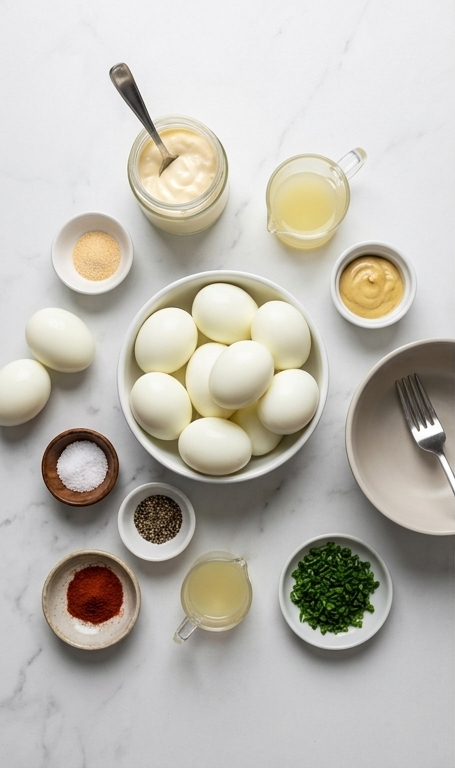
- Hard-boiled eggs: The foundation. Use very fresh eggs for easier peeling or eggs a few days old for even better peeling results. Substitute quail eggs for bite-sized portions.
- Mayo or plain Greek yogurt: Provides creaminess. Mayo gives a richer, classic flavor; Greek yogurt lightens the mix and adds tang. Use half-and-half for a balance.
- Lemon juice (or vinegar): Adds brightness and keeps the filling lively. Fresh lemon juice is best; white wine vinegar or apple cider vinegar make fine substitutes.
- Dijon mustard: Brings a gentle heat and depth. Yellow mustard is milder; whole grain mustard adds texture and visual interest.
- Garlic powder: Adds subtle savory warmth without changing texture. Use onion powder if you prefer.
- Smoked paprika and chives: Toppings that finish the dish. Smoked paprika gives color and a hint of smoke; swap to regular paprika for a milder profile. Chives can be replaced with dill or parsley for a different herb note.
Essential Kitchen Tools You Will Want
A short intro: these tools make the process smoother and help the final plates look intentional.
- Saucepan or Instant Pot: For perfect hard-boiled eggs. Use whichever you have; Instant Pot is hands-off for consistent results.
- Mixing bowl and fork: For mashing yolks. A small bowl keeps the filling concentrated and easy to taste.
- Piping bag or small spoon: For neat filling. A zip-top bag with the corner snipped works great if you do not own a piping bag.
- Measuring spoons and citrus juicer: For accuracy and bright flavor. Fresh lemon juice tastes better than bottled.
- Storage container with lid: To keep filled eggs fresh. An airtight container prevents odor transfer in the fridge.
Step-by-Step Preparation Guide
Step 1: Halve the eggs
Slice the hard‑boiled eggs in half lengthwise and gently pop each yolk from its white cradle, setting the glossy, smooth white halves on the white quartzite tabletop in a neat, single layer. Keep the removed yolks in a small bowl so they stay dry and separate — you want each egg white cavity to look pristine, with glossy edges and no ragged tearing. Work calmly and keep the plate of emptied whites close so assembly is quick and the whites stay bright and clean.
Step 2: Make the filling
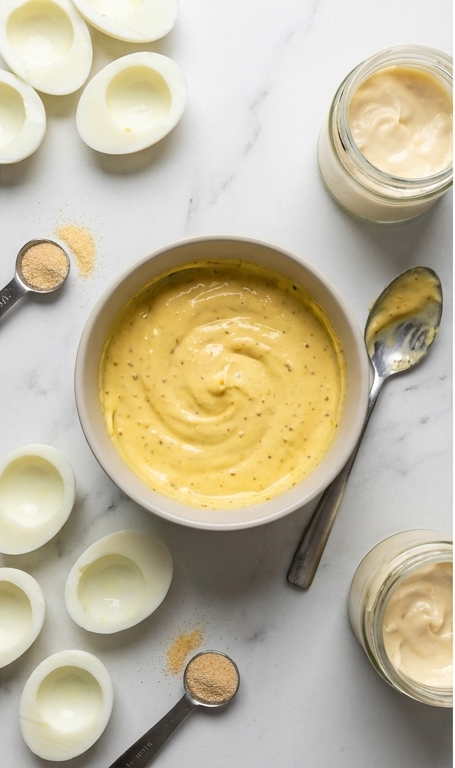
Scoop the yolks into a modern small mixing bowl and use a fork to mash them until they are a fine, almost powdery crumb. Fold in the mayo (or Greek yogurt), lemon juice, Dijon mustard and garlic powder until the mixture becomes silky, creamy and spreadable — not gluey, not soupy. Season with sea salt and freshly cracked black pepper to taste, and if the texture is too stiff, smooth it with a teaspoon more mayo or a splash of water. Taste, adjust, and transfer the finished filling to a piping bag or leave it in the same bowl ready for scooping.
Step 3: Assemble
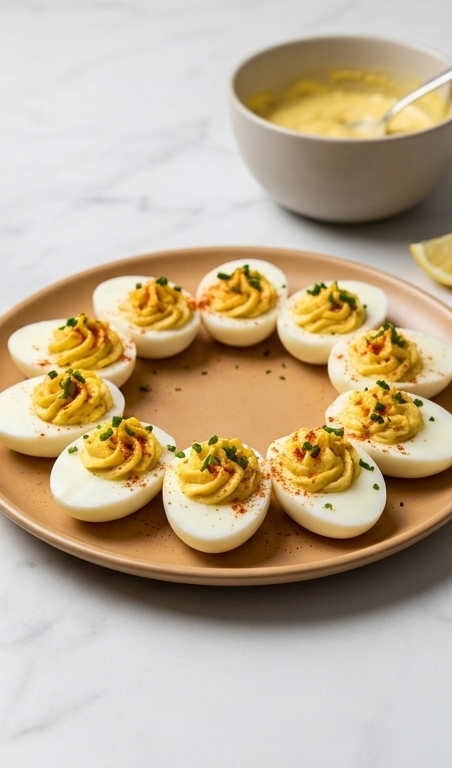
Using a small spoon, cookie scoop, or the fitted piping bag, fill each egg white cavity with the pale‑yellow filling, aiming for soft peaked or elegant piped swirls that showcase a creamy interior with tiny flecks of mustard. Keep the arrangement tidy on the serving plate and sprinkle each filled egg with a light dusting of smoked paprika and a scattering of finely chopped fresh chives for a vibrant green contrast — the toppings should look fresh, not wilted, and the paprika should sit as a dry, velvety dust on the surface.
Step 4: Serve
Arrange the completed deviled eggs on a warm‑toned circular plate and present immediately so the whites remain glossy and the filling keeps its shape; the final platter should feel inviting and balanced, with a hint of lemon visible nearby for garnish. Enjoy right away or cover lightly and refrigerate briefly, but serve within a few hours for best texture and color.
Making It Your Own
I like to think of variations as small experiments that shift the mood of The BEST Deviled Eggs without changing the soul of the recipe. For a smoky barbecue twist, stir in a teaspoon of chipotle in adobo or swap smoked paprika for regular paprika and add a pinch of brown sugar. For a fresher, lighter version, use half Greek yogurt and add finely chopped cucumber and dill for a cucumber-dill riff. If you want a Mediterranean spin, fold in a teaspoon of caper brine and top with minced roasted red pepper.
For dietary needs, swap mayo for mashed avocado for a dairy-free, creamy filling or use vegan mayo to make the recipe plant-based. Small changes like swapping herbs or adding a crunchy topping of toasted breadcrumbs can create seasonal or regional personalities for these deviled eggs.
How to Serve
When hosting, presentation matters. Arrange The BEST Deviled Eggs on a neutral platter so the paprika and chives really pop. For a casual potluck, line them up on a long tray with lemon wedges and an extra bowl of paprika to let guests personalize. If you are serving a crowd, double the recipe and use tiered serving trays to save table space.
Adjusting for serving sizes is simple: one dozen eggs becomes about 24 deviled halves, which is a good starter for 8 to 12 people. For smaller gatherings, halve the recipe and pipe the filling to make each portion feel special. Add small labels with flavor notes if offering multiple variations.
Storage and Reheating Tips
Deviled eggs are best served fresh. If you need to prepare ahead, keep the whites and filling separate in the fridge for up to 24 hours; spoon or pipe the filling just before serving for the best texture. Once filled, store the platter covered with plastic wrap or in an airtight container for up to 24 hours; after that the whites soften and the filling can become watery.
Avoid reheating deviled eggs. They are meant to be served cold or at cool room temperature. If you want warm components at a party, serve these alongside a hot dish, but keep the eggs chilled until just before guests start eating.
Common Mistakes and How to Avoid Them
One common slip is overmixing the filling until it becomes gluey. Stop when the mixture is smooth and just spreadable; add a teaspoon of mayo or a splash of water if it is too stiff. Taste as you go so you do not over-salt.
Another mistake is poor peeling of the eggs which can make whites ragged. Use a gentle crack-and-peel technique and consider steaming or using an Instant Pot for easier peeling. Finally, don’t fill and forget; fill close to serving time so the whites stay firm and the color stays fresh.
Final Thoughts
I hope you give The BEST Deviled Eggs a try the next time you want a sure-fire crowd pleaser. They are simple to make, easy to adapt, and always appreciated at any table. Happy cooking and enjoy every creamy, bright bite.
Frequently Asked Questions
- Can I make The BEST Deviled Eggs ahead of time?
Yes. Keep the whites and filling separate up to 24 hours, then assemble shortly before serving for best texture.
- How do I get smooth filling without it being too soft?
Mash the yolks finely, then add mayo or yogurt a teaspoon at a time until you reach a creamy, pipeable consistency.
- Are there good substitutes for mayo?
Plain Greek yogurt, mashed avocado, or vegan mayo all work depending on dietary needs and flavor preference.
- What causes green rings around yolks and are they safe?
A greenish rim can form from overcooking eggs; it is safe to eat though less visually appealing. Cook eggs just long enough and cool them quickly in ice water.
- How long will filled deviled eggs keep in the fridge?
Filled deviled eggs are best within 24 hours. After that the texture and color begin to decline.

The BEST Deviled Eggs
Make The BEST Deviled Eggs: creamy, tangy deviled eggs perfect for parties and potlucks.
Ingredients
Instructions
Step 1: Halve the eggs
Slice the hard‑boiled eggs in half lengthwise and gently pop each yolk from its white cradle, setting the glossy, smooth white halves on the white quartzite tabletop in a neat, single layer. Keep the removed yolks in a small bowl so they stay dry and separate — you want each egg white cavity to look pristine, with glossy edges and no ragged tearing. Work calmly and keep the plate of emptied whites close so assembly is quick and the whites stay bright and clean.
Step 2: Make the filling
Scoop the yolks into a modern small mixing bowl and use a fork to mash them until they are a fine, almost powdery crumb. Fold in the mayo (or Greek yogurt), lemon juice, Dijon mustard and garlic powder until the mixture becomes silky, creamy and spreadable — not gluey, not soupy. Season with sea salt and freshly cracked black pepper to taste, and if the texture is too stiff, smooth it with a teaspoon more mayo or a splash of water. Taste, adjust, and transfer the finished filling to a piping bag or leave it in the same bowl ready for scooping.
Step 3: Assemble
Using a small spoon, cookie scoop, or the fitted piping bag, fill each egg white cavity with the pale‑yellow filling, aiming for soft peaked or elegant piped swirls that showcase a creamy interior with tiny flecks of mustard. Keep the arrangement tidy on the serving plate and sprinkle each filled egg with a light dusting of smoked paprika and a scattering of finely chopped fresh chives for a vibrant green contrast — the toppings should look fresh, not wilted, and the paprika should sit as a dry, velvety dust on the surface.
Step 4: Serve
Arrange the completed deviled eggs on a warm‑toned circular plate and present immediately so the whites remain glossy and the filling keeps its shape; the final platter should feel inviting and balanced, with a hint of lemon visible nearby for garnish. Enjoy right away or cover lightly and refrigerate briefly, but serve within a few hours for best texture and color.
Notes
- Peel eggs under running water to help remove shells more easily.
- Chill eggs in an ice bath immediately after cooking to stop cooking and make peeling easier.
- If filling is too thick, thin with a teaspoon of mayo or a splash of water until spreadable.
- Use a zip-top bag with the corner snipped as an easy substitute for a piping bag.
- Store filled eggs covered in the fridge and consume within 24 hours.