I still remember the first time I baked Soft Chocolate Chip Cookies that actually came out like the picture – soft, slightly underbaked in the center and full of molten chocolate. Baking these has become my favorite weekend ritual; the smell of butter and vanilla fills the house and somehow makes everything feel more manageable. I tweak the timing based on mood but never skip the chill step – it makes all the difference. If you love cookies that are tender, a little gooey, and reliably crowd-pleasing, these Soft Chocolate Chip Cookies are worth the little bit of patience.
How These Cookies Became My Comfort-Baking Go-To
When I was new to apartment living, I baked my first batch of Soft Chocolate Chip Cookies on a rainy Sunday, using just what was in the pantry and a cheap hand mixer. The first tray came out oddly flat, but the second was a revelation – slightly underbaked centers that yielded like warm caramel and edges with a gentle chew. I remember sinking my teeth into one while watching rain hit the window and feeling oddly proud – it was comfort in edible form. The warm chocolate, the scent of browned butter notes, and the soft texture made me a convert. Over the years I learned that small changes – chilling the dough, accurate measuring, and using semisweet chips – keep the cookies soft and rich. Baking them now always takes me back to that rainy afternoon, and I often give the extra-warm batch to neighbors who need a pick-me-up.
What Makes the Ingredients Work
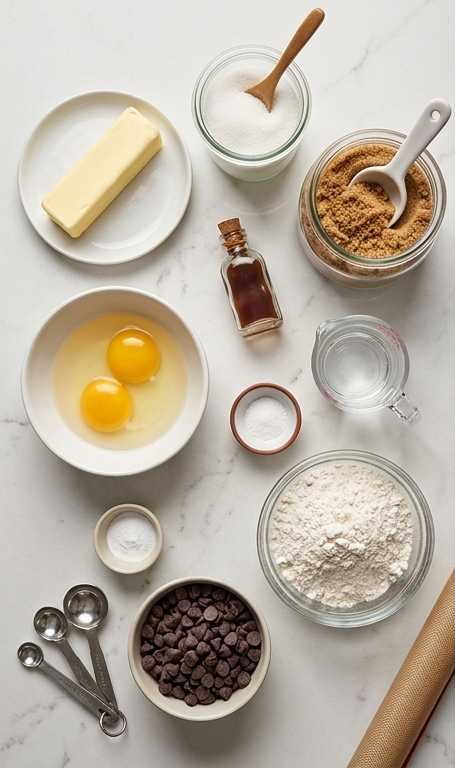
- Unsalted Butter: The backbone of texture and flavor – use softened, not melted. Salted butter can work if you reduce added salt.
- Granulated Sugar: Adds sweetness and helps with spread – swap for coconut sugar for a nuttier note.
- Brown Sugar: Key for chew and moisture – dark brown deepens flavor, light brown keeps it milder.
- Eggs: Bind and enrich – room temperature eggs incorporate more evenly.
- Vanilla Extract: Lifts the flavor – pure vanilla is best, imitation will still work in a pinch.
- Baking Soda: Reacts with hot water to give a gentle lift – do not substitute with baking powder directly.
- Hot Water: Activates the baking soda quickly – warm, not boiling.
- Salt: Balances sweetness – adjust to taste if using salted butter.
- All-Purpose Flour: Structure provider – spoon and level for accuracy; bread flour will yield chewier cookies.
- Semisweet Chocolate Chips: The melty pockets that make these memorable – try chunks for gooey pockets.
Essential Kitchen Tools
A few simple tools make this recipe easy and consistent. A stand mixer with a paddle attachment speeds things up and gives a glossy batter, but a sturdy hand mixer or vigorous whisking will get you there too. Measuring tools – cups and spoons or a kitchen scale – are essential for consistent results. A flexible spatula helps fold the flour without overworking the dough. Baking sheets lined with parchment or a silpat prevent sticking, and a cookie scoop gives uniform cookies.
- Stand Mixer or Hand Mixer: Speeds mixing; whisk or wooden spoon OK as an alternative.
- Paddle Attachment: For gentle creaming; use the flat beater or a fork if needed.
- Measuring Cups/Spoons or Scale: For accuracy; a kitchen scale is preferred.
- Spatula: For folding flour and chips; silicone preferred.
- Baking Sheets and Parchment/Silpat: Prevent spread and sticking.
- Cookie Scoop: For even portions; roll by hand as an alternate.
- Plastic Wrap and Cooling Rack: For chilling and finishing cookies.
Step-by-Step Preparation Guide
Step 1: Cream the Butter and Sugars
In a stand mixer fitted with the paddle attachment, cream the softened unsalted butter together with the granulated sugar and packed brown sugar until the mixture is pale, smooth, and slightly aerated. Scrape the bowl down a couple of times so the sugars fully incorporate into the butter – you want a soft, glossy mass that still holds its shape but yields when pressed.
Step 2: Add the Eggs and Vanilla
With the mixer running on low, add the eggs one at a time, allowing each to become fully integrated before adding the next. Fold in the vanilla extract and scrape the bowl once more; the batter should be cohesive, slightly loose, and shining from the butter, with small ribbons forming as the paddle lifts.
Step 3: Activate the Leavening
Quickly dissolve the baking soda in the hot water so it wakes up, then add that mixture to the bowl along with the salt. Beat briefly to incorporate – this is the moment the batter gains a subtle lift and a whisper of aeration from the baking soda’s activation.
Step 4: Fold in Flour and Chocolate Chips
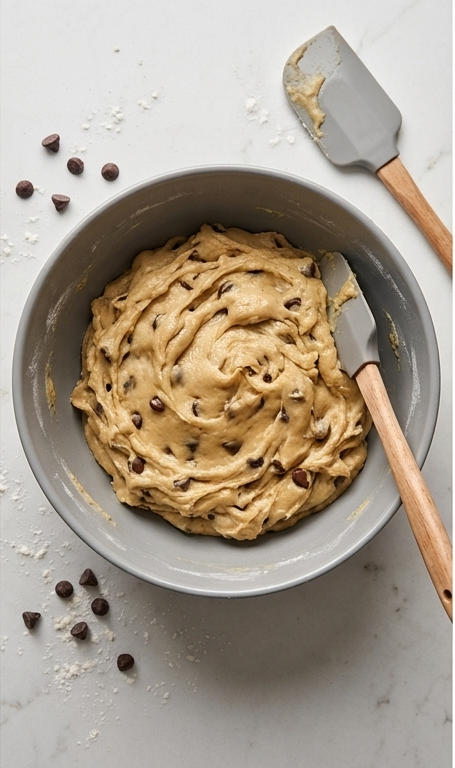
Remove the bowl from the mixer and use a sturdy spatula to gently fold in the all-purpose flour until just combined, then fold in the semisweet chocolate chips so they are evenly distributed. The resulting cookie dough should be thick, soft, slightly tacky, studded with chips, and holding gentle peaks when scooped – a dense, pliable mass with glossy spots where chips press through.
Step 5: Chill the Dough
Scoop the dough together into a log or press it into a bowl, wrap tightly in plastic wrap, and chill for at least one hour (or up to overnight). Chilling firms the dough for cleaner scoops and deepens the flavor while keeping the interior tender when baked.
Step 6: Portion and Bake
When ready, preheat the oven to 350°F and prepare cookie sheets with silpat or parchment. Portion roughly 1–2 tablespoons of dough per cookie, roll into smooth balls, and space them on the prepared pans. Bake for 8–10 minutes until the edges are just barely browning – slightly underbaked is the goal to keep them soft and gooey inside.
Step 7: Cool and Serve
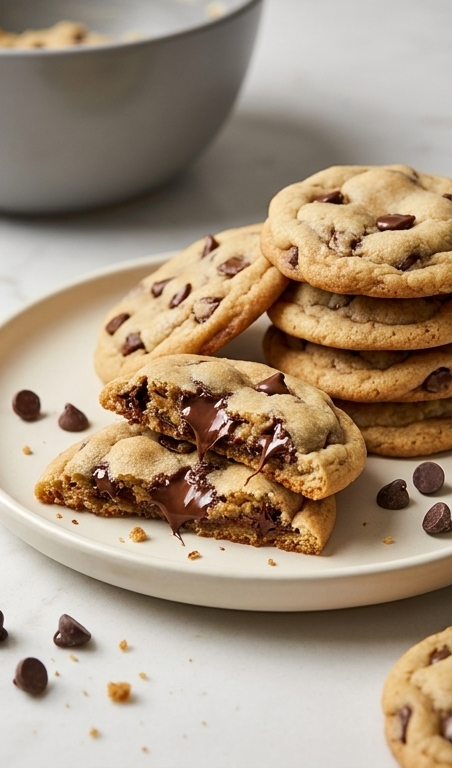
Allow the cookies to cool briefly on the sheet for a minute or two, then transfer to a rack or plate to finish setting; the centers will remain tender with melted chocolate pockets. Arrange the cookies on a shallow plate, stack a few casually, and break one in half to reveal its gooey interior before serving.
Making It Your Own
Try swapping in different chocolate types – milk chocolate for a sweeter bite or dark chocolate for contrast. For a nutty spin, fold in toasted pecans or chopped walnuts at the end. If you want a dairy-free version, use a vegan butter substitute and dairy-free chips; the texture will be slightly different but still tender. For a seasonal twist, add orange zest and dark chocolate for winter or a sprinkle of flaky sea salt and a smear of caramel for autumn. I often test mini-batch tweaks on a single tray, adjusting baking time in two-minute increments until it feels right.
How to Serve
If I were hosting, I would warm a few Soft Chocolate Chip Cookies for guests and serve them on a wide platter with a bowl of cold milk or coffee. For a dessert spread, stack cookies and label flavors – plain, nut, and salted caramel run together nicely. To scale up for a crowd, double the dough and bake on several sheets, rotating pans halfway through. For gifting, place three to five cookies in a small box with parchment and a ribbon – they travel well and feel indulgent.
Storage and Reheating Tips
Store cooled cookies in an airtight container at room temperature for up to 4 days. If you want to keep them longer, freeze unbaked dough balls on a tray, then transfer to a freezer bag for up to 3 months – bake straight from frozen with an extra minute or two.
To reheat, pop a cookie in a 300°F oven for 5 minutes or microwave for 8-10 seconds to revive the gooey center. For best texture, avoid prolonged reheating which dries them out.
Common Cookie Snafus and Fixes
If cookies spread too much, chill the dough longer and make sure your flour was measured accurately – spoon and level the flour, or use a scale. If cookies come out dry, reduce baking time slightly and be sure to remove them when edges just begin to brown.
If your cookies are flat and greasy, check the butter temperature – it should be softened but not melting. Small tweaks in temperature and timing make the difference between pretty cookies and spectacular ones.
Ready to Bake?
If you want warm, tender, and reliably gooey Soft Chocolate Chip Cookies, give this recipe a try this weekend. The method is forgiving and the result is comfort on a plate – share them, savor them, and don’t be afraid to experiment.
Frequently Asked Questions.
- Q: Can I use salted butter instead of unsalted?
A: Yes, but reduce or omit the added salt to prevent the cookies from tasting too salty. - Q: Do I have to chill the dough?
A: Chilling helps control spread and deepens flavor, so it is recommended, but you can bake immediately if short on time. - Q: How do I get soft centers every time?
A: Remove the cookies when the edges are set and just barely brown – the centers will continue to set off the sheet. - Q: Can I freeze the dough?
A: Yes, freeze scooped dough balls on a tray then store in a bag for up to 3 months; bake from frozen, adding a couple of minutes. - Q: What can I substitute for semisweet chips?
A: Use chopped chocolate, milk chocolate chips, or a mix of chips and chunks depending on your sweetness preference.

Soft Chocolate Chip Cookies
Bake Soft Chocolate Chip Cookies for soft, gooey results in about 70 minutes - follow simple steps for the best cookies.
Ingredients
Instructions
Step 1: Cream the Butter and Sugars
In a stand mixer fitted with the paddle attachment, cream the softened unsalted butter together with the granulated sugar and packed brown sugar until the mixture is pale, smooth, and slightly aerated. Scrape the bowl down a couple of times so the sugars fully incorporate into the butter — you want a soft, glossy mass that still holds its shape but yields when pressed.
Step 2: Add the Eggs and Vanilla
With the mixer running on low, add the eggs one at a time, allowing each to become fully integrated before adding the next. Fold in the vanilla extract and scrape the bowl once more; the batter should be cohesive, slightly loose, and shining from the butter, with small ribbons forming as the paddle lifts.
Step 3: Activate the Leavening
Quickly dissolve the baking soda in the hot water so it wakes up, then add that mixture to the bowl along with the salt. Beat briefly to incorporate — this is the moment the batter gains a subtle lift and a whisper of aeration from the baking soda’s activation.
Step 4: Fold in Flour and Chocolate Chips
Remove the bowl from the mixer and use a sturdy spatula to gently fold in the all-purpose flour until just combined, then fold in the semisweet chocolate chips so they are evenly distributed. The resulting cookie dough should be thick, soft, slightly tacky, studded with chips, and holding gentle peaks when scooped — a dense, pliable mass with glossy spots where chips press through.
Step 5: Chill the Dough
Scoop the dough together into a log or press it into a bowl, wrap tightly in plastic wrap, and chill for at least one hour (or up to overnight). Chilling firms the dough for cleaner scoops and deepens the flavor while keeping the interior tender when baked.
Step 6: Portion and Bake
When ready, preheat the oven to 350°F and prepare cookie sheets with silpat or parchment. Portion roughly 1–2 tablespoons of dough per cookie, roll into smooth balls, and space them on the prepared pans. Bake for 8–10 minutes until the edges are just barely browning — slightly underbaked is the goal to keep them soft and gooey inside.
Step 7: Cool and Serve
Allow the cookies to cool briefly on the sheet for a minute or two, then transfer to a rack or plate to finish setting; the centers will remain tender with melted chocolate pockets. Arrange the cookies on a shallow plate, stack a few casually, and break one in half to reveal its gooey interior before serving.
Notes
- Chill the dough at least 1 hour for best texture.
- Use a kitchen scale for more consistent results.
- Remove from oven when edges are just starting to brown for soft centers.
- Freeze dough balls on a tray then bag them for easy future baking.
- Swap chocolate types or add nuts for different flavor profiles.