Lemon Bars Recipe has been my sunshine on cloudy afternoons and my go-to showstopper when guests arrive unexpectedly. I first learned this Lemon Bars Recipe from a friend who carried a tin of perfectly dusted bars to a picnic, and I was hooked by the bright, balanced lemon filling and the tender, buttery crust. I make these whenever I want something that feels both simple and a little fancy, and they always disappear fast. If you love bright citrus desserts that travel well, this Lemon Bars Recipe is worth keeping in your arsenal.
How This Recipe Became My Rainy-Day Favorite
There is one memory I keep with these bars: a rainy Saturday when the power flickered and my kitchen smelled like butter and lemon. I pressed the crumbly crust into the pan with cold fingers while the rain tapped the windows, and when the filling baked it filled the house with the clean scent of lemon and sugar. Taking the first bite felt like sunlight through clouds: tart and sweet with a silky custard that settled against the crisp shortbread. Serving them to family that evening, watching faces brighten with each bite, made the fuss of zesting and straining feel completely worth it.
Meet the Stars of the Lemon Bars Recipe
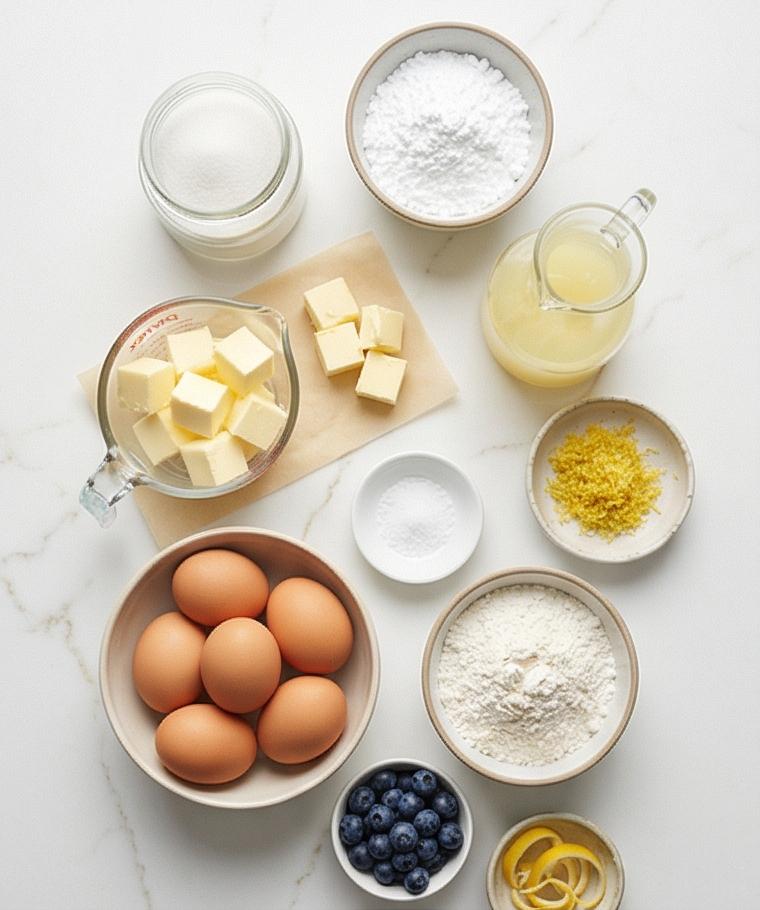
- Unsalted Butter: The backbone of the crust, providing richness and tenderness; swap for salted butter but reduce added salt slightly and choose cold, high-quality butter for best texture.
- All-Purpose Flour: Gives structure to crust and filling; for a slightly tender crumb try half pastry flour, but keep proportions the same.
- Granulated Sugar: Sweetens and stabilizes the custard; superfine sugar dissolves faster in the filling.
- Eggs: Create the custardy texture and set the filling; room-temperature eggs incorporate more evenly.
- Lemon Juice and Zest: The bright star flavor; use fresh lemons and strain the juice to avoid pulp or seeds.
Essential Kitchen Tools Youll Want on Hand
A few reliable tools make these Lemon Bars Recipe easy and consistent. A sturdy 9 x 13-inch metal pan ensures even browning; glass can change bake time. Parchment with an overhang is a small miracle for lifting the slab out cleanly. A fine-mesh sieve gives the filling its silky finish by catching stray bits of zest or chalazae. Use a good whisk and a large mixing bowl so you can combine eggs and sugar without splashing. For the crust, a pastry cutter or two forks work, but fingertips are fine if you keep the butter cool.
- 9 x 13-inch metal baking pan: Promotes even heat and crisp edges; line with parchment for easy removal.
- Parchment paper: Prevents sticking and makes lifting simple; leave a generous overhang.
- Fine-mesh sieve: Smooths the custard and removes texture irregularities.
- Pastry cutter or forks: For cutting butter into the flour; pulse briefly so crumbs stay cool.
- Sharp knife and damp cloth: For clean slicing; wipe the blade between cuts.
Step-by-Step Preparation Guide
Step 1: Preheat and prepare the pan
Preheat your oven to 350°F (175°C) and ready a 9 x 13-inch metal baking pan: lightly grease the bottom and long sides with nonstick spray or soft butter, line the bottom and two long sides with parchment leaving a 1–2 inch overhang, grease the parchment edge, and dust the pan with 1 tablespoon flour, tapping out any excess. This simple setup prevents sticking and makes removing the slab effortless once the bars are chilled.
Step 2: Combine dry ingredients and cut in butter
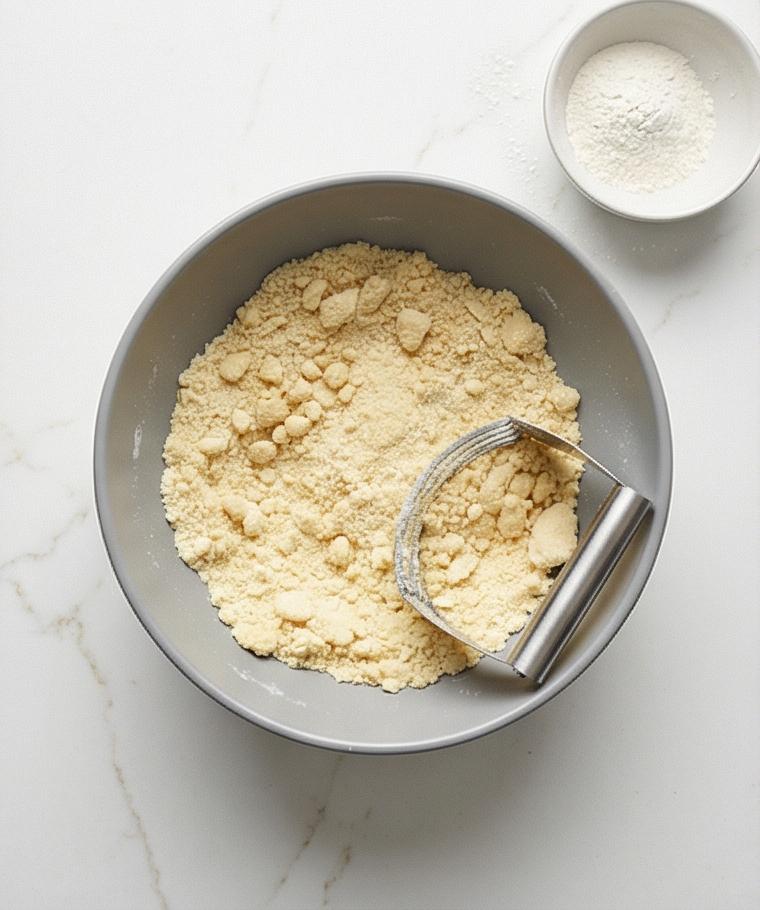
In a medium bowl, whisk together 2 cups all-purpose flour, 1/2 cup granulated sugar, and 1/4 teaspoon fine sea salt until evenly blended. Add 1 cup cold cubed unsalted butter and use a pastry cutter, two forks, or your fingertips to cut the butter into the dry mix until the texture reads sandy with small pea-sized butter bits — it should clump lightly when you squeeze a handful. Work briskly so the butter stays cool and the crumbs remain tender.
Step 3: Press the crust into the pan
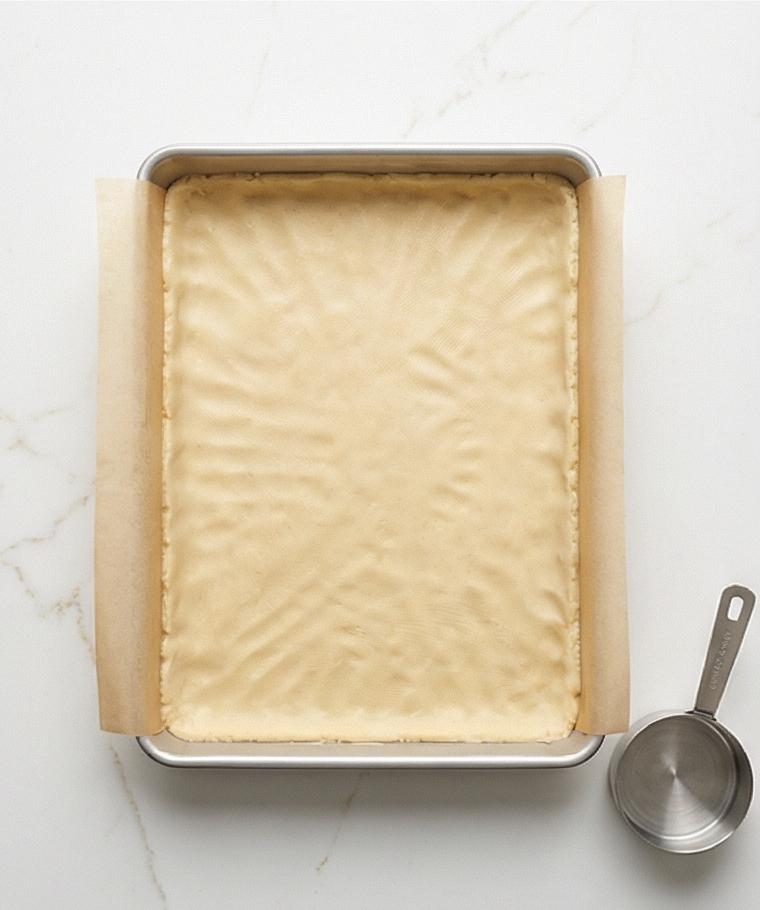
Transfer the sandy crust mixture into the prepared pan and press firmly and evenly into the bottom using your fingertips, then compact it with the flat bottom of a measuring cup or glass so the surface is uniformly dense. Pay attention to the edges and corners, pressing slightly more mixture there to avoid thin spots that over-brown. The surface should look smooth, slightly textured with compressed crumbs, and ready to par-bake.
Step 4: Par-bake the crust and let it rest
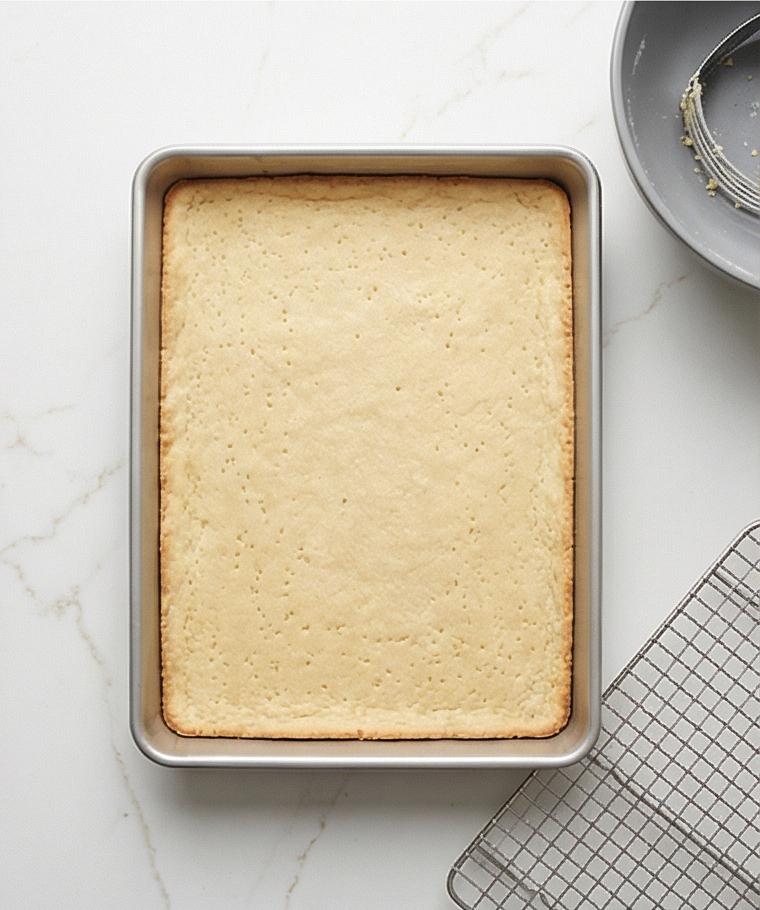
Slide the pan onto the center rack and par-bake at 350°F (175°C) for 20–22 minutes until the crust is just turning light golden at the edges and set across the top. Remove from heat and reduce the oven temperature to 325°F (165°C); let the crust cool on the counter for about 5 minutes so it’s hot but not bubbling — this helps prevent the filling from seeping underneath when poured.
Step 5: Whisk together the lemon filling
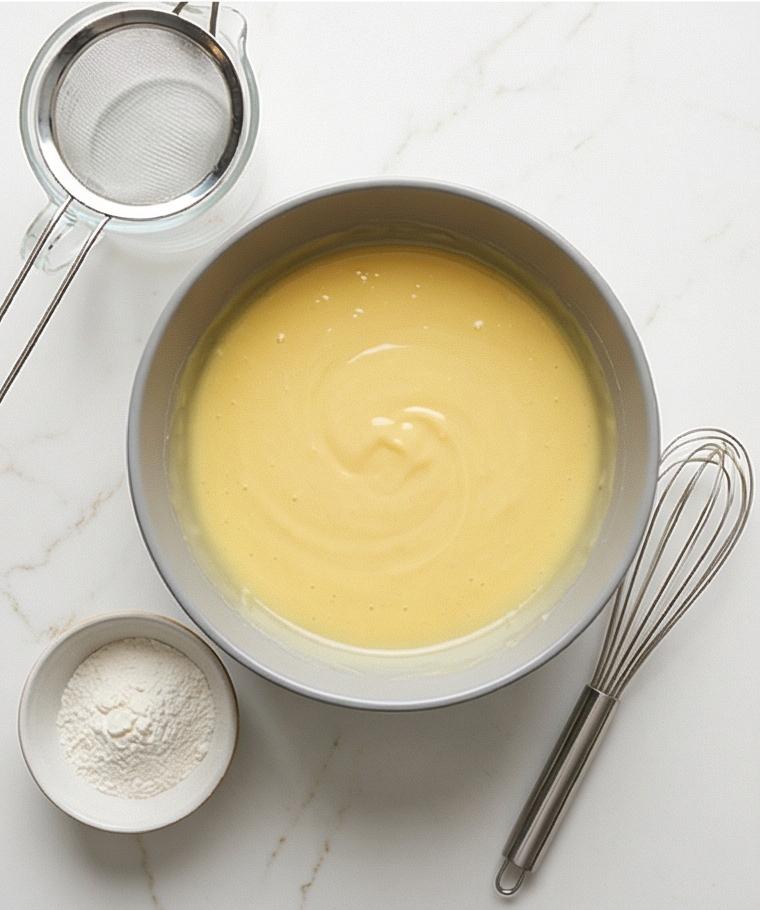
In a large mixing bowl whisk the 6 room-temperature eggs briefly until combined but not aerated. Add 2 1/4 cups granulated sugar and 1 tablespoon finely grated lemon zest and whisk until smooth and slightly thickened. Stir in 1 cup freshly squeezed strained lemon juice and 1 teaspoon vanilla until uniform, then fold in a mixture of 1/3 cup sifted flour and 1/4 teaspoon salt just until no dry pockets remain. For the silkiest texture, press the filling through a fine-mesh sieve into a clean jug or bowl to remove any chalazae or coarse zest pieces; the result should be a glossy, slightly viscous lemon custard.
Step 6: Assemble and bake the bars
Give the filling a quick gentle re-whisk, then carefully pour it over the warm par-baked crust, tilting the pan so the filling settles into an even layer. Rap the pan gently on the counter if bubbles form, skimming any that rise. Bake at 325°F (165°C) for 20–25 minutes until the edges are set and the center still has a slight, non-liquid jiggle; the surface should be matte and pale, not deeply browned.
Step 7: Cool, chill, and prepare to cut
Transfer the pan to a wire rack and cool completely at room temperature (about 1–1½ hours), then cover loosely and refrigerate for at least 2 hours until thoroughly chilled and firm. Chilling firms the custard and makes for the cleanest slices. Use the parchment overhang to lift the chilled slab onto a cutting board; run a thin knife around any stuck edges before lifting if needed.
Step 8: Dust, cut, garnish, and store
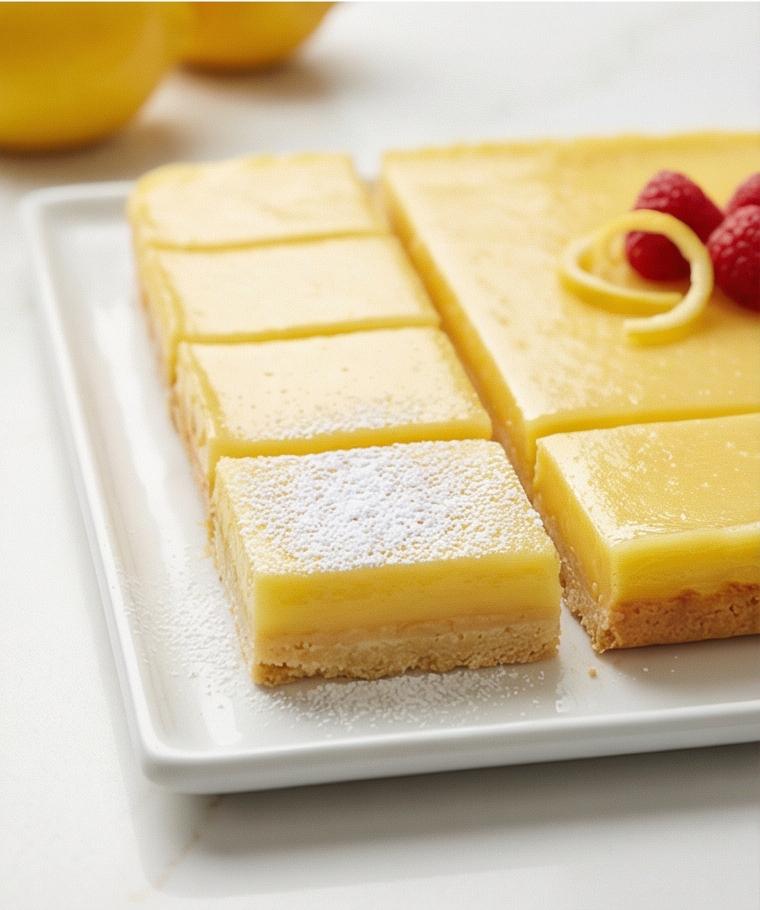
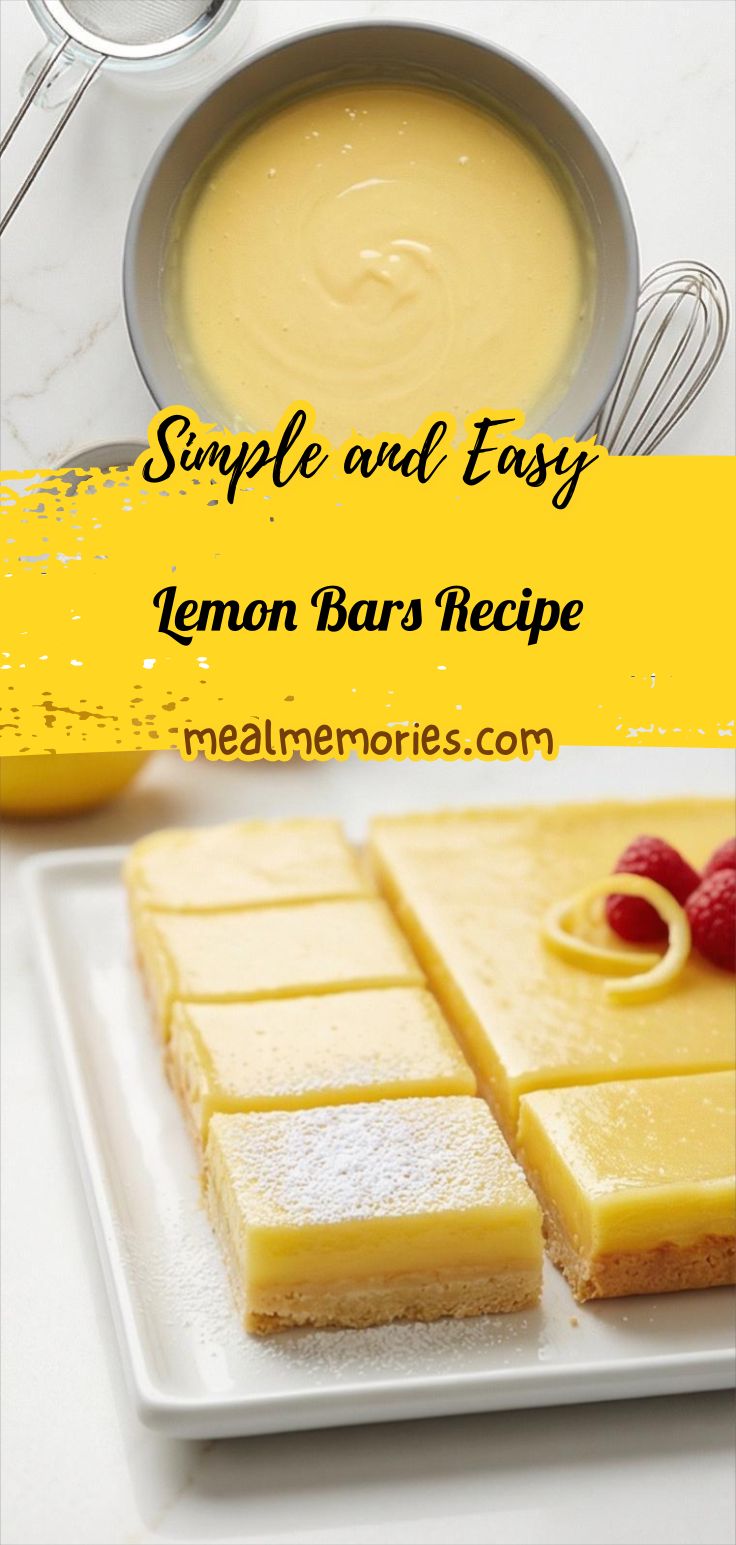
Just before cutting, dust the top evenly with powdered sugar through a fine sieve; for the cleanest appearance dust again after slicing. Trim the edges if desired and cut into 18 or 24 bars using a long sharp knife wiped with a warm damp cloth between each cut for razor-clean sides. Place each rectangular bar on a serving platter and, if you like, top with a thin lemon twist or a few fresh raspberries or blueberries. Store leftovers in a single layer in the fridge for 4–5 days or freeze un-dusted bars for longer storage.
Making It Your Own
I experimented with several spins on this Lemon Bars Recipe and each one taught me something. For a dairy-free version I swapped the crust butter with cold coconut oil and reduced oven time slightly; the texture is different but pleasantly tropical. For less sugar, cut the filling sugar by 25 percent and add a tablespoon of honey to maintain mouthfeel. In fall I stirred in a teaspoon of finely ground ginger for warmth, and at a summer potluck I topped squares with macerated berries for color and extra tart-sweet contrast. Small changes can transform the mood without losing the bright lemon heart.
How to Serve
When hosting, cut bars into smaller rectangles for an elegant dessert spread; I like 24 pieces for a larger crowd. Arrange on a platter with a dusting of powdered sugar and a few lemon twists for a refined look. For a casual gathering, plate bars with a scoop of vanilla ice cream and a scattering of fresh raspberries, which echo the lemon and add texture. If serving family, stack bars in a single layer in a dessert box for easy transport. Adjust quantities by doubling the recipe for a crowd or halving it for an intimate dessert.
Storage and Reheating Tips
Store chilled bars in a single layer in the refrigerator for up to 4 to 5 days; they hold their texture beautifully and actually taste cleaner the next day. If stacking, place parchment between layers to protect the powdered sugar finish.
To freeze, leave the bars undusted and freeze on a tray until solid, then wrap tightly and freeze for up to 2 months. Thaw overnight in the fridge and dust with powdered sugar just before serving for the best presentation.
Common Mistakes and How to Avoid Them
Underbaking the filling leads to runny bars. Bake until the edges are set and the center has a slight jiggle but is not liquid; chilling will finish the set. Overworking the crust can make it tough, so keep the butter cold and work quickly.
Not straining the filling can leave bits of zest or chalazae that affect smoothness; push the filling through a fine sieve if you want a silky custard. Also, cutting too soon will give messy slices, so be patient and chill thoroughly.
Final Thoughts
Give this Lemon Bars Recipe a try this weekend and see how a few bright, simple ingredients can make a dessert that feels special and approachable. Youll be rewarded with a silky lemon filling set on a tender, buttery crust thats perfect for sharing.
Frequently Asked Questions.
- Q: Can I make these bars ahead? A: Yes, you can bake them a day ahead, chill overnight, and dust with powdered sugar just before serving.
- Q: Can I use bottled lemon juice? A: Fresh lemon juice is recommended for brightness; bottled juice lacks the fresh aromatic oils from zest.
- Q: How do I get clean slices? A: Chill thoroughly, lift out using the parchment overhang, and wipe a sharp knife with a warm damp cloth between cuts.
- Q: Can I freeze the bars? A: Yes, freeze undusted bars tightly wrapped for up to 2 months and thaw in the fridge overnight.
- Q: What if my filling cracks or browns? A: Slight browning means it was baked a touch too long; reduce oven time and test for a gentle jiggle in the center.
Lemon Bars Recipe
Make Lemon Bars Recipe: bright lemon custard on a buttery crust—perfect for parties and easy to master.
Ingredients
Instructions
Step 1: Preheat and prepare the pan
Preheat your oven to 350°F (175°C) and ready a 9 x 13-inch metal baking pan: lightly grease the bottom and long sides with nonstick spray or soft butter, line the bottom and two long sides with parchment leaving a 1–2 inch overhang, grease the parchment edge, and dust the pan with 1 tablespoon flour, tapping out any excess. This simple setup prevents sticking and makes removing the slab effortless once the bars are chilled.
Step 2: Combine dry ingredients and cut in butter
In a medium bowl, whisk together 2 cups all-purpose flour, 1/2 cup granulated sugar, and 1/4 teaspoon fine sea salt until evenly blended. Add 1 cup cold cubed unsalted butter and use a pastry cutter, two forks, or your fingertips to cut the butter into the dry mix until the texture reads sandy with small pea-sized butter bits — it should clump lightly when you squeeze a handful. Work briskly so the butter stays cool and the crumbs remain tender.
Step 3: Press the crust into the pan
Transfer the sandy crust mixture into the prepared pan and press firmly and evenly into the bottom using your fingertips, then compact it with the flat bottom of a measuring cup or glass so the surface is uniformly dense. Pay attention to the edges and corners, pressing slightly more mixture there to avoid thin spots that over-brown. The surface should look smooth, slightly textured with compressed crumbs, and ready to par-bake.
Step 4: Par-bake the crust and let it rest
Slide the pan onto the center rack and par-bake at 350°F (175°C) for 20–22 minutes until the crust is just turning light golden at the edges and set across the top. Remove from heat and reduce the oven temperature to 325°F (165°C); let the crust cool on the counter for about 5 minutes so it’s hot but not bubbling — this helps prevent the filling from seeping underneath when poured.
Step 5: Whisk together the lemon filling
In a large mixing bowl whisk the 6 room-temperature eggs briefly until combined but not aerated. Add 2 1/4 cups granulated sugar and 1 tablespoon finely grated lemon zest and whisk until smooth and slightly thickened. Stir in 1 cup freshly squeezed strained lemon juice and 1 teaspoon vanilla until uniform, then fold in a mixture of 1/3 cup sifted flour and 1/4 teaspoon salt just until no dry pockets remain. For the silkiest texture, press the filling through a fine-mesh sieve into a clean jug or bowl to remove any chalazae or coarse zest pieces; the result should be a glossy, slightly viscous lemon custard.
Step 6: Assemble and bake the bars
Give the filling a quick gentle re-whisk, then carefully pour it over the warm par-baked crust, tilting the pan so the filling settles into an even layer. Rap the pan gently on the counter if bubbles form, skimming any that rise. Bake at 325°F (165°C) for 20–25 minutes until the edges are set and the center still has a slight, non-liquid jiggle; the surface should be matte and pale, not deeply browned.
Step 7: Cool, chill, and prepare to cut
Transfer the pan to a wire rack and cool completely at room temperature (about 1–1½ hours), then cover loosely and refrigerate for at least 2 hours until thoroughly chilled and firm. Chilling firms the custard and makes for the cleanest slices. Use the parchment overhang to lift the chilled slab onto a cutting board; run a thin knife around any stuck edges before lifting if needed.
Step 8: Dust, cut, garnish, and store
Just before cutting, dust the top evenly with powdered sugar through a fine sieve; for the cleanest appearance dust again after slicing. Trim the edges if desired and cut into 18 or 24 bars using a long sharp knife wiped with a warm damp cloth between each cut for razor-clean sides. Place each rectangular bar on a serving platter and, if you like, top with a thin lemon twist or a few fresh raspberries or blueberries. Store leftovers in a single layer in the fridge for 4–5 days or freeze un-dusted bars for longer storage.
Notes
- Chill the bars at least 2 hours for clean slices
- Use fresh lemon juice and zest for brightest flavor
- Line the pan with parchment for easy removal
- Press crust firmly and par-bake to avoid soggy bottom
- Dust with powdered sugar just before serving for best presentation