I still remember the first time I cooked this Honey Garlic Chicken Recipe for a hurried weeknight dinner. The sticky, glossy glaze smelled like a tiny triumph as it bubbled in the pan, and everyone at the table reached for seconds before I could finish plating. Over the years this Honey Garlic Chicken Recipe has become my go-to when I want something comforting but a little fancy without the fuss. It hits that sweet, savory, and garlicky note every time and feels like a small celebration on a regular Tuesday.
How This Recipe Became My Rainy-Day Favorite
The first time I made this Honey Garlic Chicken Recipe it was raining hard, and I needed something that felt warm and reassuring. I can still picture steam clouding the kitchen window while the garlic sizzled in butter and the honey melted into a glossy amber pool. The scent filled the house and made me think of cozy dinners and simple comforts. I used thick-cut chicken thighs so the meat stayed juicy, and as I spooned the sticky glaze over rice, the children’s laughter cut through the rain outside. That moment cemented the recipe for me: a tiny ritual that turns a dreary night into something bright. Each time I make it now, I look for those same small pleasures—the crackle of a hot pan, the honey stretching into ribbons, the first bite that’s a little sweet and a little salty.
Pantry Stars and Why They Matter
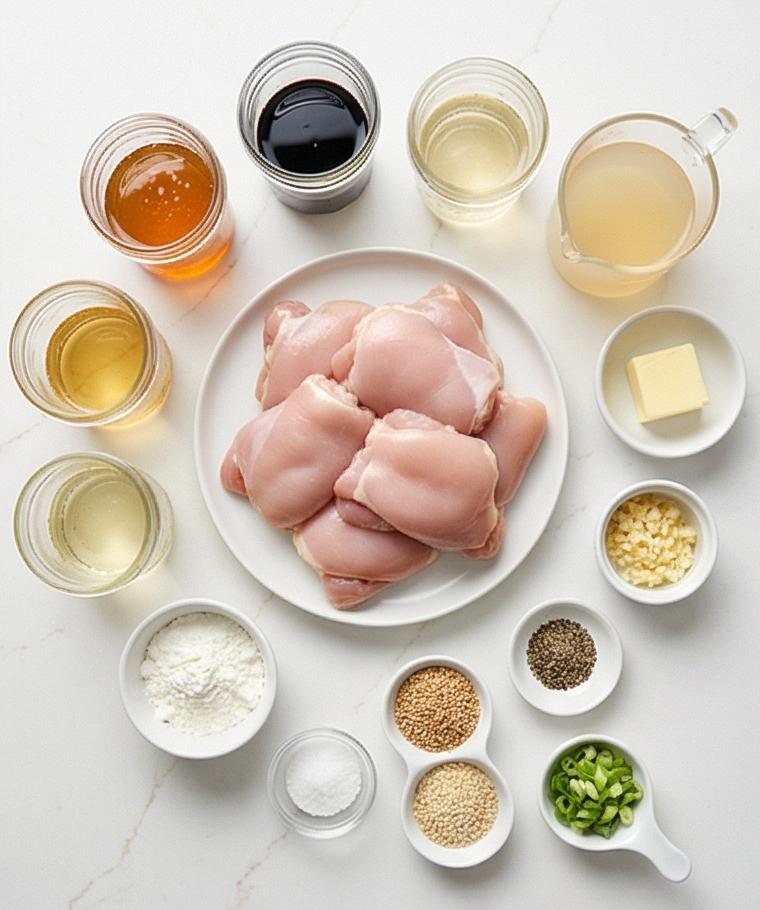
- Chicken Thighs: The star protein, juicy and forgiving; substitute chicken breasts if you prefer leaner meat but reduce cooking time to avoid drying out.
- Honey: Brings sweetness and gloss; use maple syrup for a different flavor profile in a pinch.
- Garlic: Provides the aromatic backbone; roasted garlic will mellow the bite if you want a subtler flavor.
- Soy Sauce: Adds savory depth and salt; tamari is a gluten-free swap.
- Cornstarch: Thickens the sauce and gives the chicken a light crust; arrowroot works as an alternative.
- Butter and Neutral Oil: Butter for flavor, neutral oil for searing heat; use all oil if you want a dairy-free version.
Essential Kitchen Tools You’ll Want
A quick note on tools: the right equipment makes this recipe easier and more reliable, but you can adapt if you’re missing something. A heavy skillet gives the best sear and helps the sauce caramelize evenly. Tongs or a sturdy spatula keep the chicken intact when flipping. A small whisk or fork is handy for the cornstarch slurry so the sauce thickens smoothly.
- Heavy 10–12 inch skillet: For even heat and a good crust; a cast iron or heavy stainless pan works great.
- Tongs or spatula: To flip and move the thighs without tearing them.
- Measuring spoons and cups: For accurate sauce balance.
- Small bowl and whisk: To make a lump-free cornstarch slurry.
- Sharp knife and cutting board: For trimming thighs and slicing green onions.
- Tray and foil: To rest the chicken while you build the sauce.
Step-by-Step Preparation Guide
Step 1: Trim, season, and coat the chicken
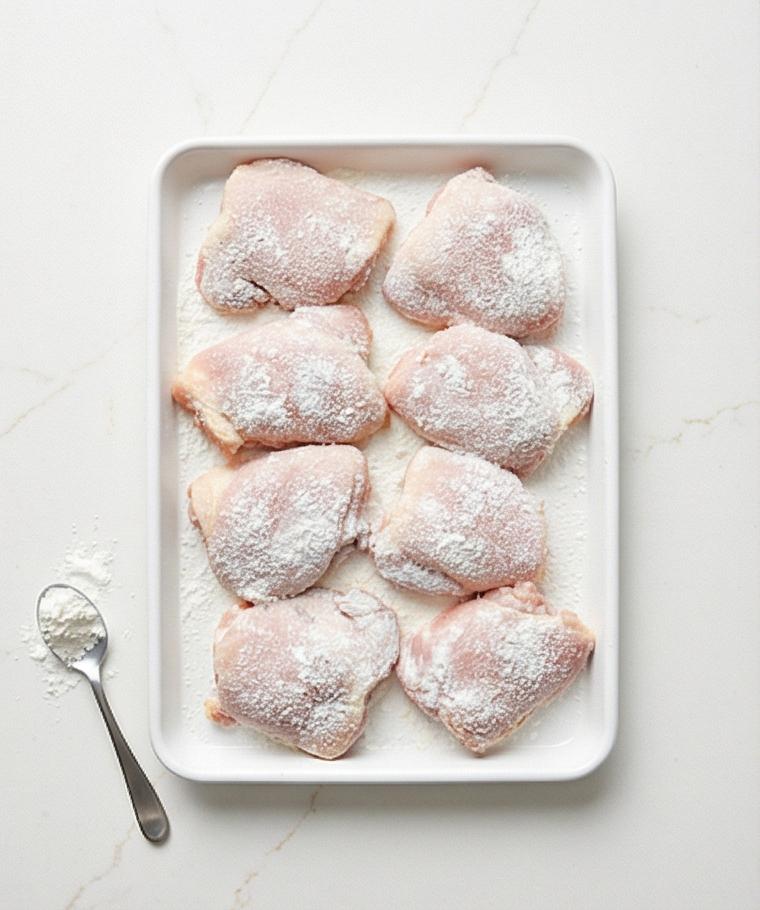
Pat the boneless, skinless chicken thighs dry and trim any excess fat. Season both sides evenly with fine sea salt and freshly ground black pepper, then dust 2 tablespoons of cornstarch over each piece and gently rub so every thigh wears a thin, even white veil of starch — shake off any excess and arrange the thighs in a single layer on a rectangular matte white tray, ready to sear.
Step 2: Sear the chicken until deep golden and rest
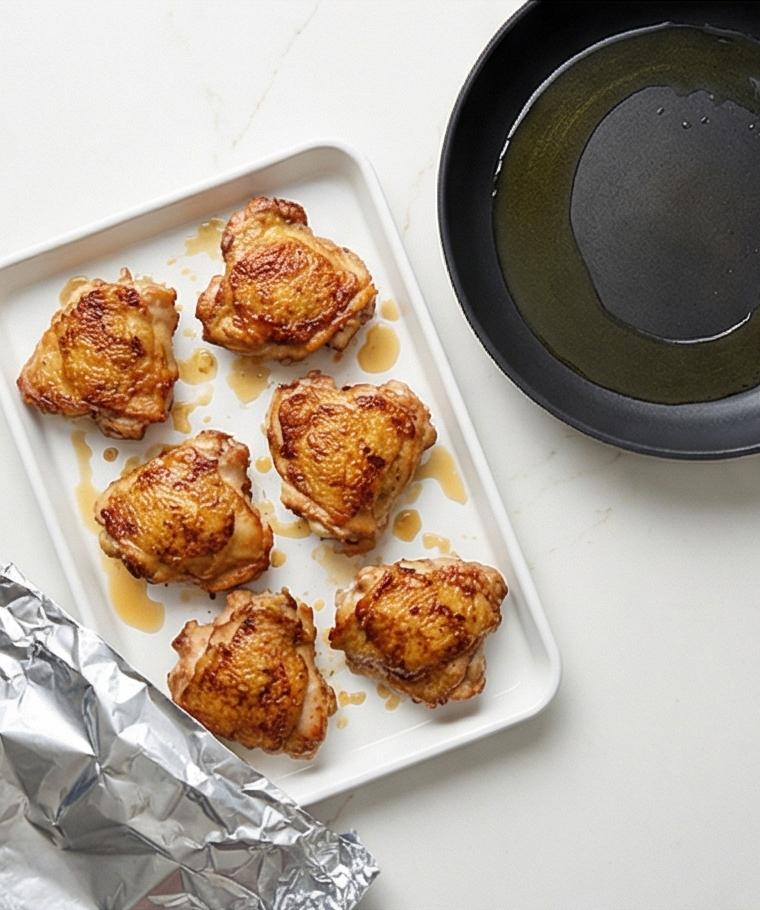
Heat a heavy 10–12 inch matte black skillet until hot, add neutral oil and sear the coated thighs without moving them until the undersides are a deep, even golden brown; flip and brown the second side until the crust is caramelized and the pieces are nearly cooked through. Transfer the browned thighs back to the same matte white tray and loosely tent with foil to keep warm while you build the sauce.
Step 3: Build a fragrant honey‑garlic sauce
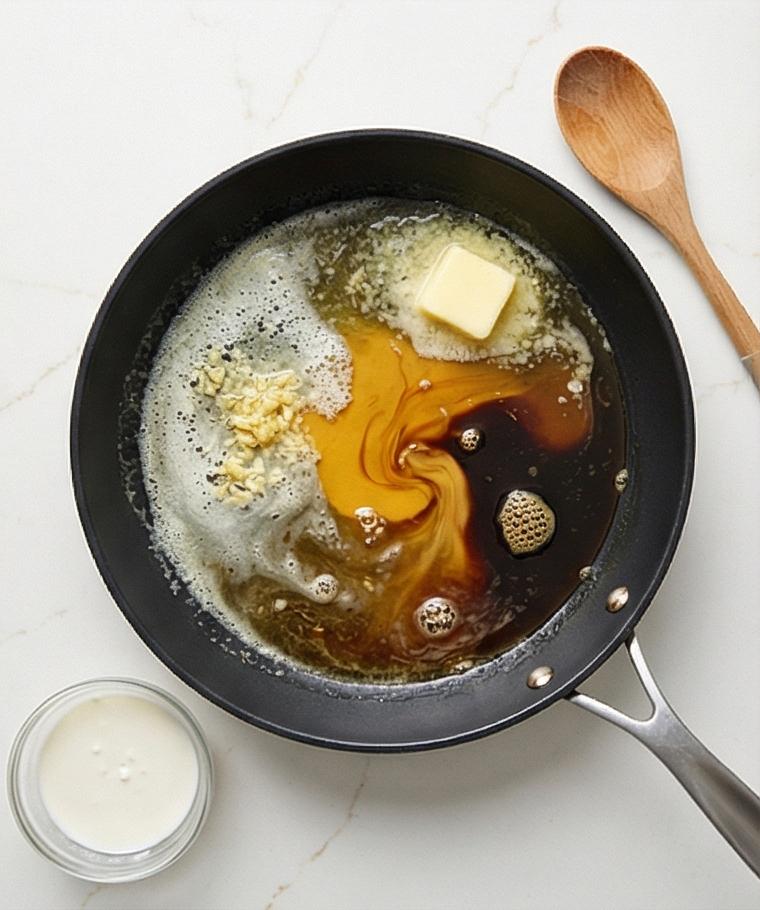
Reduce the skillet heat and add the unsalted butter; once foamy add finely minced garlic and stir constantly until just aromatic and slightly pale-golden at the edges. Pour in honey, low-sodium soy sauce, a splash of rice or apple cider vinegar, and water or broth, stirring until the honey dissolves and the mixture becomes a smooth, amber liquid with small bubbles forming at the edges.
Step 4: Thicken the sauce and coat the chicken
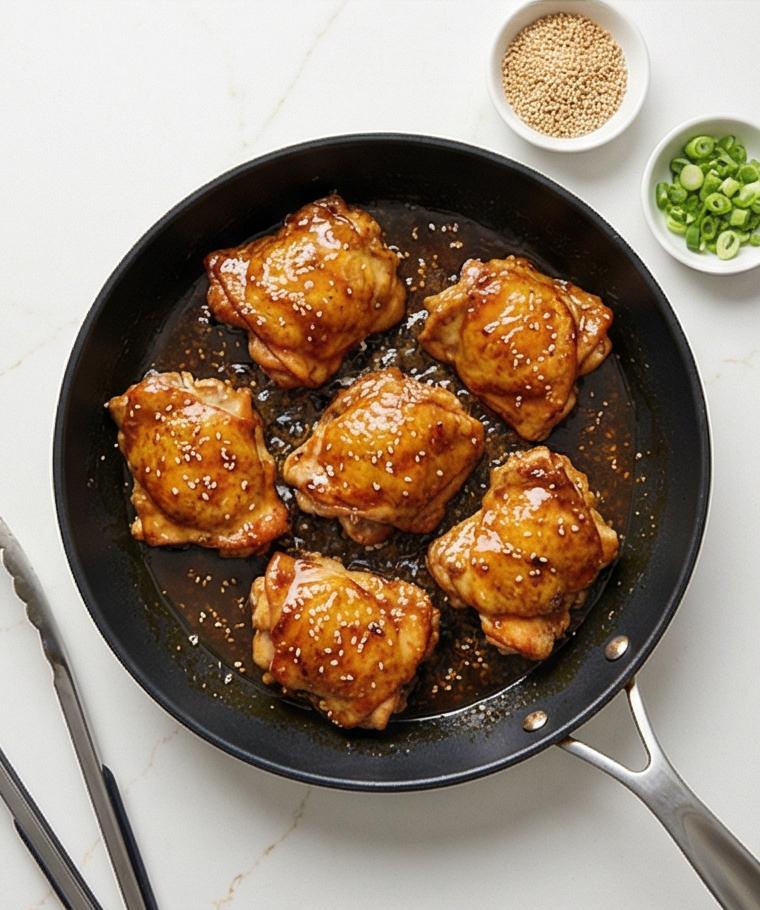
Whisk a smooth cornstarch slurry in a small glass bowl and slowly drizzle it into the simmering honey‑garlic mixture while stirring. Continue over medium heat until the sauce transforms into a glossy, syrupy glaze that ribbons and clings to the back of a spoon. Return the seared thighs to the skillet and turn each piece so the thick, sticky sauce blankets every surface.
Step 5: Simmer gently, rest, and taste‑adjust
Lower the heat and let the chicken simmer in the glaze for a few minutes until cooked through and the sauce becomes tacky and clingy; let the skillet rest off heat for 3–5 minutes so the glaze firms slightly. Taste the sauce and nudge the balance with a tiny pinch more salt, a drizzle of honey, or a few drops of vinegar if needed.
Step 6: Plate and garnish, serve while hot
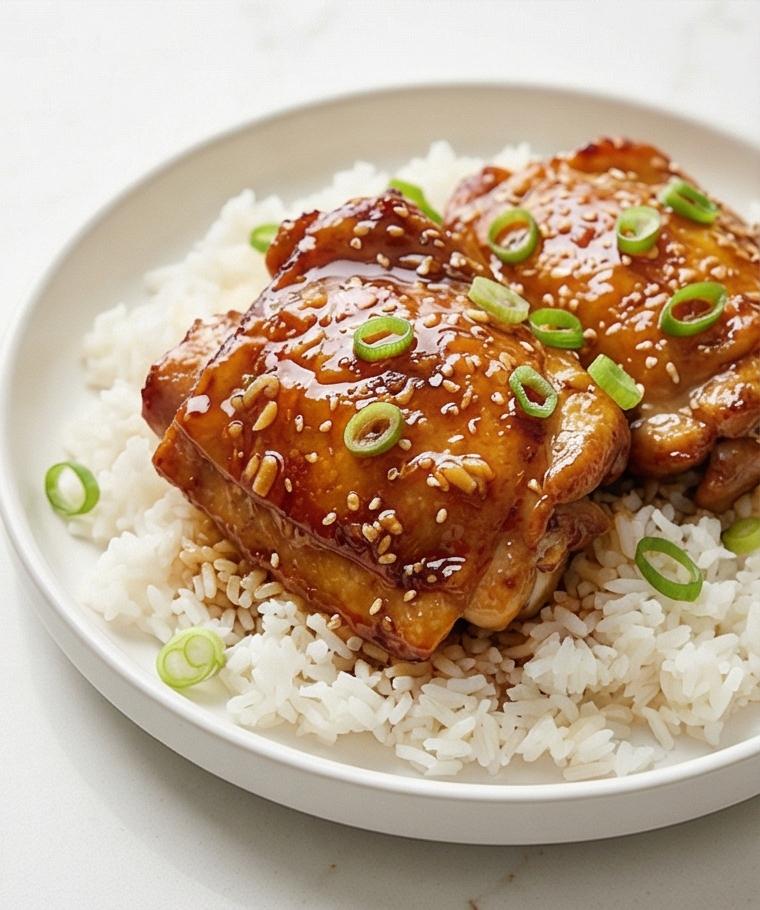
Spoon the glossy, sticky honey‑garlic thighs over hot cooked rice in a shallow round matte white serving plate, arranging pieces to show the caramelized edges and shiny glaze. Finish with a scatter of toasted sesame seeds and thinly sliced green onion, then serve immediately while the sauce is warm and glossy.
Making It Your Own
I love experimenting with small swaps. For a hotter version, stir in an extra pinch of red pepper flakes or a drizzle of chili oil just before serving. If you want a lighter glaze, reduce the honey by a quarter and add an extra splash of rice vinegar to keep the sweet-sour balance bright.
Make it gluten-free by using tamari and swapping the cornstarch for arrowroot. For a seasonal twist, add thinly sliced shiitake mushrooms in step 3 so they soak up the garlic-honey sauce. I once tossed in julienned carrots and snow peas for a quick weeknight stir-fry feel and served it on noodles instead of rice; it was colorful and lovely.
How to Serve
When hosting, plate the Honey Garlic Chicken Recipe family-style on a large platter over a bed of hot jasmine rice so everyone can help themselves. Garnish with toasted sesame seeds and a pile of thinly sliced green onions for brightness. For a dinner party, add a side of quickly steamed broccoli or bok choy dressed with a little sesame oil and soy.
To scale up, double the sauce ingredients and sear the thighs in batches to keep the crust intact. If you need to feed a crowd and want some variety, offer bowls of rice, steamed greens, and pickled cucumbers so guests can build their own plates.
Storage and Reheating Tips
Let leftovers cool to room temperature before storing. Keep the chicken and sauce together in an airtight container for up to 3 days in the refrigerator; this keeps the meat juicy and allows the flavors to meld.
Reheat gently in a skillet over low heat with a splash of water or broth to loosen the glaze, stirring until warmed through. Microwaving works in a pinch, but cover the dish and add a teaspoon of water to prevent the sauce from becoming too sticky or clumpy.
Common Mistakes and How to Avoid Them
A common slip is overcooking the thighs until they dry out. Use medium heat when simmering in the glaze and let the skillet rest off heat; the carryover will finish the cooking. Another mistake is adding the slurry too fast which can create lumps. Whisk the slurry smooth and drizzle it in slowly while stirring.
If your sauce tastes too salty, balance it with a little extra honey or a squeeze of vinegar. If it is too sweet, thin it with a splash of warm water or broth and add a pinch of salt.
Final Thoughts
Give this Honey Garlic Chicken Recipe a try this week and let it turn a simple dinner into something a little memorable. It is forgiving, quick, and endlessly adaptable, and I think you’ll find yourself reaching for it again and again.
Frequently Asked Questions
- Can I use chicken breasts instead of thighs? Yes. Chicken breasts will cook faster and can dry out if overcooked, so reduce the simmer time and watch for an internal temperature of 165 F.
- Is there a substitute for cornstarch? Arrowroot or potato starch work well as a thickener and give a similar glossy finish.
- How long does the leftover Honey Garlic Chicken keep? Store in an airtight container in the refrigerator for up to 3 days.
- Can I make the sauce ahead of time? Yes. Make the sauce and store it separately for up to 48 hours; reheat gently and toss with freshly seared chicken.
- How do I get a deeper caramelization? Sear the thighs in a very hot pan without moving them until a deep golden crust forms, then finish in the sauce.
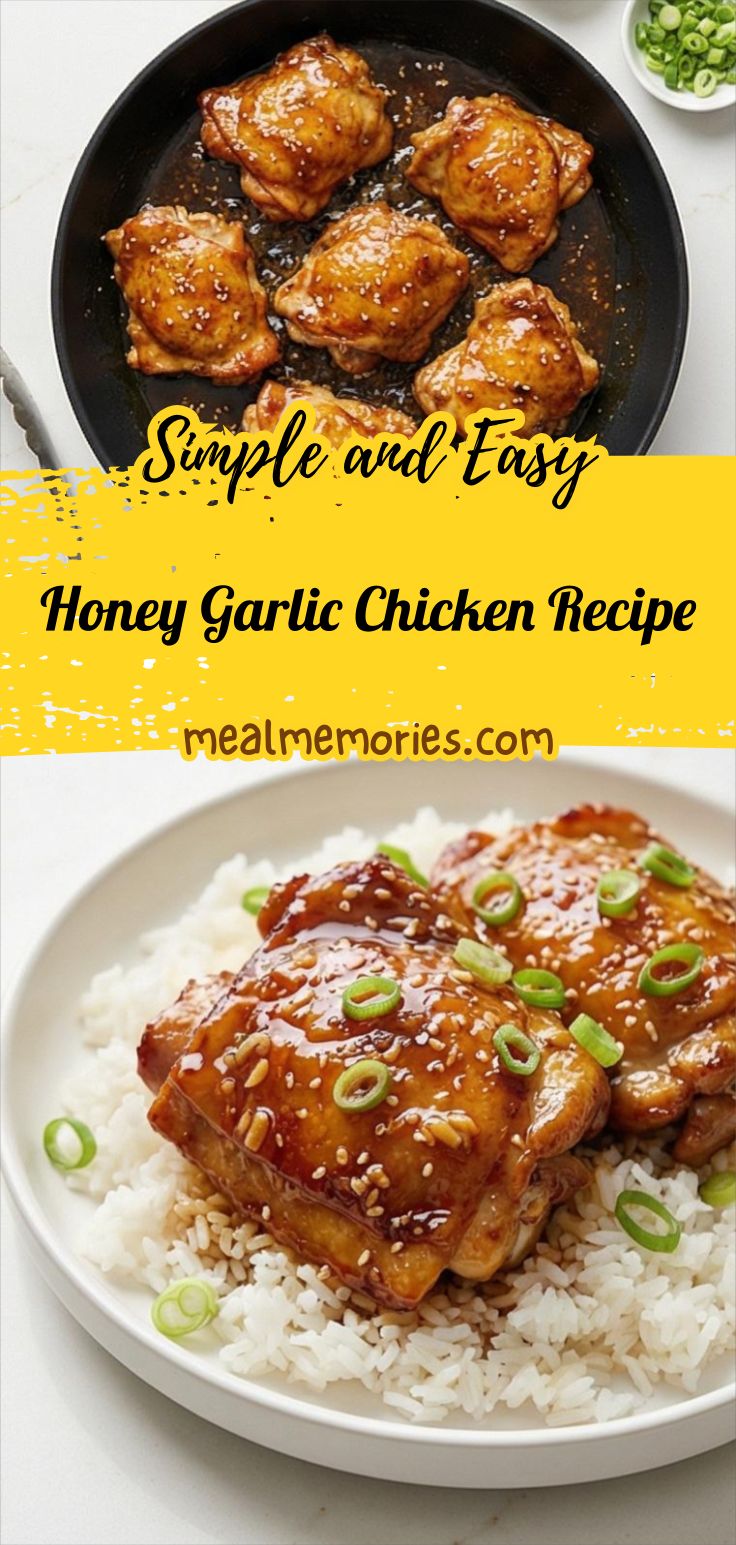
Honey Garlic Chicken Recipe
Make Honey Garlic Chicken Recipe: sticky, garlicky thighs glazed in honey-soy for a quick family dinner.
Ingredients
Instructions
Step 1: Trim, season, and coat the chicken
Pat the boneless, skinless chicken thighs dry and trim any excess fat. Season both sides evenly with fine sea salt and freshly ground black pepper, then dust 2 tablespoons of cornstarch over each piece and gently rub so every thigh wears a thin, even white veil of starch — shake off any excess and arrange the thighs in a single layer on a rectangular matte white tray, ready to sear.
Step 2: Sear the chicken until deep golden and rest
Heat a heavy 10–12 inch matte black skillet until hot, add neutral oil and sear the coated thighs without moving them until the undersides are a deep, even golden brown; flip and brown the second side until the crust is caramelized and the pieces are nearly cooked through. Transfer the browned thighs back to the same matte white tray and loosely tent with foil to keep warm while you build the sauce.
Step 3: Build a fragrant honey‑garlic sauce
Reduce the skillet heat and add the unsalted butter; once foamy add finely minced garlic and stir constantly until just aromatic and slightly pale-golden at the edges. Pour in honey, low-sodium soy sauce, a splash of rice or apple cider vinegar, and water or broth, stirring until the honey dissolves and the mixture becomes a smooth, amber liquid with small bubbles forming at the edges.
Step 4: Thicken the sauce and coat the chicken
Whisk a smooth cornstarch slurry in a small glass bowl and slowly drizzle it into the simmering honey‑garlic mixture while stirring. Continue over medium heat until the sauce transforms into a glossy, syrupy glaze that ribbons and clings to the back of a spoon. Return the seared thighs to the skillet and turn each piece so the thick, sticky sauce blankets every surface.
Step 5: Simmer gently, rest, and taste‑adjust
Lower the heat and let the chicken simmer in the glaze for a few minutes until cooked through and the sauce becomes tacky and clingy; let the skillet rest off heat for 3–5 minutes so the glaze firms slightly. Taste the sauce and nudge the balance with a tiny pinch more salt, a drizzle of honey, or a few drops of vinegar if needed.
Step 6: Plate and garnish, serve while hot
Spoon the glossy, sticky honey‑garlic thighs over hot cooked rice in a shallow round matte white serving plate, arranging pieces to show the caramelized edges and shiny glaze. Finish with a scatter of toasted sesame seeds and thinly sliced green onion, then serve immediately while the sauce is warm and glossy.
Notes
- Pat thighs very dry before seasoning to ensure a good sear
- Drizzle extra honey or a splash of vinegar to adjust the sauce balance before serving
- Rest chicken off heat for a few minutes so the glaze firms and the juices redistribute
- Reheat gently in a skillet with a splash of water or broth to loosen the glaze
- Use tamari and arrowroot to make the recipe gluten-free