Garlic Bread Recipe has been my go-to quick dinner side for years, and it still feels like a little celebration every time it comes out of the oven. I love how a few simple ingredients—soft butter, plenty of garlic, and a crusty baguette—can transform an ordinary meal into something warm and irresistible. This Garlic Bread Recipe is forgiving, fast, and endlessly customizable, which is why I return to it when I want comfort without fuss. If you want a reliable, crowd-pleasing slice of warm bread, this recipe never lets me down.
How This Recipe Became My Weeknight Comfort
I remember the first time I made this Garlic Bread Recipe for friends after a long week of work. The kitchen smelled like toasted garlic and butter within minutes, and we all paused mid-conversation to take it in. The bread crackled under the knife as I sliced through the golden crust, and the first bite was all warm, salty butter and soft, garlicky crumb. We ate standing around the counter, napkins in hand, laughing about small things. That night taught me that food can be both simple and memorable. The sensory details stuck with me: the bright green flecks of parsley, the feel of melted cheese stretching between slices, and the quiet satisfaction of making something comforting for other people. Since then, this Garlic Bread Recipe has been my easy way to turn weeknights into tiny gatherings.
The Ingredients That Make the Magic
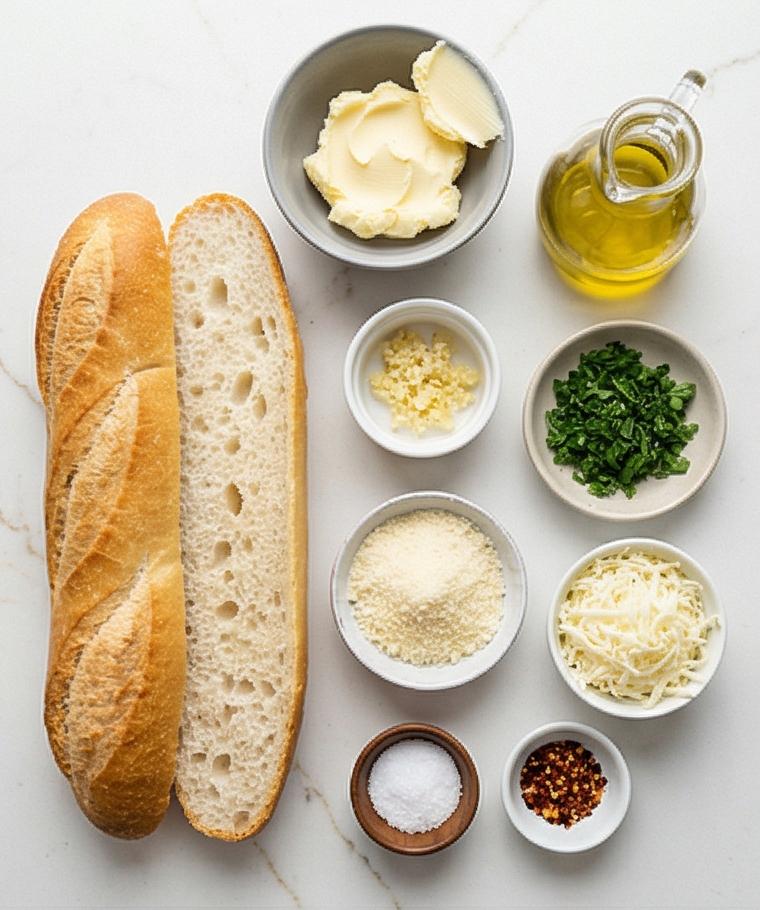
- French baguette or Italian loaf: The canvas for everything. Choose a fresh but slightly day-old loaf for better butter absorption. Substitute with sourdough for a tangier result.
- Unsalted butter: Provides richness and spreadability. Use high-quality butter and soften fully. Salted butter can be used, but reduce added salt.
- Extra-virgin olive oil: Adds gloss and aromatic depth. Light olive oil works as a milder swap.
- Garlic: The star flavor. Fresh garlic is essential; roasted garlic will give a sweeter, mellower tone.
- Flat-leaf parsley: Brightens and freshens the dish. Cilantro or chives can be used for a different herbal note.
- Parmesan and mozzarella (optional): Parmesan adds a salty bite, mozzarella gives melty strings. Pecorino or fontina are good alternatives.
Essential Kitchen Tools and Why They Matter
To make great garlic bread, you do not need a huge toolset, but the right few items will make the process smoother and the results more consistent. A good serrated knife keeps slices tidy without crushing the crumb, while an offset spatula or butter knife helps you spread the garlic-herb butter evenly. A rimmed baking sheet lined with foil makes cleanup a breeze and helps the bread crisp. If you plan to broil for color, an oven rack placed in the upper third of the oven is handy.
- Serrated knife: For clean slices without squashing the bread.
- Offset spatula or butter knife: For smooth, even spreading of the compound butter.
- Rimmed baking sheet and foil: Keeps the oven tidy and helps with crisping.
- Microplane or fine grater: For finely grating Parmesan and garlic if you prefer.
- Oven with broil option: For a quick, golden finish; a toaster oven works for smaller batches.
Step-by-Step Preparation Guide
Step 1: Preheat the oven and make the garlic-herb butter
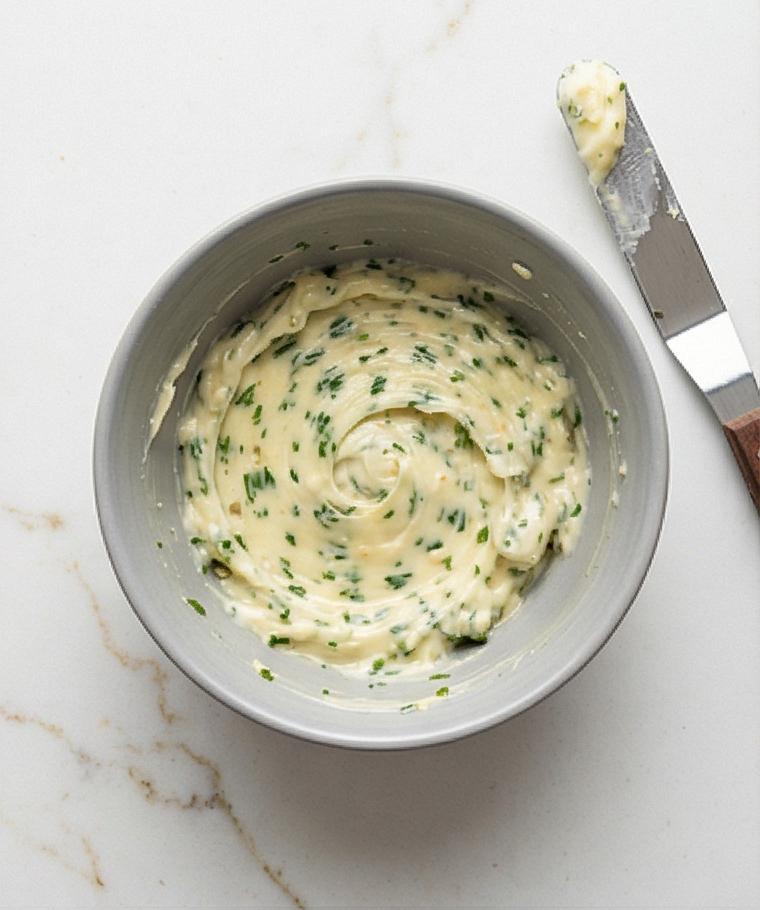
Preheat the oven to 400°F (200°C) and line a rectangular baking sheet with a sheet of aluminum foil so everything that follows stays tidy. In a medium matte grey ceramic mixing bowl, place the very soft unsalted butter and drizzle in the extra-virgin olive oil; mash them together with a fork or offset spatula until the mixture becomes completely smooth and glossy. Fold in the very finely minced garlic, the finely chopped flat-leaf parsley, sea salt, freshly ground black pepper, and optional red pepper flakes until the butter shows tiny green herb flecks and pinpricks of garlic throughout. Taste a tiny smear and adjust with a pinch more salt if needed — the compound butter should be boldly garlicky, silky and spreadable.
Step 2: Arrange the bread and spread the compound butter
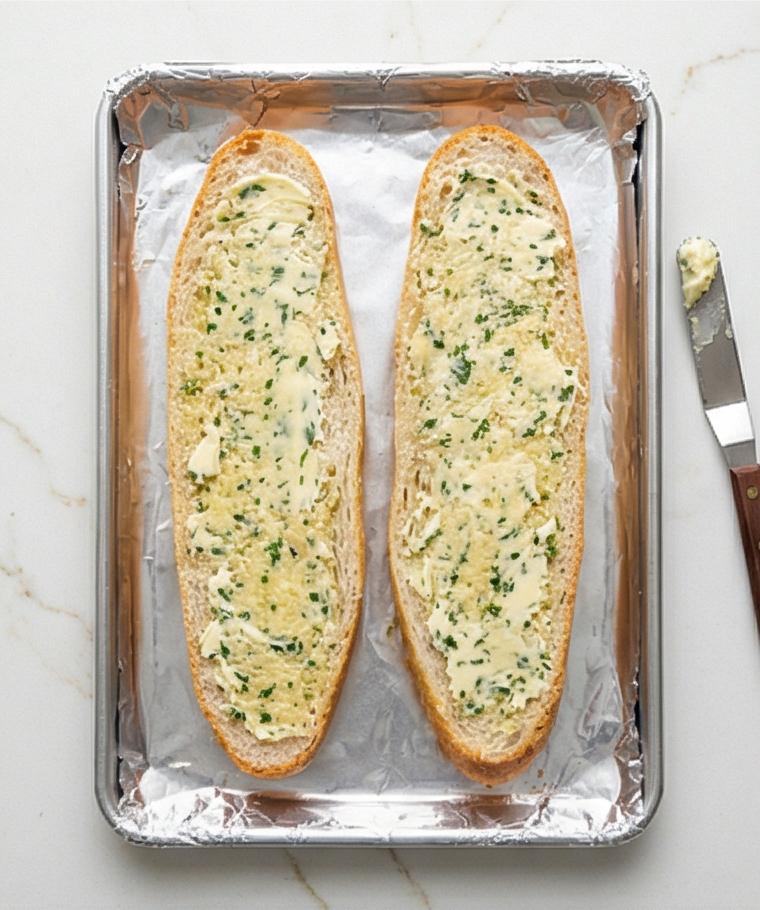
Place the baguette or Italian loaf halves cut-side up on the foil-lined rectangular baking sheet; if the loaf is long, cut each half into 2–3 shorter, manageable pieces so they sit comfortably on the sheet. Using the same offset spatula or butter knife, smear a thick, even layer of the garlic-herb butter all the way to the edges of each cut surface so the crust won’t dry out, leaving visible peaks and glossy ridges of butter that have started to melt into the open crumb. Keep the unused portion of compound butter in the same ceramic bowl nearby so the utensil stays relevant to the scene.
Step 3: Add the optional cheeses and tent with foil
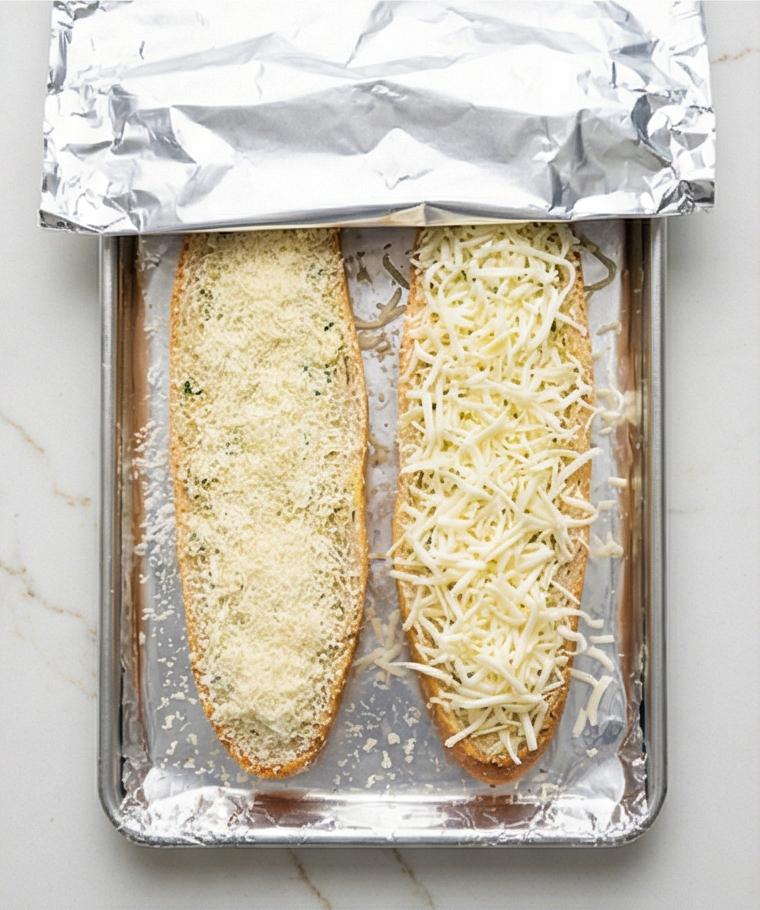
If you’re making the cheesy version, evenly dust the buttered surfaces with the finely grated Parmesan first, letting the powder settle into the butter, then top with a uniform layer of shredded low-moisture mozzarella so the strings will form when melted. The cheese should sit as a textured, slightly mounded layer over the butter, white and creamy against the pale crumb. Lightly tent the whole baking sheet with a loose sheet of aluminum foil — not wrapped tight — to allow the butter to melt fully into the bread while protecting the garlic from browning too fast.
Step 4: Bake, broil briefly for color, then rest and slice
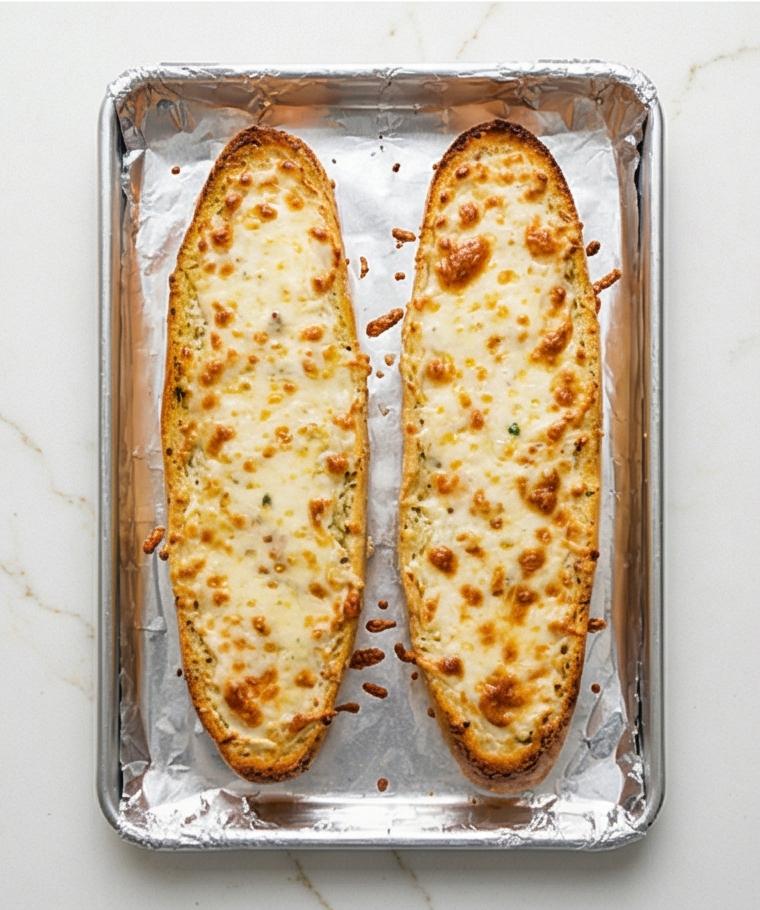
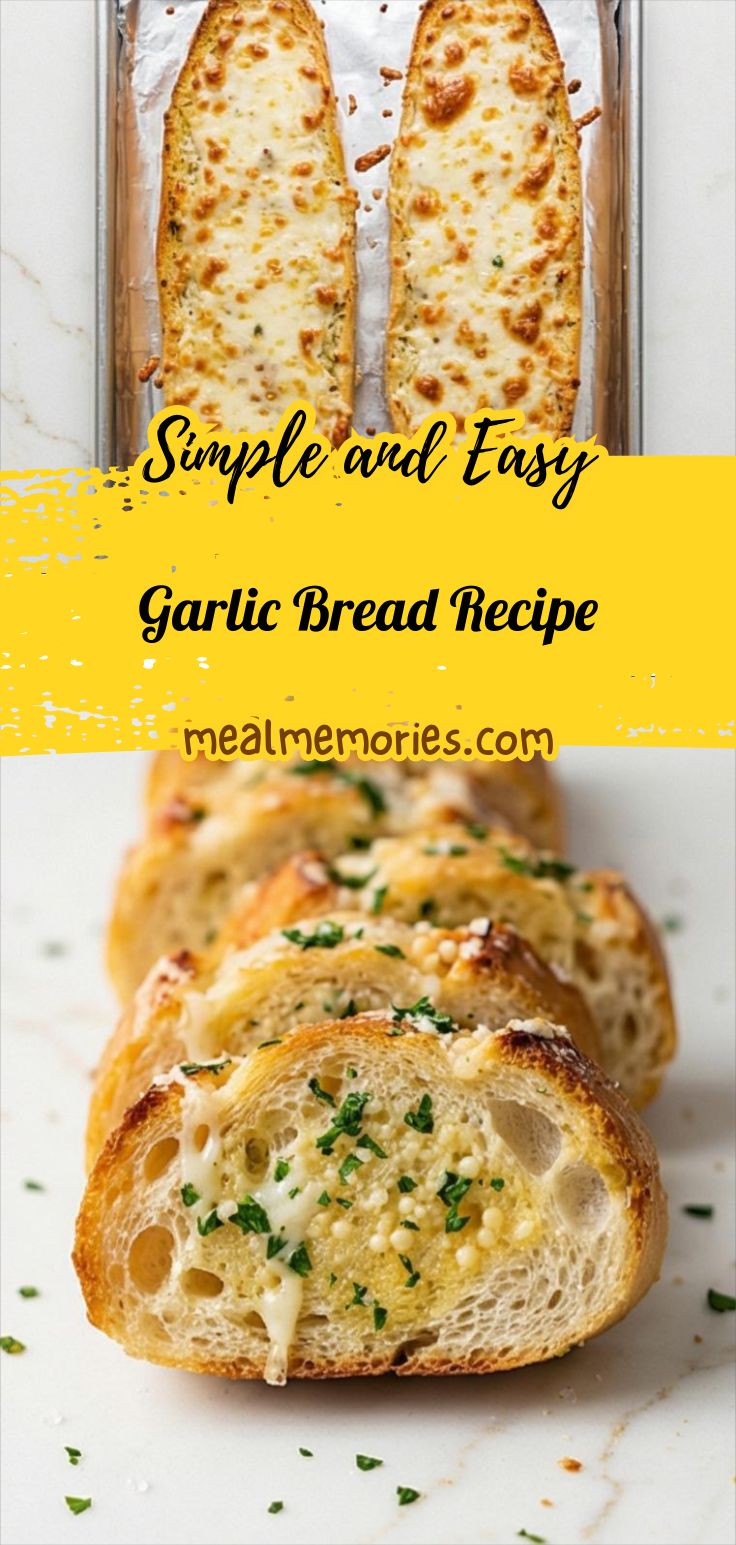
Slide the sheet into the preheated oven and bake until the butter is fully melted, the edges are beginning to crisp, and any cheese is melted and cohesive — typically 10–12 minutes. For a golden, bubbly finish, remove the foil and broil on high for just 1–2 minutes while watching closely until the top shows bubbly, golden-brown patches and the crust edges deepen to a warm amber. Remove the baking sheet and let the garlic bread rest for 2–3 minutes so the butter and cheese set slightly; then transfer back to the surface and slice crosswise into 1–1 1/2-inch (2.5–4 cm) pieces with a serrated knife, revealing a soft, butter-saturated crumb and crisp, caramelized edges.
Step 5: Plate and finish with fresh parsley
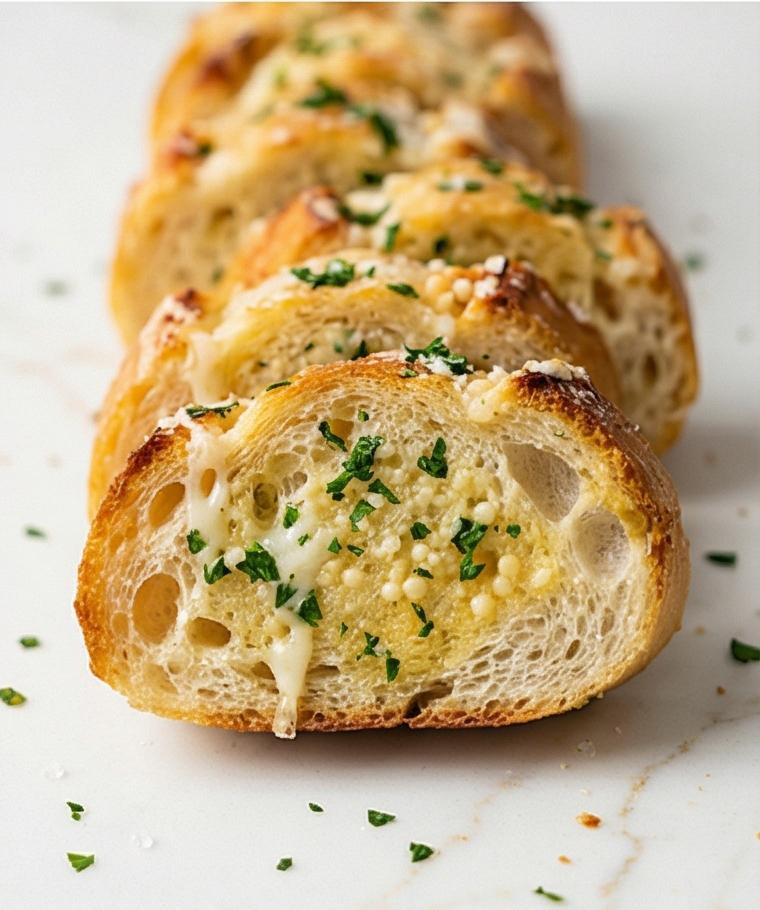
Arrange the warm slices in a neat linear row on the same rectangular sheet (or keep them aligned on a similarly shaped warm rectangular board) so the geometry remains consistent — the slices should show melted cheese strands, shiny butter pockets, and golden, crisped crusts. Sprinkle a little extra finely chopped parsley over the top for a bright, herb-flecked contrast and serve immediately while still warm and fragrant.
Making It Your Own
I like to tinker with this Garlic Bread Recipe depending on the season or what I have on hand. For a spicy kick, I add extra red pepper flakes and a scatter of chopped roasted red peppers. To make it vegetarian-friendly and richer, I swap the Parmesan for a sprinkle of smoked paprika and add a handful of caramelized onions in the middle. For a dairy-free version I mix extra-virgin olive oil with a firm vegan butter and use nutritional yeast for a cheesy note. When I have herbs from the garden, I try a mix of parsley and basil for a brighter finish. Small experiments like these turn a familiar recipe into a personal signature.
How to Serve
When I host, I slice the Garlic Bread Recipe into shorter segments and arrange them in a fan around the main dish so guests can grab pieces without crowding. For pasta night, serve alongside a wide, shallow bowl of sauce for dipping. If you need more grazing, pair the garlic bread with a charcuterie board and add roasted tomatoes or marinated olives. To stretch servings, cut thinner slices and offer a small ramekin of extra herb butter. For a buffet, keep a warm tray on the table or use chafing dishes to maintain temperature without drying the bread.
Storage and Reheating Tips
Store leftover garlic bread wrapped tightly in foil or in an airtight container at room temperature for up to 24 hours, or in the refrigerator for up to 3 days. For best texture, reheat in a 350°F oven for 6 to 8 minutes if chilled, or 3 to 4 minutes if at room temperature. Reheating in a microwave makes it soft and less crisp, so I only use that for very short reheats.
If you have frozen garlic bread, thaw in the refrigerator overnight and re-crisp in a hot oven. To refresh slices, a quick 1-minute broil will revive the top, but watch closely so it does not burn.
Common Mistakes and How to Avoid Them
One mistake is under-seasoning the compound butter. Taste a tiny smear before spreading and add salt as needed; garlic needs a little salt to sing. Another common issue is browning the garlic too quickly. Tent with foil while the butter melts to protect the garlic, and only broil briefly at the end for color.
Cutting slices too thick or too thin can change the experience. Aim for 1 to 1 1/2-inch slices to keep a balance between gooey center and crisp edge.
Final Thoughts
I hope this Garlic Bread Recipe becomes one of those small, dependable recipes you reach for when you want comfort or when guests drop by. It is quick, forgiving, and endlessly adaptable. Give it a try tonight and see which variation becomes your favorite.
Frequently Asked Questions
- How do I prevent the garlic from burning while baking? Burned garlic tastes bitter; tent the bread with foil while the butter melts and only broil for 1 to 2 minutes at the end.
- Can I use pre-minced garlic from a jar? Freshly minced or pressed garlic gives the best flavor, but jarred garlic can work in a pinch; reduce the amount slightly because it can be more pungent.
- What’s the best bread to use? A slightly day-old French baguette or Italian loaf is ideal because it soaks up the butter without becoming mushy.
- How do I make it dairy-free? Swap butter for a plant-based spread and use olive oil, and substitute nutritional yeast for Parmesan for a savory note.
- Can I prepare it ahead? Make the compound butter a day ahead and keep it chilled; spread and bake just before serving for the freshest result.
Garlic Bread Recipe
Make Garlic Bread Recipe: warm, garlicky slices with optional cheese in under 25 minutes.
Ingredients
Instructions
Step 1: Preheat the oven and make the garlic-herb butter
Preheat the oven to 400°F (200°C) and line a rectangular baking sheet with a sheet of aluminum foil so everything that follows stays tidy. In a medium matte grey ceramic mixing bowl, place the very soft unsalted butter and drizzle in the extra-virgin olive oil; mash them together with a fork or offset spatula until the mixture becomes completely smooth and glossy. Fold in the very finely minced garlic, the finely chopped flat-leaf parsley, sea salt, freshly ground black pepper, and optional red pepper flakes until the butter shows tiny green herb flecks and pinpricks of garlic throughout. Taste a tiny smear and adjust with a pinch more salt if needed — the compound butter should be boldly garlicky, silky and spreadable.
Step 2: Arrange the bread and spread the compound butter
Place the baguette or Italian loaf halves cut-side up on the foil-lined rectangular baking sheet; if the loaf is long, cut each half into 2–3 shorter, manageable pieces so they sit comfortably on the sheet. Using the same offset spatula or butter knife, smear a thick, even layer of the garlic-herb butter all the way to the edges of each cut surface so the crust won’t dry out, leaving visible peaks and glossy ridges of butter that have started to melt into the open crumb. Keep the unused portion of compound butter in the same ceramic bowl nearby so the utensil stays relevant to the scene.
Step 3: Add the optional cheeses and tent with foil
If you’re making the cheesy version, evenly dust the buttered surfaces with the finely grated Parmesan first, letting the powder settle into the butter, then top with a uniform layer of shredded low-moisture mozzarella so the strings will form when melted. The cheese should sit as a textured, slightly mounded layer over the butter, white and creamy against the pale crumb. Lightly tent the whole baking sheet with a loose sheet of aluminum foil — not wrapped tight — to allow the butter to melt fully into the bread while protecting the garlic from browning too fast.
Step 4: Bake, broil briefly for color, then rest and slice
Slide the sheet into the preheated oven and bake until the butter is fully melted, the edges are beginning to crisp, and any cheese is melted and cohesive — typically 10–12 minutes. For a golden, bubbly finish, remove the foil and broil on high for just 1–2 minutes while watching closely until the top shows bubbly, golden-brown patches and the crust edges deepen to a warm amber. Remove the baking sheet and let the garlic bread rest for 2–3 minutes so the butter and cheese set slightly; then transfer back to the surface and slice crosswise into 1–1 1/2-inch (2.5–4 cm) pieces with a serrated knife, revealing a soft, butter-saturated crumb and crisp, caramelized edges.
Step 5: Plate and finish with fresh parsley
Arrange the warm slices in a neat linear row on the same rectangular sheet (or keep them aligned on a similarly shaped warm rectangular board) so the geometry remains consistent — the slices should show melted cheese strands, shiny butter pockets, and golden, crisped crusts. Sprinkle a little extra finely chopped parsley over the top for a bright, herb-flecked contrast and serve immediately while still warm and fragrant.
Notes
- Soften butter fully to make the compound butter easy to spread.
- Taste the butter before spreading and adjust salt and garlic.
- Tent with foil while melting to avoid burnt garlic.
- Broil only briefly to achieve golden color without burning.
- Store leftovers wrapped in foil and re-crisp in a hot oven.