Naan Recipe has been a kitchen staple for me for years, and I still get excited pulling a stack of warm flatbreads from the skillet. I learned this Naan Recipe at home testing afternoons and quickly found its mix of pillowy texture and charred blisters impossible to resist. I love how simple ingredients turn into something that feels celebratory yet comforting. If you’ve been on the fence about making bread at home, this Naan Recipe is a gentle, forgiving place to start.
How This Naan Became My Rainy-Day Comfort
The first time I made this Naan Recipe it was pouring outside and the whole house smelled like toasted flour and warm milk. I remember the dough feeling cool and slightly tacky under my palms as I kneaded, the rhythm quieting my mind. When the dough rose into a domed, soft mound, I felt oddly triumphant; the tiny gas bubbles beneath the skin looked like little promises. Cooking the naan in a hot skillet sent up a hiss and a burst of steam, and when I brushed each piece with warm ghee and garlic, the scent became almost hypnotic. Eating a still-warm naan torn open with my fingers felt like sharing a small, private celebration with myself.
The Ingredients that Make This Naan Sing
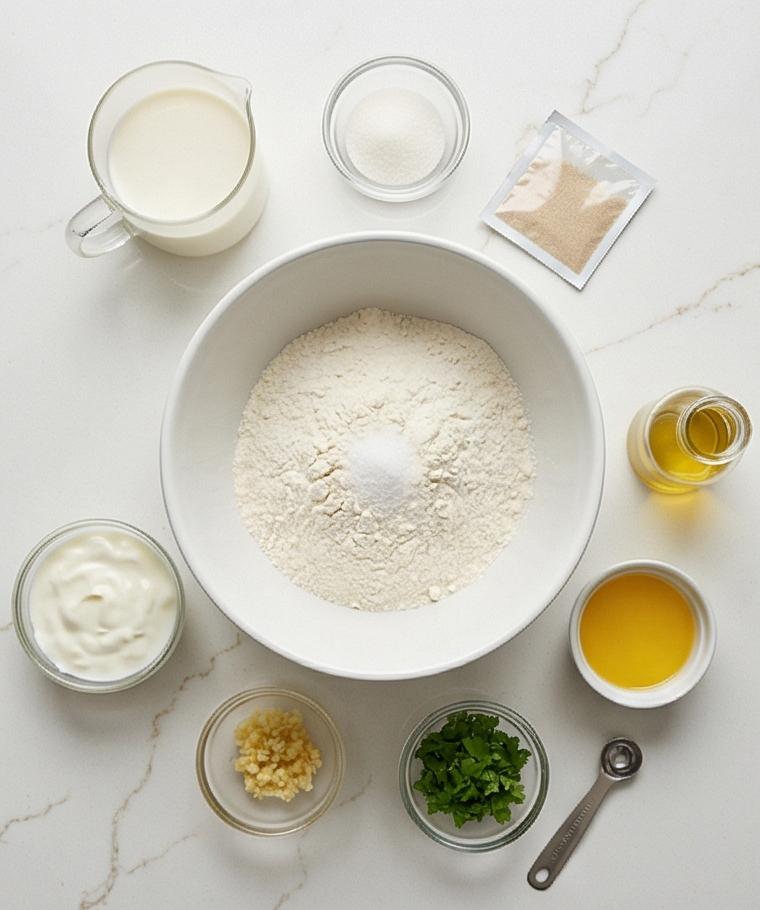
- Whole Milk: Adds richness and tenderness; use low-fat milk in a pinch but full-fat gives the best softness.
- Granulated Sugar: Feeds the yeast and encourages browning; honey works as a substitute but cut liquid slightly.
- Active Dry Yeast: The leavener; instant yeast can replace it (reduce proofing time slightly).
- All-Purpose Flour: Provides the structure; bread flour will yield chewier naan.
- Fine Sea Salt: Balances flavor; kosher salt is fine, just adjust volume.
- Plain Full-Fat Yogurt: Adds tang and keeps the crumb tender; Greek yogurt is fine thinned slightly.
- Neutral Oil: Keeps dough supple; olive oil will change the flavor profile.
- Ghee or Butter: For finishing and shine; clarified butter is traditional.
Essential Tools for Making Great Naan
A few simple tools make this Naan Recipe effortless. A heavy skillet or cast-iron pan is the most important item; it holds steady high heat and creates those blistered char spots. A reliable kitchen thermometer helps you bring milk to the correct lukewarm temperature so you don’t kill the yeast. A bench scraper keeps your workspace tidy when dividing dough, and a rolling pin helps shape even naans, though you can gently stretch them by hand. If you have a stand mixer with a dough hook, it shortens kneading time; otherwise, your hands are perfect.
- Heavy skillet or cast-iron pan: Key for high, even heat; a carbon steel pan also works.
- Kitchen thermometer: Ensures milk is 105–115°F so yeast blooms reliably.
- Bench scraper: For dividing dough and cleaning the board.
- Rolling pin: For uniform shapes; fingers-only stretching is an alternative.
- Stand mixer with dough hook (optional): Cuts kneading time and effort.
Step-by-Step Preparation Guide.
Step 1: Bloom the Yeast and Warm the Milk
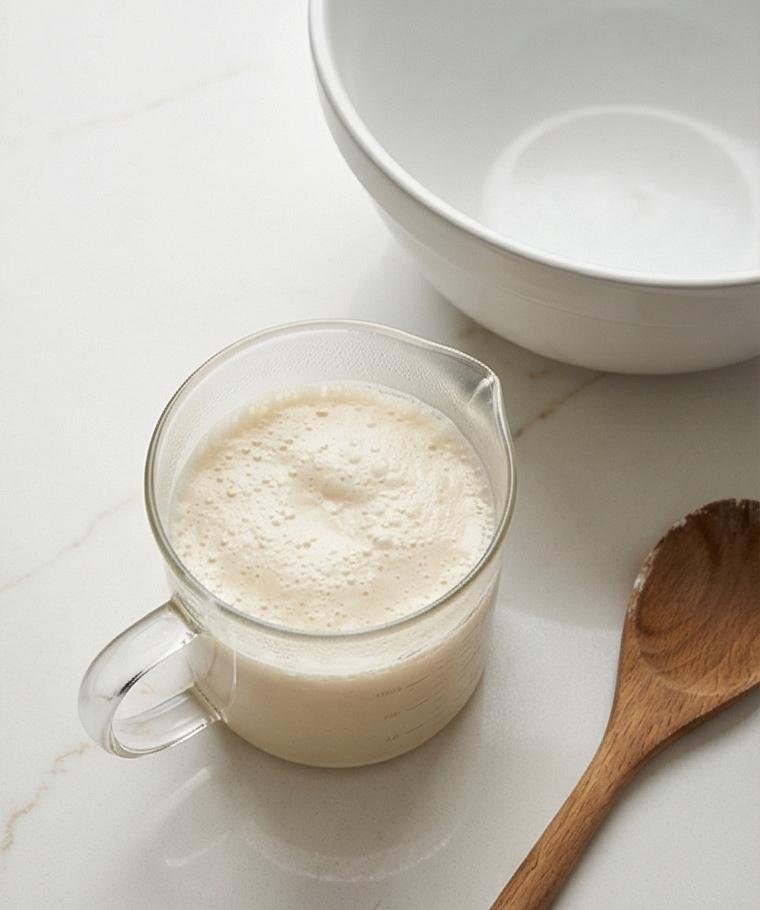
Warm the whole milk to lukewarm (about 105–115°F / 40–46°C), then whisk in the granulated sugar and sprinkle the active dry yeast on top. Stir gently until dissolved and let the mixture rest 5–10 minutes until the surface becomes foamy and creamy — a light, airy foam with tiny bubbles signals healthy yeast. If the surface remains flat, the yeast should be discarded and restarted.
Step 2: Combine the Dry Ingredients
In a large mixing bowl, whisk together the all-purpose flour and fine sea salt until evenly distributed and aerated. The flour should look pale, slightly billowed, with the salt speckling the surface; this dry base will provide structure and contrast to the wet additions. Keep this same large bowl in play for the next steps to maintain utensil and vessel continuity.
Step 3: Add Yogurt, Oil, and the Yeast Mixture to Form a Shaggy Dough
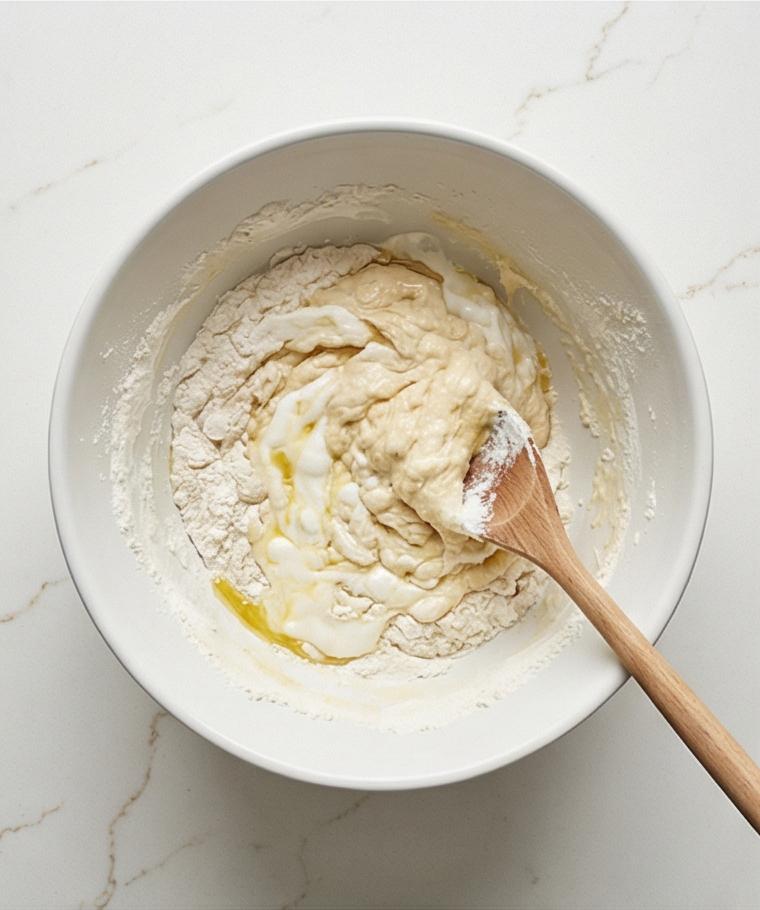
Make a shallow well in the center of the flour, add the room-temperature plain yogurt and neutral oil, then pour in the foamy yeast-milk. Mix from the center outward with a wooden spoon or your hand until a shaggy, loosely combined dough forms and most of the flour is incorporated. The result should be textured and slightly sticky, with visible streaks of dry flour that will be worked in next.
Step 4: Knead to a Smooth, Elastic Dough
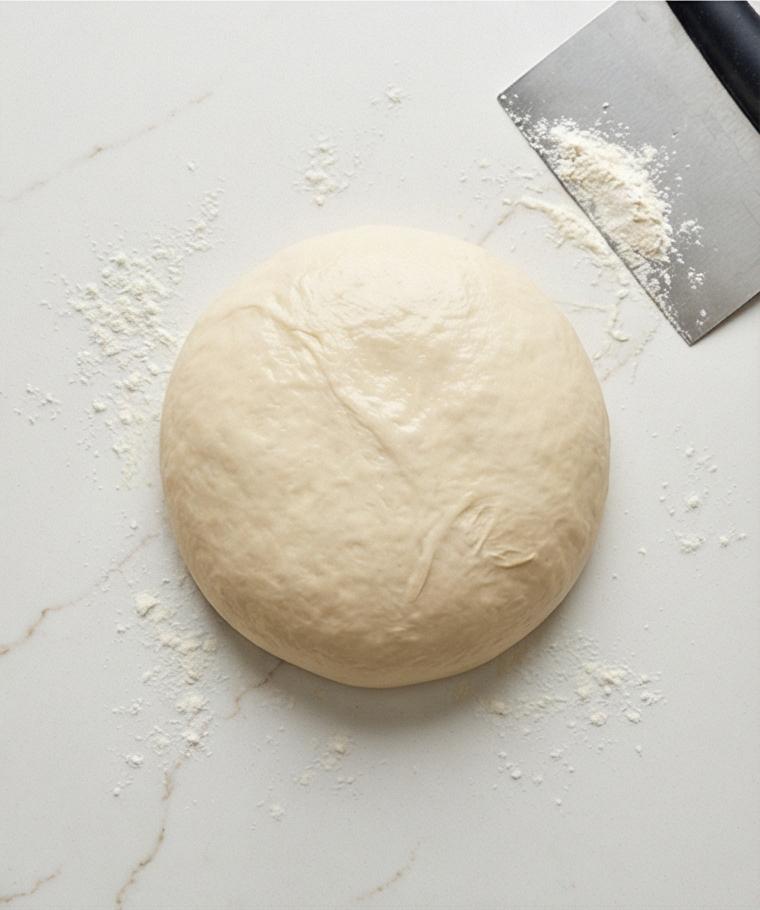
Turn the shaggy dough onto a lightly floured work surface and knead by hand for 8–10 minutes (or use a stand mixer with a dough hook for 5–6 minutes) until it becomes smooth, elastic, and just slightly tacky — supple and springy to the touch with a faint sheen from the oil. If the dough resists or cracks, add tiny teaspoons of warm milk to coax elasticity. A bench scraper and a small dusting of extra flour are the only tools visible here.
Step 5: Oil, Cover, and First Rise Until Doubled
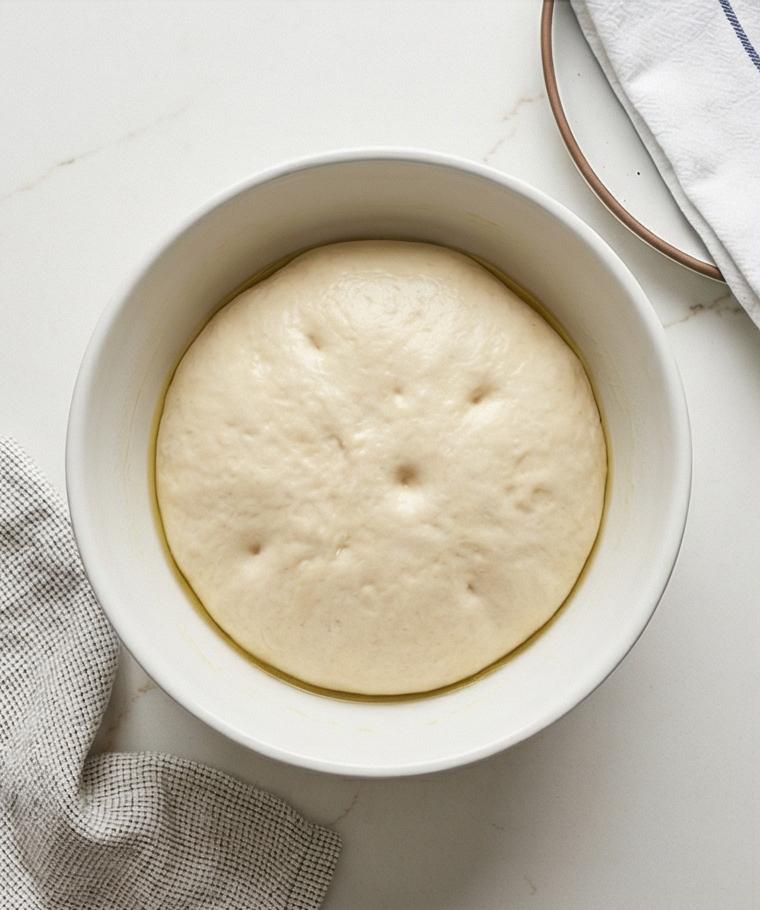
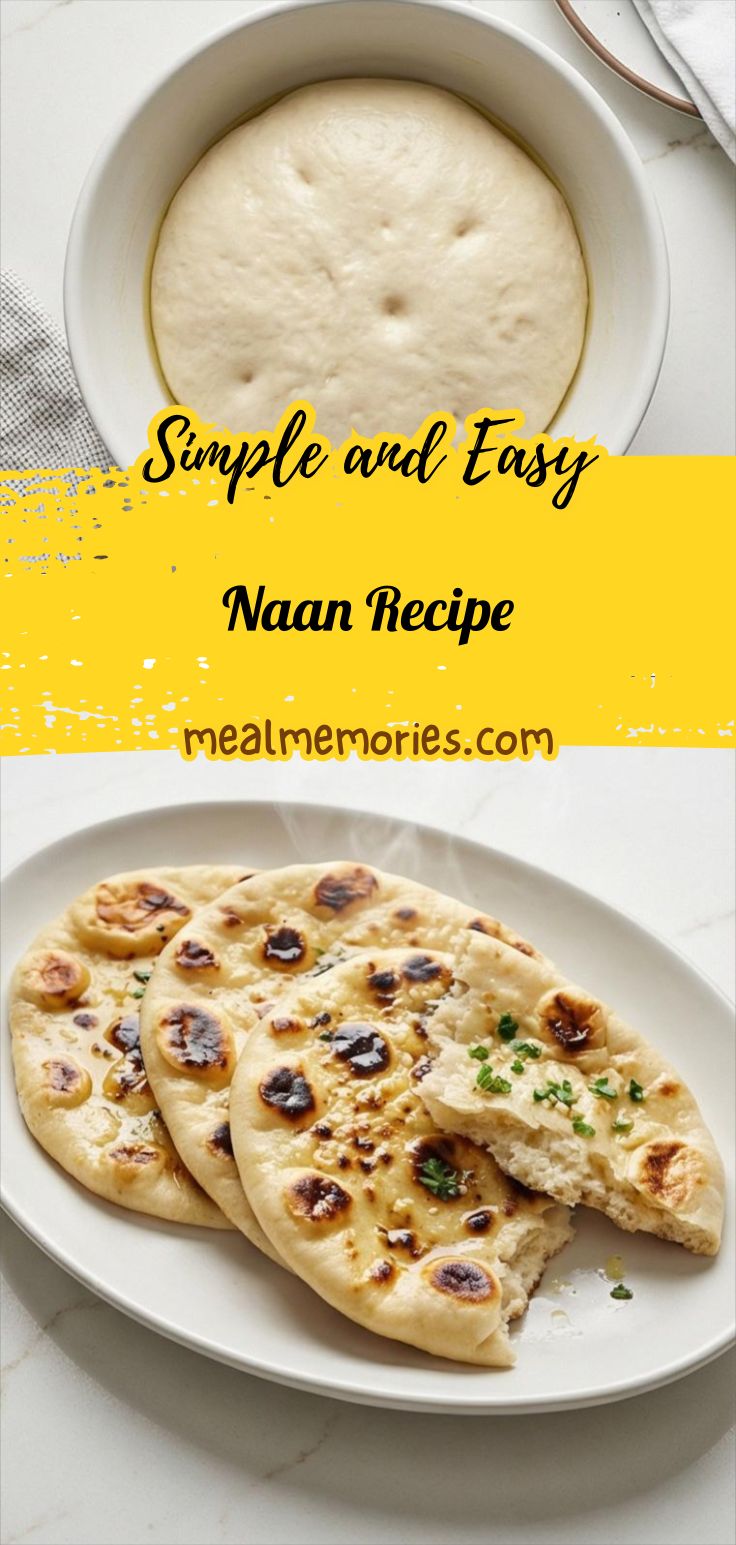
Lightly oil a clean mixing bowl with a neutral oil, shape the dough into a tight ball, place it seam-side down, and turn once to coat. Cover tightly with plastic wrap or a damp towel and let the dough rise in a warm, draft-free place until it has doubled — typically 60–75 minutes — showing a smooth domed surface and faint gas pockets beneath the skin. This is the gentle, puffy stage that indicates readiness for dividing.
Step 6: Divide, Round, and Rest the Dough Pieces
Gently deflate the risen dough, turn it out, and shape into a rough log. Using a bench scraper, divide into eight equal pieces; shape each into a tight ball by tucking the edges underneath until the tops are smooth. Cover the balls lightly and let them rest 15–20 minutes so the gluten relaxes and they become easier to roll thin.
Step 7: Roll, Dust, and Cook into Puffy Flatbreads
Working one ball at a time on a lightly floured surface, flatten with your fingertips and roll into an oval or teardrop about 8–9 inches long and 1/8–1/4 inch thick, brushing off excess flour so it won’t burn. Transfer the rolled dough to a very hot, preheated heavy skillet (not shown) and cook until large surface bubbles form and deep golden-brown spots appear; flip and finish until scattered charred blisters and soft interior pockets develop. Transfer each cooked naan to the lined plate, keeping them covered to retain softness.
Step 8: Brush with Warm Ghee (Optional Garlic & Cilantro) and Serve
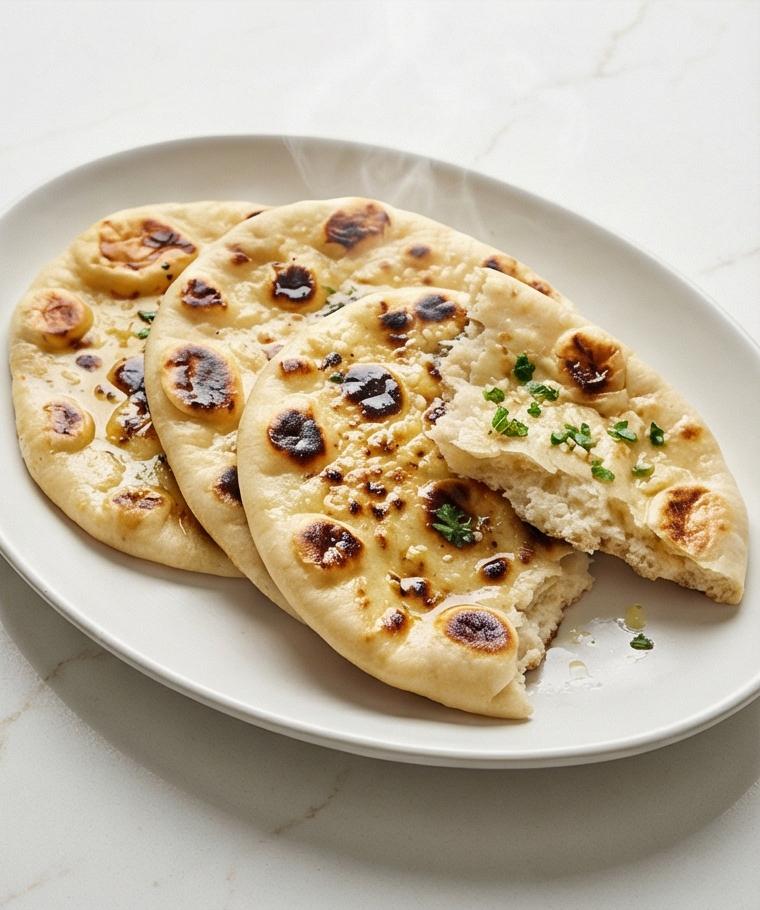
Immediately brush the hot naan generously with warm melted ghee or butter blended with very finely minced garlic and chopped cilantro if desired, creating a glossy, fragrant finish. Stack or fan the finished naans on a simple serving plate so the brushed tops glisten, steam gently rising. Serve hot alongside curries, grilled vegetables, or use as a wrap; to retain the visual warmth and texture, present the final image eye-level and very close-up to capture the blistered surface and pillowy crumb.
Making It Your Own
I often tinker with the Naan Recipe depending on what I have on hand. For a dairy-free version I swap the milk for coconut milk and use a neutral oil in place of butter; the texture shifts slightly but remains tender. To make garlic naan, I press very finely minced garlic into the rolled dough before cooking and finish with garlicky ghee. For a herbed twist, finely chopped rosemary or mint folded into the dough gives a seasonal note. I even tried whole wheat blend once; you can go up to half whole wheat for a nuttier, denser loaf.
How to Serve
When I host, naan steals the show because it can act as plate and utensil. For a casual dinner, stack the naans in a cloth-lined basket and let guests tear pieces to scoop curry. For a composed meal, fan three naans on each place, top with a small bowl of spiced yogurt and a scattering of chopped cilantro for contrast. To scale up, double the dough and keep cooked naans warm in an oven set to low heat. Leftovers make brilliant sandwich wraps with spiced lamb or roasted vegetables.
Storage and Reheating Tips
Store cooled naan in an airtight container or zipper bag at room temperature for up to two days; longer and they start to lose softness. For fridge storage, wrap tightly and use within five days.
To reheat, sprinkle each naan lightly with water and warm briefly in a hot skillet or wrap in foil and heat in a 350°F oven until pliable. A quick zap in the microwave works for immediate use but loses surface texture.
Common Mistakes and How to Avoid Them
Underproofing the dough is the most common problem; if the first rise is short, the naans will be dense. Be patient and look for a smooth, domed surface with gentle spring back. Over-flouring while rolling makes the bread dry; use minimal dusting and brush off excess before cooking.
If your skillet isn’t hot enough, you won’t get those signature blisters. Preheat for several minutes and test with a small scrap of dough to check blistering.
A Warm Invitation
Give this Naan Recipe a go this week; it rewards a little patience with buttery, blistered flatbreads that lift any meal. I promise the first warm piece off the skillet will make the time feel worth it.
Frequently Asked Questions.
- What if my yeast doesn’t foam? If the yeast stays flat, discard and start again with fresh yeast and make sure the milk is lukewarm, not hot.
- Can I use instant yeast instead of active dry yeast? Yes, you can; reduce the proofing time slightly and mix instant yeast directly into the dry ingredients.
- How do I make garlic naan? Mix very finely minced garlic with melted ghee and brush it on immediately after cooking, or press some garlic into the rolled dough before cooking.
- Can I freeze naan? Yes, cool completely, stack with parchment between pieces, freeze in a tight bag, and reheat from frozen in a skillet or oven.
- Why didn’t my naan puff up? Likely issues include underproofing, a skillet that is too cool, or overworking the dough. Rest the shaped pieces and ensure high heat.
Naan Recipe
Make this Naan Recipe: pillowy, blistered flatbreads ready to serve warm and buttery.
Ingredients
Instructions
Step 1: Bloom the Yeast and Warm the Milk
Warm the whole milk to lukewarm (about 105–115°F / 40–46°C), then whisk in the granulated sugar and sprinkle the active dry yeast on top. Stir gently until dissolved and let the mixture rest 5–10 minutes until the surface becomes foamy and creamy — a light, airy foam with tiny bubbles signals healthy yeast. If the surface remains flat, the yeast should be discarded and restarted.
Step 2: Combine the Dry Ingredients
In a large mixing bowl, whisk together the all-purpose flour and fine sea salt until evenly distributed and aerated. The flour should look pale, slightly billowed, with the salt speckling the surface; this dry base will provide structure and contrast to the wet additions. Keep this same large bowl in play for the next steps to maintain utensil and vessel continuity.
Step 3: Add Yogurt, Oil, and the Yeast Mixture to Form a Shaggy Dough
Make a shallow well in the center of the flour, add the room-temperature plain yogurt and neutral oil, then pour in the foamy yeast-milk. Mix from the center outward with a wooden spoon or your hand until a shaggy, loosely combined dough forms and most of the flour is incorporated. The result should be textured and slightly sticky, with visible streaks of dry flour that will be worked in next.
Step 4: Knead to a Smooth, Elastic Dough
Turn the shaggy dough onto a lightly floured work surface and knead by hand for 8–10 minutes (or use a stand mixer with a dough hook for 5–6 minutes) until it becomes smooth, elastic, and just slightly tacky — supple and springy to the touch with a faint sheen from the oil. If the dough resists or cracks, add tiny teaspoons of warm milk to coax elasticity. A bench scraper and a small dusting of extra flour are the only tools visible here.
Step 5: Oil, Cover, and First Rise Until Doubled
Lightly oil a clean mixing bowl with a neutral oil, shape the dough into a tight ball, place it seam-side down, and turn once to coat. Cover tightly with plastic wrap or a damp towel and let the dough rise in a warm, draft-free place until it has doubled — typically 60–75 minutes — showing a smooth domed surface and faint gas pockets beneath the skin. This is the gentle, puffy stage that indicates readiness for dividing.
Step 6: Divide, Round, and Rest the Dough Pieces
Gently deflate the risen dough, turn it out, and shape into a rough log. Using a bench scraper, divide into eight equal pieces; shape each into a tight ball by tucking the edges underneath until the tops are smooth. Cover the balls lightly and let them rest 15–20 minutes so the gluten relaxes and they become easier to roll thin.
Step 7: Roll, Dust, and Cook into Puffy Flatbreads
Working one ball at a time on a lightly floured surface, flatten with your fingertips and roll into an oval or teardrop about 8–9 inches long and 1/8–1/4 inch thick, brushing off excess flour so it won’t burn. Transfer the rolled dough to a very hot, preheated heavy skillet (not shown) and cook until large surface bubbles form and deep golden-brown spots appear; flip and finish until scattered charred blisters and soft interior pockets develop. Transfer each cooked naan to the lined plate, keeping them covered to retain softness.
Step 8: Brush with Warm Ghee (Optional Garlic & Cilantro) and Serve
Immediately brush the hot naan generously with warm melted ghee or butter blended with very finely minced garlic and chopped cilantro if desired, creating a glossy, fragrant finish. Stack or fan the finished naans on a simple serving plate so the brushed tops glisten, steam gently rising. Serve hot alongside curries, grilled vegetables, or use as a wrap; to retain the visual warmth and texture, present the final image eye-level and very close-up to capture the blistered surface and pillowy crumb.
Notes
- Test milk temperature with a thermometer to ensure yeast blooms.
- Keep cooked naans covered to retain softness until serving.
- Use minimal flour when rolling to avoid dry, tough naan.
- Preheat the skillet thoroughly for proper blistering.
- For garlic naan, brush with garlic-ghee immediately after cooking.