Mimosa Cake is one of those recipes that feels like sunshine on a plate. I remember the first time I made this cake, the kitchen smelled like a citrus grove and bubbles, and I knew I had to keep the recipe close. It balances bright orange zest with the silk of Swiss meringue buttercream in a way that feels celebratory but not fussy. If you love a dessert that’s light, elegant, and a little bit cheeky, the Mimosa Cake will become a go-to for brunches and special evenings.
I learned to trust this recipe after a few temperamental baking days; it’s forgiving where it counts and delivers that unmistakable orange-champagne lift. The cake layers are tender and the frosting is glossy and satiny, flecked with fresh orange zest. Every bite tastes like a toast to good things, which is why I keep the Mimosa Cake on rotation for birthdays and slow Sunday afternoons.
How This Recipe Became My Rainy-Day Favorite
I first made this Mimosa Cake on a rainy spring afternoon when friends dropped by unexpectedly. I had champagne left over from a small celebration and a bowl of oranges on the counter, so I improvised: a citrus batter, a splash of bubbly, and the patience to coax a Swiss meringue into buttercream. The house filled with the scent of orange and warm sugar, and by the time we sat down with plates, the rain felt gentle and celebratory instead of dreary. I still remember the bright zing on my tongue and how a simple cluster of berries on top made it look like a cake from a bakery window. That day taught me that a little patience and the right technique turn humble ingredients into something that makes people smile.
Main Ingredients and Why They Matter
This cake is all about balance: tender crumb, citrus brightness, and glossy buttercream.
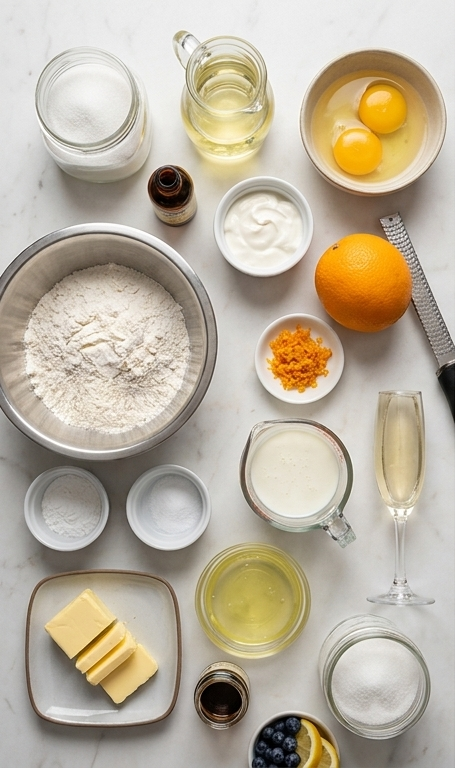
- Granulated Sugar: Sweetens both batter and meringue; use fine granulated sugar for the meringue so it dissolves cleanly. Substitute with caster sugar if needed.
- Eggs and Egg Whites: Whole eggs enrich the batter; egg whites give the Swiss meringue structure. Use room-temperature eggs for better volume.
- Unsalted Butter: The backbone of the buttercream; use high-quality butter for flavor. If you need dairy-free options, try a stable vegan butter.
- Champagne: Adds a subtle floral acidity and aroma; prosecco or dry sparkling wine works well as a substitute.
- Oranges: Zest is key for bright citrus notes; pick thin-skinned, fragrant oranges and avoid the bitter white pith.
- All-purpose Flour and Buttermilk: Flour provides structure; buttermilk keeps the crumb tender and slightly tangy. A milk and lemon substitute can mimic buttermilk in a pinch.
Essential Kitchen Tools and Why They Help
A few tools make this recipe much easier and keep the results consistent.
- Stand Mixer or Hand Mixer:: Needed for whipping the Swiss meringue to glossy peaks and for creaming the batter; a hand mixer will work but expect longer mixing times.
- Candy Thermometer:: Critical for bringing the sugar and egg white mix to the right temperature over a bain-marie; a digital instant-read thermometer is fine if it clips or can be steadied.
- 9-inch Round Pans and Silpats or Parchment:: Use pans of the same size for even layers; Silpats or parchment ensure an easy release.
- Offset Spatula and Bench Scraper:: Helpful for applying a smooth crumb coat and achieving that semi-naked finish; a stiff spatula can substitute in a pinch.
- Fine Zester or Microplane:: For delicate orange zest that disperses through batter and buttercream without large bits.
Step-by-Step Preparation Guide
Step 1: Cream the wet base
In a large mixing bowl combine the granulated sugar, vegetable oil, and eggs with the vanilla extract. Beat on medium speed until the eggs and oil are fully incorporated and the mixture lightens slightly in color, about two minutes, scraping down the bowl as needed. Fold in the sour cream and the zest of one large orange until evenly dispersed; the batter should feel silky and slightly thick, scented bright with citrus.
Step 2: Combine dry, alternate liquids, and bake
Whisk together the all‑purpose flour, baking powder, and salt in a separate bowl. On low speed, alternate adding the dry ingredients with the buttermilk and champagne so the flour just begins to incorporate; finish by hand with a spatula, stirring from bottom to top to ensure a smooth, lump‑free batter. Divide the batter between two 9‑inch round baking pans lined with Silpats, bake at 350°F for 18–22 minutes until a toothpick comes out clean, then cool for about 10 minutes before removing from the pans. Repeat the baking process to make the next two layers as directed, ending with several completely cooled cake layers ready for assembly.
Step 3: Build the Swiss meringue base over a bain‑marie
Place the granulated sugar and the room‑temperature egg whites into a heat‑proof stainless‑steel mixing bowl and clip a candy thermometer to the side. Set the bowl over a shallow pan of simmering water (the water must not touch the bowl) and stir constantly until the mixture reaches 140°F and the sugar is fully dissolved; the eggs should feel smooth between your fingers with no grit. Remove the bowl from the heat and cool slightly before proceeding.
Step 4: Whip to glossy meringue peaks
Transfer the warm sugar‑egg mixture to your stand mixer and whisk starting on low, then increasing to medium after two minutes. Whip for about 10–15 minutes until the mixture becomes pure white, thick, glossy and forms soft to medium peaks; the bowl should feel cool to the touch at the end. Scrape down all sides and the bottom so every bit of meringue is aerated evenly.
Step 5: Transform to buttercream and flavor
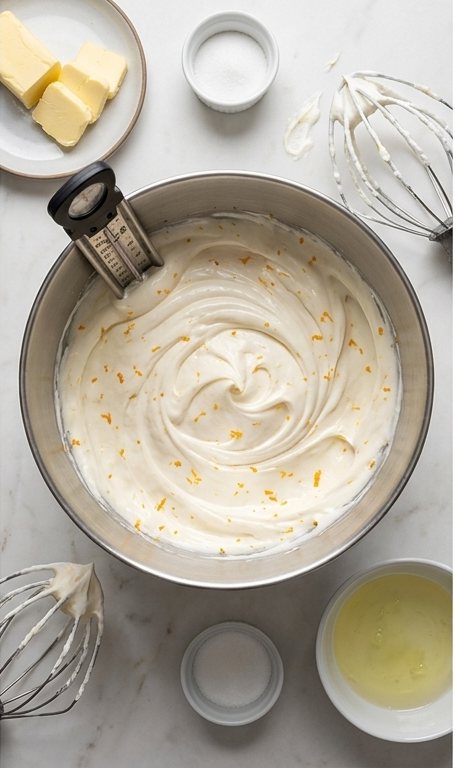
Switch to the paddle attachment and add room‑temperature unsalted butter in one‑tablespoon pieces, a couple of tablespoons at a time, beating on medium‑low so each addition is incorporated before adding more. The mixture may look curdled at times — keep going. Once all the butter is incorporated, add vanilla bean paste (or vanilla extract) and the zest of two large oranges, then beat on medium until the frosting becomes smooth, silky, and satiny, with tiny flecks of orange distributed throughout. This is your Swiss meringue buttercream, glossy and spreadable.
Step 6: Assemble and semi‑naked finish
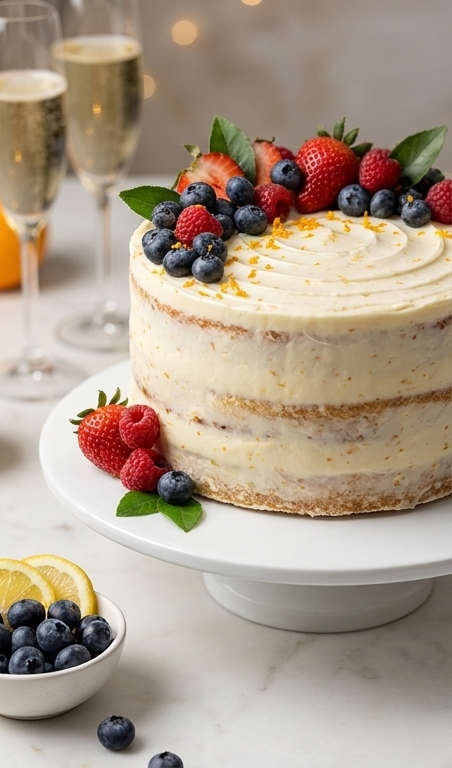
Level the cooled cake layers if needed, then stack them on a round cake board or the base of your stand using a generous layer of orange‑zested buttercream between each tier. Apply a thin crumb coat and chill briefly to set, then finish with a light, semi‑naked outer coat that allows the moist cake strata to peek through — smooth the frosting for soft ridges and visible texture where the layers meet.
Step 7: Garnish and present
Top the assembled Mimosa Cake with an artful cluster of fresh berries (blueberries, strawberries, raspberries) and scatter a few small green leaves and extra orange zest across the top for bright color contrast. Place the finished cake on a round white cake stand set on the quartzite surface; pair with a small white bowl of extra blueberries and a few lemon slices nearby.
Making It Your Own
I like to tinker with the Mimosa Cake depending on the season. In spring I fold a few finely chopped strawberries into the filling for a subtle jammy surprise. For a dairy-free version I swap the butter for a high-quality vegan butter and use coconut cream in place of sour cream; the texture shifts slightly but the bright orange flavor still sings.
Try prosecco instead of champagne for a sweeter, fruitier note, or add a tablespoon of orange liqueur to the buttercream for an adult twist. For a regional touch, stir in a pinch of cardamom for a warm floral lift that pairs beautifully with orange.
How to Serve
When I serve this Mimosa Cake at a brunch, I slice it into modest wedges and place a small mound of berries alongside each plate. For larger gatherings, the cake scales well: a four-layer version serves more and looks extra impressive on a tall stand. If you need to stretch servings, cut thinner slices and offer small spoons of whipped cream or a citrus compote on the side.
For an elegant dessert course, pair slices with a chilled glass of the same bubbly used in the batter. If you want a kid-friendly option, replace the champagne with extra orange juice and label the slices so guests know it is alcohol-free.
Storage and Reheating
Store the assembled Mimosa Cake in the refrigerator, covered lightly with a cake dome or loose plastic wrap so the buttercream keeps its texture. It will stay fresh for up to 3 days chilled; bring slices to room temperature for 20 to 30 minutes before serving so the frosting softens and the flavors open.
For longer storage, freeze individual slices wrapped tightly in plastic and placed in an airtight container for up to 1 month. Thaw overnight in the refrigerator and then warm briefly to room temperature before serving.
Common Mistakes and How to Avoid Them
Not dissolving the sugar when building the meringue is a frequent issue; heat the sugar and egg whites to the indicated temperature and check between your fingers for any grit. Patience while whipping is key — rush it and the meringue won’t reach glossy peaks.
Another common hiccup is adding cold butter to the meringue too quickly. Use room-temperature butter and add it gradually; if the buttercream looks curdled, keep mixing — it usually comes together. If you overbeat, chill the bowl briefly and then re-whip on low.
Ready to Try It?
If you’re tempted, give the Mimosa Cake a go this weekend. It’s one of those recipes that rewards attention and makes any occasion feel a little brighter. Start with the steps and trust the process; the result is a light, citrusy cake that’s worth the effort.
Frequently Asked Questions
- Can I substitute prosecco for champagne? Yes, prosecco works well and gives a slightly fruitier, sweeter note; adjust sweetness if needed.
- How do I know when the meringue is ready? The meringue is ready when it is pure white, glossy, and the bowl feels cool to the touch after whipping.
- Can I make the cake layers ahead of time? Yes, you can bake the layers a day ahead, wrap them tightly, and refrigerate; allow them to come to room temperature before assembling.
- What if my buttercream looks curdled? Keep beating — patience usually rescues it; if not, chill briefly and re-whip on low.
- Is there a non-alcoholic version? Absolutely, replace the champagne with extra buttermilk or orange juice for a non-alcoholic Mimosa Cake.
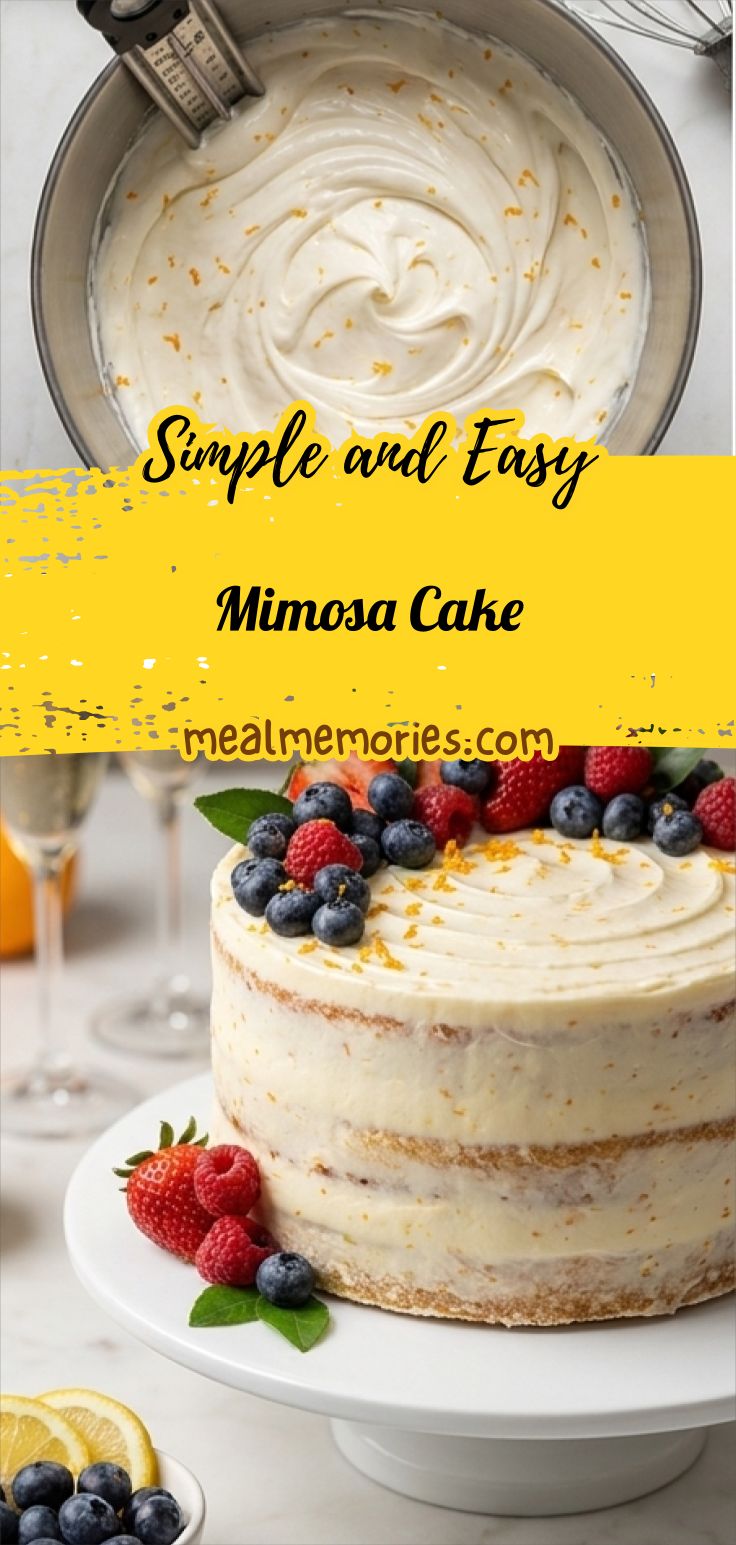
Mimosa Cake
Make Mimosa Cake with bright orange zest and champagne-infused layers for a light, celebratory dessert.
Ingredients
Instructions
Step 1: Cream the wet base
In a large mixing bowl combine the granulated sugar, vegetable oil, and eggs with the vanilla extract. Beat on medium speed until the eggs and oil are fully incorporated and the mixture lightens slightly in color, about two minutes, scraping down the bowl as needed. Fold in the sour cream and the zest of one large orange until evenly dispersed; the batter should feel silky and slightly thick, scented bright with citrus.
Step 2: Combine dry, alternate liquids, and bake
Whisk together the all‑purpose flour, baking powder, and salt in a separate bowl. On low speed, alternate adding the dry ingredients with the buttermilk and champagne so the flour just begins to incorporate; finish by hand with a spatula, stirring from bottom to top to ensure a smooth, lump‑free batter. Divide the batter between two 9‑inch round baking pans lined with Silpats, bake at 350°F for 18–22 minutes until a toothpick comes out clean, then cool for about 10 minutes before removing from the pans. Repeat the baking process to make the next two layers as directed, ending with several completely cooled cake layers ready for assembly.
Step 3: Build the Swiss meringue base over a bain‑marie
Place the granulated sugar and the room‑temperature egg whites into a heat‑proof stainless‑steel mixing bowl and clip a candy thermometer to the side. Set the bowl over a shallow pan of simmering water (the water must not touch the bowl) and stir constantly until the mixture reaches 140°F and the sugar is fully dissolved; the eggs should feel smooth between your fingers with no grit. Remove the bowl from the heat and cool slightly before proceeding.
Step 4: Whip to glossy meringue peaks
Transfer the warm sugar‑egg mixture to your stand mixer and whisk starting on low, then increasing to medium after two minutes. Whip for about 10–15 minutes until the mixture becomes pure white, thick, glossy and forms soft to medium peaks; the bowl should feel cool to the touch at the end. Scrape down all sides and the bottom so every bit of meringue is aerated evenly.
Step 5: Transform to buttercream and flavor
Switch to the paddle attachment and add room‑temperature unsalted butter in one‑tablespoon pieces, a couple of tablespoons at a time, beating on medium‑low so each addition is incorporated before adding more. The mixture may look curdled at times — keep going. Once all the butter is incorporated, add vanilla bean paste (or vanilla extract) and the zest of two large oranges, then beat on medium until the frosting becomes smooth, silky, and satiny, with tiny flecks of orange distributed throughout. This is your Swiss meringue buttercream, glossy and spreadable.
Step 6: Assemble and semi‑naked finish
Level the cooled cake layers if needed, then stack them on a round cake board or the base of your stand using a generous layer of orange‑zested buttercream between each tier. Apply a thin crumb coat and chill briefly to set, then finish with a light, semi‑naked outer coat that allows the moist cake strata to peek through — smooth the frosting for soft ridges and visible texture where the layers meet.
Step 7: Garnish and present
Top the assembled Mimosa Cake with an artful cluster of fresh berries (blueberries, strawberries, raspberries) and scatter a few small green leaves and extra orange zest across the top for bright color contrast. Place the finished cake on a round white cake stand set on the quartzite surface; pair with a small white bowl of extra blueberries and a few lemon slices nearby.
Notes
- Use room-temperature eggs and butter for better emulsification and texture.
- Use a candy thermometer when making the meringue to ensure sugar fully dissolves.
- If the buttercream looks curdled, keep beating; chilling briefly and re-whipping often helps.
- Substitute prosecco for champagne for a fruitier note, or use extra orange juice for a non-alcoholic version.
- Store assembled cake in the refrigerator and bring to room temperature before serving.