Macarons Recipe has been a small obsession of mine for years, and I love sharing the process with friends who think these delicate cookies are way too intimidating. The first time I made this Macarons Recipe, I stayed up late folding batter and learned that patience and rhythm matter more than fancy tools. I keep coming back to this Macarons Recipe because the payoff is a tiny, elegant bite of texture and flavor that makes every cup of tea feel celebratory. If you enjoy precise baking and tiny, photogenic treats, this recipe will quickly become a go-to.
How This Recipe Became My Rainy-Day Favorite
I remember one rainy afternoon when I decided to try the Macarons Recipe to cheer up a friend. The kitchen filled with the warm smell of vanilla and toasted almond flour as I sifted and folded, and the gentle sound of rain made the whole process feel like cooking therapy. I felt a quiet thrill when the piped shells dried to a matte skin, and an even bigger thrill when the oven revealed neat domes and delicate feet. Sharing the first bite with my friend – a crisp shell giving way to soft, vanilla buttercream – felt like giving a small, edible hug. That day taught me that macarons are less about perfection and more about the care you fold into them, and they now sit in my recipe rotation whenever I want to turn a grey day into something a little sweeter.
Main Ingredients and Why They Matter
- Blanched fine almond flour: The backbone of texture and flavor; choose fine, fresh almond flour and avoid coarse bits. Substitute finely ground hazelnuts for a different nutty profile.
- Powdered (confectioners’) sugar: Sweetens and gives structure when combined with the almond flour; sift well to avoid lumps. You can reduce slightly for less sweetness.
- Egg whites: Provide the lift through meringue; aged whites whip more easily. Pasteurized whites can work in humid climates.
- Granulated sugar: Stabilizes the meringue and controls shell gloss; use superfine if you have it.
- Unsalted butter and cream: For a smooth vanilla buttercream that contrasts the crisp shell; use European butter for extra richness.
Essential Kitchen Tools and Why They Help
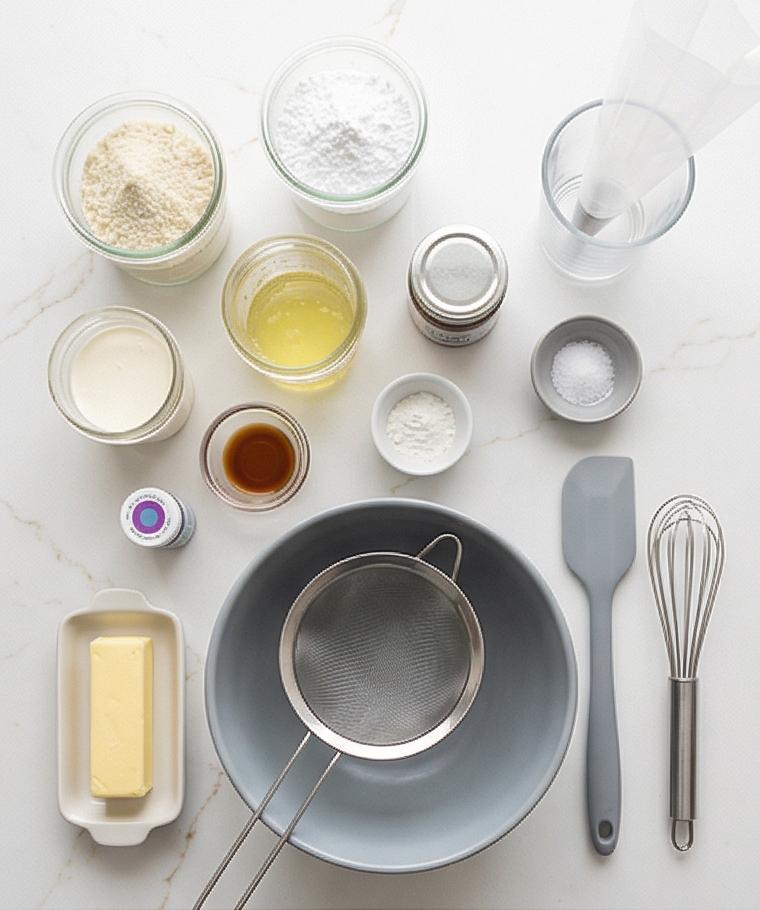
Making macarons rewards a few reliable tools more than many fancy gadgets. A good digital scale keeps measurements accurate, which is the most important factor for consistent shells. A flexible silicone spatula makes the macaronage fold much easier to control. A stand mixer or handheld with a whisk attachment speeds up making glossy meringue and reduces arm fatigue. Nonstick baking mats or quality parchment ensure clean release, and a piping bag with a round tip helps you pipe even rounds.
- Digital kitchen scale: Accuracy for grams.
- Stand mixer or electric hand mixer: For stable meringue.
- Silicone spatula: For gentle folding.
- Piping bag and 1/2-inch round tip: For neat, consistent rounds.
- Parchment or silicone macaron mats: For even baking and easy release.
Step-by-Step Preparation Guide
Step 1: Age and ready the egg whites
Separate the eggs at least 24 hours ahead, placing the egg whites in a clean covered glass jar in the refrigerator so they relax and lose some moisture; on baking day leave the jar on the counter for 30–45 minutes so the 100 g of whites come to a cool room temperature. Treat this like gentle mise en place — the aged whites should look slightly glossy in their jar, not cloudy, and feel fluid when poured into the whisking bowl.
Step 2: Set up the workstation and tools
Line two large baking sheets with unwrinkled parchment or silicone macaron mats and, if you like, slip a template under the parchment (1½-inch circles spaced ~1 inch apart). Fit a large piping bag with a ½-inch round tip and nest it in a tall clear glass for filling later. Keep a fine-mesh sieve, a flexible grey-handled silicone spatula, a stainless whisk, and a reliable digital scale nearby so everything stays tidy and consistent.
Step 3: Combine the dry ingredients into a unified powder
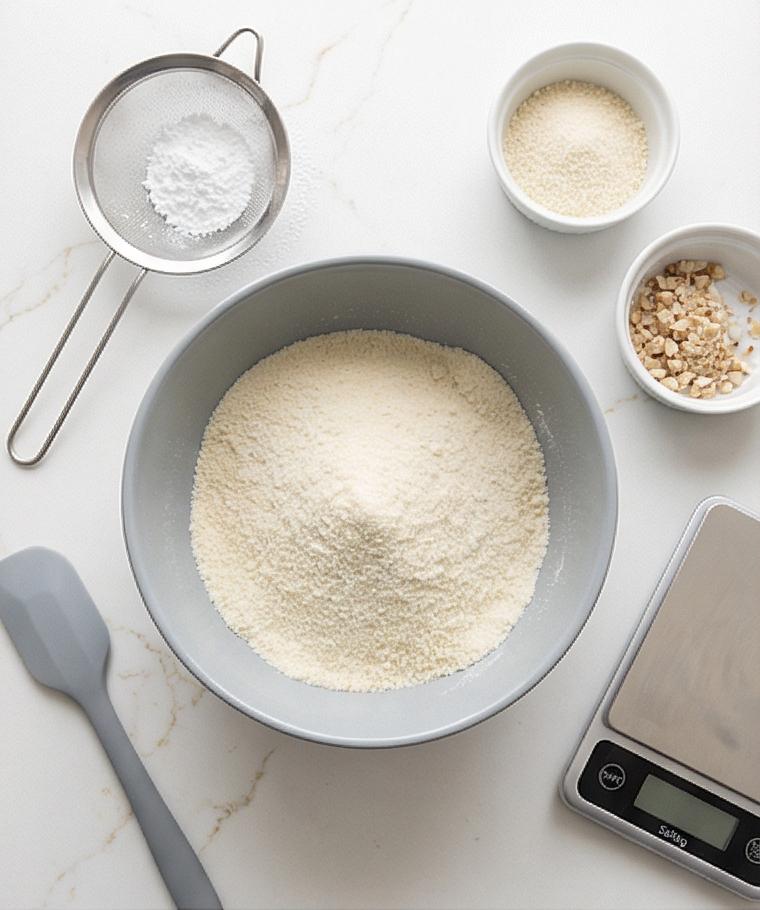
Measure 110 g blanched fine almond flour and 200 g sifted powdered sugar into a medium bowl or onto a sieve set over a matte grey ceramic mixing bowl; sift or whisk until completely homogenized and lump-free. The finished dry mix should read as a silky, pale off-white dust with only the finest granules visible — if any coarse almond bits remain, remove them rather than forcing them through the sieve to avoid future lumps.
Step 4: Whip glossy, stable meringue
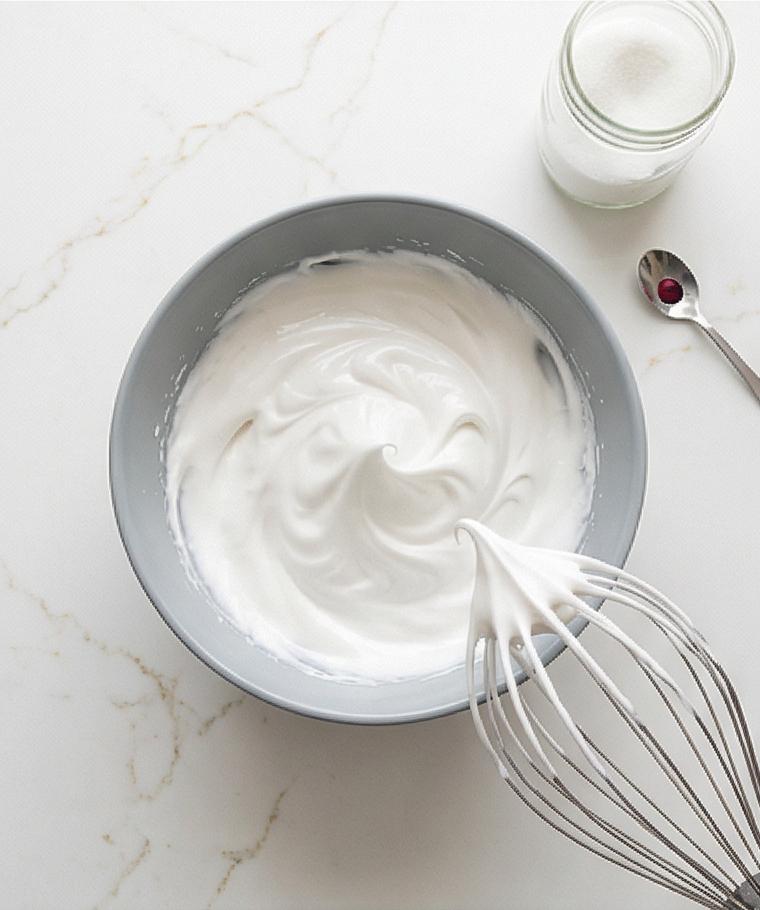
In a very clean large metal or glass bowl add the room-temperature egg whites, cream of tartar and a tiny pinch of sea salt. Whisk on medium to foamy, then stream in 90 g granulated sugar slowly while increasing to medium-high speed until a glossy meringue forms that holds medium–stiff peaks (peaks stand but curl slightly at the tip). Fold in 1 teaspoon vanilla and a dab of gel food coloring on low speed just until evenly tinted — the meringue should feel satiny and heavy enough to coat the whisk.
Step 5: Macaronage — fold to a flowing ribbon
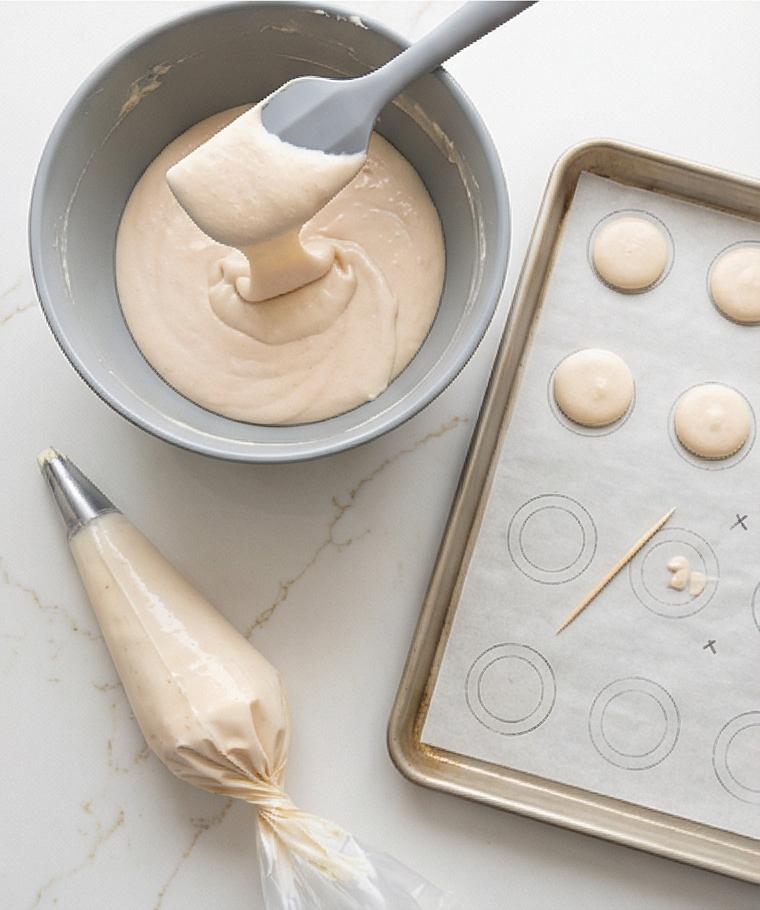
Add the entire almond–sugar mix to the meringue and fold with the silicone spatula: scrape the sides, cut through the center and turn the bowl rhythmically. You’re aiming for a smooth, satin batter that flows off the spatula in a thick ribbon and slowly reabsorbs in about 10–15 seconds — glossy but relaxed, not stiff peaks and not runny. This batter stage dictates surface smoothness and the iconic rise.
Step 6: Pipe, tap, and rest until skins form
Transfer the batter to the prepared piping bag, twist the top closed and push batter down to remove large air pockets. Hold the bag perpendicular about ¼ inch above the parchment and pipe neat 1½-inch rounds, easing pressure before lifting. Firmly tap each sheet 5–7 times to release trapped air and pop visible bubbles with a toothpick, smoothing slightly. Allow the piped shells to rest uncovered at room temperature until a dry, matte skin forms to the touch — usually 25–60 minutes depending on humidity.
Step 7: Bake and cool to reveal feet and set tops
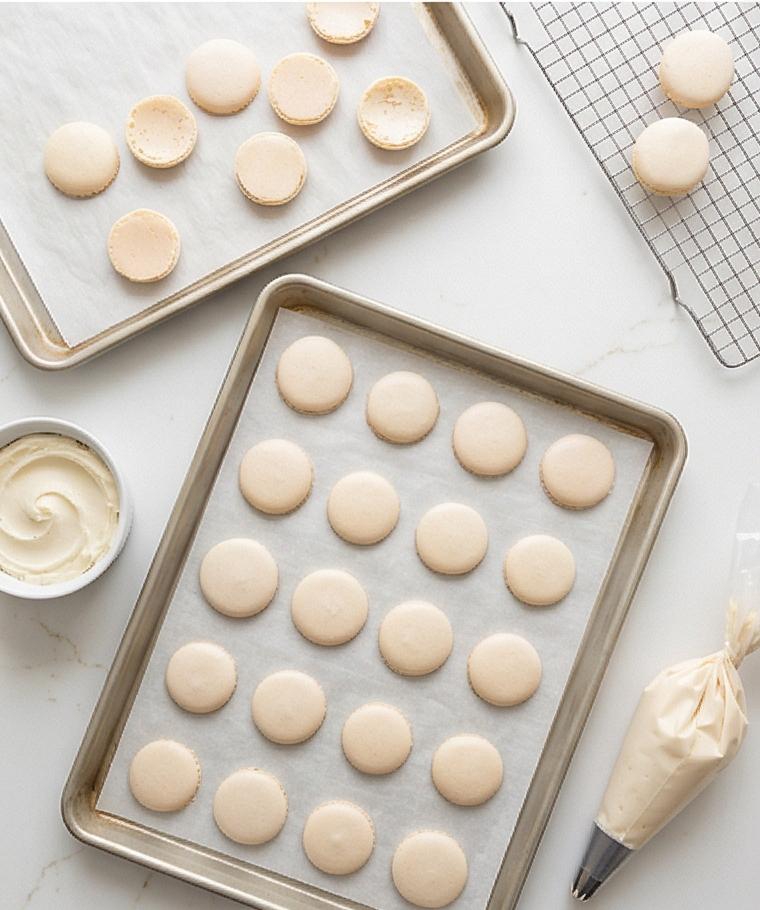
Preheat the oven to 300°F (150°C) and slide one sheet into the center rack when shells have formed skins. Bake until the tops are set, feet have formed, and bottoms are just barely colored. Remove the sheet and cool completely on a wire rack for 20–30 minutes before attempting to lift shells from the parchment; repeat the process with the second tray. The cooled shells should have smooth domes, delicate ruffled feet, and a slightly chewy interior when checked.
Step 8: Whip the vanilla buttercream filling
Beat 115 g softened unsalted butter in a medium bowl until creamy, then gradually add 210 g sifted powdered sugar on low to avoid a sugar cloud. Add 1/8 teaspoon salt and 1½ teaspoons vanilla, then 2–3 teaspoons heavy cream, beating until the buttercream is light, glossy and pipeable — thick enough to hold shape but soft enough to yield. Transfer the buttercream to a clean piping bag fitted with a small round or star tip; if using jam or curd, portion that into a separate tiny bag.
Step 9: Assemble, mature, and serve
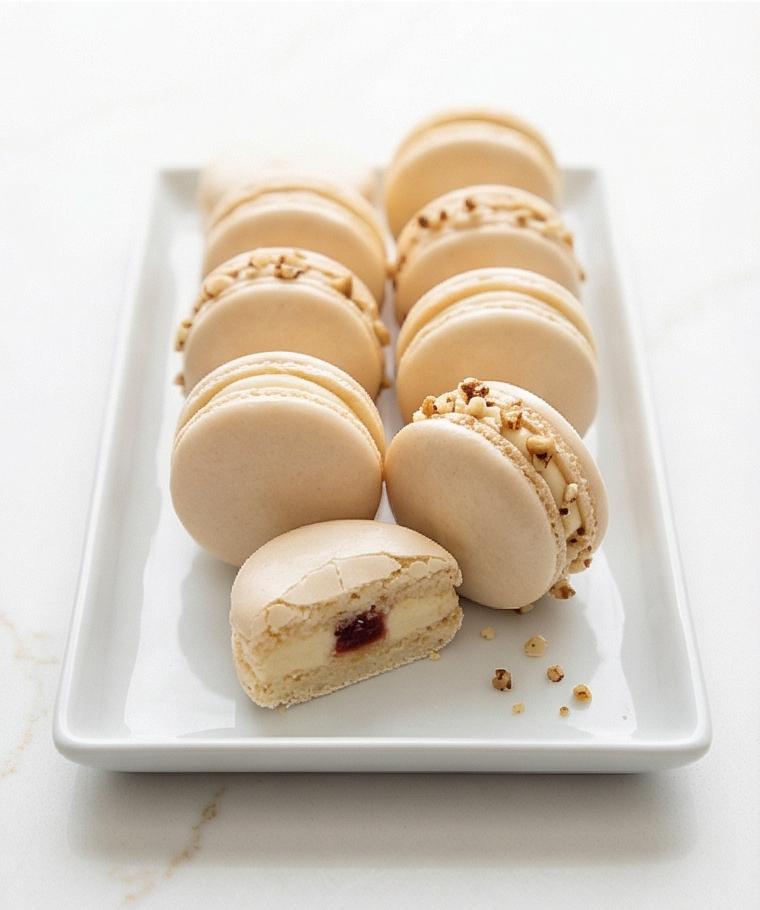
Pair similar-sized shells upside down, pipe a buttercream ring on one shell, add a small dot of jam or curd if desired, then sandwich with the matching shell and twist gently until the filling reaches the edges without oozing. Optionally roll edges in finely chopped toasted nuts or freeze-dried fruit powder. Arrange in a single layer in an airtight container and mature in the refrigerator for at least 24 hours to develop the classic contrast of crisp exterior and tender interior. Bring to cool room temperature for 20–30 minutes before serving.
Making It Your Own
Try small experiments with fillings, colors, and infusions to keep the Macarons Recipe fresh. Swap the vanilla buttercream for a lemon curd center and pair it with a pale yellow shell for a bright, springtime bite. For a chocolate twist, fold a spoon of cocoa powder into the almond mix and use chocolate ganache as the filling. If you need gluten-free or nut-free options, try making pavlova-style sandwich cookies or use a finely ground oat mixture in place of almond flour and expect a slightly different texture.
How to Serve
When hosting, arrange the macarons on a tiered stand for a pretty, bite-sized dessert display. For a tea party, plan two to three macarons per guest paired with milder flavor profiles like vanilla and raspberry. If serving at a larger gathering, make multiple flavors and label them so guests know which is which.
For plated desserts, place two macarons beside small glasses of dessert wine or espresso. Warm the plated macarons for a few minutes at room temperature to bring out the buttercream flavor and to soften the interior just slightly.
Storage and Reheating Tips
Store filled macarons in an airtight container in the refrigerator; they improve after 24 hours of maturation. Keep them layered with parchment to prevent sticking and maintain their shape.
To serve, remove macarons from the refrigerator 20–30 minutes before eating so they reach cool room temperature. Do not microwave; if they need slight softening, let them sit at room temperature rather than applying heat.
Common Mistakes and How to Avoid Them
Piping uneven rounds or overmixing the batter will change texture and rise. Practice piping on a spare sheet and watch the batter flow – it should form a thick ribbon and settle slowly.
Humidity and inaccurate weighing are other common culprits. Use a scale, sift dry ingredients, and pick a dry day or use an air-conditioned kitchen for best results.
Ready? Give It a Try
I hope this Macarons Recipe inspires you to give these delicate cookies a try. They reward patience and care, and once you get the rhythm, you may find yourself making them for small celebrations and quiet afternoons alike. Have fun, experiment, and enjoy the tiny, perfect treats you create.
Frequently Asked Questions.
-
Q: How long can I store assembled macarons?
A: Store in an airtight container in the refrigerator for up to 7 days; they taste best after 24 to 48 hours of resting. -
Q: Can I use liquid food coloring?
A: It is best to avoid liquid color because it can change batter consistency; use gel or powdered food coloring for stable results. -
Q: Do I have to age the egg whites for macarons?
A: Aging helps reduce moisture and can improve whipping, but if you are short on time, room-temperature egg whites can work with careful meringue technique. -
Q: Can I freeze macaron shells or filled macarons?
A: Yes, unfilled shells freeze well in a single layer; filled macarons can be frozen in an airtight container and thawed in the fridge overnight. -
Q: Why do my macarons have no feet?
A: No feet often result from under-matured shells, overmixing, or oven temperature that is too low. Make sure a skin forms and check oven calibration.
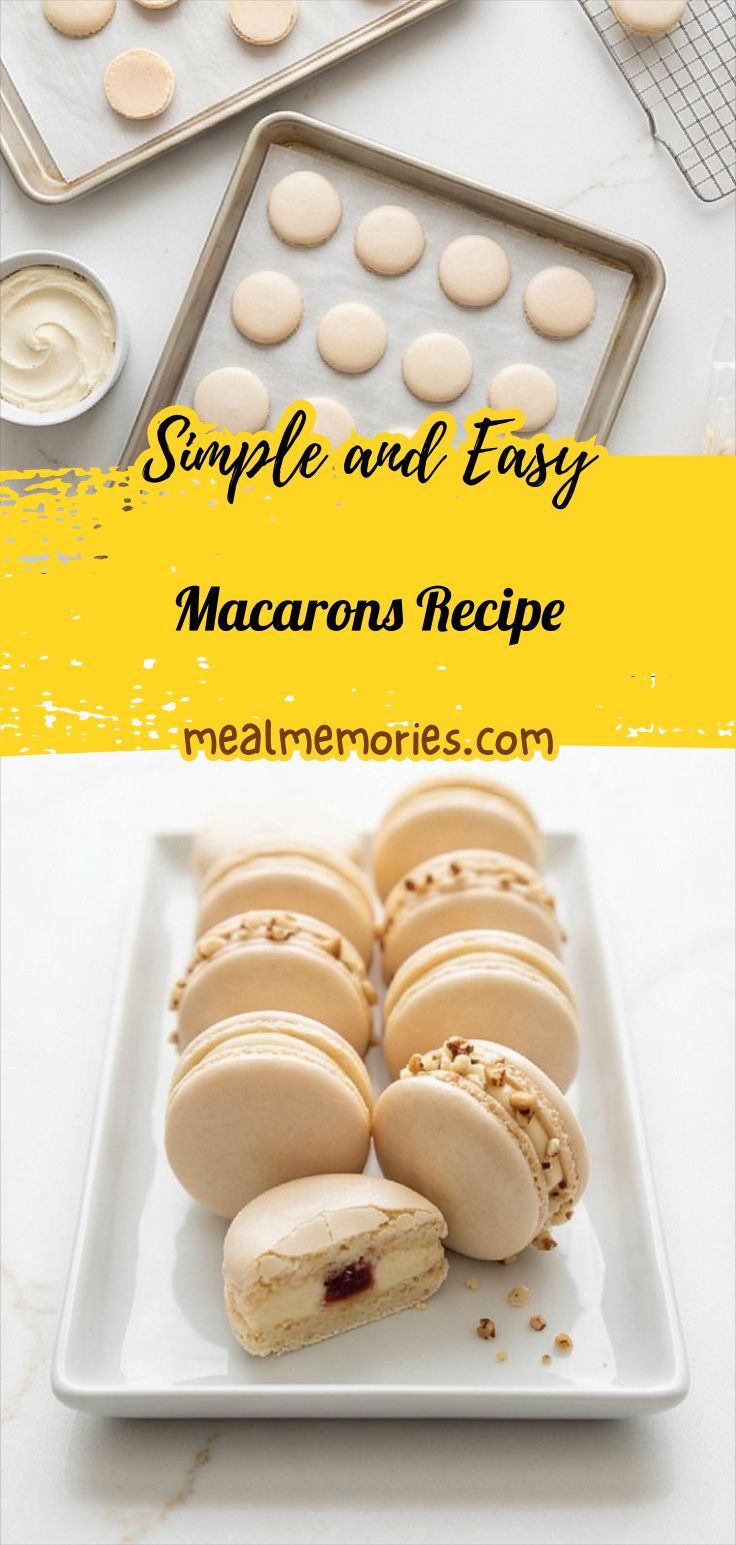
Macarons Recipe
Make elegant Macarons Recipe with crisp shells and vanilla buttercream. Try this macaron method for reliable results.
Ingredients
Instructions
Step 1: Age and ready the egg whites
Separate the eggs at least 24 hours ahead, placing the egg whites in a clean covered glass jar in the refrigerator so they relax and lose some moisture; on baking day leave the jar on the counter for 30–45 minutes so the 100 g of whites come to a cool room temperature. Treat this like gentle mise en place — the aged whites should look slightly glossy in their jar, not cloudy, and feel fluid when poured into the whisking bowl.
Step 2: Set up the workstation and tools
Line two large baking sheets with unwrinkled parchment or silicone macaron mats and, if you like, slip a template under the parchment (1½-inch circles spaced ~1 inch apart). Fit a large piping bag with a ½-inch round tip and nest it in a tall clear glass for filling later. Keep a fine-mesh sieve, a flexible grey-handled silicone spatula, a stainless whisk, and a reliable digital scale nearby so everything stays tidy and consistent.
Step 3: Combine the dry ingredients into a unified powder
Measure 110 g blanched fine almond flour and 200 g sifted powdered sugar into a medium bowl or onto a sieve set over a matte grey ceramic mixing bowl; sift or whisk until completely homogenized and lump-free. The finished dry mix should read as a silky, pale off-white dust with only the finest granules visible — if any coarse almond bits remain, remove them rather than forcing them through the sieve to avoid future lumps.
Step 4: Whip glossy, stable meringue
In a very clean large metal or glass bowl add the room-temperature egg whites, cream of tartar and a tiny pinch of sea salt. Whisk on medium to foamy, then stream in 90 g granulated sugar slowly while increasing to medium-high speed until a glossy meringue forms that holds medium–stiff peaks (peaks stand but curl slightly at the tip). Fold in 1 teaspoon vanilla and a dab of gel food coloring on low speed just until evenly tinted — the meringue should feel satiny and heavy enough to coat the whisk.
Step 5: Macaronage — fold to a flowing ribbon
Add the entire almond–sugar mix to the meringue and fold with the silicone spatula: scrape the sides, cut through the center and turn the bowl rhythmically. You’re aiming for a smooth, satin batter that flows off the spatula in a thick ribbon and slowly reabsorbs in about 10–15 seconds — glossy but relaxed, not stiff peaks and not runny. This batter stage dictates surface smoothness and the iconic rise.
Step 6: Pipe, tap, and rest until skins form
Transfer the batter to the prepared piping bag, twist the top closed and push batter down to remove large air pockets. Hold the bag perpendicular about ¼ inch above the parchment and pipe neat 1½-inch rounds, easing pressure before lifting. Firmly tap each sheet 5–7 times to release trapped air and pop visible bubbles with a toothpick, smoothing slightly. Allow the piped shells to rest uncovered at room temperature until a dry, matte skin forms to the touch — usually 25–60 minutes depending on humidity.
Step 7: Bake and cool to reveal feet and set tops
Preheat the oven to 300°F (150°C) and slide one sheet into the center rack when shells have formed skins. Bake until the tops are set, feet have formed, and bottoms are just barely colored. Remove the sheet and cool completely on a wire rack for 20–30 minutes before attempting to lift shells from the parchment; repeat the process with the second tray. The cooled shells should have smooth domes, delicate ruffled feet, and a slightly chewy interior when checked.
Step 8: Whip the vanilla buttercream filling
Beat 115 g softened unsalted butter in a medium bowl until creamy, then gradually add 210 g sifted powdered sugar on low to avoid a sugar cloud. Add 1/8 teaspoon salt and 1½ teaspoons vanilla, then 2–3 teaspoons heavy cream, beating until the buttercream is light, glossy and pipeable — thick enough to hold shape but soft enough to yield. Transfer the buttercream to a clean piping bag fitted with a small round or star tip; if using jam or curd, portion that into a separate tiny bag.
Step 9: Assemble, mature, and serve
Pair similar-sized shells upside down, pipe a buttercream ring on one shell, add a small dot of jam or curd if desired, then sandwich with the matching shell and twist gently until the filling reaches the edges without oozing. Optionally roll edges in finely chopped toasted nuts or freeze-dried fruit powder. Arrange in a single layer in an airtight container and mature in the refrigerator for at least 24 hours to develop the classic contrast of crisp exterior and tender interior. Bring to cool room temperature for 20–30 minutes before serving.
Notes
- Use a digital scale for consistent results.
- Sift almond flour and powdered sugar to avoid lumps.
- Allow filled macarons to mature 24 hours for best texture.