Chocolate Mousse Recipe has been a go-to dessert for cozy evenings and small celebrations in my kitchen for years. I first learned the rhythm of the recipe by watching my grandmother coax glossy chocolate into something airy and playful, and I still make it when I want to feel a little proud without sweating over a complicated dessert. This Chocolate Mousse Recipe balances deep bittersweet chocolate with light whipped cream and a whisper of espresso for depth. It is elegant enough for guests and simple enough for a midweek treat, and it always brings that small, satisfied hush when people taste it.
How This Recipe Became My Rainy-Day Favorite
The first time I made this Chocolate Mousse Recipe it was raining outside and the house smelled like coffee and warm chocolate. I remember stirring the chocolate over a gentle bain-marie and feeling the tension of the week melt as the glossy mixture came together. Folding in whipped cream felt like painting clouds into the chocolate; the texture shifted from dense and serious to light and buoyant. When I portioned it into little glass ramekins, the sound of the spoon tapping the sides felt celebratory. The first spoonful was the best kind of surprise: silky, rich, and a little bright from the berries I had on hand. That rainy evening turned into a new ritual, and now whenever the sky looks gray I reach for this recipe because comfort and beauty can exist in the same spoon.
Chocolate’s Cast and Their Roles
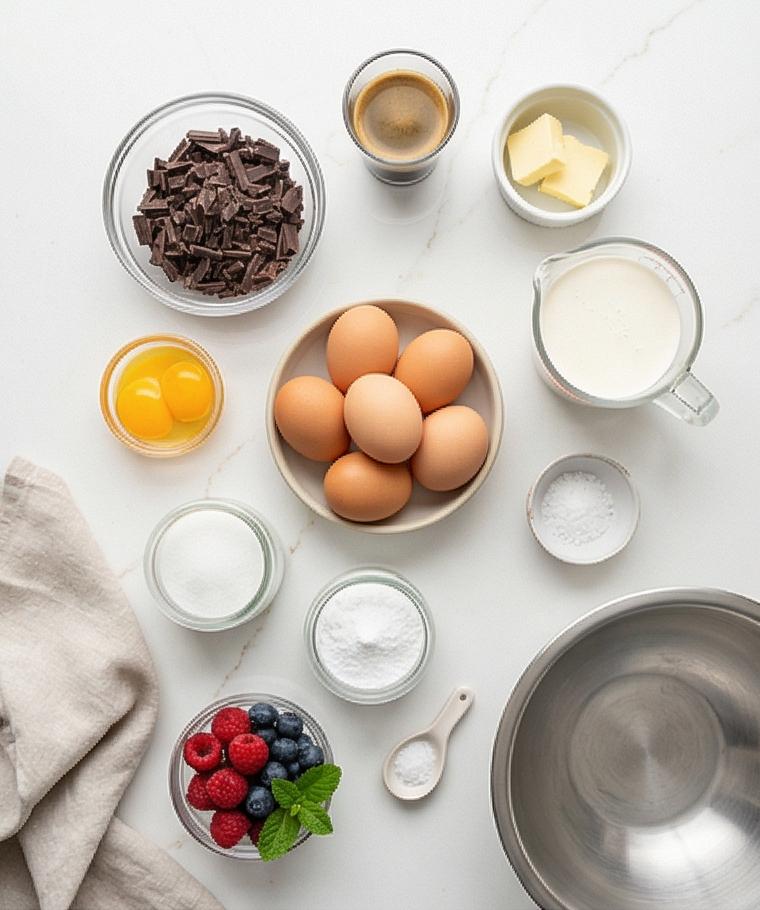
- Bittersweet Chocolate: The star of the show. Choose 60 to 70% cacao for balance; swap for semisweet if you want it sweeter or use single-origin for a flavor note. Look for a glossy, firm bar with a clean snap.
- Egg Yolks and Whites: Yolks add silk and body, whites give lift. Pasteurized eggs are a safe option if you worry about raw whites.
- Heavy Cream: Provides richness and airy texture when whipped; use 36% fat or higher. For a lighter version, try half-and-half with stabilized whipped egg whites, though texture changes.
- Sugar: Split between yolks and whites to sweeten and stabilize. Brown sugar will change flavor, so stick to granulated for the original profile.
- Butter and Espresso: Butter smooths and rounds the chocolate; espresso intensifies flavor without adding a coffee taste.
Essential Tools to Make It Well
This recipe benefits from a few reliable tools; none are intimidating. A chilled metal bowl and a sturdy whisk (or hand mixer) mean the cream whips quickly and holds its shape. A heatproof bowl that fits over a saucepan is essential for gentle melting and for cooking yolks without scrambling. A small silicone spatula makes folding tender and efficient, while an offset spatula and piping bag help for neat presentation. If you don’t own a bain-marie setup, use a small metal or glass bowl over a saucepan of simmering water and go low and slow. Ramekins or small glasses make serving simple and elegant; no fancy equipment required.
Step-by-Step Preparation Guide
Step 1: Chill equipment and set out vessels
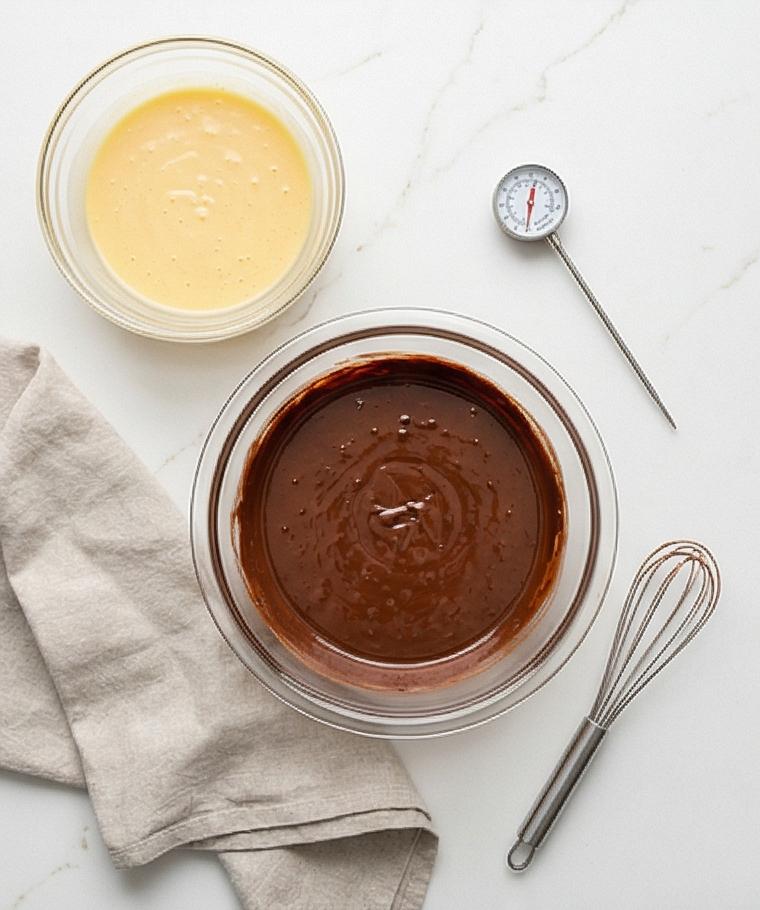
Pop a large stainless-steel mixing bowl and the whisk (or beaters) into the refrigerator until cold; chilling the metal bowl makes the cream whip faster and hold shape. While the bowl chills, arrange 4 to 6 small clear glass ramekins (or short footless dessert glasses) on a bright white tray so they’re ready to be filled — keep lids or plastic wrap nearby for loosely covering later. Lay a folded kitchen towel, a small heatproof clear glass bowl, a matte grey silicone spatula, and a long stainless whisk at the ready on the counter so everything will sit neatly on the surface when you need it.
Step 2: Melt chocolate, butter and espresso over a gentle bain-marie
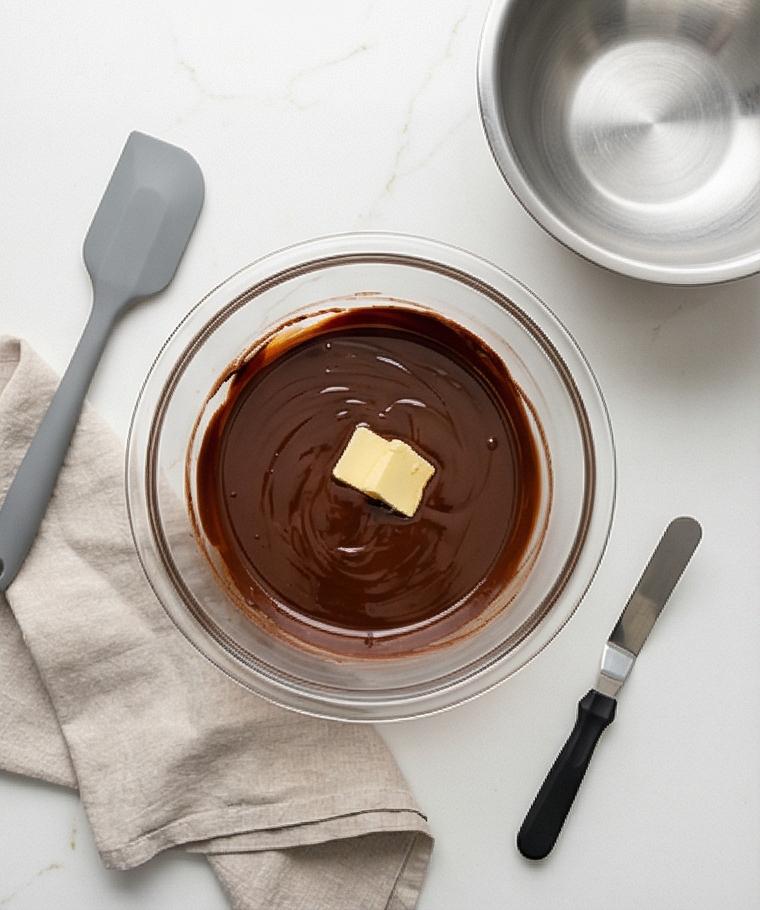
Place finely chopped bittersweet chocolate, the small pieces of butter and the hot brewed coffee or espresso into that small heatproof clear glass bowl. Rest the bowl on the folded towel and warm it gently over a barely simmering water bath until everything is just melted and glossy — stir slowly with the silicone spatula until perfectly smooth. Remove from the heat and let the chocolate cool on the towel until it feels warm but not hot to the touch, stirring occasionally so the texture stays silky and fluid.
Step 3: Cook yolks with sugar and marry them with the chocolate
Whisk the egg yolks with three tablespoons of sugar in another heatproof bowl and place that bowl over the same barely simmering water; whisk constantly until the mixture thickens, turns pale and creamy, and reaches a safe temperature. Stir in vanilla and cool briefly until warm. Temper the yolks by whisking a few spoonfuls of the warm melted chocolate into the yolks, then gently whisk the loosened yolk mixture back into the rest of the chocolate until the chocolate-yolk base is smooth, glossy and slightly thickened; set it aside to cool until just-warm to the touch.
Step 4: Whip the cream to soft peaks and lighten the chocolate base
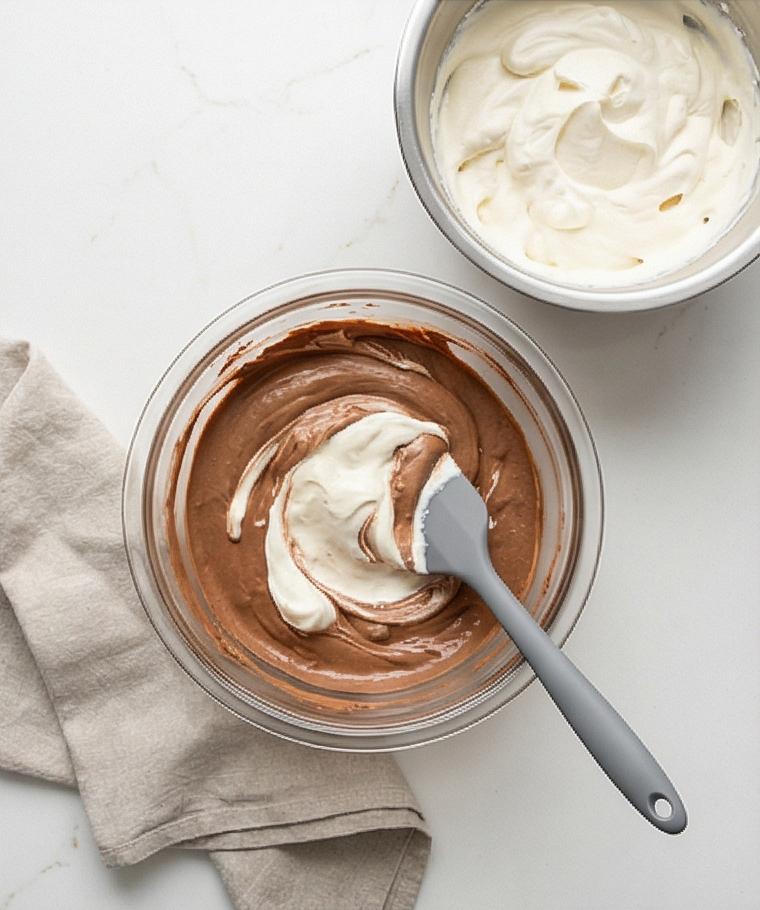
Retrieve the chilled stainless-steel bowl and whisk. Pour in the cold heavy cream and whip just until soft peaks form — the peaks should gently fold over at the tip, still pillowy and tender. Take about one-third of that whipped cream and fold it deliberately into the warm chocolate-yolk base with broad upward strokes using the matte grey spatula to loosen and lighten the mixture; the result should be a glossy, billowy chocolate cream that is aerated but still richly chocolatey.
Step 5: Beat egg whites to glossy medium peaks and finish the mousse
In a clean, dry bowl, whisk the egg whites with a pinch of salt until foamy, then add the remaining sugar gradually and beat to glossy medium peaks that hold their shape but curl slightly. Fold one-third of the meringue into the chocolate-cream to further lighten it, then fold in the remaining meringue in two gentle additions until the mixture is uniform in color and texture — thick, airy, and full of small lifted bubbles without any streaks of white.
Step 6: Portion into serving dishes and chill
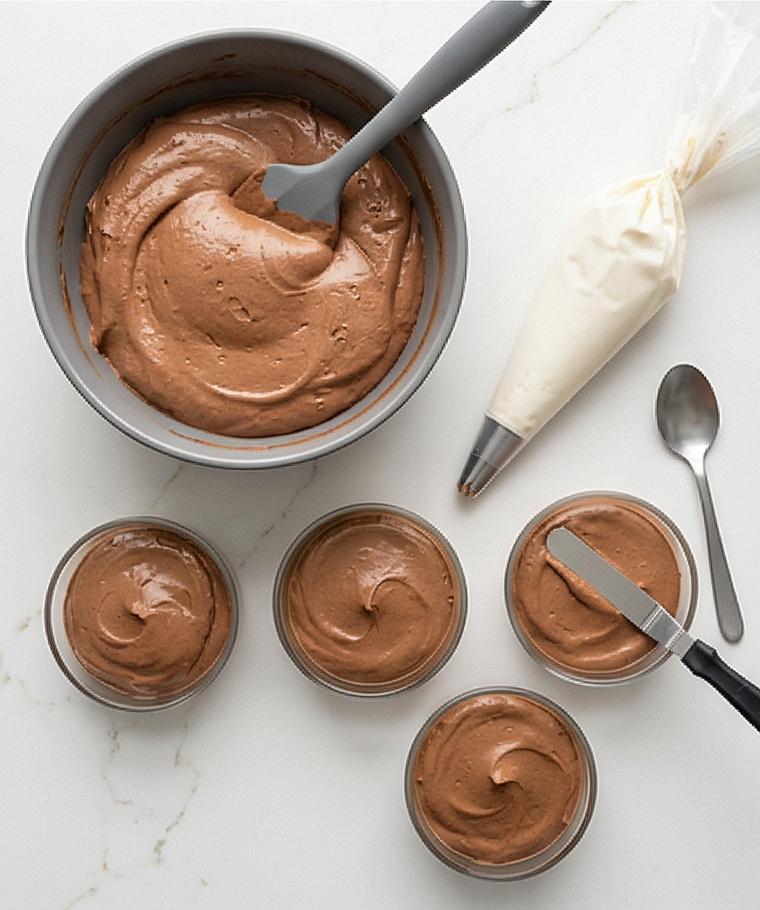
Immediately spoon or pipe the finished chocolate mousse into the prepared glass ramekins, dividing it evenly and smoothing the tops with a small offset spatula so each surface is satin-smooth. Cover each dish loosely with plastic wrap, avoiding contact with the mousse surface, and refrigerate until softly set and well chilled — ideally 3 to 4 hours, at least 2 hours.
Step 7: (Optional) Make the sweetened whipped cream garnish
Shortly before serving, chill the stainless bowl again if needed and whip the small amount of remaining cold heavy cream with the powdered sugar in the chilled bowl until soft peaks form. Keep the whipped cream in the refrigerator until ready to top the mousses.
Step 8: Uncover, garnish and serve
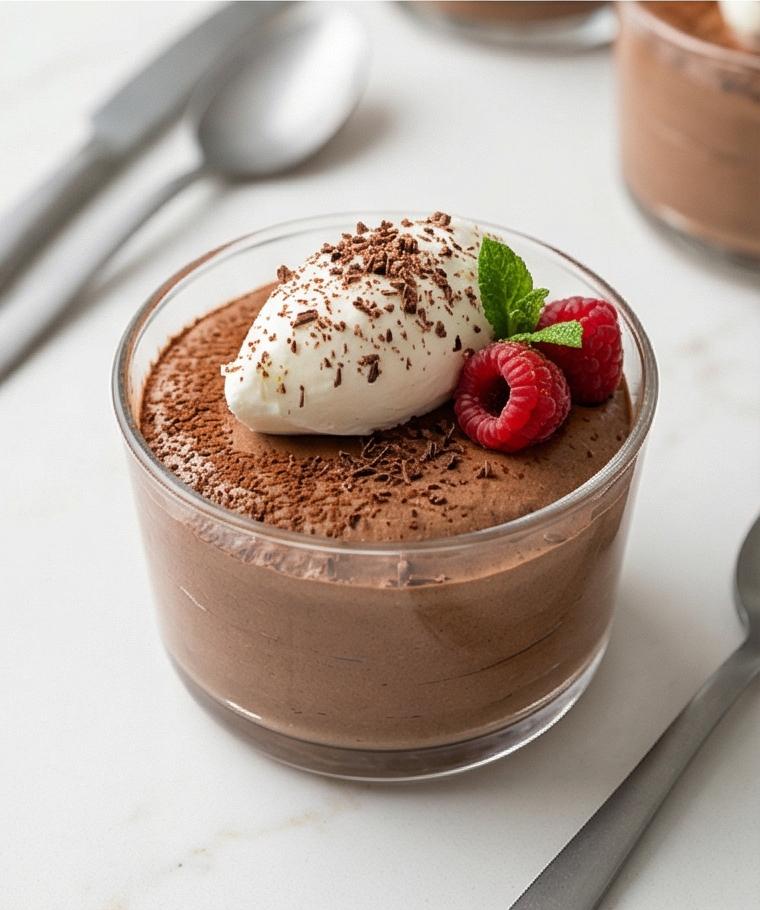
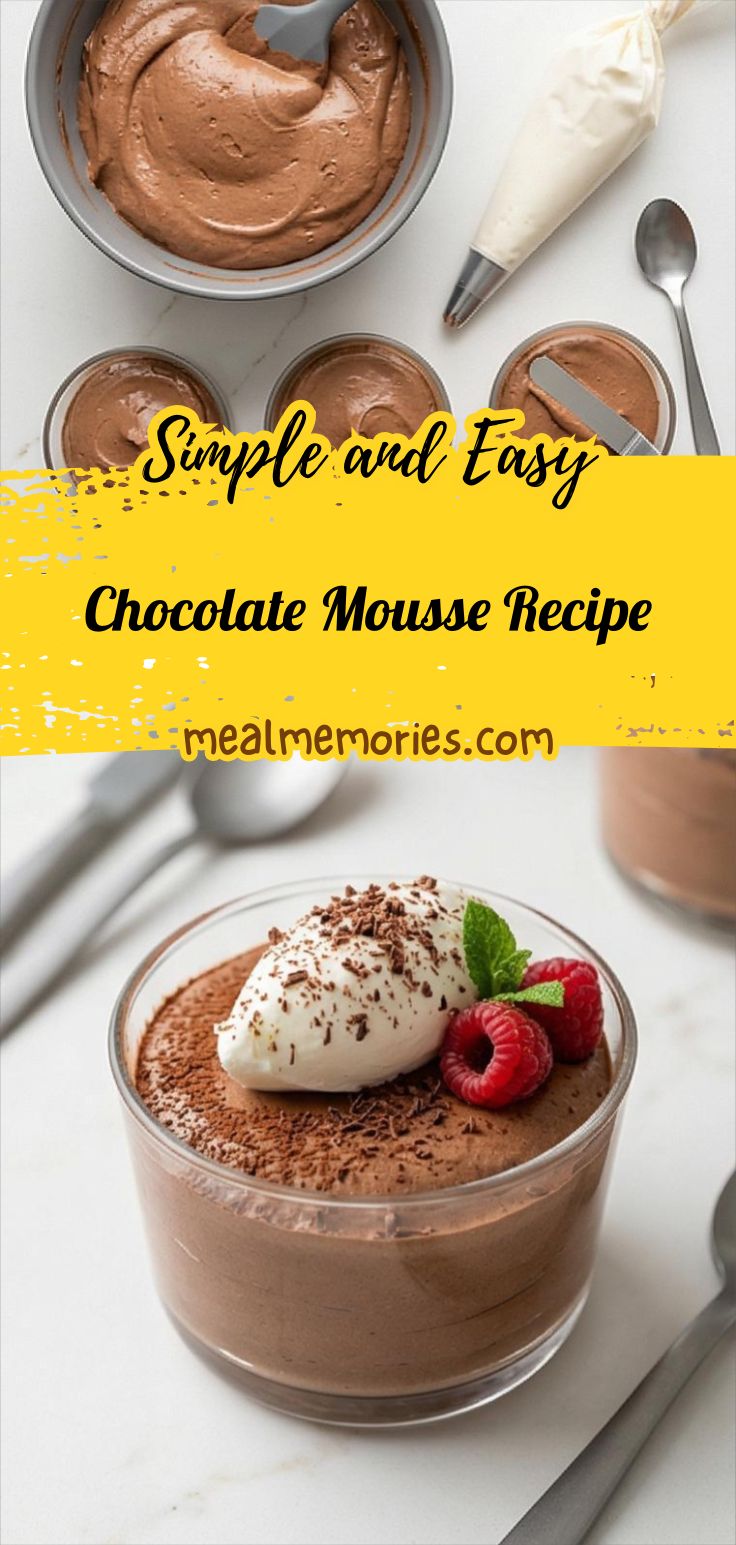
Uncover the chilled mousses, give them about five minutes at room temperature to slightly bloom in aroma, then top each portion with a generous quenelle or spoonful of the sweetened whipped cream. Finish with fine dark chocolate shavings, a light dusting of unsweetened cocoa powder, a few fresh berries and a tiny mint sprig for color and freshness. Serve immediately straight from the refrigerator and store any leftovers tightly covered for up to 24 hours.
Making It Your Own
I like to experiment with texture and intensity. For a gluten-free twist that is also dairy-free, I once swapped the cream for full-fat coconut cream and used aquafaba in place of the egg whites; the mousse was silkier and had a hint of toasted coconut. Another time I stirred in orange zest for a bright, festive note and it became a holiday favorite. For a richer, more adult dessert, a tablespoon of dark rum or orange liqueur stirred into the base is lovely. If you need a kid-friendly version, skip the espresso and use semisweet chocolate.
How to Serve
If I am hosting, I portion the mousse into 6 smaller glasses so guests can taste a few desserts, but for an intimate dinner I serve four generous portions in larger ramekins. Pair the Chocolate Mousse Recipe with a small plate of shortbread or almond biscotti for texture. For a summer party, top with macerated berries and a little citrus zest to brighten the richness. For an elegant finish, pipe the whipped cream in a small rosette and add fine chocolate shavings on top. Consider chilled serving plates for warm-weather dinners so the mousse stays pleasantly cold longer.
Storage and Reheating Tips
Store the mousses tightly covered in the refrigerator and eat within 24 hours for the best texture; the mousse is at its silky peak on day one. If it firms up too much, let it sit five to ten minutes at room temperature before serving to release aromas and soften slightly.
This dessert is not meant for reheating. If you want a warm chocolate component, serve a warm sauce on the side and spoon it over the chilled mousse at the table so you get contrast without losing texture.
Common Mistakes and How to Avoid Them
Overbeating the cream or the whites is a common trap; stop when the peaks look right and test by folding. Use gentle, patient folding motions to keep air in the mousse.
Another mistake is adding the chocolate when it is too hot to the yolks or cream; cool the chocolate until just warm to the touch to avoid curdling or melting the whipped components.
Final Thoughts
Give this Chocolate Mousse Recipe a try the next time you want a dessert that feels special but is totally doable. It rewards gentle timing and simple technique, and the payoff is a silky, chocolatey mousse that makes people smile.
Frequently Asked Questions
- Q: Can I make Chocolate Mousse Recipe ahead of time? A: Yes, make it up to 24 hours ahead and keep covered in the fridge for best texture.
- Q: Are raw eggs safe in this Chocolate Mousse Recipe? A: Use very fresh eggs or pasteurized eggs if you are concerned; the yolks are cooked gently over a bain-marie in this version.
- Q: Can I freeze chocolate mousse? A: It will freeze, but texture may change on thawing; I recommend serving chilled rather than frozen.
- Q: What chocolate is best? A: A 60 to 70% cacao bittersweet bar gives balance; adjust to taste for sweeter or more intense options.
- Q: How do I fix a grainy mousse? A: Make sure the chocolate is fully melted and smooth before combining and avoid overheating the eggs or cream.
Chocolate Mousse Recipe
Make Chocolate Mousse Recipe: whip a silky, airy chocolate mousse in 30 minutes plus chilling.
Ingredients
Instructions
Step 1: Chill equipment and set out vessels
Pop a large stainless-steel mixing bowl and the whisk (or beaters) into the refrigerator until cold; chilling the metal bowl makes the cream whip faster and hold shape. While the bowl chills, arrange 4 to 6 small clear glass ramekins (or short footless dessert glasses) on a bright white tray so they’re ready to be filled — keep lids or plastic wrap nearby for loosely covering later. Lay a folded kitchen towel, a small heatproof clear glass bowl, a matte grey silicone spatula, and a long stainless whisk at the ready on the counter so everything will sit neatly on the surface when you need it.
Step 2: Melt chocolate, butter and espresso over a gentle bain-marie
Place finely chopped bittersweet chocolate, the small pieces of butter and the hot brewed coffee or espresso into that small heatproof clear glass bowl. Rest the bowl on the folded towel and warm it gently over a barely simmering water bath until everything is just melted and glossy — stir slowly with the silicone spatula until perfectly smooth. Remove from the heat and let the chocolate cool on the towel until it feels warm but not hot to the touch, stirring occasionally so the texture stays silky and fluid.
Step 3: Cook yolks with sugar and marry them with the chocolate
Whisk the egg yolks with three tablespoons of sugar in another heatproof bowl and place that bowl over the same barely simmering water; whisk constantly until the mixture thickens, turns pale and creamy, and reaches a safe temperature. Stir in vanilla and cool briefly until warm. Temper the yolks by whisking a few spoonfuls of the warm melted chocolate into the yolks, then gently whisk the loosened yolk mixture back into the rest of the chocolate until the chocolate-yolk base is smooth, glossy and slightly thickened; set it aside to cool until just-warm to the touch.
Step 4: Whip the cream to soft peaks and lighten the chocolate base
Retrieve the chilled stainless-steel bowl and whisk. Pour in the cold heavy cream and whip just until soft peaks form — the peaks should gently fold over at the tip, still pillowy and tender. Take about one-third of that whipped cream and fold it deliberately into the warm chocolate-yolk base with broad upward strokes using the matte grey spatula to loosen and lighten the mixture; the result should be a glossy, billowy chocolate cream that is aerated but still richly chocolatey.
Step 5: Beat egg whites to glossy medium peaks and finish the mousse
In a clean, dry bowl, whisk the egg whites with a pinch of salt until foamy, then add the remaining sugar gradually and beat to glossy medium peaks that hold their shape but curl slightly. Fold one-third of the meringue into the chocolate-cream to further lighten it, then fold in the remaining meringue in two gentle additions until the mixture is uniform in color and texture — thick, airy, and full of small lifted bubbles without any streaks of white.
Step 6: Portion into serving dishes and chill
Immediately spoon or pipe the finished chocolate mousse into the prepared glass ramekins, dividing it evenly and smoothing the tops with a small offset spatula so each surface is satin-smooth. Cover each dish loosely with plastic wrap, avoiding contact with the mousse surface, and refrigerate until softly set and well chilled — ideally 3 to 4 hours, at least 2 hours.
Step 7: (Optional) Make the sweetened whipped cream garnish
Shortly before serving, chill the stainless bowl again if needed and whip the small amount of remaining cold heavy cream with the powdered sugar in the chilled bowl until soft peaks form. Keep the whipped cream in the refrigerator until ready to top the mousses.
Step 8: Uncover, garnish and serve
Uncover the chilled mousses, give them about five minutes at room temperature to slightly bloom in aroma, then top each portion with a generous quenelle or spoonful of the sweetened whipped cream. Finish with fine dark chocolate shavings, a light dusting of unsweetened cocoa powder, a few fresh berries and a tiny mint sprig for color and freshness. Serve immediately straight from the refrigerator and store any leftovers tightly covered for up to 24 hours.
Notes
- Use very fresh or pasteurized eggs if you are concerned about raw eggs
- Chill bowl and whisk for faster, more stable whipped cream
- Don’t overwhip cream or egg whites; stop at soft/medium peaks
- Let chilled mousse sit a few minutes at room temperature before serving to bloom aroma
- Store covered and consume within 24 hours for best texture