Focaccia Recipe has been a kitchen staple for me for years, and I still get a little thrill when the oven door opens and that fragrant, olive oil-scented cloud drifts out. I started with a basic loaf and slowly tuned the hydration, oil, and rosemary until it felt like home. This Focaccia Recipe is forgiving, wildly adaptable, and perfect for both weeknight dinners and weekend baking experiments. If you love bread with a crisp edge and pillowy interior, this is one you’ll keep coming back to.
How This Recipe Became My Rainy-Day Favorite
The first time I baked this Focaccia Recipe it was pouring outside and the whole kitchen smelled like sunshine and salt. I remember pressing my fingers into the dough and watching little bubbles puff under the skin as I waited for the first rise; the sound of rain became a soft percussion that matched the rhythm of my patience. When the focaccia came out, hot and dimpled, I ate a corner still steaming, tasting oily rosemary and warm crumb, and felt an unexpected, quiet happiness. Baking it now takes me right back to that calm evening, and I love how the simple act of kneading and waiting turns into something comforting and sharable.
Why These Ingredients Matter
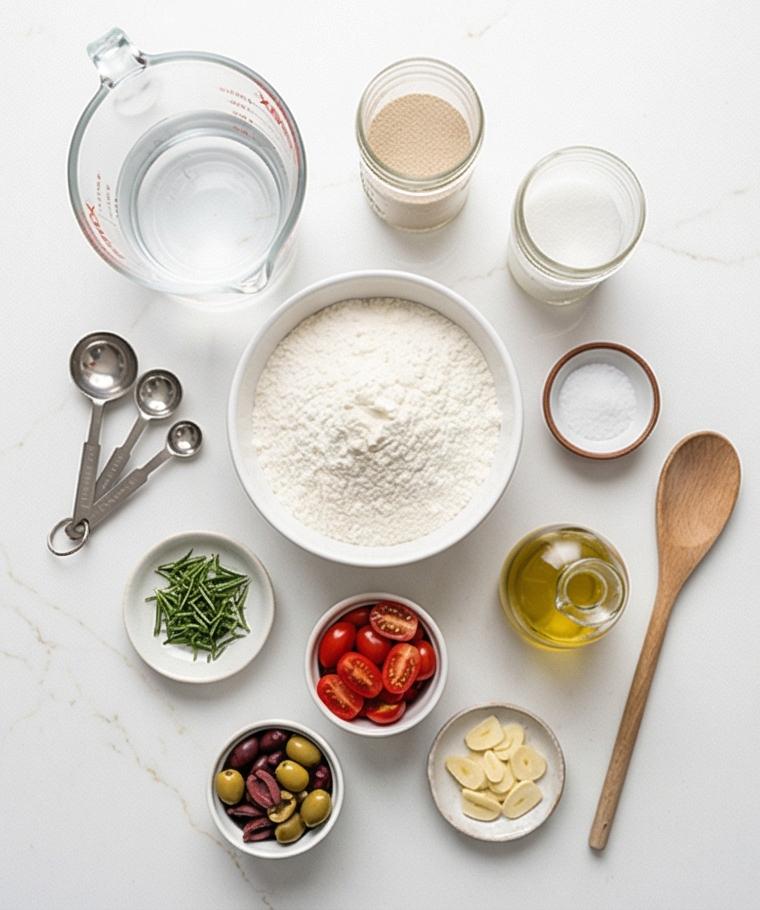
- 375 g warm water: Hydration is the foundation of texture; you can use water at 100-110F for active yeast. If you prefer a slightly tangier crumb, swap 25-50 g for room-temperature Greek yogurt.
- 2 1/4 teaspoons instant yeast: The leavening engine. Active dry works too but proof it first. If you want slower flavor development, halve the yeast and extend the first rise.
- 500 g bread flour: Gives structure and chew. Substitute half with all-purpose for a softer bite.
- 10 g fine sea salt: Balances flavor; avoid iodized salt for best taste.
- Extra-virgin olive oil: Key for crust and flavor; choose a fruity, fresh oil.
Essential Kitchen Tools and Why They Help
You don’t need a lot to make great focaccia, but the right tools make the process smooth and enjoyable. A few well-chosen items speed things up, help you avoid sticky messes, and improve the final texture. If you don’t have every tool listed, workable alternatives will keep the recipe accessible.
- Large mixing bowl: For proofing and rising; an oiled bowl gives the dough room to puff. Use any large, clean bowl if you don’t have a ceramic one.
- Rectangular metal baking pan (9×13-inch): Ensures the focaccia keeps that classic rectangular shape; a rimmed sheet pan can work in a pinch.
- Measuring scale: For accuracy with flour and water; cups work, but grams are more reliable.
- Sturdy wooden spoon or silicone spatula: To mix sticky dough without overworking your hands.
- Small ramekin and measuring cup: For holding salt, rosemary, and olive oil while you work.
Step-by-Step Preparation Guide.
Step 1: Bloom the yeast
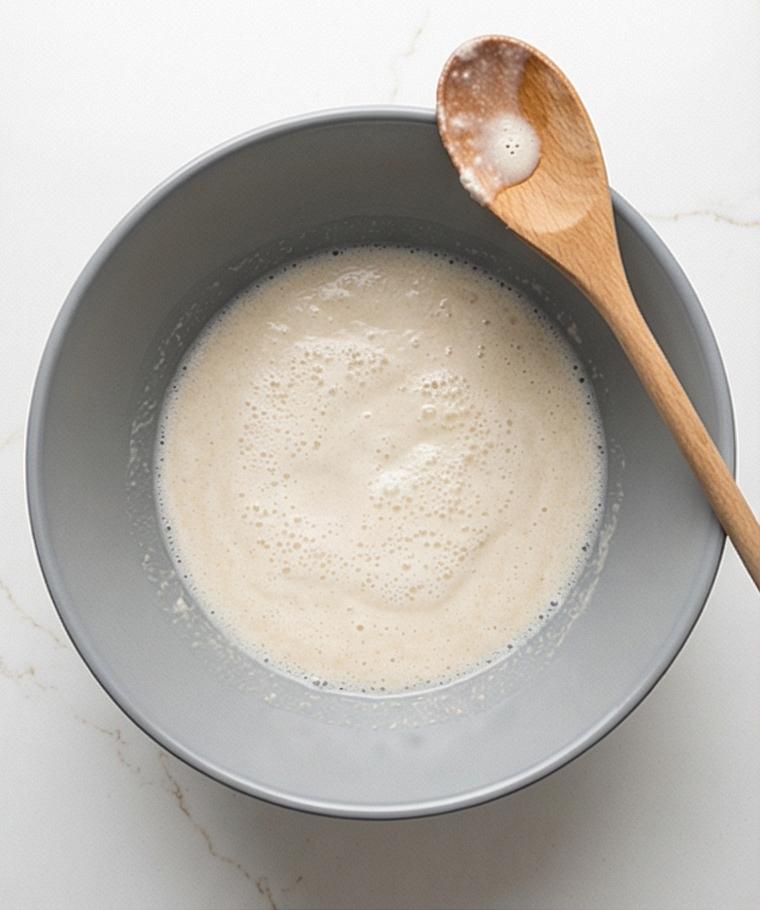
In a large matte grey ceramic mixing bowl combine the warm water, instant yeast, and a pinch of sugar; stir gently until the yeast dissolves and leave it undisturbed for 5–10 minutes so the surface becomes foamy and slightly creamy – that airy foam is your visual cue that the yeast is active and alive. Give a warm, everyday voice description of the foam texture, the tiny bubbles sitting on a slightly glossy liquid, and leave the vessel resting on the engineered Calacatta-like quartz surface, with a small glass measuring cup of extra olive oil and a tiny ramekin of sugar neatly nearby.
Step 2: Combine and whisk dry ingredients
In a separate white ceramic bowl whisk the bread flour and fine sea salt together until evenly blended and light in color; note the fine powdery texture, soft flour dust motes pooling slightly in the bowl’s corners, and the contrast of the matte grey mixing bowl and the white flour bowl against the bright marble-inspired surface.
Step 3: Bring the dough together
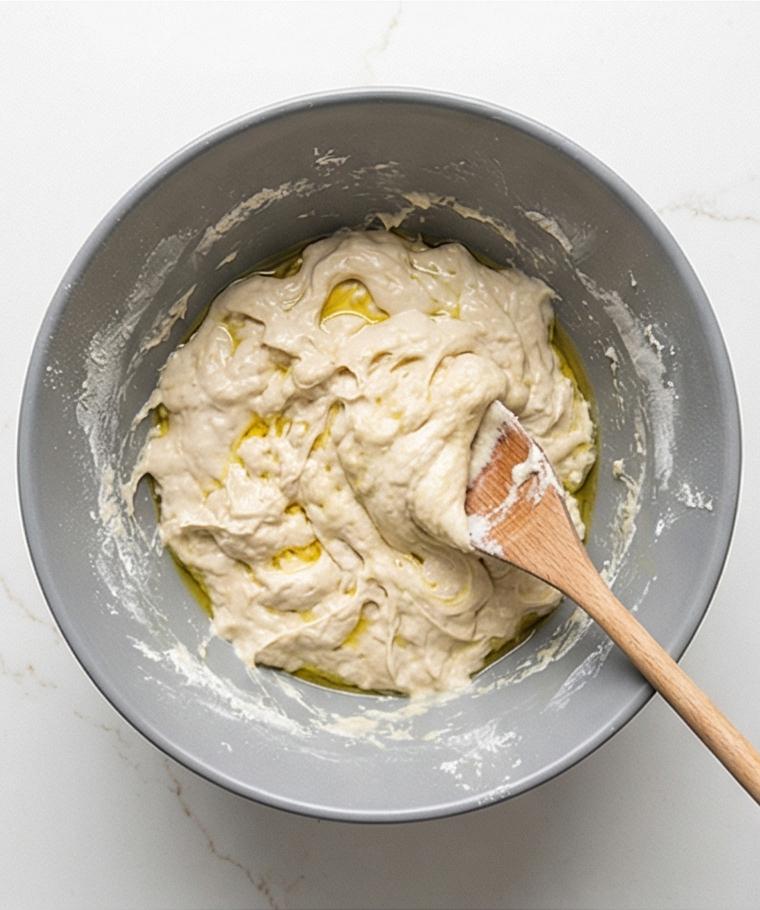
Pour the flour mixture into the foamy yeast bowl with three tablespoons of extra-virgin olive oil and stir with a sturdy wooden spoon until a shaggy, sticky mass forms and no dry patches remain – describe the sticky ribbons of dough clinging to the spoon, the rough torn edges of the shaggy dough, and the glossy sheen of olive oil working into the flour.
Step 4: Gentle stretch-and-fold knead
Turn the sticky dough onto the same lightly oiled quartz surface and with well-oiled hands perform gentle stretch-and-folds for 3–4 minutes; the dough should transform from rough and patchy to noticeably smoother and slightly elastic, showing small air bubbles beneath the surface and a tender, tacky skin that springs slowly when prodded.
Step 5: First rise in an oiled bowl
Lightly oil the large matte grey mixing bowl, shape the dough into a rough ball, place it seam-side down and turn once to coat; cover and let it rest in the bowl so it can become puffy and jiggle when the bowl is shifted – describe the dough’s surface smoothing out and the bowl’s interior dotted with a thin film of olive oil that keeps the skin supple.
Step 6: Dough doubled and ready
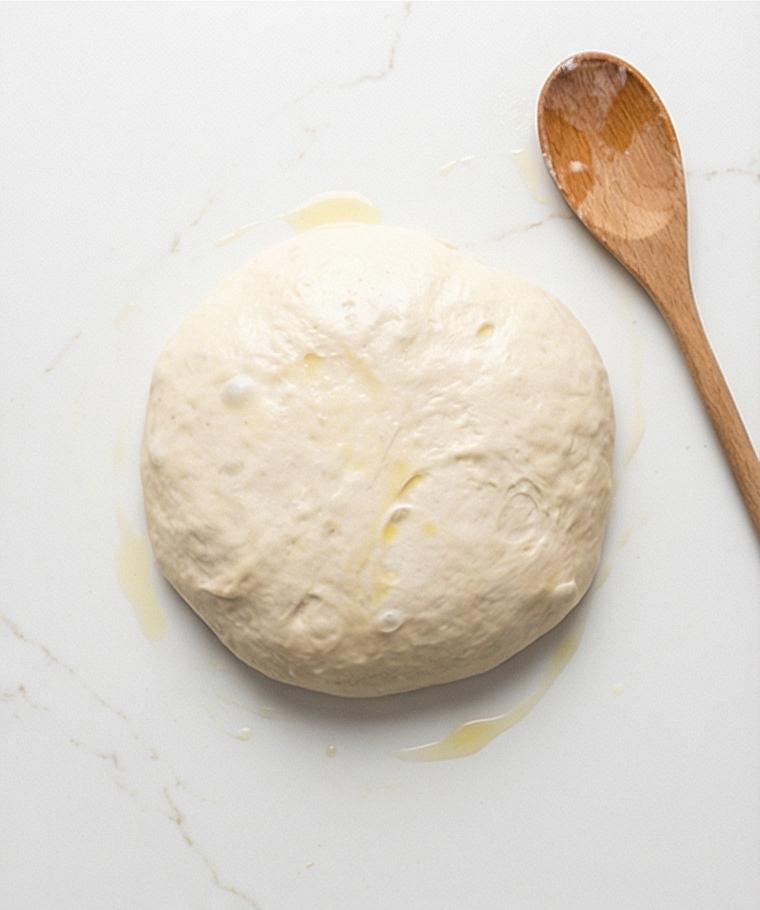
After about 60–90 minutes the dough should have doubled; describe the puffy, pillowy dome inside the matte grey bowl, the soft tensile bulges and faint shine where the dough has stretched against the bowl, and the light indentation left when you gently press a fingertip into the dough’s surface.
Step 7: Oil the pan and transfer
Generously oil a rectangular 9×13-inch metal baking pan with extra-virgin olive oil, scrape the dough from the bowl onto the pan, and with oiled hands gently press and coax the dough toward the corners; emphasize the way the dough clings and relaxes as you ease it into a mostly filled rectangle, and the oily sheen that prevents sticking while promising a crisp edge.
Step 8: Second rise while preheating the oven
Cover the oiled pan loosely and let the dough rise again until very puffy – about 30–45 minutes – while you preheat the oven; describe the dough gaining height, the surface becoming pillowy and slightly domed, and the pan’s corners gently rounded with a doughy wall beginning to form.
Step 9: Dimple, top, and season
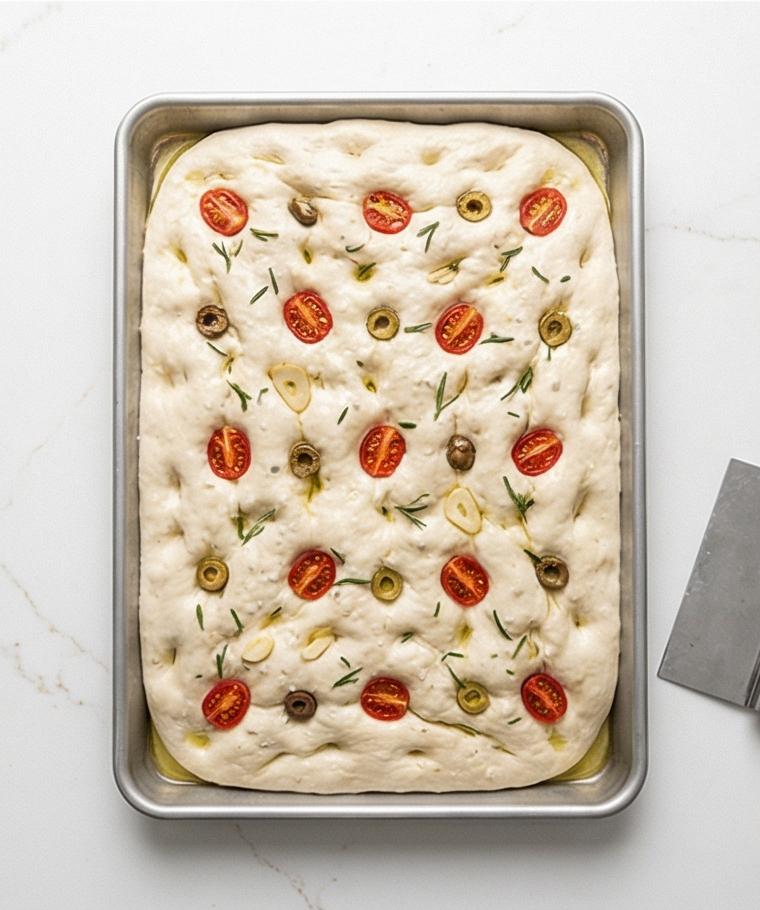
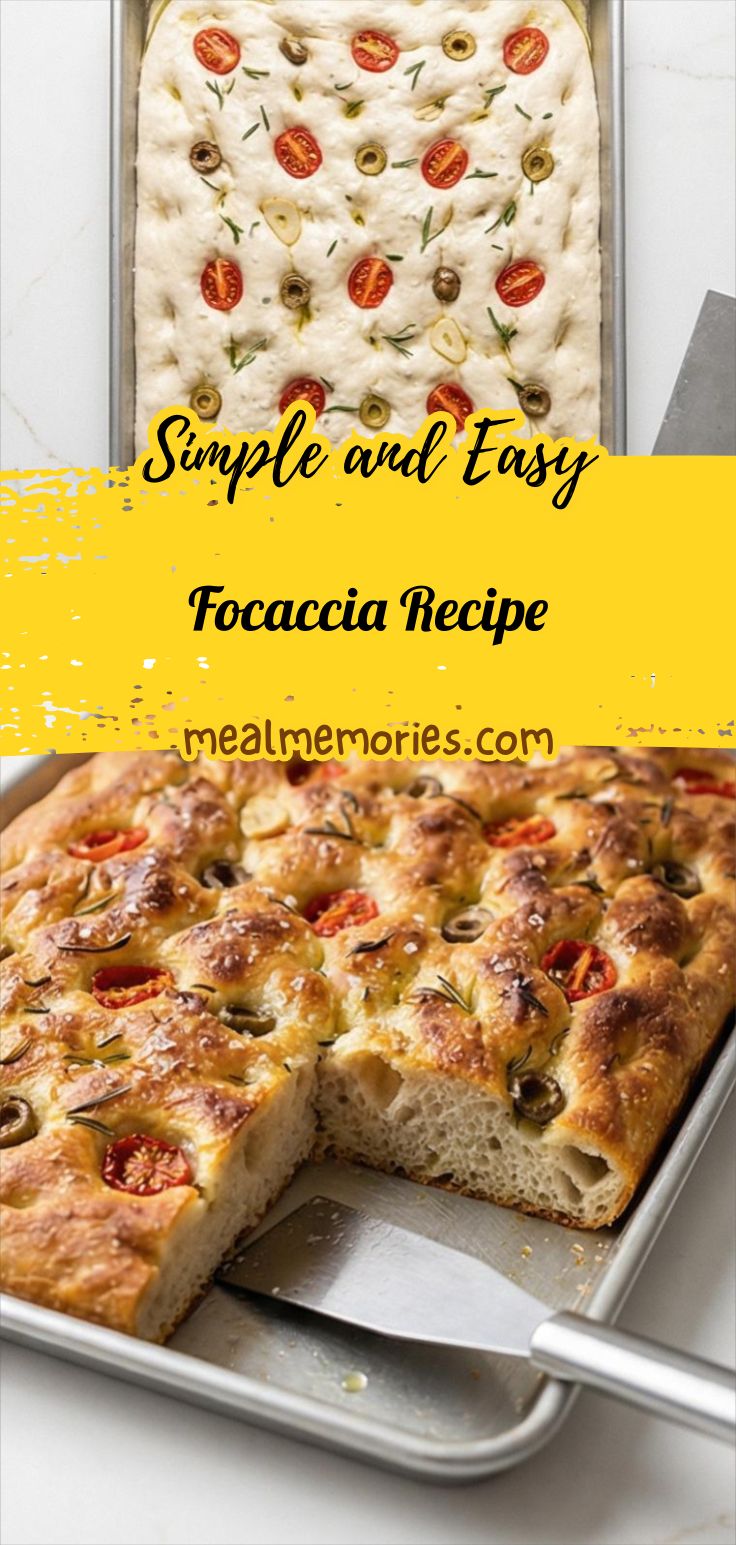
Uncover, drizzle two tablespoons of olive oil evenly across the surface, and use well-oiled fingertips to make deep, evenly spaced dimples that reach the pan; scatter finely chopped fresh rosemary, nestle optional halved cherry tomatoes, olives, and thin garlic slices into some dimples, and finish with flaky sea salt so the top glistens with oil and studded aromatics – this is the last raw, arranged state before baking.
Step 10: Bake, rest, finish, and serve
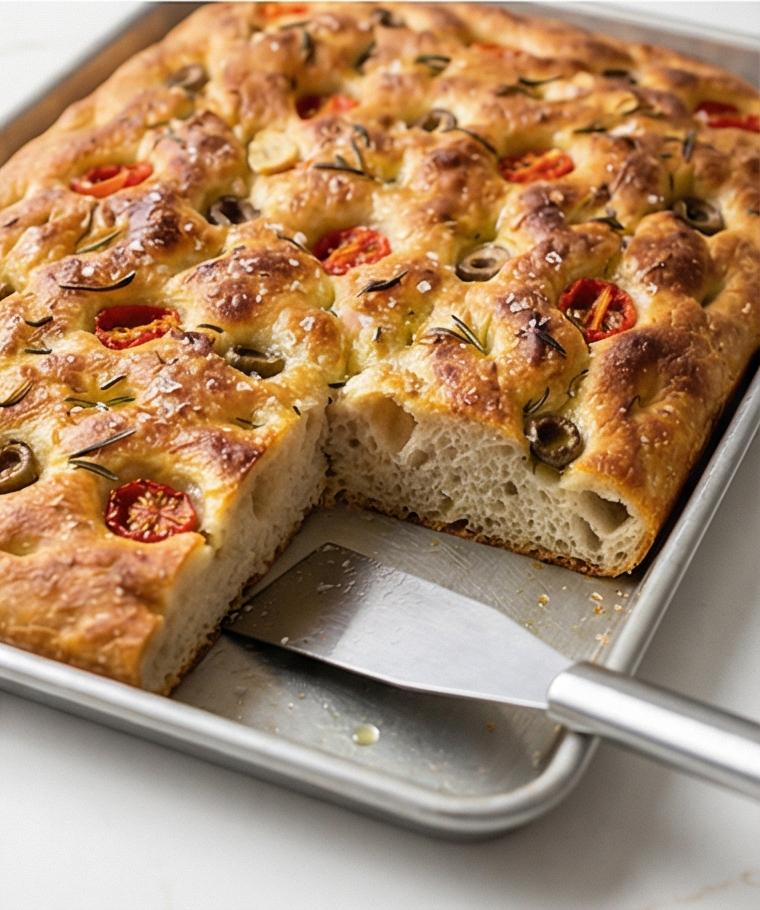
Bake until deep golden brown and crisp at the edges, then cool briefly in the same rectangular metal pan so the crumb sets; finish with an optional extra drizzle of olive oil and freshly ground black pepper, loosen the edges with a spatula and lift out rectangular pieces to serve warm or room temperature – describe the hot crust’s crackled sheen, the tender open crumb beneath, and the retained rectangular geometry of the pan that frames the finished focaccia.
Making It Your Own
I like to treat this Focaccia Recipe as a canvas. For a bright, summery variation I press halved cherry tomatoes and torn basil into the dimples just before baking. In cooler months I experiment with caramelized onions, thin slices of potato, or a scattering of grated pecorino for a richer finish.
If you need a diet-friendly option, try a gluten-free flour blend formulated for yeast breads and expect a slightly denser crumb. For a Mediterranean twist, use kalamata olives, capers, and a lemon zest finish. Small changes to olive oil quantity, herbs, or toppings make it feel new every time.
How to Serve
When I host, I slice this focaccia into neat rectangles and arrange them on a wooden board with bowls of extra-virgin olive oil for dipping, marinated olives, and a simple herb salad. For a casual gathering, stack pieces with slices of prosciutto and fresh mozzarella for instant sandwiches.
To scale up, bake two pans at once and keep one warm in a low oven (200F) for serving. For a picnic, cool completely, wrap in parchment, and carry in a flat basket so the crust stays intact. Warm slightly before serving to revive the oil-scented aroma and soft crumb.
Storage and Reheating Tips
Store cooled focaccia in an airtight container at room temperature for up to two days; beyond that, freeze slices individually wrapped in parchment and a resealable bag. Freezing keeps the texture and flavor fresh for up to three months.
To reheat, thaw at room temperature and warm in a 350F oven for 7-10 minutes, or toast slices in a skillet with a little olive oil until the edges crisp. Avoid the microwave if you want to keep the crust crisp.
Common Mistakes and How to Avoid Them
Underproofing is a frequent misstep. If your dough has not doubled and still feels dense, give it more time in a warm spot – patience pays off in an open crumb.
Another slip is using too little oil in the pan; the oil creates the signature crispy edges. Be generous at the base and on top for the best texture.
Let’s Bake It
Try this Focaccia Recipe this weekend and see how small changes make a big difference. It rewards gentle hands and tasty patience, and once you master the basics you can play with toppings and shapes freely.
Frequently Asked Questions.
- What temperature should the water be to bloom yeast?
- Aim for about 100-110F; it should feel warm, not hot, to the touch.
- Can I use instant yeast instead of active dry?
- Yes, instant yeast works well and can be mixed directly with the flour or dissolved in water like in this recipe.
- How do I get big air pockets in the crumb?
- Higher hydration and a gentle stretch-and-fold rather than aggressive kneading helps create an open, airy crumb.
- Can I make the dough ahead of time?
- Yes, refrigerate the dough after the first rise for up to 24 hours for more flavor; bring it back to room temperature before shaping.
- What are good topping combinations?
- Classic rosemary and sea salt, cherry tomatoes and basil, or olives and thin garlic slices are all excellent choices.
Focaccia Recipe
Make Focaccia Recipe today: bake a crisp-edged, olive oil-forward focaccia perfect for dipping or sandwiches.
Ingredients
Instructions
Step 1: Bloom the yeast
In a large matte grey ceramic mixing bowl combine the warm water, instant yeast, and a pinch of sugar; stir gently until the yeast dissolves and leave it undisturbed for 5–10 minutes so the surface becomes foamy and slightly creamy — that airy foam is your visual cue that the yeast is active and alive. Give a warm, everyday voice description of the foam texture, the tiny bubbles sitting on a slightly glossy liquid, and leave the vessel resting on the engineered Calacatta-like quartz surface, with a small glass measuring cup of extra olive oil and a tiny ramekin of sugar neatly nearby.
Step 2: Combine and whisk dry ingredients
In a separate white ceramic bowl whisk the bread flour and fine sea salt together until evenly blended and light in color; note the fine powdery texture, soft flour dust motes pooling slightly in the bowl’s corners, and the contrast of the matte grey mixing bowl and the white flour bowl against the bright marble-inspired surface.
Step 3: Bring the dough together
Pour the flour mixture into the foamy yeast bowl with three tablespoons of extra-virgin olive oil and stir with a sturdy wooden spoon until a shaggy, sticky mass forms and no dry patches remain — describe the sticky ribbons of dough clinging to the spoon, the rough torn edges of the shaggy dough, and the glossy sheen of olive oil working into the flour.
Step 4: Gentle stretch-and-fold knead
Turn the sticky dough onto the same lightly oiled quartz surface and with well-oiled hands perform gentle stretch-and-folds for 3–4 minutes; the dough should transform from rough and patchy to noticeably smoother and slightly elastic, showing small air bubbles beneath the surface and a tender, tacky skin that springs slowly when prodded.
Step 5: First rise in an oiled bowl
Lightly oil the large matte grey mixing bowl, shape the dough into a rough ball, place it seam-side down and turn once to coat; cover and let it rest in the bowl so it can become puffy and jiggle when the bowl is shifted — describe the dough’s surface smoothing out and the bowl’s interior dotted with a thin film of olive oil that keeps the skin supple.
Step 6: Dough doubled and ready
After about 60–90 minutes the dough should have doubled; describe the puffy, pillowy dome inside the matte grey bowl, the soft tensile bulges and faint shine where the dough has stretched against the bowl, and the light indentation left when you gently press a fingertip into the dough’s surface.
Step 7: Oil the pan and transfer
Generously oil a rectangular 9x13-inch metal baking pan with extra-virgin olive oil, scrape the dough from the bowl onto the pan, and with oiled hands gently press and coax the dough toward the corners; emphasize the way the dough clings and relaxes as you ease it into a mostly filled rectangle, and the oily sheen that prevents sticking while promising a crisp edge.
Step 8: Second rise while preheating the oven
Cover the oiled pan loosely and let the dough rise again until very puffy — about 30–45 minutes — while you preheat the oven; describe the dough gaining height, the surface becoming pillowy and slightly domed, and the pan’s corners gently rounded with a doughy wall beginning to form.
Step 9: Dimple, top, and season
Uncover, drizzle two tablespoons of olive oil evenly across the surface, and use well-oiled fingertips to make deep, evenly spaced dimples that reach the pan; scatter finely chopped fresh rosemary, nestle optional halved cherry tomatoes, olives, and thin garlic slices into some dimples, and finish with flaky sea salt so the top glistens with oil and studded aromatics — this is the last raw, arranged state before baking.
Step 10: Bake, rest, finish, and serve
Bake until deep golden brown and crisp at the edges, then cool briefly in the same rectangular metal pan so the crumb sets; finish with an optional extra drizzle of olive oil and freshly ground black pepper, loosen the edges with a spatula and lift out rectangular pieces to serve warm or room temperature — describe the hot crust’s crackled sheen, the tender open crumb beneath, and the retained rectangular geometry of the pan that frames the finished focaccia.
Notes
- Use a kitchen scale for consistent results.
- If dough seems too sticky, let it rest 5 minutes and continue gentle folds.
- For deeper flavor, refrigerate the dough after the first rise for up to 24 hours.
- Be generous with olive oil in the pan to ensure crisp edges.
- Warm focaccia briefly before serving to revive crust and aroma.