French Toast Recipe has become my go-to weekend treat; there is something about the custardy interior and caramelized edges that makes mornings feel celebratory. I love how a few humble ingredients—eggs, milk, day-old brioche—transform into something almost indulgent but still simple. Over the years I have refined this French Toast Recipe so the texture stays pillowy inside while the outside crisps to a deep golden brown. You can make it for a quiet breakfast for two or a lively brunch for friends and still feel like you didn’t spend the whole morning in the kitchen.
How This Recipe Became My Rainy-Day Favorite
I first learned this version of the French Toast Recipe on a gray, rainy morning when I needed a lift. The house smelled like warm vanilla and cinnamon as the custard absorbed into thick slices of brioche; I remember the satisfying sizzle when the soaked slices hit the pan. I stood by the window watching fat raindrops map the pavement and kept thinking how ordinary moments become memorable with the right food. The texture was the real revelation: a slightly custardy center and a crisp, caramelized edge that gave each bite its own small drama. Serving it with berries and a spoonful of cold whipped cream made the kitchen feel like a tiny cafe, and I’ve returned to that recipe every time I want comfort with a little showmanship.
Key Ingredients and What They Do
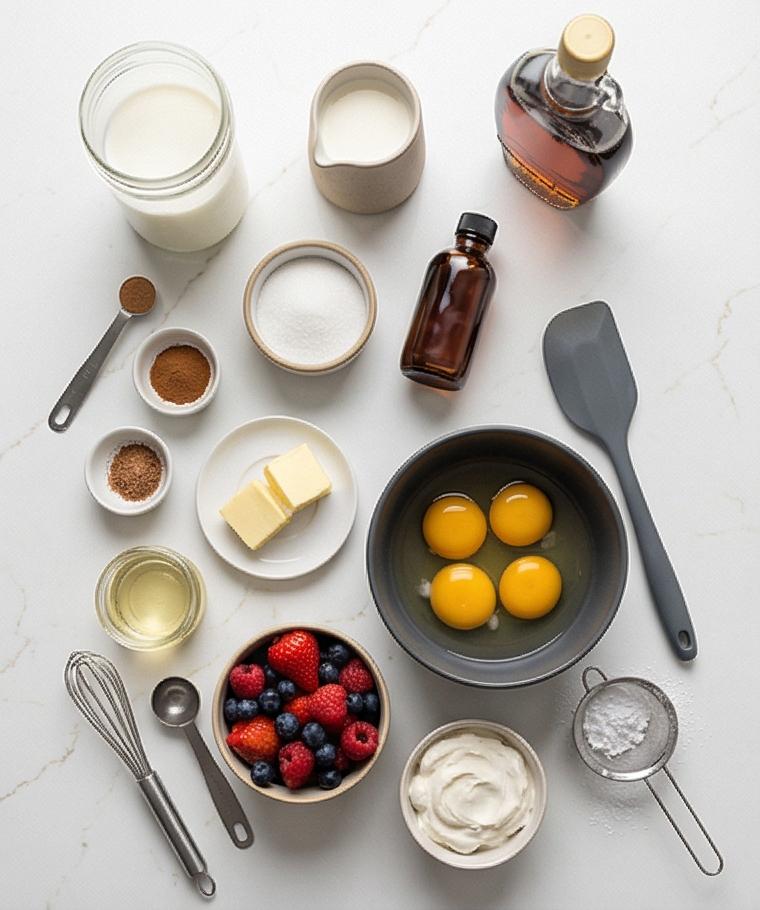
- Eggs: The structure and richness come from eggs; they bind the custard and set into a soft, custardy interior. Substitute with a mix of egg replacer and extra yolk for similar richness.
- Milk and Heavy Cream: These control custard richness. Use whole milk with a splash of cream for balance; for lighter toast use all milk.
- Brioche or Challah: The base that soaks liquid without falling apart; stale slices are best. Substitute with thick Texas toast in a pinch.
- Butter and Neutral Oil: Butter gives flavor while oil keeps it from burning; use clarified butter for higher heat.
- Maple Syrup and Berries: For finishing and contrast; use fruit compote as an alternative.
Essential Tools and Why They Matter
You do not need a kitchen full of gadgets, but a few tools make this French Toast Recipe easy and consistent. A wide shallow dish helps even soaking so each slice absorbs custard uniformly. A sturdy whisk blends the eggs and dairy into a smooth custard; a fork will work but takes longer. A nonstick skillet or well-seasoned cast-iron pan gives reliable browning; use a griddle if you are cooking many slices. A wire rack over a rimmed baking sheet keeps slices crisp while you finish the batch. Alternatives: an oven-safe cooling rack if you do not have a rimmed sheet, and a silicone spatula instead of a metal one to protect nonstick surfaces.
Step-by-Step Preparation Guide
Step 1: Warm the oven and prep a holding rack
If you plan to keep finished slices warm, preheat the oven to a low 200°F (95°C) and place a wire rack over a rimmed baking sheet — this simple set-up keeps French toast crisp without steaming. Arrange the rack and sheet on the quartz surface so they are ready to receive cooked slices; if you don’t need the oven, simply set a single wire rack on the surface for resting warm toast.
Step 2: Whisk the custard until silky and slightly aerated
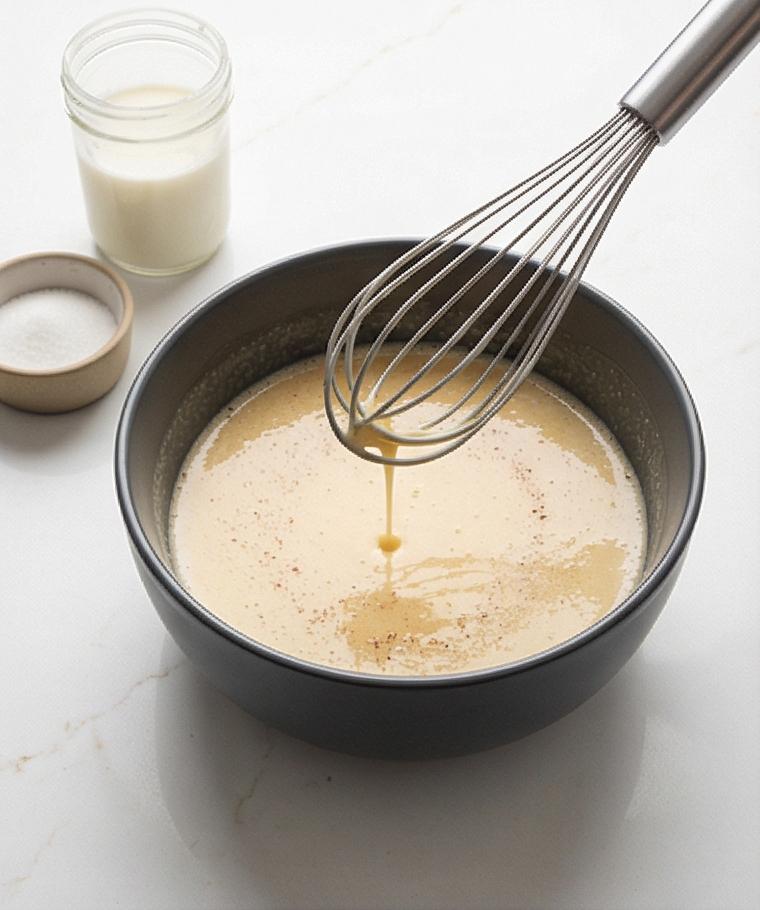
Crack the eggs into a medium matte charcoal ceramic mixing bowl and whisk until the yolks and whites are fully blended and lightly frothy, about 30–45 seconds. Pour in the whole milk and heavy cream and whisk until perfectly smooth and uniform. Add the granulated sugar, vanilla extract, cinnamon, nutmeg (if using), and salt, then whisk until the sugar is mostly dissolved and the custard looks smooth and gently speckled with spice flecks — glossy, fluid, and ready for soaking. Keep the whisk resting in the bowl so the tool reads as active.
Step 3: Transfer the custard and prepare the bread for even soaking
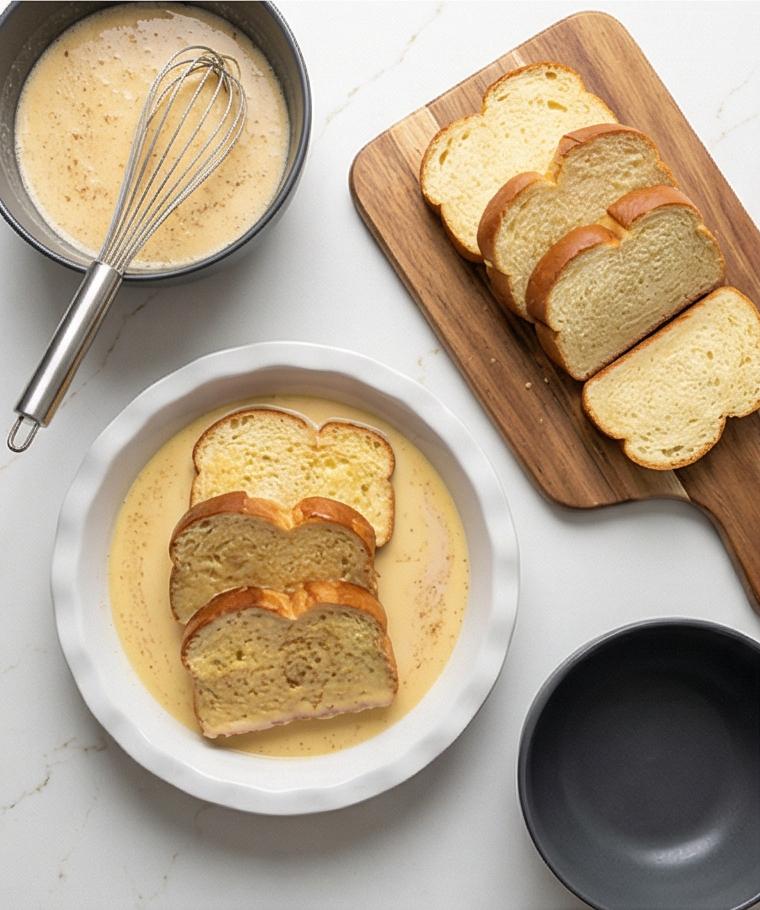
Pour the finished custard into a shallow wide ceramic pie plate so a slice can lie flat and soak evenly. Lay the brioche or challah slices in a single layer on a cutting board; if the bread is very fresh, let the slices air-dry on the board for 10–15 minutes so they absorb custard without falling apart. Working in small groups, transfer 2–3 slices into the shallow dish and let them soak 15–20 seconds per side until the bread feels moist but still intact. Let excess drip back into the dish and place the soaked slices on the board, ready to cook. Keep the shallow dish, whisk, and the same charcoal bowl visible nearby for continuity.
Step 4: Cook batches to a deep, even golden brown and rest on the rack
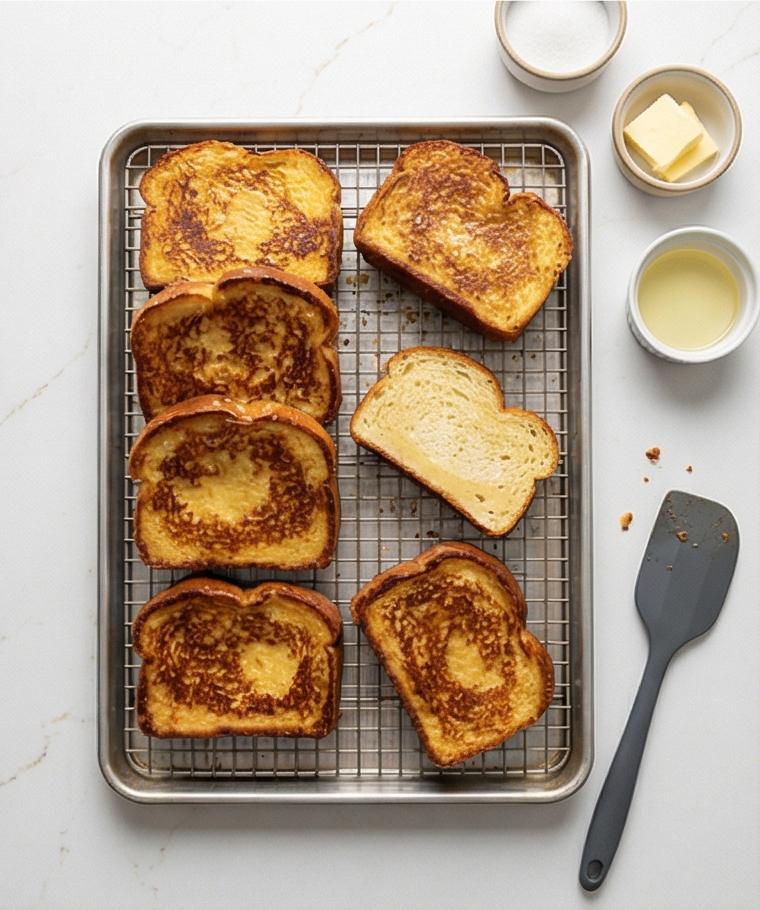
Instead of showing the stove, display the result: golden-brown French toast slices arranged in a single layer on the wire rack over the rimmed sheet on the quartz surface. Beside them, show small ramekins holding the measured unsalted butter and neutral oil used for greasing, a small spatula resting nearby, and a tiny butter knife with a smear of softened butter — evidence of gentle, controlled cooking where edges are crisp and centers remain custardy. The underside visible from above should show even caramelized color and crisp edges, while the tops hint at tender interior springiness.
Step 5: Assemble and garnish two-slice servings with syrup, berries, and cream
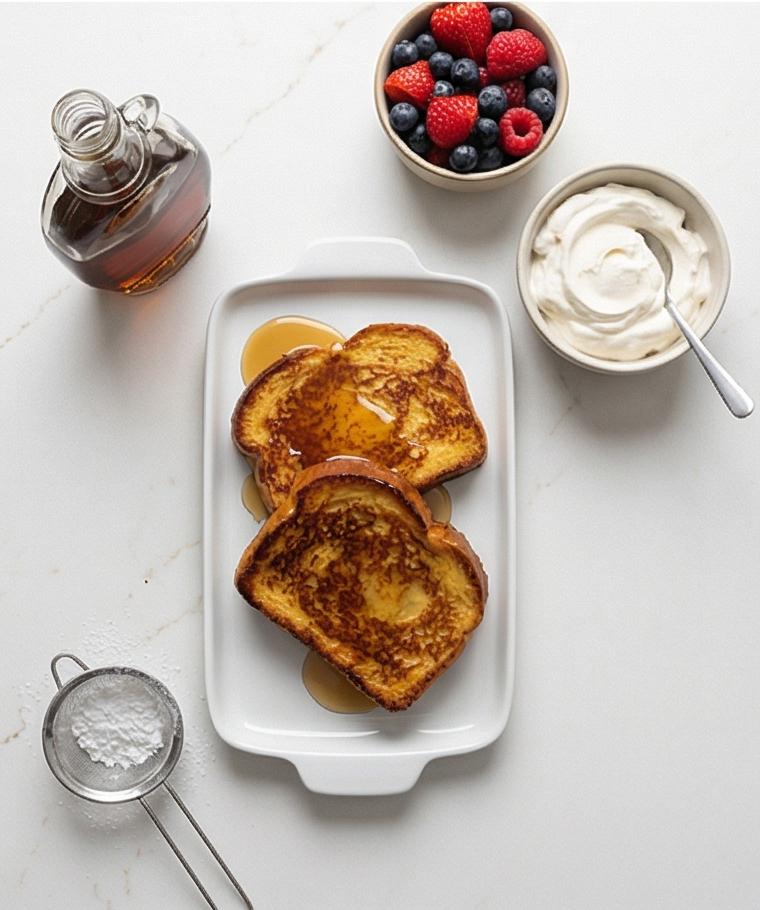
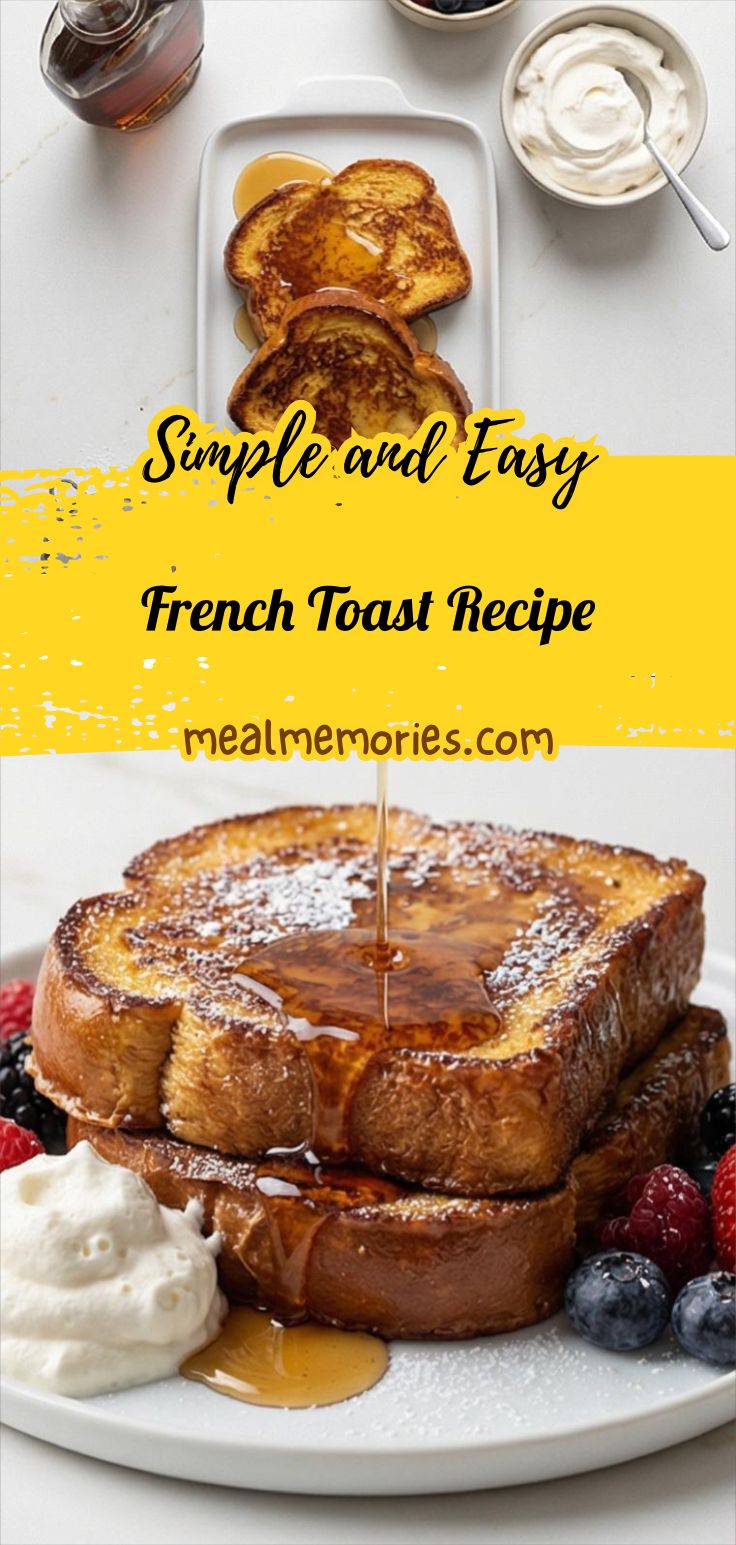
Plate two slices per serving on a low, wide white ceramic plate (or a rectangular platter if you prefer a linear presentation) set directly on the marble-like quartz. Nearby, show a room-temperature glass jug of maple syrup, a small bowl of rinsed fresh berries, a chilled bowl of lightly sweetened whipped cream, and a fine-mesh sifter with powdered sugar residue for dusting. Drizzle syrup from the jug so the flow and pooling textures are visible in plan view, arrange berries and a spoonful of cream, and leave the powdered sugar sifter poised to be dusted.
Step 6: Final presentation — hot, crisp, custardy French toast plated and ready
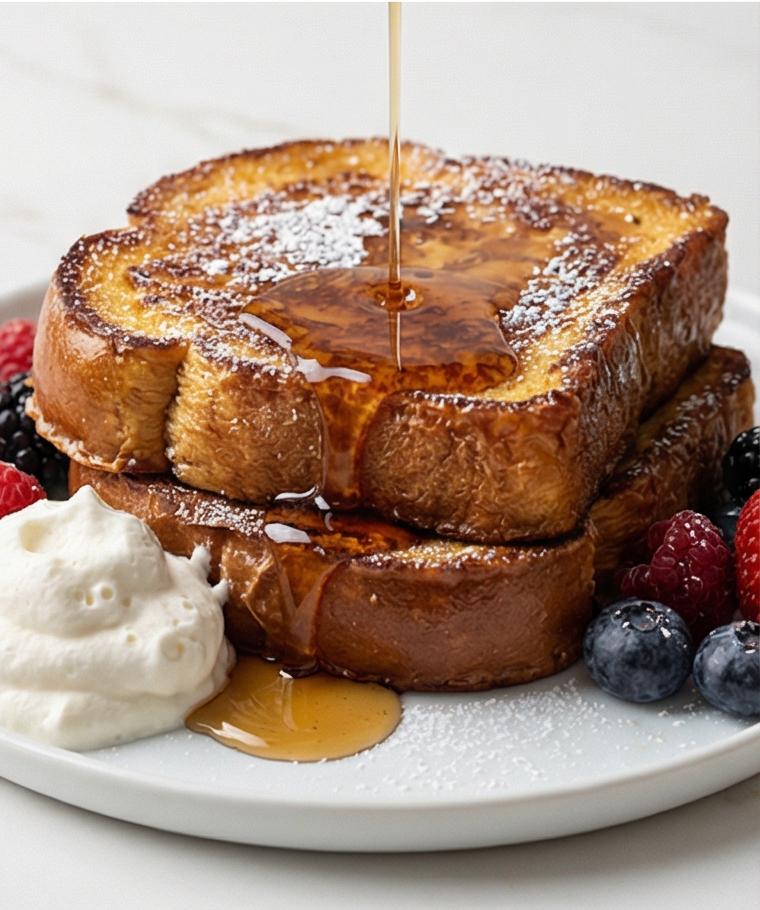
Plate two steaming, golden slices with crisp, deeply caramelized edges and a pillowy, custardy interior. Generously drizzle room-temperature maple syrup so it clings to edges and pools slightly at the plate’s base, crown the stack with fresh berries and a cold quenelle of whipped cream, and dust a whisper of powdered sugar across the top. Capture a close, eye-level, very tight view that emphasizes texture contrasts: the fragile powdered-sugar dusting, glossy syrup ribbons, matte brioche crumb, and the velvety cream.
Making It Your Own
I like to experiment with small swaps when I am in the mood to change the French Toast Recipe. For a gluten-free option, use thick slices of sturdy gluten-free brioche or day-old sweet bread; the soaking times may be slightly shorter. In autumn I add a spoonful of pumpkin puree and a pinch of ginger to the custard for warm spice notes. For a dairy-free take use full-fat coconut milk and a touch of olive oil instead of butter for pan greasing. If you want a boozy brunch, macerate berries in Grand Marnier or rum for 30 minutes before serving.
How to Serve
Think of each plate as a small stage. For a relaxed family breakfast, stack two slices and serve syrup in a jug with a bowl of berries on the side so people can garnish themselves. Hosting a brunch for eight? Keep warmed slices on a rack in a low oven and set up a topping station with whipped cream, compote, nuts, and citrus zests so guests personalize plates. For smaller servings, cut slices into halves and present two halves per person with a single berry and a drizzle of syrup for a delicate, cafe-style portion.
Storage and Reheating Tips
Store leftover slices in an airtight container in the refrigerator for up to 3 days. Lay slices flat and separate layers with parchment paper to prevent sticking.
To reheat, place slices on a wire rack in a 350°F (175°C) oven for 8 to 10 minutes until warmed through and crisped. If you are in a rush, reheat gently in a nonstick skillet over medium-low heat with a small pat of butter until warmed; avoid high heat which can dry them out.
Common Mistakes and How to Avoid Them
Soaking bread too long is one of the most common errors; it will fall apart or become soggy. Use day-old bread or slightly stale slices and test-soak a piece first to judge timing.
Cooking at too high heat can brown the outside before the center sets. Aim for medium to medium-low heat and be patient; a nice golden brown takes time and yields the best custardy interior.
Warm Invitation to Try This Recipe
Give this French Toast Recipe a try this weekend; it rewards a little attention with big flavor and comfort. Once you taste the contrast of crisp edges and tender custard, you will know why it becomes a repeat in your breakfast rotation. Make a pot of coffee, play a favorite record, and enjoy the simple ritual of breakfast done well.
Frequently Asked Questions.
- Can I use day-old sandwich bread instead of brioche? Yes, but choose a thick, sturdy slice so it soaks without falling apart; slightly stale brioche is still best.
- How long can I refrigerate leftover French toast? Store in an airtight container for up to 3 days; separate layers with parchment to avoid sticking.
- Can I make the custard ahead of time? Yes, you can make custard a few hours ahead and keep it chilled; whisk briefly before using.
- What if my French toast is soggy in the middle? Reduce soak time, use slightly stale bread, and make sure your pan temperature is not too low so it browns efficiently.
- Is there a vegan version of this recipe? Use a commercial egg replacer or blended silken tofu plus a thick plant milk and a bit of cornstarch to mimic custard texture.
French Toast Recipe
Make French Toast Recipe with custardy brioche, warm vanilla, and maple syrup for a rich weekend breakfast.
Ingredients
Instructions
Step 1: Warm the oven and prep a holding rack
If you plan to keep finished slices warm, preheat the oven to a low 200°F (95°C) and place a wire rack over a rimmed baking sheet — this simple set-up keeps French toast crisp without steaming. Arrange the rack and sheet on the quartz surface so they are ready to receive cooked slices; if you don't need the oven, simply set a single wire rack on the surface for resting warm toast.
Step 2: Whisk the custard until silky and slightly aerated
Crack the eggs into a medium matte charcoal ceramic mixing bowl and whisk until the yolks and whites are fully blended and lightly frothy, about 30–45 seconds. Pour in the whole milk and heavy cream and whisk until perfectly smooth and uniform. Add the granulated sugar, vanilla extract, cinnamon, nutmeg (if using), and salt, then whisk until the sugar is mostly dissolved and the custard looks smooth and gently speckled with spice flecks — glossy, fluid, and ready for soaking. Keep the whisk resting in the bowl so the tool reads as active.
Step 3: Transfer the custard and prepare the bread for even soaking
Pour the finished custard into a shallow wide ceramic pie plate so a slice can lie flat and soak evenly. Lay the brioche or challah slices in a single layer on a cutting board; if the bread is very fresh, let the slices air-dry on the board for 10–15 minutes so they absorb custard without falling apart. Working in small groups, transfer 2–3 slices into the shallow dish and let them soak 15–20 seconds per side until the bread feels moist but still intact. Let excess drip back into the dish and place the soaked slices on the board, ready to cook. Keep the shallow dish, whisk, and the same charcoal bowl visible nearby for continuity.
Step 4: Cook batches to a deep, even golden brown and rest on the rack
Instead of showing the stove, display the result: golden-brown French toast slices arranged in a single layer on the wire rack over the rimmed sheet on the quartz surface. Beside them, show small ramekins holding the measured unsalted butter and neutral oil used for greasing, a small spatula resting nearby, and a tiny butter knife with a smear of softened butter — evidence of gentle, controlled cooking where edges are crisp and centers remain custardy. The underside visible from above should show even caramelized color and crisp edges, while the tops hint at tender interior springiness.
Step 5: Assemble and garnish two-slice servings with syrup, berries, and cream
Plate two slices per serving on a low, wide white ceramic plate (or a rectangular platter if you prefer a linear presentation) set directly on the marble-like quartz. Nearby, show a room-temperature glass jug of maple syrup, a small bowl of rinsed fresh berries, a chilled bowl of lightly sweetened whipped cream, and a fine-mesh sifter with powdered sugar residue for dusting. Drizzle syrup from the jug so the flow and pooling textures are visible in plan view, arrange berries and a spoonful of cream, and leave the powdered sugar sifter poised to be dusted.
Step 6: Final presentation — hot, crisp, custardy French toast plated and ready
Plate two steaming, golden slices with crisp, deeply caramelized edges and a pillowy, custardy interior. Generously drizzle room-temperature maple syrup so it clings to edges and pools slightly at the plate's base, crown the stack with fresh berries and a cold quenelle of whipped cream, and dust a whisper of powdered sugar across the top. Capture a close, eye-level, very tight view that emphasizes texture contrasts: the fragile powdered-sugar dusting, glossy syrup ribbons, matte brioche crumb, and the velvety cream.
Notes
- Use day-old brioche or challah for best absorption and texture.
- Test-soak one slice to gauge soak time if your bread is very fresh.
- Keep finished slices on a wire rack in a low oven to stay crisp while you finish the batch.
- For extra flavor, toast slices briefly before soaking for a nuttier edge.
- Clarified butter can be used to prevent burning at higher heat.