Ice Cream (homemade) Recipe
I make this Ice Cream (homemade) Recipe whenever the calendar says celebration or I just need a little comfort. It started as a weekend experiment and turned into my go-to for birthdays, warm-weather dinners, and quiet evenings at home. The custard base is simple but exacting, and the payoff is a scoop that feels both luxurious and familiar. If you love vanilla that tastes real and creamy texture that melts on the tongue, this Ice Cream (homemade) Recipe will win you over fast.
How This Recipe Became My Rainy-Day Favorite
There is one rainy afternoon I remember clearly: the kind of rain that sounds like a slow drum on the roof. I was craving something warm-meets-cold, and making this ice cream felt like permission to slow down. As the vanilla seeds bloomed in the steaming milk I stood by the counter, stirring, inhaling a scent that felt like childhood holidays. The custard thickened slowly, and when I passed it through the strainer into the cold cream, the kitchen seemed to hush. Later, with a bowl of glossy, speckled ice cream and a scattering of toasted nuts on top, the rain became part of the ritual. That chilly, cozy contrast is why I reach for this Ice Cream (homemade) Recipe when I need comfort and a little celebration at once.
The Heart of the Recipe: Primary Ingredients
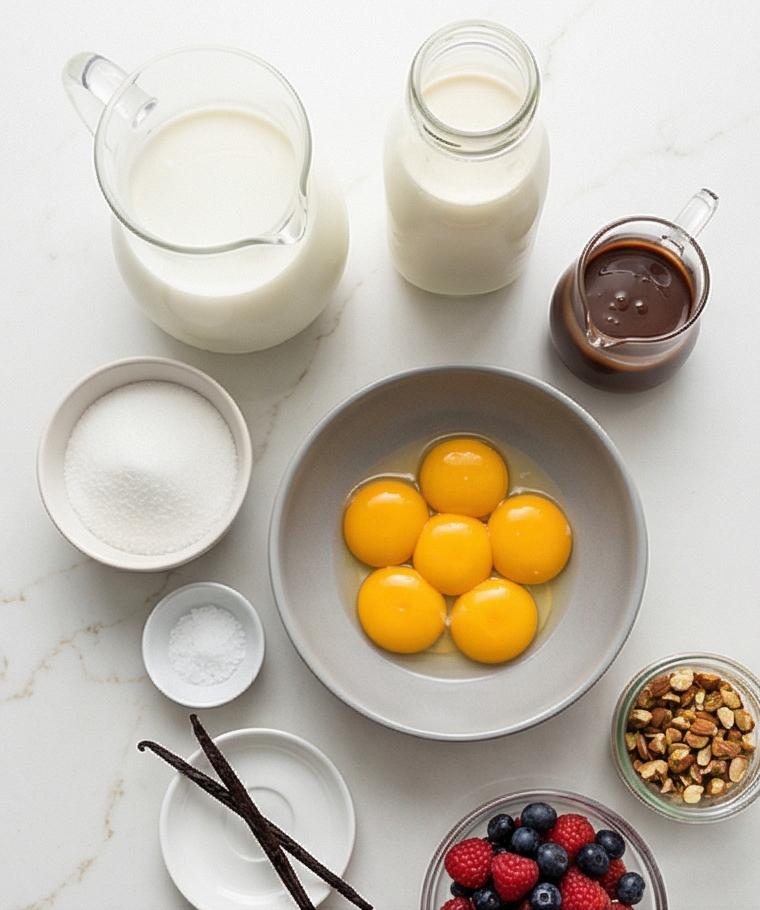
- Whole Milk: Provides the liquid base and helps the custard set with a clean dairy note; substitute with 2% for a lighter mouthfeel but avoid skim which makes the texture thin.
- Heavy Cream: The star of the show for richness and silkiness; full-fat cream gives the best mouth-coating texture. For a lighter version, use 1 1/2 cups cream and 1/2 cup milk.
- Granulated Sugar: Sweetens and affects freezing point – you can swap part for invert sugar or honey (reduce heat slightly) to keep scoopability.
- Fine Sea Salt: Balances sweetness and brightens flavors; use kosher salt but reduce quantity slightly.
- Egg Yolks: Build the custard structure and give a velvet density; for an eggless version, use 3/4 cup cornstarch slurry and cook until thick.
- Vanilla Bean or Extract: Real vanilla seeds create visible flecks and deep aroma; pure vanilla extract is fine if you skip the pod.
Essential Kitchen Tools and Why They Matter
A few simple tools make the difference between good and great ice cream. A sturdy saucepan with a heavy bottom gives even heat so the custard doesn’t scorch. A fine-mesh strainer catches any cooked bits and the vanilla pod, leaving a silky base. Use a whisk for aerating the yolks and a wooden spatula for stirring—metal spoons can be noisy and less gentle. An ice-cream maker is important for texture; if you don’t have one, use the freeze-and-whisk method but expect a denser result. Lastly, chilled freezer-safe containers and a reliable thermometer help you track temperature and keep the ice cream from forming crystals.
- Heavy-bottomed saucepan: Even heat distribution prevents scorching and promotes a smooth custard.
- Fine-mesh strainer: Removes solids and ensures silkiness.
- Whisk and wooden spatula: Whisk for ribbons; spatula for gentle stirring.
- Ice-cream maker: Incorporates air and gives the classic texture; alternatives include stirring by hand during freezing.
- Chilled freezer-safe container: Minimizes temperature fluctuation and ice crystal formation.
Step-by-Step Preparation Guide
Step 1: Prepare the chilling station and reserve the cream
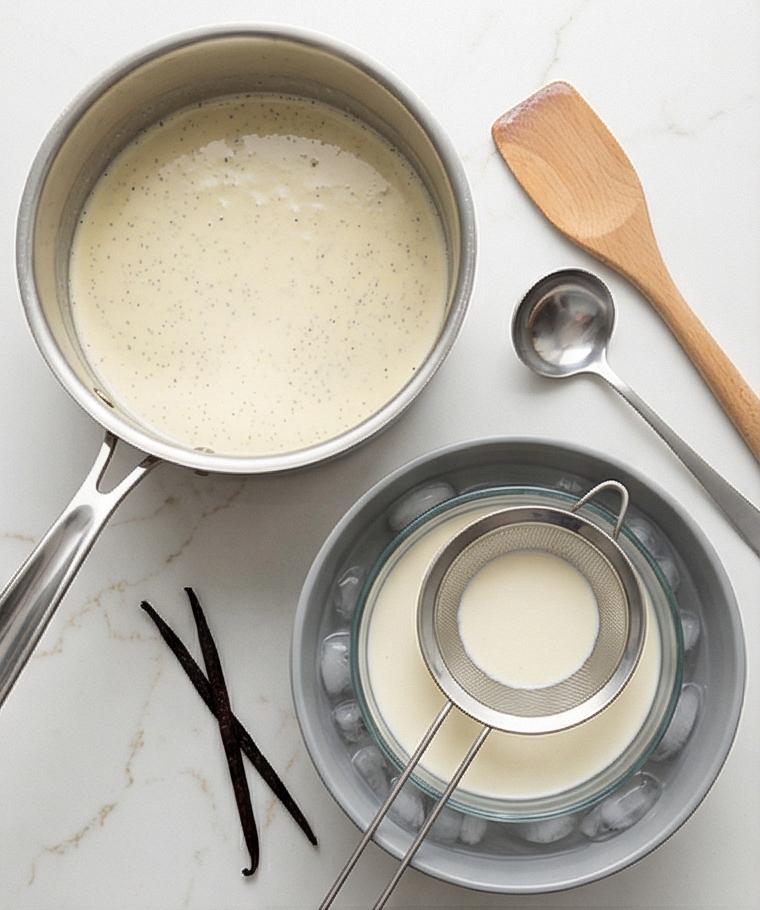
Make sure your ice-cream maker bowl has been frozen for at least 24 hours. Set a large bowl half-filled with ice and a little cold water on the quartz surface and nest a medium matte grey ceramic heatproof bowl inside it to form an ice bath. Pour 1 cup of the cold heavy cream into that inner grey bowl and rest a fine-mesh strainer across its rim; keep a wooden spatula and a small stainless ladle nearby on the surface. This quiet staging keeps everything ready for rapid cooling and preserves the texture of the custard.
Step 2: Infuse the milk and cream with vanilla until steaming
Place the remaining milk and cream together with the scraped vanilla seeds and pod and a pinch of fine sea salt into a heavy-bottomed stainless pot and gently warm until steaming with tiny bubbles around the edge- until it’s visibly steaming and fragrant but not boiling. Remove the pot from heat and let it rest briefly so the vanilla seeds bloom in the warm liquid; the surface should look silky and slightly glossy, flecked with vanilla specks. Keep the pot on the quartz surface beside the ice bath to proceed with tempering.
Step 3: Whisk yolks with sugar and temper
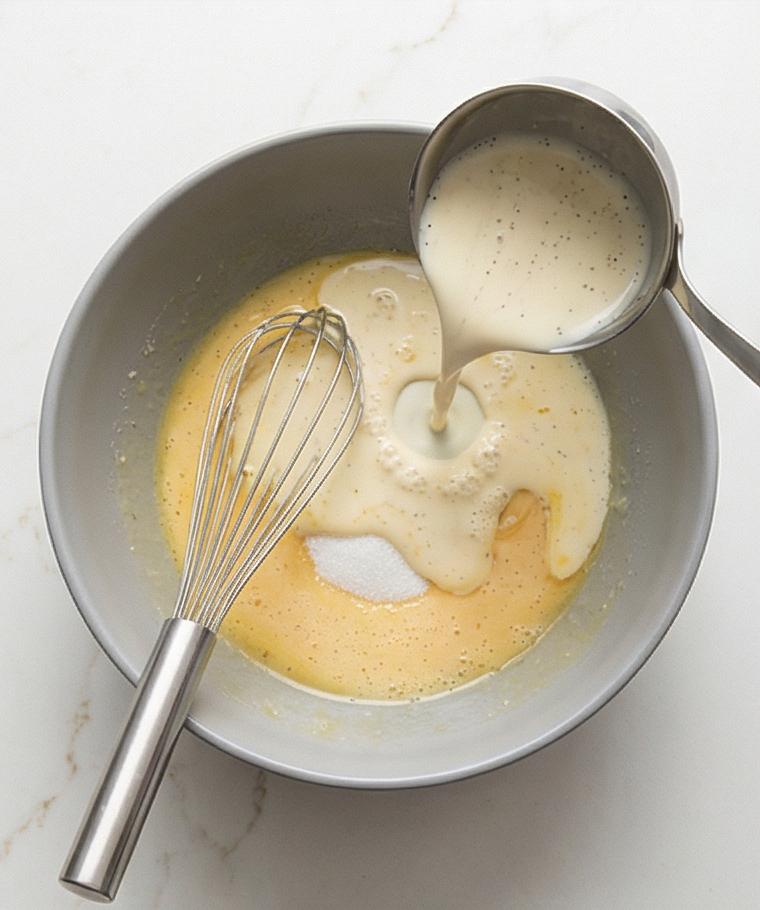
In the same matte grey mixing bowl whisk the six large yolks with the granulated sugar vigorously until the mixture becomes pale, smooth, and slightly ribbon-like when the whisk is lifted. Slowly drizzle a small stream of the hot infused milk into the yolks while whisking constantly to temper-the yolk mixture should warm and thicken a touch but remain fluid and glossy, free of curdled bits. This tempered, homogenous pale custard base is the key visual milestone before cooking.
Step 4: Combine and cook the custard to nappe
Pour the tempered yolk mixture back into the stainless pot with the remaining warm milk-cream, then work the custard on low heat off any appliance- stirring constantly with the wooden spatula on the quartz surface- until it thickens enough to coat the back of the spatula and leaves a clean trail when you draw your finger across it. The custard should be velvety, luminous, and fall in slow ribbons- no graininess, just a satiny nappe ready for finishing.
Step 5: Strain into the cold cream and chill over ice
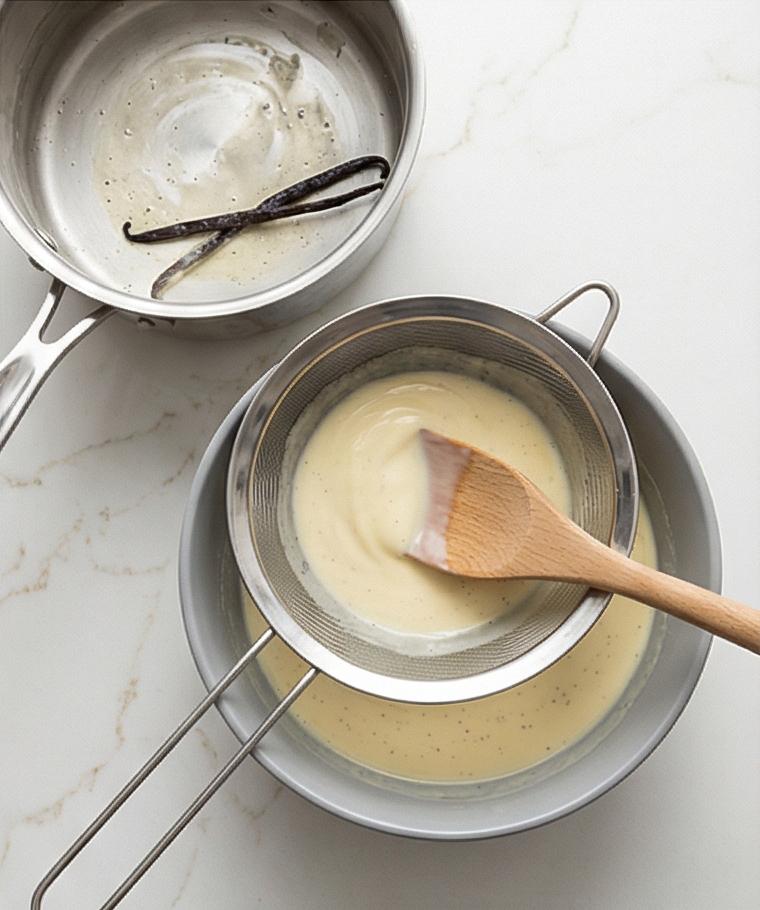
Immediately pass the hot custard through the fine-mesh strainer into the reserved cold cream in the matte grey bowl, pressing gently with the spatula to extract every drop; discard solids and the vanilla pod. If using vanilla extract, stir it in now. Set the grey bowl back into the ice bath and stir the custard occasionally until it cools to near room temperature, then press plastic wrap directly onto the surface and refrigerate until thoroughly cold (preferably overnight) so the texture relaxes and the flavors meld.
Step 6: Briefly whisk and transfer to the ice-cream maker
Remove the chilled custard from the refrigerator and give it a quick whisk to smooth any set edges. Set your frozen freezer bowl into the machine according to the maker’s instructions, turn the machine on, and slowly pour the cold custard into the running machine from the matte grey bowl. Watch the mixture thicken and increase in volume as air is incorporated; the texture should change from glossy liquid to a soft, aerated ribbon.
Step 7: Churn to soft-serve consistency
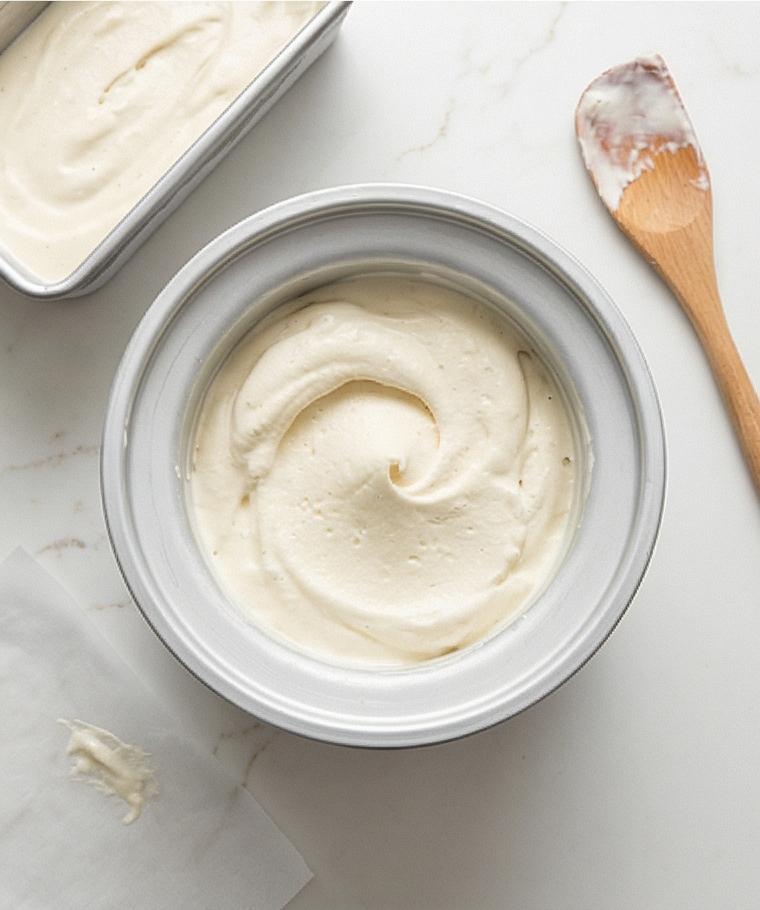
Let the machine churn until the ice cream reaches a soft-serve stage- lightly aerated, holding soft peaks on the paddle, dense but scoopable. The churned ice cream should look pillowy with fine, creamy bubbles and a slightly matte sheen that signals optimal overrun and structure. Stop the machine and quickly transfer the soft ice cream to a chilled, freezer-safe container.
Step 8: Press, seal, and firm in the freezer
Smooth the surface with a spatula, press a piece of parchment or plastic wrap directly onto the custard to minimize ice crystals, and seal with a lid. Place the container in the coldest part of your freezer and let it firm for at least 3–4 hours (6–8 for scoop-shop firmness) so the microstructure stabilizes and the texture sets fully.
Step 9: Soften briefly, scoop, and garnish for serving
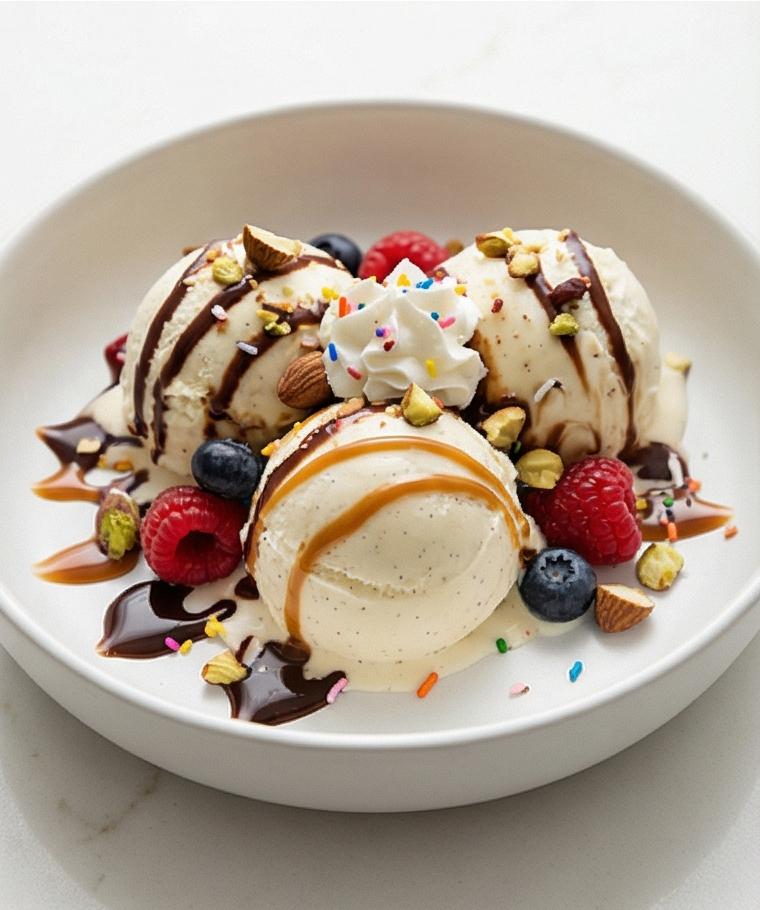
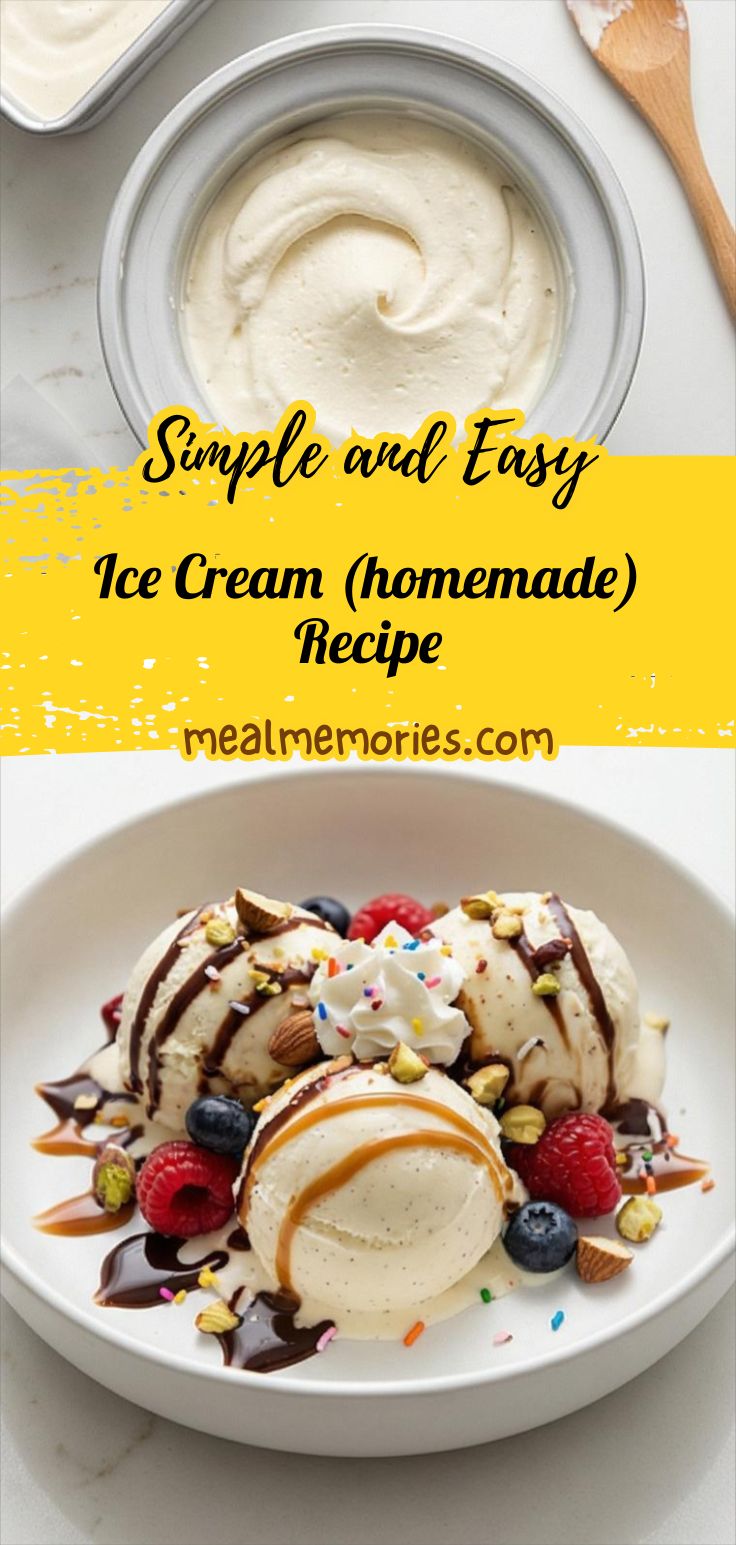
When ready to serve, let the container sit at room temperature for 5–10 minutes to soften slightly for ideal scooping. Use a chilled scooper to form clean, dense scoops into a chilled matte white porcelain bowl; finish with warm chocolate or caramel drizzle, fresh berries, chopped toasted nuts, a dollop of whipped cream, or sprinkles as you like. Capture the final dish with a close, eye-level view that celebrates the creamy surface, visible vanilla specks, and the gentle melt at the edges.
Making It Your Own
Try small experiments to see how flavor and texture change. For a berry twist, fold in a warm raspberry compote just after churning for bright pockets of fruit. If you want a nutty version, toast chopped hazelnuts or pistachios and swirl them in at the finish for crunch. For a dairy-free take, use a coconut cream base and temper with a cornstarch slurry for body; it will be slightly denser but satisfyingly lush. Salted caramel or chocolate ribbons added in the last minute of churn create a marbled effect that looks as impressive as it tastes.
How to Serve
When I host, I think about contrast and rhythm. For a dinner party of six, present single scoops in small chilled bowls and add one dramatic garnish—like warm chocolate sauce ladled tableside—to keep portions in check and focus on texture. For family-style serving, pack scoops into a chilled serving bowl with an assortment of toppings in small dishes so guests can customize. If you need to stretch the recipe, serve smaller scoops alongside thin butter cookies or espresso for a composed dessert plate. Use chilled bowls and a warm spoon for the cleanest scoops.
Storage and Reheating Tips
Store the ice cream in the coldest part of your freezer in an airtight container with plastic wrap pressed to the surface to limit ice crystals. If the texture becomes very firm, let it sit at room temperature for 5–10 minutes before scooping; this softens the outer layer without melting the core.
When reviving slightly icy ice cream, a few quick whirls in a stand mixer or a vigorous whisk in a chilled bowl will restore creaminess. Avoid microwaving; it changes texture and can create graininess. For best flavor, consume within 2 weeks, though properly sealed ice cream can keep well for a month.
Common Mistakes and How to Avoid Them
Overcooking the custard leads to grainy texture. Keep the heat low, stir constantly, and aim for the nappe stage where the custard coats the spatula. Remove from heat promptly and strain to remove any cooked bits.
Skipping the chill step results in poor structure. Cool the custard thoroughly before churning; overnight refrigeration relaxes the proteins and gives smoother mouthfeel. Also, don’t forget to freeze your ice-cream maker bowl for at least 24 hours so it performs properly.
A Warm Invitation
Give this Ice Cream (homemade) Recipe a try this weekend and enjoy the little ritual of making custard by hand. It rewards patience with unforgettable texture and flavor, and once you master the base you can play with endless mix-ins and toppings. Scoop, taste, and share the results.
Frequently Asked Questions
- Q: Can I make this without eggs? A: Yes. Substitute a cornstarch slurry or use an eggless custard recipe; results will be slightly less rich but still delicious.
- Q: How long does the ice cream keep in the freezer? A: Properly sealed, it stays great for up to a month, though best within two weeks for optimal texture.
- Q: Can I use vanilla extract instead of a vanilla bean? A: Absolutely. Use 2 teaspoons of pure vanilla extract and stir it in after straining the custard.
- Q: My custard curdled when I tempered – what went wrong? A: You likely added hot liquid too quickly. Always drizzle the hot milk slowly while whisking to gradually raise the yolk temperature.
- Q: No ice-cream maker, can I still make it? A: Yes. Freeze in a shallow container and whisk every 30 minutes until semi-frozen to mimic churning.
Ice Cream (homemade) Recipe
Make Ice Cream (homemade) Recipe for silky vanilla custard — churn, firm, and serve with warm toppings.
Ingredients
Instructions
Step 1: Prepare the chilling station and reserve the cream
Make sure your ice-cream maker bowl has been frozen for at least 24 hours. Set a large bowl half-filled with ice and a little cold water on the quartz surface and nest a medium matte grey ceramic heatproof bowl inside it to form an ice bath. Pour 1 cup of the cold heavy cream into that inner grey bowl and rest a fine-mesh strainer across its rim; keep a wooden spatula and a small stainless ladle nearby on the surface. This quiet staging keeps everything ready for rapid cooling and preserves the texture of the custard.
Step 2: Infuse the milk and cream with vanilla until steaming
Place the remaining milk and cream together with the scraped vanilla seeds and pod and a pinch of fine sea salt into a heavy-bottomed stainless pot and gently warm until steaming with tiny bubbles around the edge—until it’s visibly steaming and fragrant but not boiling. Remove the pot from heat and let it rest briefly so the vanilla seeds bloom in the warm liquid; the surface should look silky and slightly glossy, flecked with vanilla specks. Keep the pot on the quartz surface beside the ice bath to proceed with tempering.
Step 3: Whisk yolks with sugar and temper
In the same matte grey mixing bowl whisk the six large yolks with the granulated sugar vigorously until the mixture becomes pale, smooth, and slightly ribbon-like when the whisk is lifted. Slowly drizzle a small stream of the hot infused milk into the yolks while whisking constantly to temper—the yolk mixture should warm and thicken a touch but remain fluid and glossy, free of curdled bits. This tempered, homogenous pale custard base is the key visual milestone before cooking.
Step 4: Combine and cook the custard to nappe
Pour the tempered yolk mixture back into the stainless pot with the remaining warm milk-cream, then work the custard on low heat off any appliance—stirring constantly with the wooden spatula on the quartz surface—until it thickens enough to coat the back of the spatula and leaves a clean trail when you draw your finger across it. The custard should be velvety, luminous, and fall in slow ribbons—no graininess, just a satiny nappe ready for finishing.
Step 5: Strain into the cold cream and chill over ice
Immediately pass the hot custard through the fine-mesh strainer into the reserved cold cream in the matte grey bowl, pressing gently with the spatula to extract every drop; discard solids and the vanilla pod. If using vanilla extract, stir it in now. Set the grey bowl back into the ice bath and stir the custard occasionally until it cools to near room temperature, then press plastic wrap directly onto the surface and refrigerate until thoroughly cold (preferably overnight) so the texture relaxes and the flavors meld.
Step 6: Briefly whisk and transfer to the ice-cream maker
Remove the chilled custard from the refrigerator and give it a quick whisk to smooth any set edges. Set your frozen freezer bowl into the machine according to the maker’s instructions, turn the machine on, and slowly pour the cold custard into the running machine from the matte grey bowl. Watch the mixture thicken and increase in volume as air is incorporated; the texture should change from glossy liquid to a soft, aerated ribbon.
Step 7: Churn to soft-serve consistency
Let the machine churn until the ice cream reaches a soft-serve stage—lightly aerated, holding soft peaks on the paddle, dense but scoopable. The churned ice cream should look pillowy with fine, creamy bubbles and a slightly matte sheen that signals optimal overrun and structure. Stop the machine and quickly transfer the soft ice cream to a chilled, freezer-safe container.
Step 8: Press, seal, and firm in the freezer
Smooth the surface with a spatula, press a piece of parchment or plastic wrap directly onto the custard to minimize ice crystals, and seal with a lid. Place the container in the coldest part of your freezer and let it firm for at least 3–4 hours (6–8 for scoop-shop firmness) so the microstructure stabilizes and the texture sets fully.
Step 9: Soften briefly, scoop, and garnish for serving
When ready to serve, let the container sit at room temperature for 5–10 minutes to soften slightly for ideal scooping. Use a chilled scooper to form clean, dense scoops into a chilled matte white porcelain bowl; finish with warm chocolate or caramel drizzle, fresh berries, chopped toasted nuts, a dollop of whipped cream, or sprinkles as you like. Capture the final dish with a close, eye-level view that celebrates the creamy surface, visible vanilla specks, and the gentle melt at the edges.
Notes
- Freeze the ice-cream maker bowl at least 24 hours before churning
- Chill custard thoroughly (preferably overnight) before churning
- Press plastic wrap onto the custard surface before freezing to reduce ice crystals
- Use a fine-mesh strainer to ensure silky texture
- For lighter ice cream, reduce cream and increase milk slightly