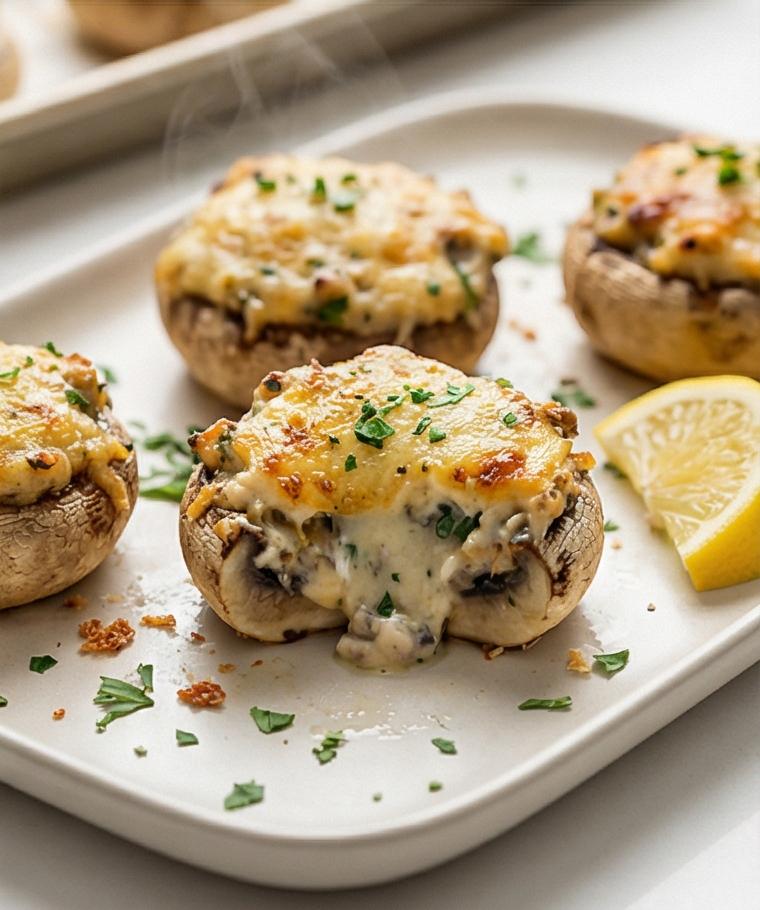
My kitchen always smells like a little adventure when I make my Jalapeño Poppers Recipe. I first learned to balance heat and creaminess by watching my aunt fold cheese into tiny pepper boats, and that curiosity stuck with me. These poppers are a crowd-pleaser that feel fancy but are shockingly simple to pull together on a weeknight or for game-day snacking. You get the snap of a roasted pepper, the tang of cheddar and Parmesan, and the irresistible crunch from buttered panko.
How This Recipe Became My Rainy-Day Favorite
The first time I made this Jalapeño Poppers Recipe it was raining and my kitchen felt like the coziest place in the world. I remember the hiss of the oven and the way the sharp cheddar melted into the cream cheese, sending tiny clouds of savory steam up into the air. I was nervous about how spicy the peppers might be, so I removed most of the membranes and seeds; when the first bite hit my tongue it was creamy, a little smoky from the paprika, and perfectly balanced. I served them on a humble baking sheet, and my friends insisted I write the method down. The memory of passing that tray around, watching faces light up and hands reach for seconds, is why I keep this Jalapeño Poppers Recipe in heavy rotation. It tastes of simple comfort, shared plates, and those small, loud moments that make a night in feel special.
The Stars of the Filling and How to Choose Them
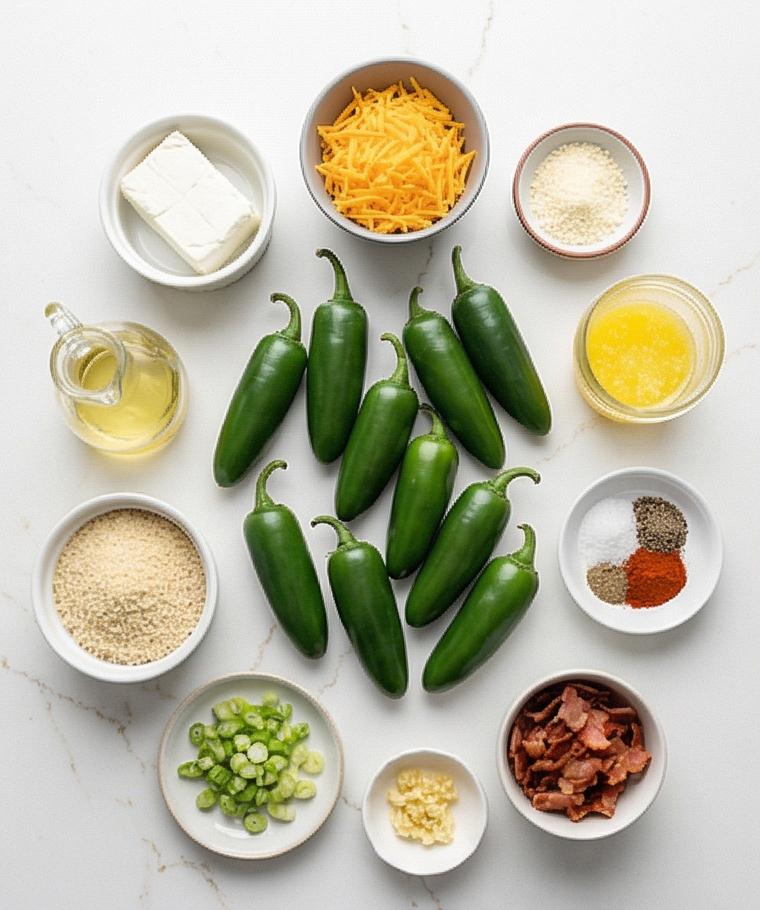
- Jalapeño Peppers: The base of this Jalapeño Poppers Recipe. Look for firm, glossy peppers without soft spots; pick smaller to medium peppers for an ideal pepper-to-filling ratio. Substitute poblano for milder heat.
- Cream Cheese: Provides the creamy body. Full-fat yields the best texture; use neufchâtel for a lighter version.
- Sharp Cheddar: Gives tang and melt. Try smoked cheddar for depth or a pepper jack for added heat.
- Panko Breadcrumbs: Add crunch when buttered and toasted. Swap with crushed cornflakes for a gluten-free crunch.
- Bacon (optional): Adds savory crunch; use turkey bacon or omit for vegetarian poppers.
Essential Kitchen Tools and Why They Matter
A few simple tools make the process quick and keep the kitchen calm. A sturdy rimmed baking sheet protects the oven and makes transport easy; line it so cleaning is painless. A medium mixing bowl lets you combine the cheeses without fuss. A small spoon or piping bag helps you fill the peppers neatly and consistently. Gloves are handy when handling jalapeños to avoid accidental eye irritation. Finally, a small spatula or tongs is perfect for transferring poppers after baking. If you do not have a piping bag, a zip-top bag with a corner snipped works fine, and if you are missing panko, use fine breadcrumbs tossed briefly in melted butter.
Step-by-Step Preparation Guide
Step 1: Preheat and prepare the work surface
Preheat the oven to 400°F (200°C). Line a rectangular rimmed baking sheet with parchment paper or aluminum foil and lightly spray the lined surface with a neutral cooking oil spray so the poppers won’t stick. Keep the prepared sheet on the engineered quartz surface so it’s ready to receive the peppers; this is your primary rectangular tool and will reappear later.
Step 2: Halve and clean the jalapeños
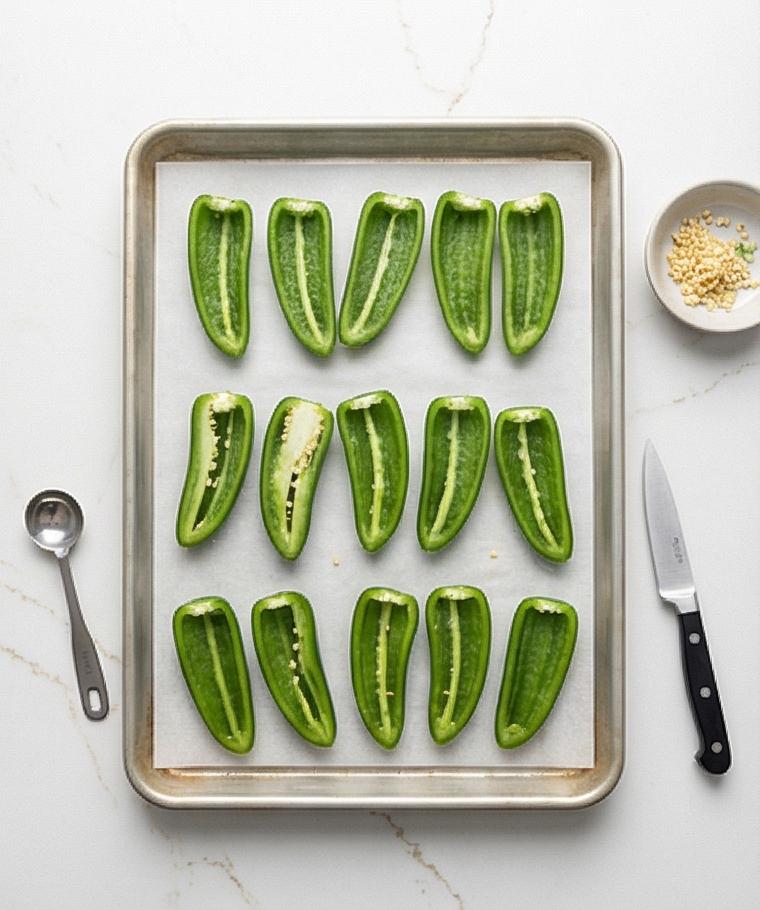
Wearing gloves if you prefer, slice each jalapeño lengthwise from stem to tip, keeping the stem attached when possible for a tidy presentation. Use a small spoon or paring knife to scrape out and discard the seeds and white membranes (leave a little membrane only if you want extra heat). Arrange the cleaned, dried jalapeño halves cut-side up on the prepared rimmed baking sheet in a single stable layer so they sit flat and don’t tip.
Step 3: Optional heat-reducing soak and dry
If you want milder poppers, place the cleaned halves in a bowl of cold water for 10–15 minutes, then drain and pat completely dry—moisture will make the filling runny. After soaking and drying, re-check that the jalapeño halves sit flat on the lined baking sheet; reposition any that need stabilizing.
Step 4: Combine the cheese filling until smooth
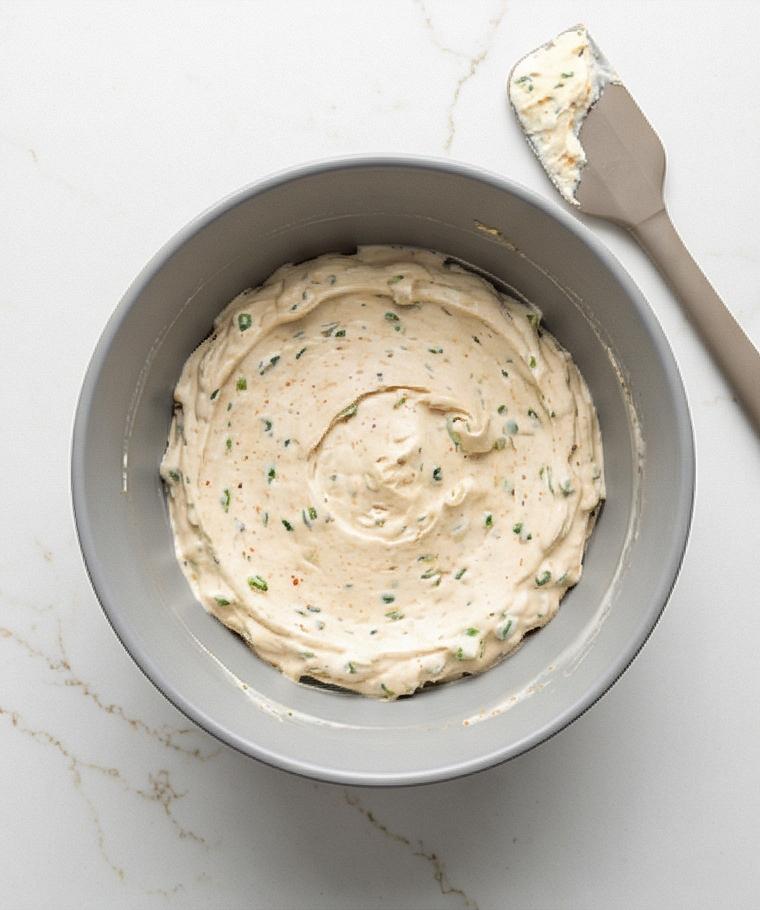
In a medium matte grey mixing bowl add room-temperature cream cheese, shredded sharp cheddar, grated Parmesan, finely sliced green onions, minced garlic, fine sea salt, freshly ground black pepper, smoked paprika and the optional cayenne. Use a sturdy spoon or rubber spatula to mix until the mixture is thoroughly combined, smooth and homogenous with visible flecks of green onion and paprika but no streaks of plain cream cheese. The texture should be creamy, slightly glossy, and scoopable.
Step 5: Taste and fold in optional bacon
Taste a tiny dab of the cheese mix (only if no raw bacon was added) and adjust seasoning with a small pinch more salt or pepper as needed. If using fully cooked, crisp bacon, fold the finely chopped bacon gently into the cheese mixture until evenly distributed; the bacon pieces should be suspended through the filling without breaking it up. Set the filling near the baking sheet so the same spoon and bowl remain visually consistent.
Step 6: Prepare the buttered panko and fill the peppers
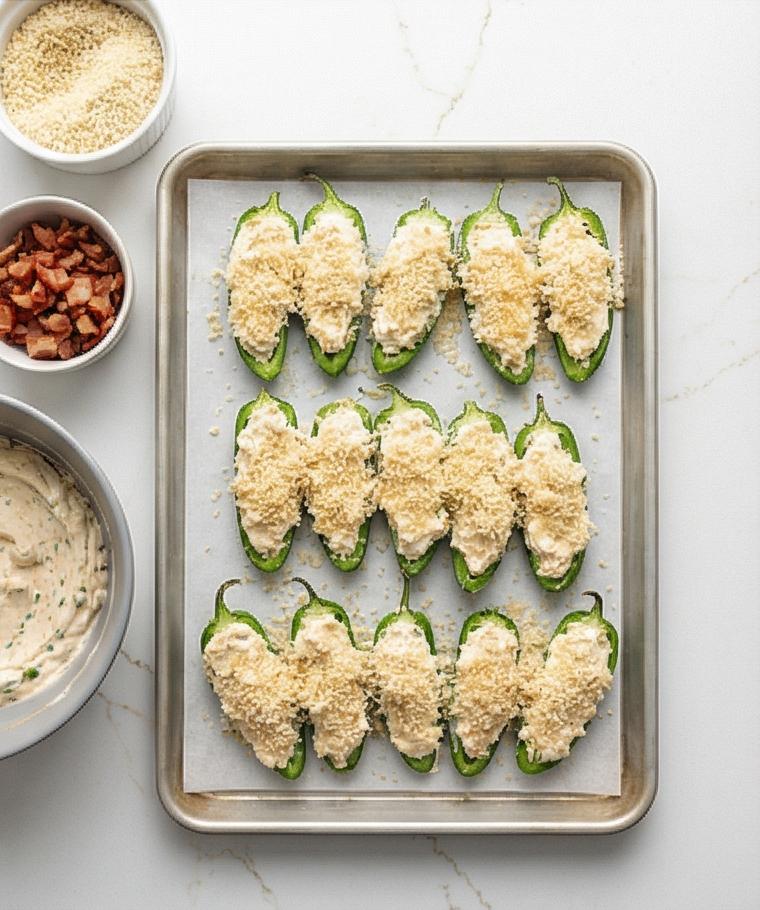
In a small bowl combine panko breadcrumbs with the melted, slightly cooled butter, stirring until the crumbs look damp and clumpy. Using a small spoon or a piping bag, fill each jalapeño half generously but not overfilled—press the filling gently so it reaches the tip and mounds just above the rim. Sprinkle and press the buttered panko evenly over each filled pepper so the crumbs adhere. Use the same rimmed baking sheet and keep the small bowl of panko and the mixing bowl nearby to retain utensil consistency.
Step 7: Bake until bubbling and golden, then rest
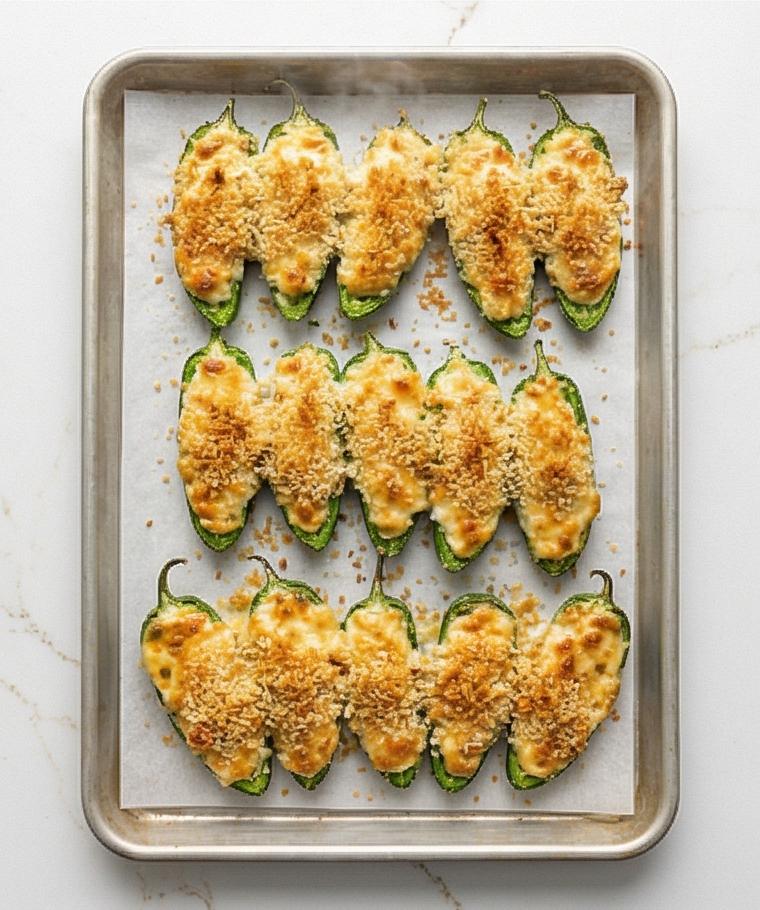
Place the baking sheet on the center rack (this is the oven action; do not show the oven). Bake at 400°F (200°C) for 18–22 minutes until the jalapeños are tender, the cheese is bubbling, and the panko is golden brown. If needed, briefly broil 1–2 minutes to deepen browning—watch carefully to avoid burning. Remove the rimmed baking sheet to the quartz surface and let the poppers rest 5–10 minutes so the filling firms up slightly and is safe to handle.
Step 8: Transfer, garnish and serve warm
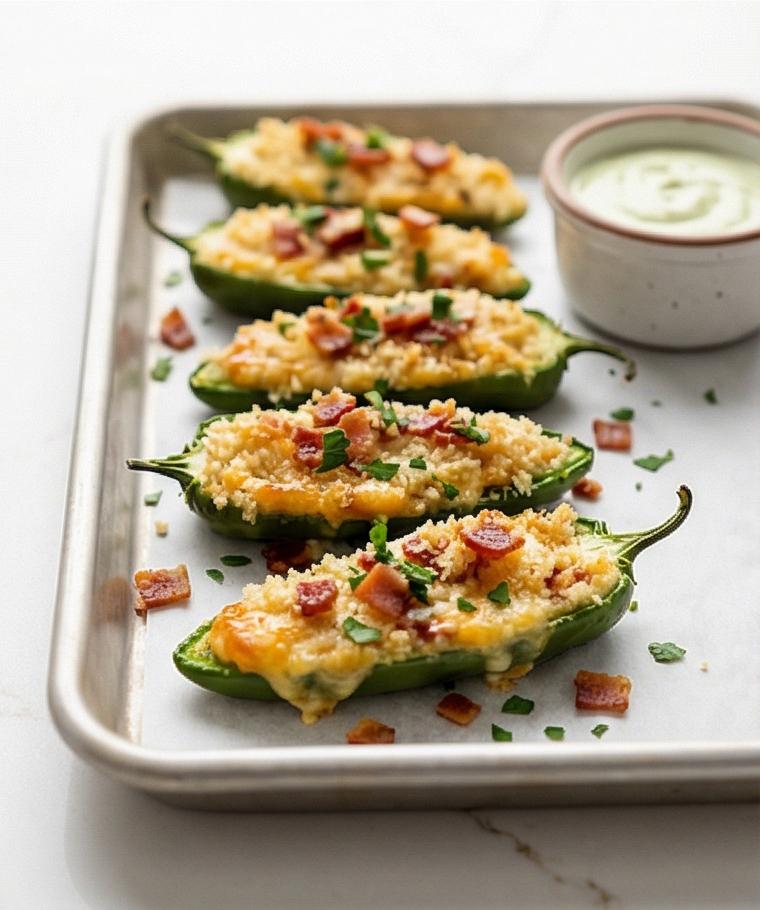
Using a small spatula or tongs, transfer the finished jalapeño poppers onto the same rectangular geometry for serving (a rimmed rectangular tray or the lined baking sheet works best). Garnish lightly with finely chopped fresh parsley or cilantro if desired and present with a small ramekin of ranch or lime crema on the side. Serve warm; leftovers may be cooled and refrigerated in an airtight container for up to 3 days.
Making It Your Own
I like to tinker with this Jalapeño Poppers Recipe depending on the season. In summer I add fresh corn kernels and a little lime zest to the filling for bright contrast. For a vegetarian holiday plate I swap finely chopped roasted mushrooms for bacon and fold in smoked cheddar to keep that savory punch. If you want more heat, try stuffing with pepper jack or leaving some seeds and membranes; for a milder version soak the halves briefly in cold water before filling. These small experiments keep the recipe lively and make it easy to adapt to guests with different tastes.
How to Serve
Think about pacing when you bring these out to guests. For a cocktail party, arrange the poppers on a long tray with small forks and a ramekin of ranch and a quick lime crema so people can mix flavors. For a family dinner, serve them as an appetizer on a shared platter with extra napkins and a crisp green salad. If you need to stretch the batch, halve the popper servings and add veggie sticks and chips to the board. Warm them briefly in a 350°F oven for 5 minutes before serving if they have chilled.
Storage and Reheating
Leftover Jalapeño Poppers Recipe keeps well in an airtight container in the refrigerator for up to 3 days. Let them cool to room temperature before refrigerating to avoid sogginess from trapped steam. To reheat, place them on a baking sheet and warm in a 350°F oven for about 8 to 10 minutes until heated through and the panko regains some crunch.
For longer storage, freeze unbaked filled jalapeño halves on a tray until firm and then transfer to a labeled freezer bag; bake from frozen but add a few extra minutes to the cook time. Reheating from frozen works best in a hot oven rather than a microwave so the texture stays close to original.
Common Mistakes and How to Avoid Them
Overfilling the peppers can cause a messy bake; scoop and press the filling so it reaches close to the tip but does not mound excessively. If the filling spills, dab away excess with a paper towel before baking.
Not drying the peppers after an optional soak will make the filling runny and the panko won’t stick. Pat the halves completely dry and press the crumbs into the cheese filling so they adhere before baking.
Final Thoughts
I hope this Jalapeño Poppers Recipe becomes a go-to in your kitchen the way it is in mine. It rewards simple attention to texture and seasoning, and it adapts easily to what you have on hand. Make a batch, invite a few friends, and watch how quickly the tray clears.
Frequently Asked Questions
- Can I make this Jalapeño Poppers Recipe ahead of time? Yes, you can prep and fill the peppers a few hours ahead; keep them covered in the refrigerator and bake just before serving.
- How do I make the poppers less spicy? Remove the seeds and white membranes and optionally soak the pepper halves in cold water for 10 to 15 minutes before drying and filling.
- Can I make these gluten free? Absolutely, swap the panko for gluten-free breadcrumbs or crushed gluten-free cereal and follow the same buttering step.
- Is there a vegetarian version that still has a savory bite? Yes, omit the bacon and add finely chopped roasted mushrooms or sun-dried tomatoes and use smoked cheddar to keep a meaty depth.
- What dipping sauces pair best? Ranch, lime crema, or a simple yogurt and cilantro dip all complement the creamy filling and the pepper heat.
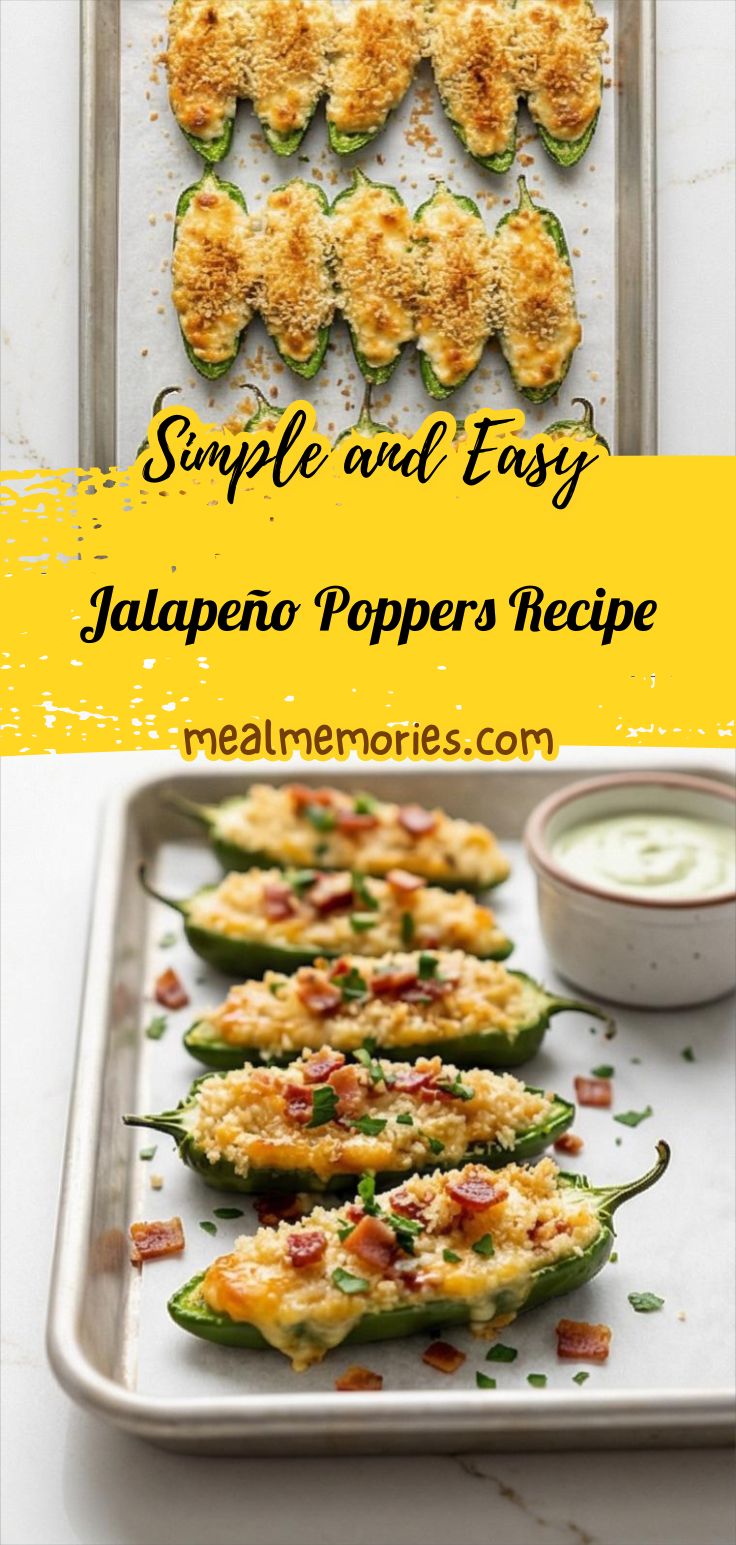
Jalapeño Poppers Recipe
Make Jalapeño Poppers Recipe: creamy, cheesy jalapeños with a crisp panko topping; perfect for parties and weeknights.
Ingredients
Instructions
Step 1: Preheat and prepare the work surface
Preheat the oven to 400°F (200°C). Line a rectangular rimmed baking sheet with parchment paper or aluminum foil and lightly spray the lined surface with a neutral cooking oil spray so the poppers won’t stick. Keep the prepared sheet on the engineered quartz surface so it’s ready to receive the peppers; this is your primary rectangular tool and will reappear later.
Step 2: Halve and clean the jalapeños
Wearing gloves if you prefer, slice each jalapeño lengthwise from stem to tip, keeping the stem attached when possible for a tidy presentation. Use a small spoon or paring knife to scrape out and discard the seeds and white membranes (leave a little membrane only if you want extra heat). Arrange the cleaned, dried jalapeño halves cut-side up on the prepared rimmed baking sheet in a single stable layer so they sit flat and don’t tip.
Step 3: Optional heat-reducing soak and dry
If you want milder poppers, place the cleaned halves in a bowl of cold water for 10–15 minutes, then drain and pat completely dry—moisture will make the filling runny. After soaking and drying, re-check that the jalapeño halves sit flat on the lined baking sheet; reposition any that need stabilizing.
Step 4: Combine the cheese filling until smooth
In a medium matte grey mixing bowl add room-temperature cream cheese, shredded sharp cheddar, grated Parmesan, finely sliced green onions, minced garlic, fine sea salt, freshly ground black pepper, smoked paprika and the optional cayenne. Use a sturdy spoon or rubber spatula to mix until the mixture is thoroughly combined, smooth and homogenous with visible flecks of green onion and paprika but no streaks of plain cream cheese. The texture should be creamy, slightly glossy, and scoopable.
Step 5: Taste and fold in optional bacon
Taste a tiny dab of the cheese mix (only if no raw bacon was added) and adjust seasoning with a small pinch more salt or pepper as needed. If using fully cooked, crisp bacon, fold the finely chopped bacon gently into the cheese mixture until evenly distributed; the bacon pieces should be suspended through the filling without breaking it up. Set the filling near the baking sheet so the same spoon and bowl remain visually consistent.
Step 6: Prepare the buttered panko and fill the peppers
In a small bowl combine panko breadcrumbs with the melted, slightly cooled butter, stirring until the crumbs look damp and clumpy. Using a small spoon or a piping bag, fill each jalapeño half generously but not overfilled—press the filling gently so it reaches the tip and mounds just above the rim. Sprinkle and press the buttered panko evenly over each filled pepper so the crumbs adhere. Use the same rimmed baking sheet and keep the small bowl of panko and the mixing bowl nearby to retain utensil consistency.
Step 7: Bake until bubbling and golden, then rest
Place the baking sheet on the center rack (this is the oven action; do not show the oven). Bake at 400°F (200°C) for 18–22 minutes until the jalapeños are tender, the cheese is bubbling, and the panko is golden brown. If needed, briefly broil 1–2 minutes to deepen browning—watch carefully to avoid burning. Remove the rimmed baking sheet to the quartz surface and let the poppers rest 5–10 minutes so the filling firms up slightly and is safe to handle.
Step 8: Transfer, garnish and serve warm
Using a small spatula or tongs, transfer the finished jalapeño poppers onto the same rectangular geometry for serving (a rimmed rectangular tray or the lined baking sheet works best). Garnish lightly with finely chopped fresh parsley or cilantro if desired and present with a small ramekin of ranch or lime crema on the side. Serve warm; leftovers may be cooled and refrigerated in an airtight container for up to 3 days.
Notes
- Use gloves when seeding jalapeños to avoid skin and eye irritation
- Pat peppers completely dry after soaking to prevent runny filling
- Make filling ahead and refrigerate up to a few hours before baking
- For extra crispness, broil 1 to 2 minutes at the end while watching closely
- Freeze unbaked filled peppers on a tray then bag for longer storage