The Bacon-wrapped Dates Recipe feels like a little celebration in every bite. I first learned to make this Bacon-wrapped Dates Recipe at a cramped holiday party where the platter never lasted more than ten minutes. Sweet, salty, creamy and crisp all at once, these bites are the kind of thing I bring when I want people to linger and talk. I still make them the same way now, with the same small rituals that turn simple ingredients into an irresistible appetizer.
How This Recipe Became My Party-Perfect Go-To
The first time I tried the Bacon-wrapped Dates Recipe I was nervous about the salt-to-sweet balance, but that first tray taught me a lot about timing and patience. I remember the smell of syrup and bacon fat in the kitchen, the tiny pops of honey caramelizing as the oven did its work, and the way people leaned in to take the first warm bite. It felt like a small magic trick: one minute the dates looked humble, the next they were the star of the table. There was the quiet satisfaction of someone closing their eyes and smiling after that first chew, and I still get the same little rush every time a guest asks for the recipe.
The Ingredients That Make It Sing
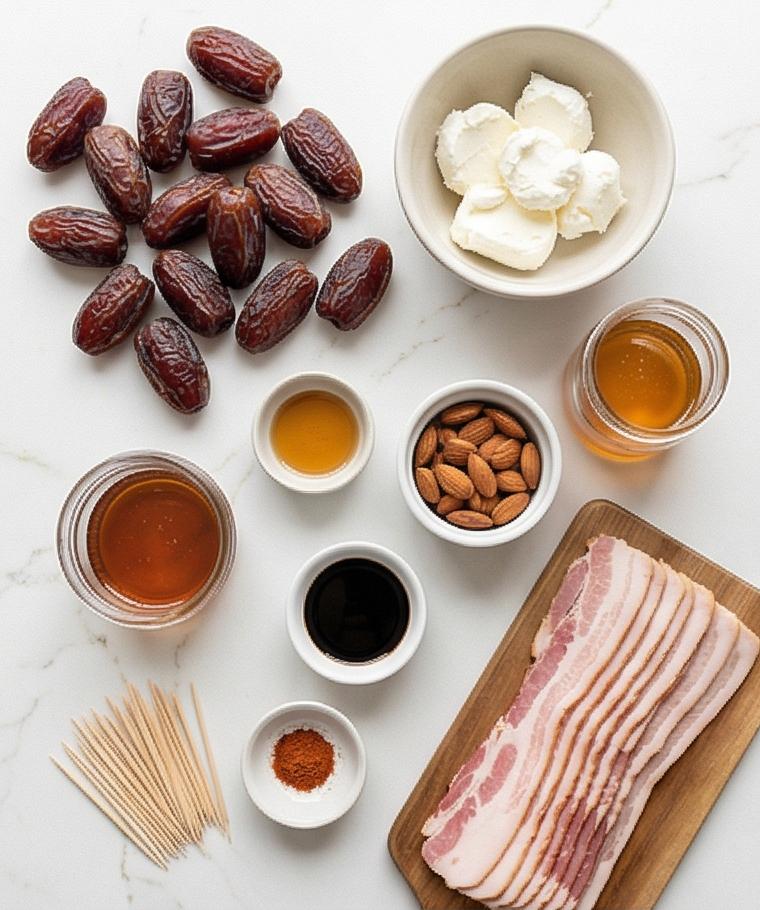
These ingredients are the backbone of the Bacon-wrapped Dates Recipe. I keep things simple and pick the best quality I can find so the flavor needs little help.
- Medjool Dates: The sweet, caramel-like base. Pick plump, glossy dates; they should be tender but not dried out. Substitute with large Deglet Noor if needed, but soak briefly if they seem firm.
- Bacon: The crisp, savory wrapper. Thin-cut cooks evenly and crisps quickly; use center-cut or thick if you want more chew but expect longer cook time.
- Goat Cheese + Cream Cheese: Creamy filling that balances sugar and salt. Use goat cheese for tang and cream cheese for stability. Mascarpone can be a substitute for extra silkiness.
- Almonds: Optional crunch. Use roasted unsalted almonds or toasted walnuts for a different texture.
- Maple, Balsamic, Cayenne: Optional glaze ingredients that add shine, acidity, and heat; adjust proportions to taste.
Essential Kitchen Tools and Why They Matter
A few reliable tools turn this into an easy, calm process. You do not need a fancy setup, but the right pieces will save time and keep things tidy.
- Rimmed baking sheet and wire rack: The rack keeps dates crisp by letting fat drip away; if you do not have a rack, place them on a foil-lined sheet and flip them toward the end to crisp both sides.
- Small sharp knife: For precise slits in the dates; dull blades bruise fruit.
- Mixing bowl and spoon or piping bag: For the cheese filling; a piping bag makes filling neater, but a spoon works perfectly well.
- Tongs and flat spatula: For turning and transferring the hot dates; use silicone-tipped tongs if you have them to avoid scratching nonstick surfaces.
- Small brush (optional): Helpful for glazing; a spoon works in a pinch.
Step-by-Step Preparation Guide
Step 1: Prep the oven and the baking station
Preheat the oven to 400°F (200°C). Line a rimmed rectangular baking sheet with parchment paper or aluminum foil, then place a metal wire rack on top so rendered bacon fat can drip away and the pieces crisp evenly. Keep a small pair of tongs and a flat baking spatula nearby on the same surface for later—these will persist as the logical tools through the next panels.
Step 2: Prepare the dates and optional almonds
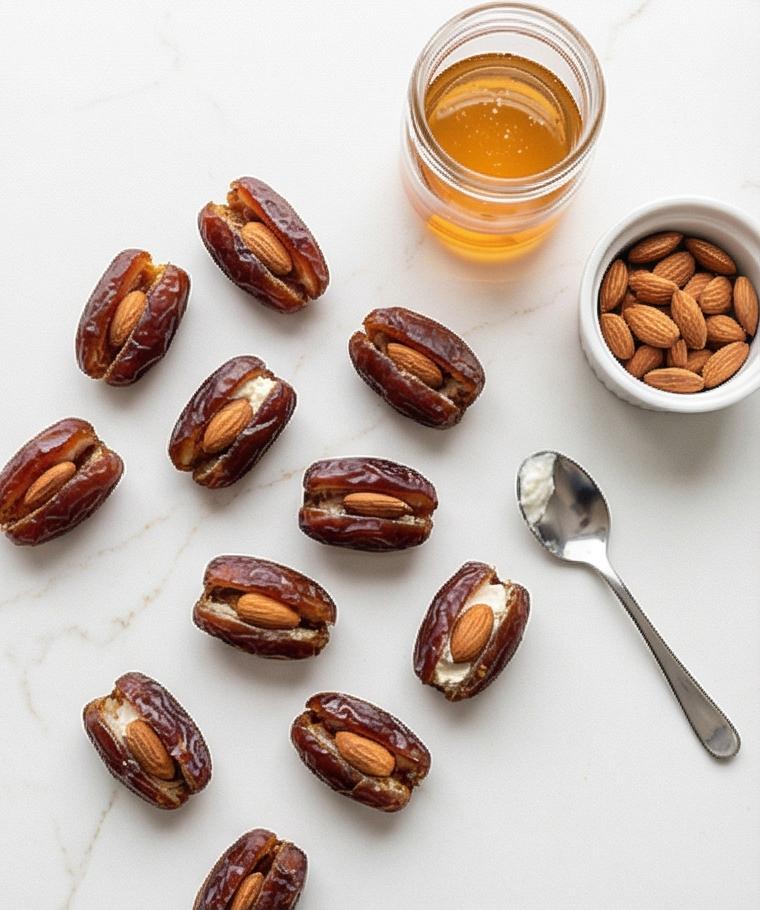
Using a small sharp knife, make a lengthwise slit in each Medjool date and gently remove the pit, keeping one side intact so the fruit can close around a filling. If using the roasted almonds, tuck one almond into each pitted date’s cavity and press the date closed so a small pocket remains for cheese. Arrange the pitted (and almond-filled) dates in a tidy cluster on the quartz surface beside a small glass jar of honey and a small ceramic ramekin holding the almonds.
Step 3: Make and spoon the cheese filling
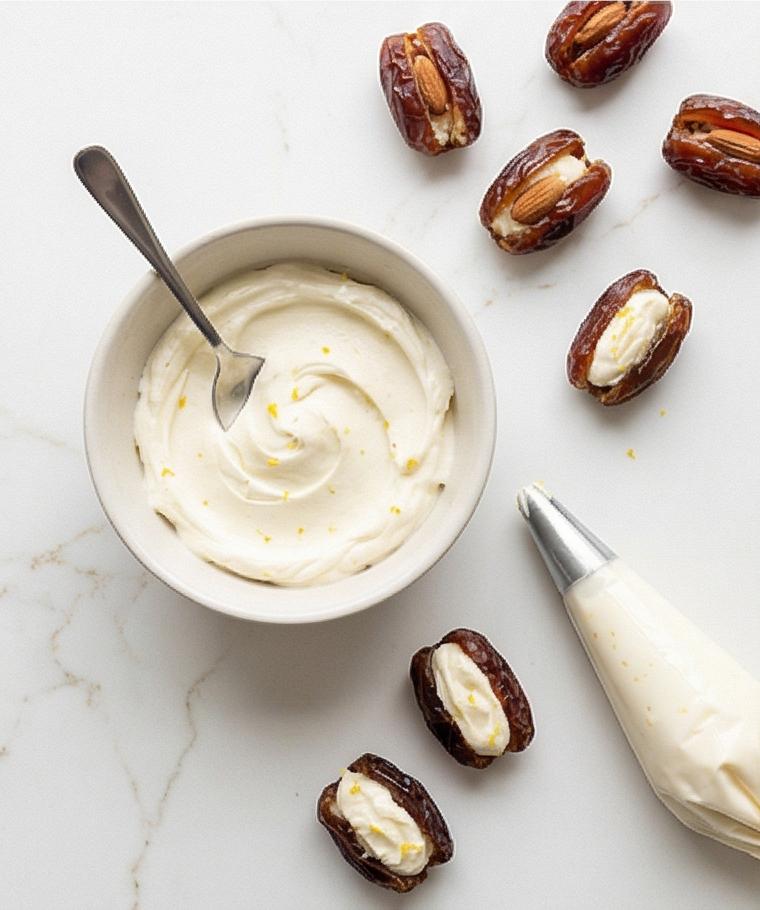
In a small matte off-white ceramic bowl combine soft goat cheese, cream cheese, lemon zest (if using), honey, salt and pepper. Mash and stir with a small stainless spoon until the mixture is completely smooth and glossy. Using the spoon or a small piping bag, fill each date with about 1–1½ teaspoons of the cheese mixture so a little creamy peak shows but the date can still close. Keep the mixing bowl and the same stainless spoon visible nearby as evidence of continuity.
Step 4: Wrap with bacon and secure
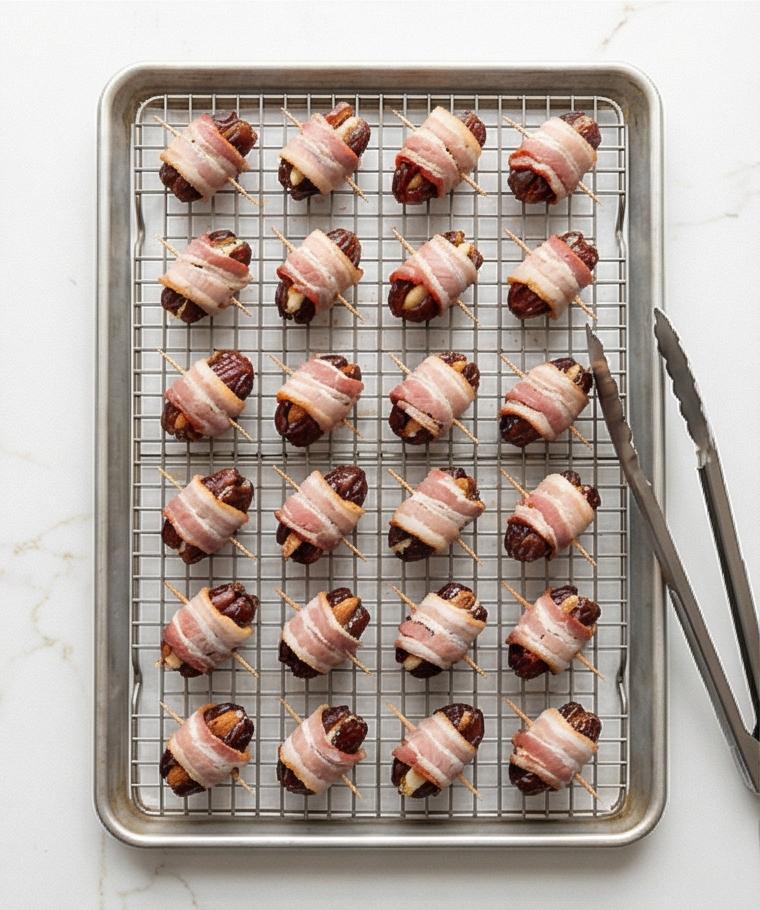
Cut each thin-cut bacon slice in half crosswise. Place a filled date near the end of a bacon piece and roll it so the bacon fully encircles the date; secure each with a small wooden toothpick pushed through the seam. Lay each wrapped date seam-side down in orderly rows on the wire rack set over the prepared rectangular baking sheet, about ½ inch apart. Show the bacon pieces aligned and the tines of the tongs resting beside the rack.
Step 5: Roast, turn, glaze and rest
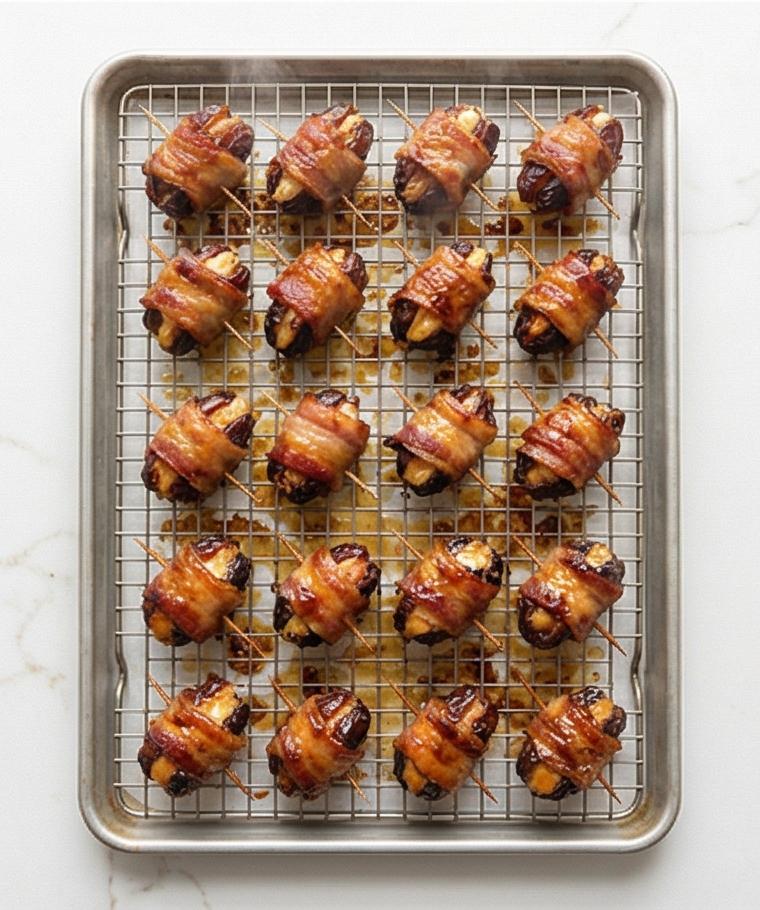
Bake on the rack until the bacon begins to render and color (first stage), then turn each piece with tongs and continue roasting until the bacon is deep golden and crisp and the cheese is just bubbling. If using the optional maple-balsamic-cayenne glaze, brush each hot date lightly and return to the rack briefly until the glaze is shiny and slightly caramelized. After removing from the oven, let the dates cool on the rack for 5–10 minutes so the filling sets slightly. Arrange several finished pieces on the rack showing glossy glaze, crisp ridges, and a tiny puddle of caramelized glaze at the base of a date.
Step 6: Transfer and serve on a rectangular platter
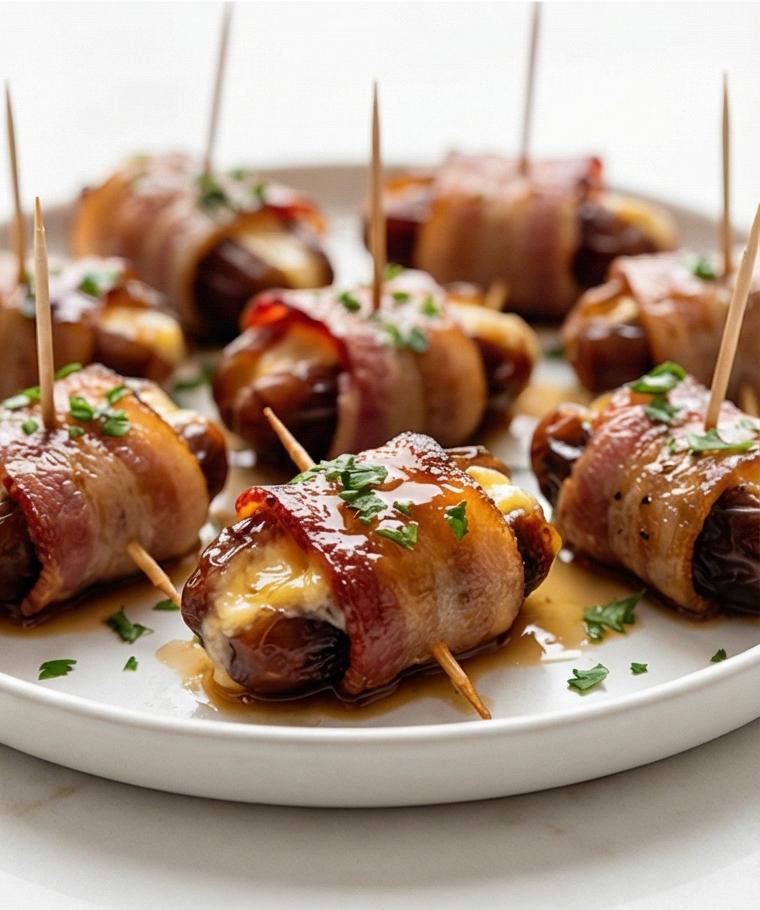
Carefully transfer the warm bacon-wrapped dates to a low rectangular matte-white ceramic platter that echoes the baking sheet’s geometry. Keep a few toothpicks inserted, sprinkle finely chopped flat-leaf parsley for a bright, green contrast, and let the platter sit on the same Calacatta-mimic quartz surface. Capture a very-close eye-level view that highlights the crispy bacon texture, the shiny glaze, and the creamy cheese just peeking from a split date.
Making It Your Own
I like to think of variations as small experiments that reveal new personalities in the Bacon-wrapped Dates Recipe. Try swapping the goat cheese for blue cheese if you want a bolder bite; a little goes a long way and guests tend to be surprised by how well it works. For a vegetarian-friendly version swap bacon for roasted thin eggplant ribbons brushed with olive oil and crisped under the broiler for a smoky vibe.
Seasonal twists work well: in winter I add a sprinkle of crushed roasted pistachios for color and texture, and in summer I lighten the glaze with lemon juice instead of balsamic. If you want a spicier regional spin, use smoked paprika and a touch of chipotle in the glaze. Each tweak teaches you more about balance and what your crowd prefers.
How to Serve
When I host, presentation matters as much as flavor. Arrange the Bacon-wrapped Dates Recipe on a low rectangular platter with the toothpicks still in place so guests can grab them easily. A scattering of chopped parsley or pistachios adds color and crunch.
For larger parties, double the batch and keep one sheet warm in a low 200°F oven while you finish the second so everything is served hot. If you are doing a plated appetizer course, place three dates per plate with a small arugula salad and a drizzle of glaze. For a casual buffet, tuck small cocktail napkins under the platter and include an extra bowl of glaze for dipping.
Storage and Reheating Tips
Leftovers keep well for a day or two in the refrigerator. Store the bacon-wrapped dates in a single layer or with parchment between layers to prevent sticking. Bring them to room temperature before reheating so the filling does not separate.
To reheat, place them on a wire rack over a sheet pan in a 350°F oven for 6 to 8 minutes just to warm through and re-crisp the bacon. Avoid microwaving unless you are in a rush; microwaves make the bacon chewy and the filling may become too soft.
Common Mistakes and How to Avoid Them
The most common slip is overfilling dates, which makes them hard to wrap and encourages filling to leak out. Use 1 to 1½ teaspoons of the cheese mixture and leave a little room so the date can close.
Another mistake is undercooking or overcrowding the pan. Give each date breathing room on a rack so air circulates and the bacon crisps evenly. If you rush the process at too high a temperature, the bacon may burn before the cheese softens.
Final Thoughts
I hope you give the Bacon-wrapped Dates Recipe a try at your next gathering. They are forgiving, adaptable, and always disappear fast, which is exactly why they have a permanent spot in my entertaining playbook. Let these bites be your little celebration starter.
Frequently Asked Questions.
-
Can I make the Bacon-wrapped Dates Recipe ahead of time?
Yes. You can assemble and refrigerate them for up to 24 hours; bake them just before serving for best texture. -
What can I use instead of goat cheese?
Cream cheese alone, mascarpone, or a small amount of blue cheese for a sharper flavor all work well depending on how tangy you want the filling. -
How do I keep the bacon from getting soggy?
Use a wire rack during baking so fat drains away, and avoid stacking cooked dates until they are cool enough for the bacon to stay crisp. -
Can I make these vegetarian?
Yes. Swap bacon for roasted eggplant or thinly sliced and brushed zucchini ribbons broiled until crisp; results will be different but tasty. -
How should I serve them at a party?
Serve warm on a platter with toothpicks and a small bowl of extra glaze on the side for dipping.
Bacon-wrapped Dates Recipe
Make Bacon-wrapped Dates Recipe: stuff Medjool dates with goat cheese, wrap in bacon, roast until crisp and serve warm.
Ingredients
Instructions
Step 1: Prep the oven and the baking station
Preheat the oven to 400°F (200°C). Line a rimmed rectangular baking sheet with parchment paper or aluminum foil, then place a metal wire rack on top so rendered bacon fat can drip away and the pieces crisp evenly. Keep a small pair of tongs and a flat baking spatula nearby on the same surface for later—these will persist as the logical tools through the next panels.
Step 2: Prepare the dates and optional almonds
Using a small sharp knife, make a lengthwise slit in each Medjool date and gently remove the pit, keeping one side intact so the fruit can close around a filling. If using the roasted almonds, tuck one almond into each pitted date’s cavity and press the date closed so a small pocket remains for cheese. Arrange the pitted (and almond-filled) dates in a tidy cluster on the quartz surface beside a small glass jar of honey and a small ceramic ramekin holding the almonds.
Step 3: Make and spoon the cheese filling
In a small matte off-white ceramic bowl combine soft goat cheese, cream cheese, lemon zest (if using), honey, salt and pepper. Mash and stir with a small stainless spoon until the mixture is completely smooth and glossy. Using the spoon or a small piping bag, fill each date with about 1–1½ teaspoons of the cheese mixture so a little creamy peak shows but the date can still close. Keep the mixing bowl and the same stainless spoon visible nearby as evidence of continuity.
Step 4: Wrap with bacon and secure
Cut each thin-cut bacon slice in half crosswise. Place a filled date near the end of a bacon piece and roll it so the bacon fully encircles the date; secure each with a small wooden toothpick pushed through the seam. Lay each wrapped date seam-side down in orderly rows on the wire rack set over the prepared rectangular baking sheet, about ½ inch apart. Show the bacon pieces aligned and the tines of the tongs resting beside the rack.
Step 5: Roast, turn, glaze and rest
Bake on the rack until the bacon begins to render and color (first stage), then turn each piece with tongs and continue roasting until the bacon is deep golden and crisp and the cheese is just bubbling. If using the optional maple-balsamic-cayenne glaze, brush each hot date lightly and return to the rack briefly until the glaze is shiny and slightly caramelized. After removing from the oven, let the dates cool on the rack for 5–10 minutes so the filling sets slightly. Arrange several finished pieces on the rack showing glossy glaze, crisp ridges, and a tiny puddle of caramelized glaze at the base of a date.
Step 6: Transfer and serve on a rectangular platter
Carefully transfer the warm bacon-wrapped dates to a low rectangular matte-white ceramic platter that echoes the baking sheet’s geometry. Keep a few toothpicks inserted, sprinkle finely chopped flat-leaf parsley for a bright, green contrast, and let the platter sit on the same Calacatta-mimic quartz surface. Capture a very-close eye-level view that highlights the crispy bacon texture, the shiny glaze, and the creamy cheese just peeking from a split date.
Notes
- Use plump Medjool dates for best texture and easy stuffing.
- If dates are firm, soak in warm water for 10 minutes and pat dry before using.
- Keep bacon slices thin-cut for quicker, even crisping.
- Assemble ahead but bake just before serving for peak crispness.
- Reheat on a wire rack in a 350°F oven to re-crisp bacon.
- Use a piping bag for neater filling if making a large batch.