Buffalo Wings Recipe has been my go-to party trick for years: crisp skin, spicy tang, and that addicting glossy sauce that clings to every nook. I first learned to make this Buffalo Wings Recipe late one winter when friends dropped by and I needed something fast, bold, and totally shareable. The smell of hot sauce and melting butter in a warm kitchen still brings me back to that night. If you love wings that are crisp on the outside and juicy inside, this Buffalo Wings Recipe will become your shortcut to instant applause.
How This Recipe Became My Rainy-Day Favorite
I remember the first time I made these wings in a tiny apartment kitchen while rain drummed on the windows. The sound of oil heating and the bright orange swirl of sauce felt like a small celebration. I stood by the stove flipping wings and inhaling that sharp vinegar-and-chili scent, and when guests bit into them there was a little cheer. The contrast between the blistered, crackly skin and the warm, buttery heat of the sauce still feels like comfort and excitement at the same time. Those evenings taught me how simple techniques – drying the skin, frying in batches, and tossing while hot – turn ordinary chicken into something memorable.
Primary Ingredients and Why They Matter
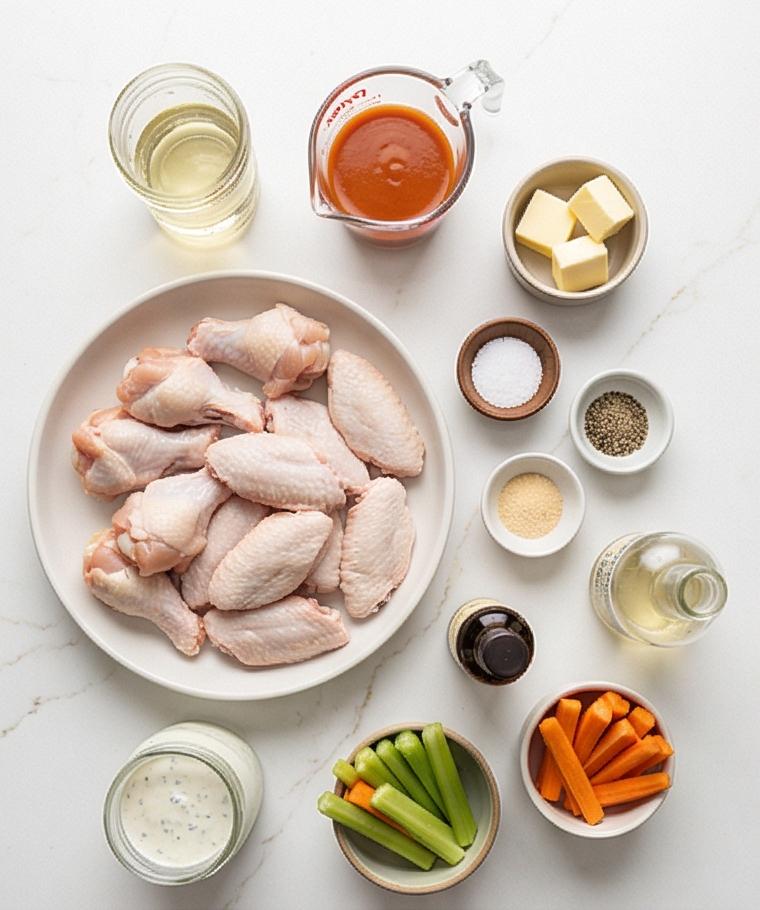
- Chicken Wings: The canvas for everything; choose fresh or fully thawed wings separated into drumettes and flats. For me, meat-to-skin ratio matters, so pick meaty pieces. Substitute: bone-in thighs for a different cut.
- Hot Sauce: The flavor backbone. Frank’s-style cayenne hot sauce gives the classic tang. Substitute: other vinegary hot sauces but adjust salt.
- Unsalted Butter: Adds gloss and richness to the sauce; use unsalted to control seasoning. Substitute: ghee or vegan butter.
- Vegetable Oil: Neutral oil with a high smoke point is essential for deep-frying crisp skin. Substitute: peanut oil for extra flavor.
- Blue Cheese Dressing and Veg Sticks: Cool, creamy counterpoint and crisp crudites for balance.
Essential Kitchen Tools and Why They Help
A few reliable tools make this recipe easy and safe. A heavy pot or deep fryer keeps oil temperature steady so wings crisp evenly; a thermometer is worth the few dollars to avoid undercooking or burning. A wire cooling rack with a rimmed baking sheet underneath lets drained wings stay crisp, while tongs keep you safe and precise when moving hot pieces. Use a heatproof ladle or small pouring jug to keep the sauce warm for quick coating. Alternatives: use an air fryer (longer time) or an oven with a wire rack if you can’t deep-fry.
- Large heavy pot or deep fryer: maintains stable frying temp.
- Cooking thermometer: ensures safe oil and meat temperatures.
- Wire rack and rimmed baking sheet: for draining and crisping.
- Tongs: for safe, even handling.
- Large matte bowl: for seasoning and tossing.
- Small heatproof vessel or ladle: to make and pour the sauce.
Step-by-Step Preparation Guide
Step 1: Prep the wings
Rinse each wing briefly under cold running water, then pat every piece thoroughly dry with paper towels until the skin is matte and free of surface moisture; remove and reserve wing tips if desired for stock. Lay the wings out in a single layer on a clean plate or tray for a few minutes to come to room temperature—this reduces splatter and helps the skin crisp uniformly when fried.
Step 2: Season and rest the wings
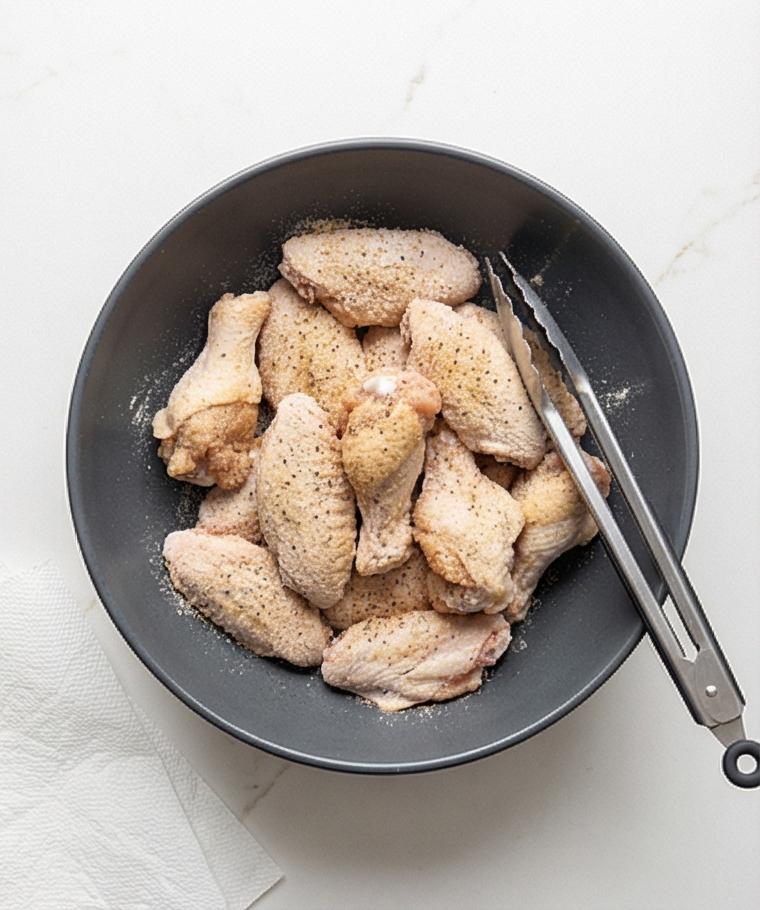
Place the dried wings into a single large matte charcoal ceramic bowl. Sprinkle evenly with kosher salt, freshly ground black pepper, and garlic powder; toss gently so each drumette and flat is evenly coated and the spices cling to the dry skin. Let the seasoned wings sit in the bowl at room temperature for 20–30 minutes to take the chill off the meat and allow the seasoning to penetrate.
Step 3: Fry until deeply crisp and drain
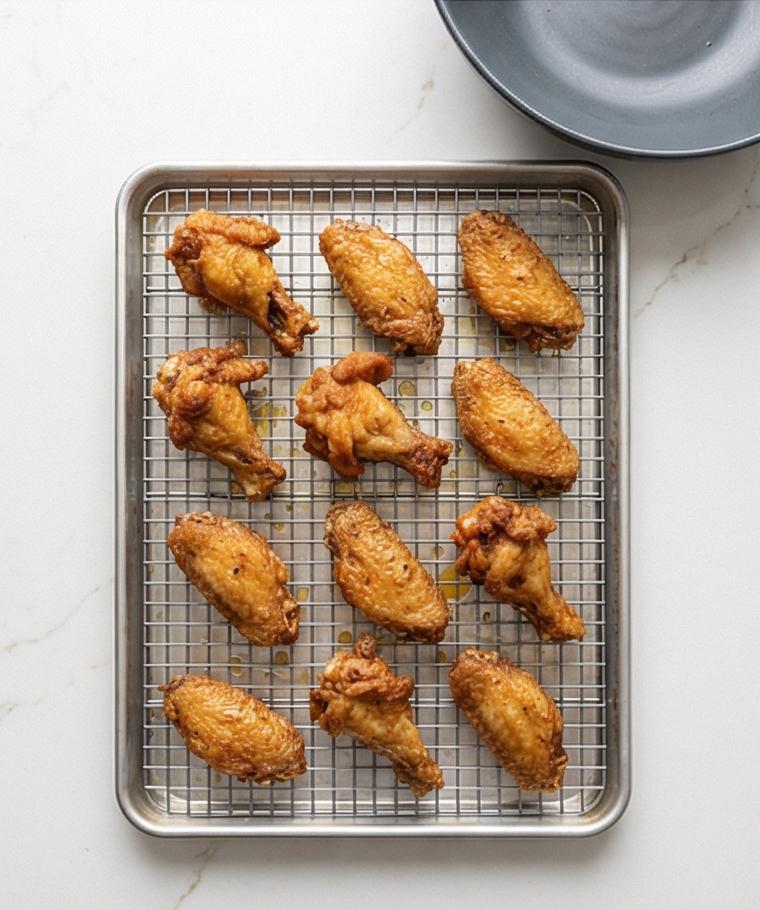
Working in batches, fry the wings until the skin is deep golden-brown, blistered, and very crisp; drain each finished batch on a wire cooling rack set over a rimmed baking sheet so excess oil returns to the pan and the skin stays textured. Transfer wings to the rack in single layers and, while still hot, sprinkle very lightly with a pinch of salt if desired. Keep the matte charcoal bowl nearby (empty or holding a small pinch of salt) so the same vessel remains the consistent tool in the workflow.
Step 4: Make the glossy Buffalo sauce
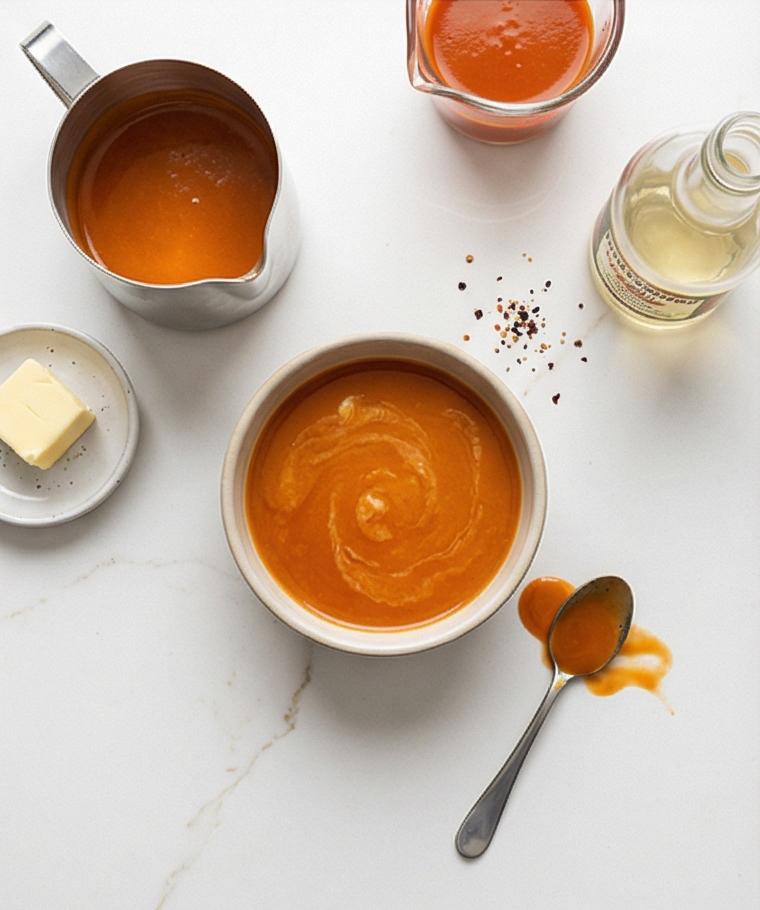
In a small heatproof vessel off the stove, combine the hot sauce, small cubes of butter, distilled white vinegar, Worcestershire, garlic powder, a touch of cayenne if you like extra heat, and a pinch of salt and pepper; stir until the butter is fully melted and the sauce is smooth and slightly thickened into a glossy orange emulsion. Keep the sauce warm in a small stainless ladle or pouring jug ready for coating.
Step 5: Toss the hot wings in sauce and rest briefly
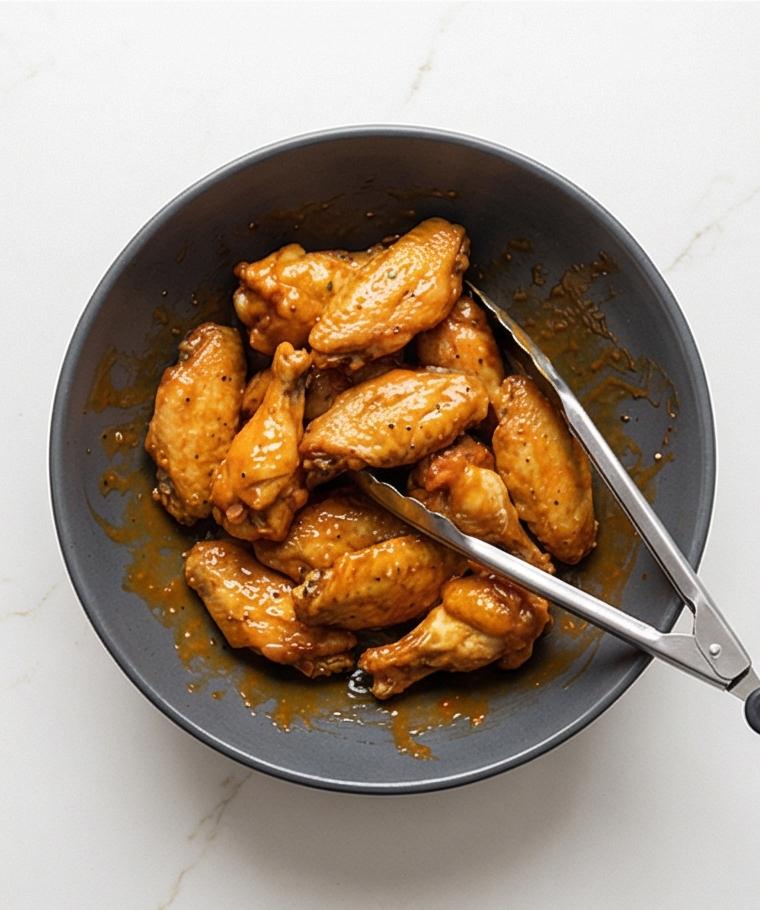
Return the hot, drained wings to the same matte charcoal ceramic bowl; pour the warm Buffalo sauce over the wings and toss vigorously with tongs until every piece is evenly coated in a glossy, clinging glaze. Let the sauced wings rest in the bowl for 2–3 minutes so the sauce settles into the skin’s creases while preserving crunch.
Step 6: Arrange the platter, garnish, and serve
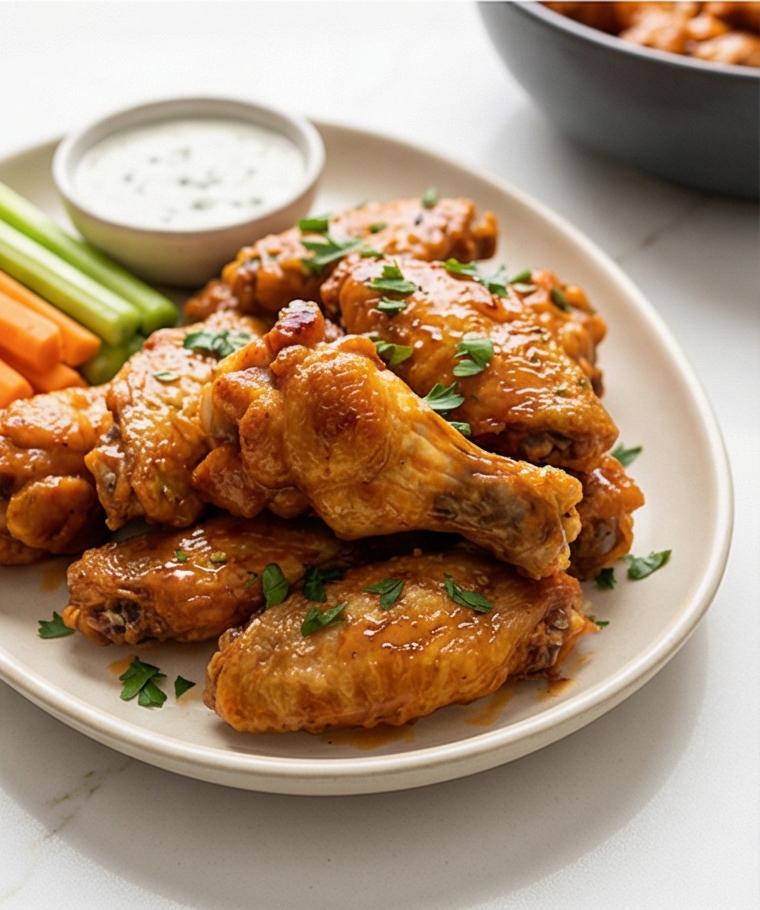
Arrange the sauced wings on a warm, shallow serving platter piled for an attractive, rustic mound. On the same surface place celery and carrot sticks trimmed into 3-inch batons and a small chilled bowl of blue cheese dressing for dipping; sprinkle chopped flat-leaf parsley over the wings if using. Serve immediately while the skin is piping hot and the sauce is glossy and clingy.
Making It Your Own
I like to experiment depending on mood and season. For a lower-fat twist, try oven-roasting at high heat on a wire rack and finishing with the warm sauce; you lose some blistered texture but keep a lot of flavor. For smoke lovers, toss the wings quickly on a hot grill after frying for a hint of char. If you want sweet heat, add a tablespoon of honey to the sauce and finish with a squeeze of lime for brightness.
For a vegetarian option, cauliflower florets make a lovely stand-in: batter or coat and roast until crisp, then toss in the Buffalo sauce. Regional spins work well too: add smoked paprika and a touch of maple for a Canadian twist, or swap blue cheese for ranch in the South.
How to Serve
When hosting, warm the serving platter so the wings stay hotter longer. Arrange wings in a rustic pile and place small bowls of blue cheese dressing and extra hot sauce nearby. For a casual game-night spread, set up a station with celery, carrots, pickles, and napkins so guests help themselves. If feeding a crowd, scale up in 4-pound batches or set up two pots to fry simultaneously with extra hands.
For elegant entertaining, de-bone a few drumettes and serve as finger-food skewers plated with microgreens and a drizzle of extra sauce. If you need to stretch portions, offer heartier sides like fries, coleslaw, or garlic roasted potatoes so people build full plates.
Storage and Reheating Tips
Leftover wings store best uncovered in the fridge for a short time so the skin stays crisper, then transfer to an airtight container after an hour. Eat within 2 days for best texture and flavor. The sauce may mellow in the fridge; reheat gently.
To reheat, use a hot oven or toaster oven at 375 F on a wire rack set over a baking sheet until warmed through and the exterior crisps again. Avoid the microwave if you want to preserve crunch; it makes skin soft and soggy. For small batches, a hot skillet with a splash of oil also revives texture quickly.
Common Mistakes and How to Fix Them
Not drying the wings is the top offender because moisture causes splatter and prevents crisping. Pat the skin until it feels matte and dry before seasoning.
Overcrowding the fryer cools the oil and results in greasy wings. Fry in batches and keep finished pieces on a wire rack so they stay crisp. If your sauce separates, whisk a bit of warm butter in off the heat to bring it back to a glossy emulsion.
Ready to Try It?
Give this Buffalo Wings Recipe a go this weekend. Keep the steps simple, focus on drying and hot oil, and toss the wings while they are piping hot so the sauce clings. Invite a few friends, lay out celery and blue cheese, and enjoy the small celebration that is perfectly crisp, saucy wings.
Frequently Asked Questions.
-
Can I bake these instead of frying?
Yes, you can oven-roast on a wire rack at high heat until crisp, then toss with warm sauce; texture will be slightly different but still delicious. -
How do I make the sauce less spicy?
Use less cayenne in the sauce and choose a milder hot sauce; adding a touch more butter will also mellow the heat. -
Can I prepare wings ahead of time?
You can season and refrigerate briefly, but fry them just before serving for best crispness; sauce is best made and applied while hot. -
What is the best oil to use for frying?
Neutral oils with high smoke points like canola or peanut are great; peanut adds a subtle flavor if there are no allergies. -
How should I reheat leftovers?
Warm in a 375 F oven on a wire rack until heated through to revive crispness; avoid the microwave for best texture.
Buffalo Wings Recipe
Make Buffalo Wings Recipe: crisp-fried wings tossed in glossy, tangy Buffalo sauce—serve with celery and blue cheese.
Ingredients
Instructions
Step 1: Prep the wings
Rinse each wing briefly under cold running water, then pat every piece thoroughly dry with paper towels until the skin is matte and free of surface moisture; remove and reserve wing tips if desired for stock. Lay the wings out in a single layer on a clean plate or tray for a few minutes to come to room temperature—this reduces splatter and helps the skin crisp uniformly when fried.
Step 2: Season and rest the wings
Place the dried wings into a single large matte charcoal ceramic bowl. Sprinkle evenly with kosher salt, freshly ground black pepper, and garlic powder; toss gently so each drumette and flat is evenly coated and the spices cling to the dry skin. Let the seasoned wings sit in the bowl at room temperature for 20–30 minutes to take the chill off the meat and allow the seasoning to penetrate.
Step 3: Fry until deeply crisp and drain
Working in batches, fry the wings until the skin is deep golden-brown, blistered, and very crisp; drain each finished batch on a wire cooling rack set over a rimmed baking sheet so excess oil returns to the pan and the skin stays textured. Transfer wings to the rack in single layers and, while still hot, sprinkle very lightly with a pinch of salt if desired. Keep the matte charcoal bowl nearby (empty or holding a small pinch of salt) so the same vessel remains the consistent tool in the workflow.
Step 4: Make the glossy Buffalo sauce
In a small heatproof vessel off the stove, combine the hot sauce, small cubes of butter, distilled white vinegar, Worcestershire, garlic powder, a touch of cayenne if you like extra heat, and a pinch of salt and pepper; stir until the butter is fully melted and the sauce is smooth and slightly thickened into a glossy orange emulsion. Keep the sauce warm in a small stainless ladle or pouring jug ready for coating.
Step 5: Toss the hot wings in sauce and rest briefly
Return the hot, drained wings to the same matte charcoal ceramic bowl; pour the warm Buffalo sauce over the wings and toss vigorously with tongs until every piece is evenly coated in a glossy, clinging glaze. Let the sauced wings rest in the bowl for 2–3 minutes so the sauce settles into the skin’s creases while preserving crunch.
Step 6: Arrange the platter, garnish, and serve
Arrange the sauced wings on a warm, shallow serving platter piled for an attractive, rustic mound. On the same surface place celery and carrot sticks trimmed into 3-inch batons and a small chilled bowl of blue cheese dressing for dipping; sprinkle chopped flat-leaf parsley over the wings if using. Serve immediately while the skin is piping hot and the sauce is glossy and clingy.
Notes
- Pat wings very dry before seasoning to ensure crisp skin.
- Fry in batches to avoid overcrowding the oil and losing crispness.
- Keep the sauce warm and toss wings while hot so it clings.
- Reheat in a hot oven on a wire rack to restore crunch.
- Substitute cauliflower for a vegetarian version.