Bbq Pulled Pork Recipe has been one of those dishes I make when I want comfort food that still feels a little celebratory. I first learned this version by chance, testing a braise-heavy approach that keeps the meat moist and yields a glossy, smoky sauce. It is the kind of recipe you can serve for a casual weeknight or a weekend gathering, and it always disappears fast. I love how the sweet brown sugar and paprika rub plays off the tang of apple cider vinegar, and this Bbq Pulled Pork Recipe is reliably forgiving even if you get distracted while cooking.
How This Recipe Became My Rainy-Day Favorite
I remember the first time I made this Bbq Pulled Pork Recipe on a gray Saturday when the forecast promised rain all afternoon. The house filled with the smell of caramelizing brown sugar and paprika while the pork sizzled in the Dutch oven. I sat at the kitchen table with a cup of tea and watched steam curl from the pot as onions turned golden and garlic softened to butter. That slow, patient cooking felt like a quiet ritual, each minute coaxing out deeper aromas. When I finally shredded the pork, the meat fell apart like soft ropes and the sauce clung to each strand. Friends came over that evening, and their delighted silence as they bit into the sandwiches made the whole slow day feel worth it. The memory is tactile: the sticky edges of a napkin, the tang of pickles, and the warm, cozy hush of a kitchen made welcoming by smoke and spice.
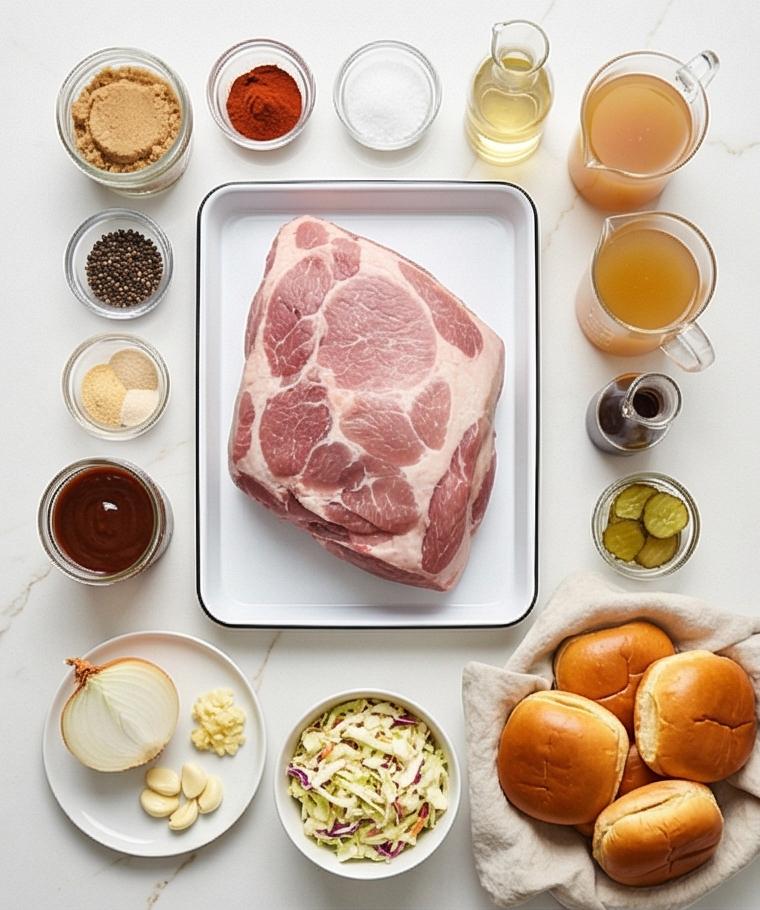
Primary Ingredients and Why They Matter
- Packed light brown sugar: Adds sweetness and helps the rub form a sticky, caramelized crust; substitute dark brown sugar for a deeper molasses note.
- Sweet paprika: Brings color and mild sweetness; smoked paprika can replace it for extra smoke.
- Kosher salt: Essential for seasoning and drawing moisture for better crust; use a bit less if swapping fine sea salt.
- Bone-in pork shoulder (Boston butt): The star of the dish, its fat and collagen melt into silky textures; you can use a boneless shoulder if needed, but cook time may change.
- Apple cider and vinegar: Add brightness and help deglaze for a balanced sauce; white wine or apple juice can substitute.
- Thick smoky barbecue sauce: Finishes the pulled pork with familiar BBQ flavor; choose a high-quality store-bought sauce or use your favorite homemade version.
Essential Kitchen Tools and Why You Need Them
Start with a few reliable tools and you will be surprised how much easier this recipe becomes. A heavy Dutch oven gives even heat and excellent searing capability; if you do not have one, a heavy oven-safe pot or a large braiser works well. A sturdy pair of tongs and two forks are indispensable for moving and shredding the pork. Use a rimmed tray for resting the roast and catching juices. Measuring spoons and a whisk make the dry rub accurate and clump-free. A small mesh strainer or spoon helps skim fat from the braising liquid, and a meat thermometer takes the guesswork out of doneness.
- Heavy Dutch oven or oven-safe braiser: For searing and slow braising.
- Tongs and two forks: For handling and shredding the pork.
- Rimmed baking tray and foil: For resting the roast and collecting juices.
- Measuring spoons and mixing bowls: For the dry rub and marinades.
- Meat thermometer and skimmer/spoon: For accurate doneness and fat removal.
Step-by-Step Preparation Guide
Step 1: Make the dry rub and season the pork
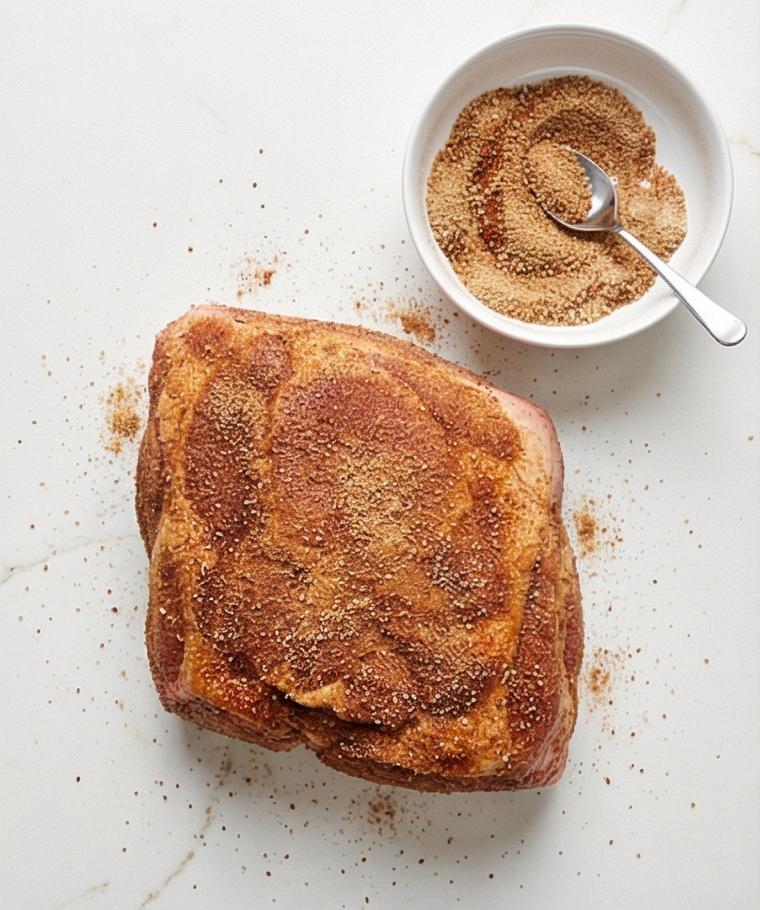
In a medium bowl, whisk together packed light brown sugar, sweet paprika, kosher salt, freshly ground black pepper, garlic powder, onion powder, dry mustard, and cayenne until the sugar is evenly distributed and the spices form a cohesive, slightly damp sand — you should see glints of brown sugar crystals and a deep reddish paprika dust. Pat the trimmed bone-in pork shoulder very dry; press the rub into every surface and crevice with your palms so the granules cling and form a textured crust. Let the rubbed pork rest at room temperature for 20–30 minutes so the rub adheres and the meat loses its chill, while you prepare vessels and the pot.
Step 2: Sear the pork and cook the aromatics
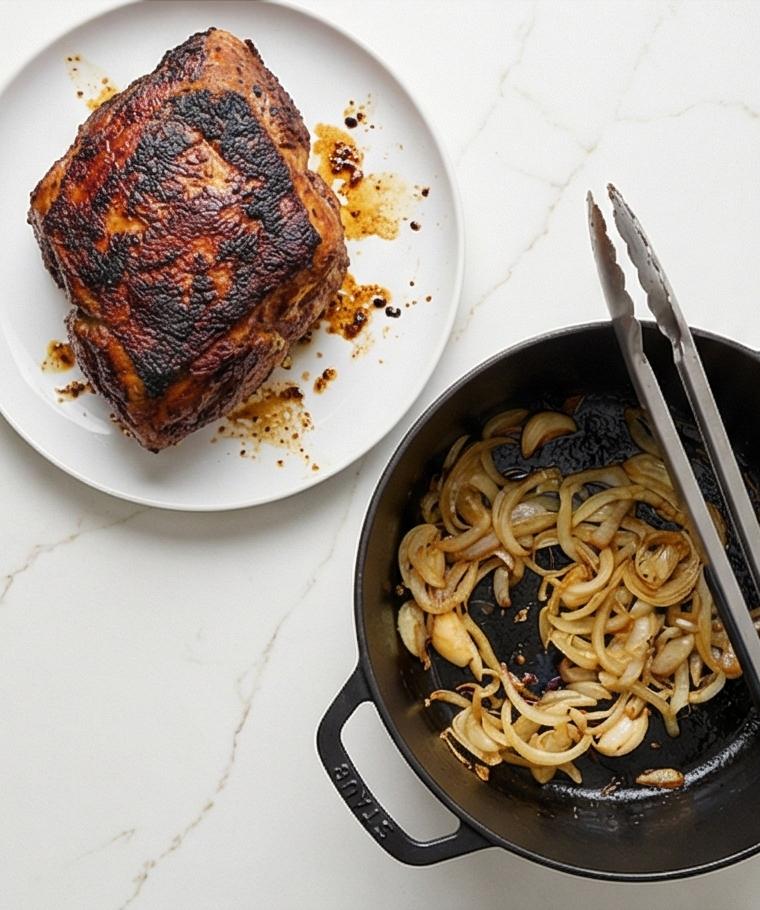
Heat a heavy Dutch oven until the fat in the pot shimmers, then sear the rubbed pork on all sides until a dark, deeply browned crust develops – look for a rich mahogany crust with tiny blistered points and concentrated flavor pockets. Transfer the seared roast to a tray. In the same pot, cook the sliced yellow onion and smashed garlic in the rendered fat until the onions soften and their edges turn golden and translucent, the fond loosening into amber streaks along the pot’s interior.
Step 3: Deglaze, assemble the braise, and slow-cook
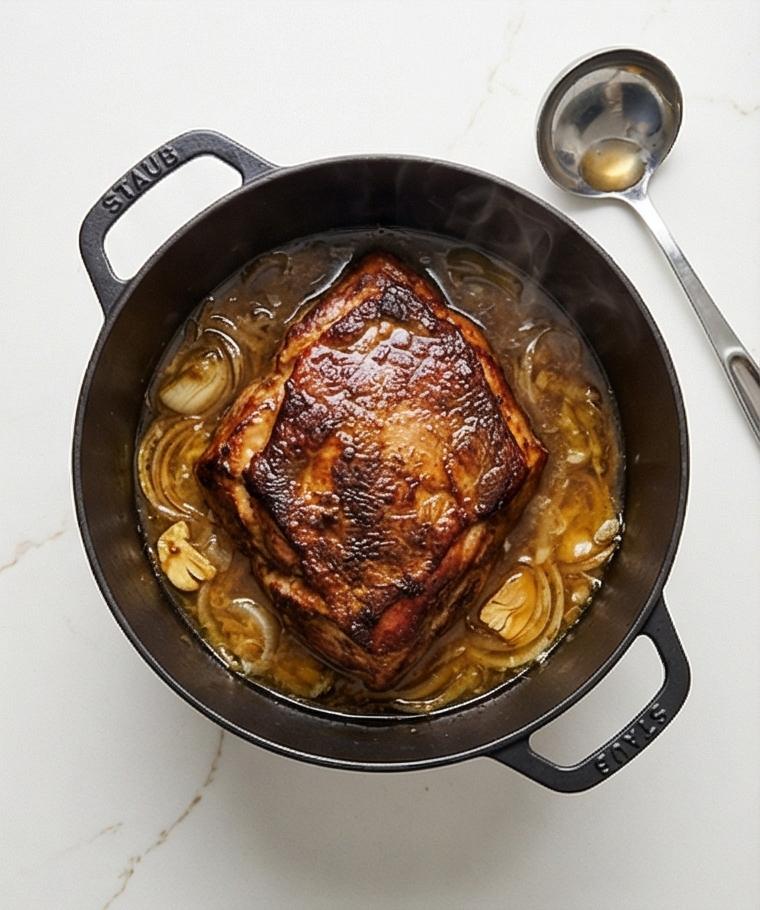
Pour apple cider (or unsweetened apple juice) into the pot to deglaze, scraping up the browned fond until the liquid is glossy and slightly syrupy, then add chicken broth, apple cider vinegar, and Worcestershire sauce and bring the mixture to a gentle simmer. Nestle the seared pork back into the aromatic liquid so the braising liquid comes an inch or two up the sides of the roast — the meat should be sitting in a shallow, shimmering pool rather than fully submerged. Cover tightly and transfer the covered vessel to a low oven to braise long and slow until the center yields easily to a fork and the collagen has converted to silky gelatin.
Step 4: Rest the roast and reduce the braising liquid
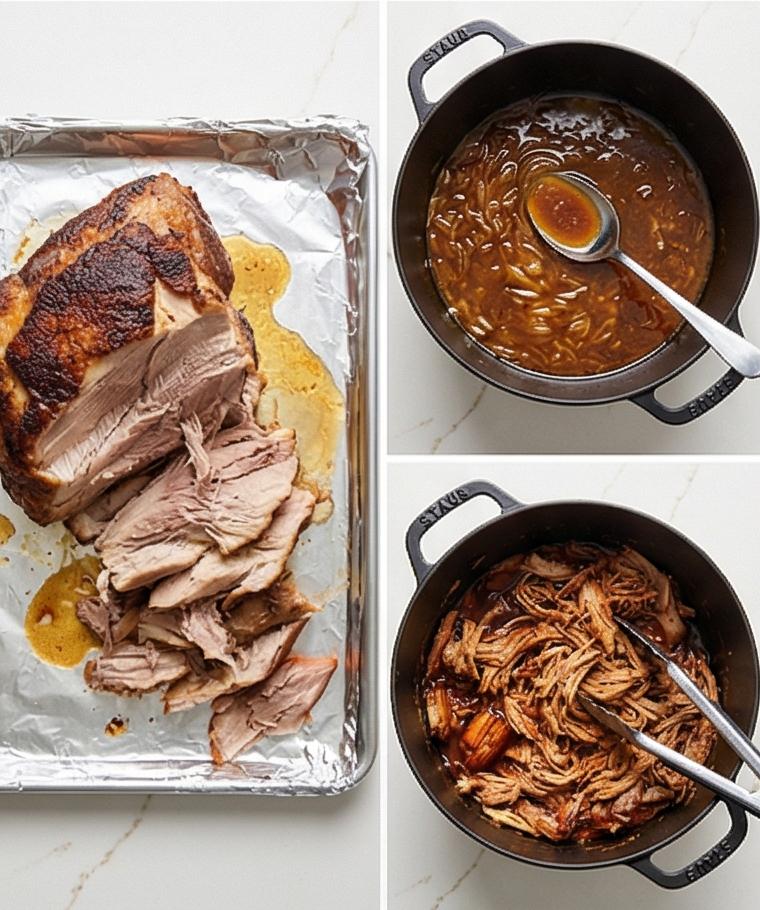
Carefully remove the pot once the pork is very tender; transfer the roast to a rimmed tray, tent loosely with foil, and let it rest so the juices redistribute and the exterior firms slightly. While the meat rests, skim off most of the fat from the braising liquid and return the remaining flavorful liquid with softened onions and garlic to the pot to simmer and reduce until slightly thickened and glossy — the sauce should cling to a spoon and concentrate into roughly 1 to 1 1/2 cups of deeply savory, slightly sweet pan sauce.
Step 5: Shred the pork and finish with barbecue sauce
Remove and discard the bone and large pieces of gristle, then pull the rested pork into a pleasing mix of fine strands and larger ropey chunks using two forks (or tongs). Transfer the shreds into the same round pot or a wide mixing vessel and fold in smoky barbecue sauce and a splash of the reduced braising liquid until the meat is glossy, saucy but not soupy — aim for a mixture with visible caramelized edges, moist interior fibers, and a tacky sheen that glistens under the light. Taste and adjust with salt, black pepper, or a tablespoon or two of apple cider vinegar for brightness as needed.
Step 6: Toast the buns and assemble sandwiches
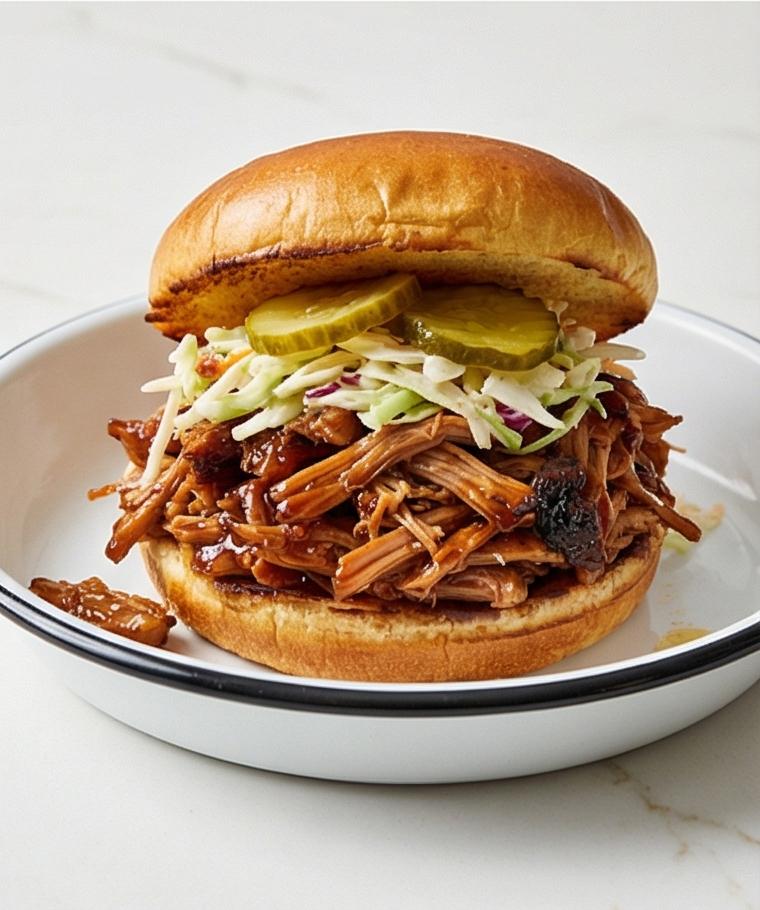
Lightly toast split brioche or soft sandwich buns until the cut edges are golden and slightly crisp, then pile a generous mound of hot pulled pork onto each bottom half, top with a small handful of well-drained coleslaw and a few sliced dill pickles, and cap with the top bun. Serve immediately while the pork is steaming and juicy; alternatively present the sauced pork in the warmed covered vessel with buns and accompaniments for a family-style spread.
Making It Your Own
Try small experiments to make this Bbq Pulled Pork Recipe feel like yours. For a tang-forward version, stir an extra tablespoon or two of apple cider vinegar into the finished pork. If you want more smoke without a smoker, swap sweet paprika for smoked paprika or add a splash of liquid smoke. For a lighter take, use a leaner cut, but expect less silky texture because collagen contributes to that mouthfeel. Try a regional twist with a vinegar-forward North Carolina sauce, or a molasses-rich Kansas City style sauce for sweeter, thicker coating. For a quick weeknight shortcut, cook the pork in a slow cooker on low for 6-8 hours instead of oven braising.
How to Serve
If you are hosting, set up a build-your-own sandwich station with toasted buns, warm pulled pork, coleslaw, and pickles so guests can assemble their ideal bite. For a casual crowd, keep the pork in the covered pot to preserve heat and bring it to the table family-style. To stretch the recipe for more people, serve smaller portions on slider buns or offer the pork over baked potatoes or rice as a main course. Pair with bright sides like a vinegar slaw or roasted Brussels sprouts, and provide plenty of napkins because this Bbq Pulled Pork Recipe is gloriously saucy.
Storage and Reheating Tips
Store cooled pulled pork in an airtight container in the refrigerator for up to 4 days. Keep the sauce separate if you prefer to control moisture when reheating, or store everything together for convenience. For longer storage, freeze portions in freezer-safe bags for up to 3 months; flatten the bags so they thaw faster.
Reheat gently to preserve texture. Warm in a covered skillet over low heat with a splash of the reserved braising liquid or water to keep the meat moist, or reheat in a 325 F oven until warmed through. Avoid overheating which can dry the pork out.
Common Mistakes and How to Avoid Them
Skipping the sear is a frequent shortcut that costs the final flavor; take the extra minutes to brown the meat well. Searing properly creates the base flavors that the braise builds on.
Underseasoning is another issue; taste the sauce and adjust with salt, pepper, or a little vinegar at the end. Finally, try not to rush the braise – low and slow is what turns tough connective tissue into luxuriously tender pulled pork.
Final Thoughts
Give this Bbq Pulled Pork Recipe a try the next time you want a comforting, crowd-pleasing main. It rewards patience with rich texture and deep flavor, and it is flexible enough to suit lots of different meals, from sandwiches to plated mains.
Frequently Asked Questions.
- What cut of pork is best for this recipe? The bone-in pork shoulder, often called a Boston butt, is best because its fat and collagen break down into a silky texture when braised.
- Can I make this in a slow cooker? Yes, you can braise in a slow cooker on low for 6-8 hours until the pork is fork tender; finish by shredding and tossing with barbecue sauce.
- How do I avoid dry pulled pork? Do not skip the collagen-rich shoulder, braise low and slow, and reintroduce a splash of braising liquid when reheating to keep the meat moist.
- Can I prepare this ahead of time? Absolutely. The pork can be made a day ahead and reheated gently; flavors often deepen after resting overnight.
- What sides pair well with this pulled pork? Classic pairings include vinegar slaw, baked beans, potato salad, roasted vegetables, or simple green salads.
Bbq Pulled Pork Recipe
Make Bbq Pulled Pork Recipe now — tender, smoky pulled pork served on toasted buns with coleslaw and pickles.
Ingredients
Instructions
Step 1: Make the dry rub and season the pork
In a medium bowl, whisk together packed light brown sugar, sweet paprika, kosher salt, freshly ground black pepper, garlic powder, onion powder, dry mustard, and cayenne until the sugar is evenly distributed and the spices form a cohesive, slightly damp sand — you should see glints of brown sugar crystals and a deep reddish paprika dust. Pat the trimmed bone-in pork shoulder very dry; press the rub into every surface and crevice with your palms so the granules cling and form a textured crust. Let the rubbed pork rest at room temperature for 20–30 minutes so the rub adheres and the meat loses its chill, while you prepare vessels and the pot.
Step 2: Sear the pork and cook the aromatics
Heat a heavy Dutch oven until the fat in the pot shimmers, then sear the rubbed pork on all sides until a dark, deeply browned crust develops — look for a rich mahogany crust with tiny blistered points and concentrated flavor pockets. Transfer the seared roast to a tray. In the same pot, cook the sliced yellow onion and smashed garlic in the rendered fat until the onions soften and their edges turn golden and translucent, the fond loosening into amber streaks along the pot's interior.
Step 3: Deglaze, assemble the braise, and slow-cook
Pour apple cider (or unsweetened apple juice) into the pot to deglaze, scraping up the browned fond until the liquid is glossy and slightly syrupy, then add chicken broth, apple cider vinegar, and Worcestershire sauce and bring the mixture to a gentle simmer. Nestle the seared pork back into the aromatic liquid so the braising liquid comes an inch or two up the sides of the roast — the meat should be sitting in a shallow, shimmering pool rather than fully submerged. Cover tightly and transfer the covered vessel to a low oven to braise long and slow until the center yields easily to a fork and the collagen has converted to silky gelatin.
Step 4: Rest the roast and reduce the braising liquid
Carefully remove the pot once the pork is very tender; transfer the roast to a rimmed tray, tent loosely with foil, and let it rest so the juices redistribute and the exterior firms slightly. While the meat rests, skim off most of the fat from the braising liquid and return the remaining flavorful liquid with softened onions and garlic to the pot to simmer and reduce until slightly thickened and glossy — the sauce should cling to a spoon and concentrate into roughly 1 to 1 1/2 cups of deeply savory, slightly sweet pan sauce.
Step 5: Shred the pork and finish with barbecue sauce
Remove and discard the bone and large pieces of gristle, then pull the rested pork into a pleasing mix of fine strands and larger ropey chunks using two forks (or tongs). Transfer the shreds into the same round pot or a wide mixing vessel and fold in smoky barbecue sauce and a splash of the reduced braising liquid until the meat is glossy, saucy but not soupy — aim for a mixture with visible caramelized edges, moist interior fibers, and a tacky sheen that glistens under the light. Taste and adjust with salt, black pepper, or a tablespoon or two of apple cider vinegar for brightness as needed.
Step 6: Toast the buns and assemble sandwiches
Lightly toast split brioche or soft sandwich buns until the cut edges are golden and slightly crisp, then pile a generous mound of hot pulled pork onto each bottom half, top with a small handful of well-drained coleslaw and a few sliced dill pickles, and cap with the top bun. Serve immediately while the pork is steaming and juicy; alternatively present the sauced pork in the warmed covered vessel with buns and accompaniments for a family-style spread.
Notes
- Let the rubbed pork rest 20-30 minutes to help the rub adhere.
- Use a meat thermometer to check for tenderness; pork should be very easy to pull apart.
- Skim fat from the braising liquid and reduce to concentrate flavor before finishing the sauce.
- For extra smoke, swap smoked paprika for sweet paprika or add a touch of liquid smoke.
- Store cooled pork in the fridge for up to 4 days or freeze portions for up to 3 months.