I still wake up craving a crunchy edge and soft center, which is why my Hash Browns Recipe lives on heavy rotation in my kitchen. It started as a weekend project and morphed into a technique I rely on when I want a simple, impressive breakfast. The steps look fussy but they reward you with whisper-thin threads of golden potato and a satisfying crust. If you love texture and comfort food, this Hash Browns Recipe is a small ritual that pays off every time.
How This Dish Found Its Way Into My Morning Routine
There was a rainy Saturday when I first tackled this Hash Browns Recipe properly. I remember the sound of the grater hitting the bowl, the cold splash of rinse water, and how the kitchen filled with that toasted, buttery scent as the potatoes browned. I felt oddly proud pressing the potato cake into the skillet, worrying it would fall apart, and then watching as a perfect golden crust revealed itself when I lifted the spatula. It was the kind of kitchen win that made me want to invite people over, to pass around wedges and watch them grin at the crisp edges and pillowy interior. That day taught me patience with simple things and how a few careful steps can turn humble russets into something celebratory.
Key Ingredients and What They Do
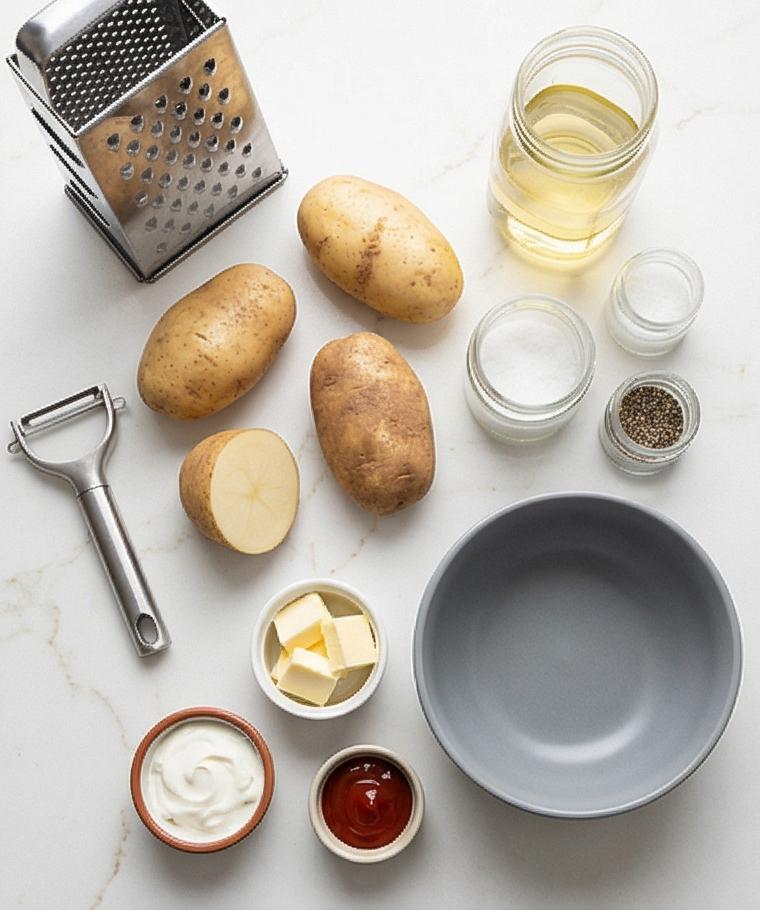
- Russet Potatoes: The foundation of the Hash Browns Recipe. Russets give a fluffy yet crisp result; Yukon Golds can be used for a creamier texture but they brown a touch faster.
- Ice-cold Water: Stops oxidation and washes away surface starch so the shreds crisp rather than glue together.
- Kosher Salt: Enhances flavor; use fine salt sparingly if you only have that on hand.
- Neutral High-Heat Oil: Provides the heat range needed for a golden crust; use vegetable, canola, or sunflower.
- Unsalted Butter: Adds flavor and browning; keep it cold so it melts and foams slowly.
- Fresh Chives: A bright, optional garnish that contrasts the rich potato.
Essential Kitchen Tools
A few simple tools make this Hash Browns Recipe effortless and consistent. A sturdy box grater gives even, coarse shreds; if you have a food processor with a shredding disk it speeds things up. A heavy skillet, preferably cast iron, holds heat and develops an even crust; a nonstick pan works in a pinch but will not brown quite the same. A fine-mesh strainer or colander and a clean kitchen towel are crucial for draining and squeezing excess moisture; if you don’t have a towel, paper towels will do but you may need more. Finally, a thin, wide spatula helps you test and flip the potato cake without breaking it.
Step-by-Step Preparation Guide
Step 1: Prepare the potatoes: Peel and shred the russets
Peel the russet potatoes immediately and work briskly at the large holes of a box grater to produce long, coarse shreds. Keep the shreds loose in a bowl so they don’t clump — speed matters here to limit oxidation and keep the color bright.
Step 2: Rinse to remove excess starch
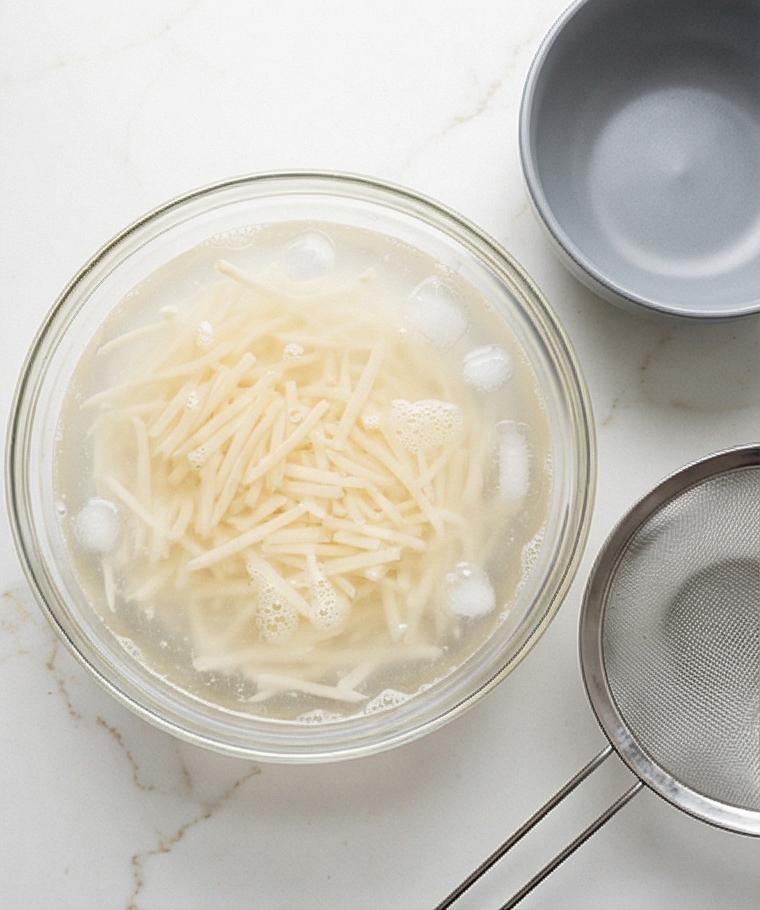
Place the coarse shreds into a large mixing bowl and pour in plenty of ice‑cold water. Swish the potatoes for 30–60 seconds until the water clouds; that cloudy water is the surface starch leaving the shreds. Drain and repeat briefly if the rinse water stays very cloudy.
Step 3: Drain the potatoes
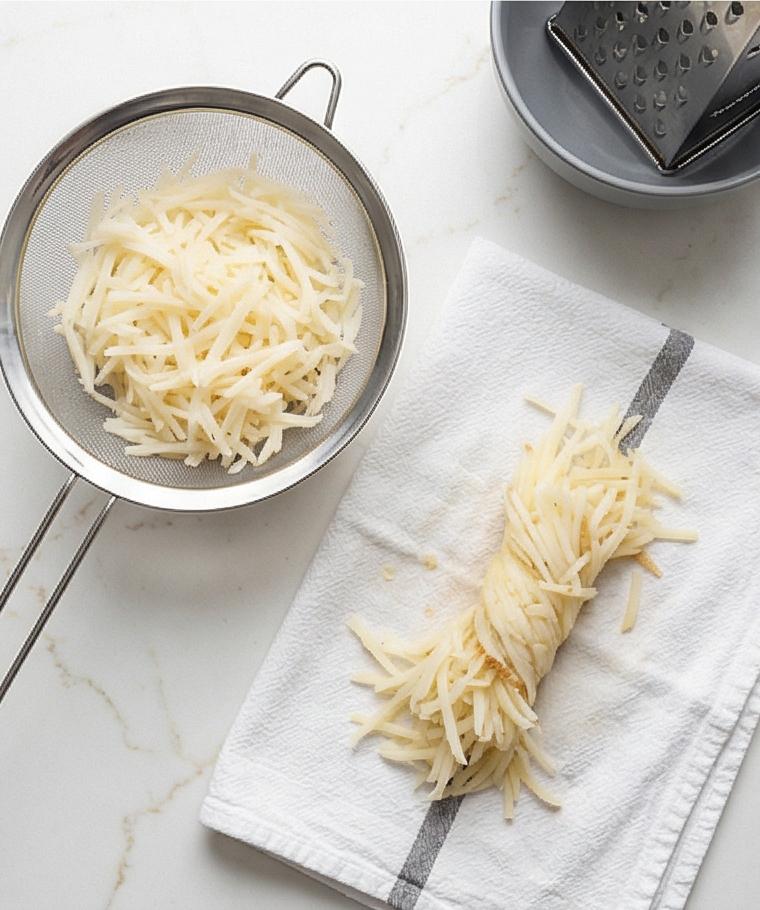
Pour the shredded potatoes into a fine‑mesh strainer or colander and shake well to remove most of the rinse water. If any clumps remain, gently tease them apart so the strands are separated and able to crisp independently.
Step 4: Squeeze out moisture
Transfer the drained shreds to a clean kitchen towel or several layers of paper towels, gather the cloth around the potatoes and twist firmly — squeeze out as much liquid as you can. The shreds should feel significantly drier and slightly tacky rather than dripping.
Step 5: Season the potatoes
Return the dried shreds to a dry bowl and sprinkle with the kosher salt, freshly ground black pepper, and the optional garlic powder. Toss gently with a fork or your fingers until the seasoning is evenly distributed and the strands look lightly speckled with seasoning.
Step 6: Preheat the pan and fat
Place a heavy 10–12 inch skillet (cast iron preferred) on the work surface and add the neutral oil and the cold cubed butter; heat the fat until the butter melts and the fat appears hot and shimmering but not smoking — it should glisten and spread easily in the pan.
Step 7: Test for heat
Test the skillet by letting a tiny pinch of shredded potato drop into the fat; if it sizzles briskly the pan is ready. If the pinch barely reacts, warm the fat a little longer and test again.
Step 8: Form the hash browns
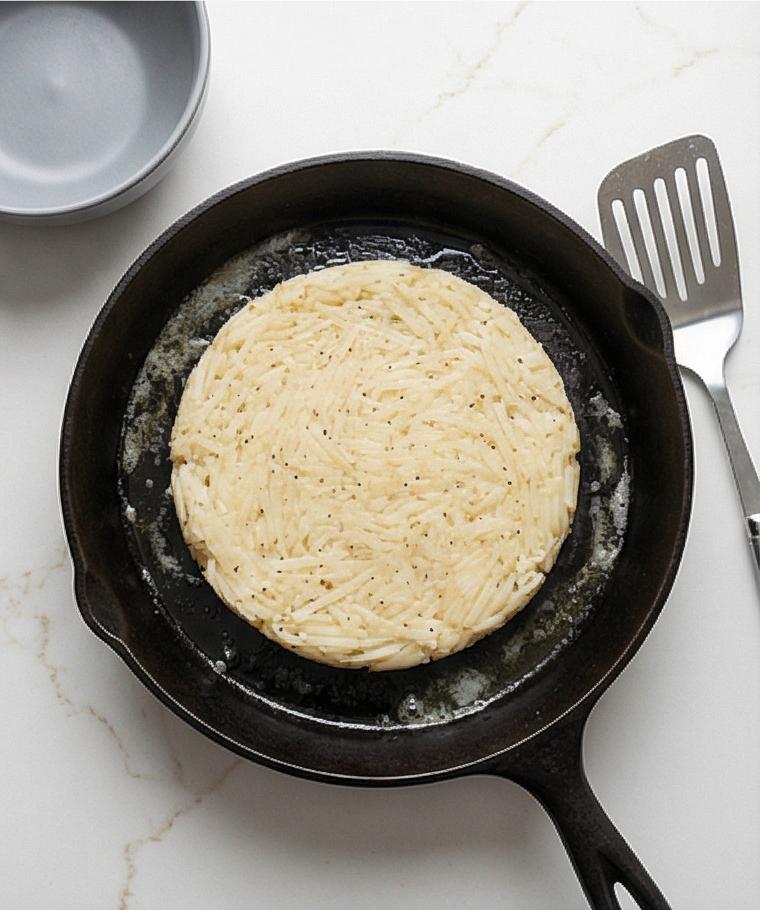
Quickly add the seasoned shredded potato to the hot skillet and spread into an even layer. Press down gently with a spatula to compact into a flat cake about 1/2 inch thick so it browns evenly; the surface should look uniform and the strands well compressed.
Step 9: Compress and cook the first side undisturbed
Lower the heat slightly to medium or medium‑low and let the potato cake cook without moving it. Over the next 7–10 minutes the bottom will develop a rich golden crust and the edges will crisp. Keep the surface still so a solid crust can form.
Step 10: Check readiness to flip
Slide a thin spatula under an edge to peek at the underside — when it’s a deep golden brown and releases cleanly, it’s ready. If the cake still clings, give it another minute or two to finish forming that crust.
Step 11: Flip the hash browns
For a single large cake, slide it onto a plate, invert the empty skillet over the plate and flip the whole assembly to return the cake to the pan, browned side up; for smaller portions flip each section with a wide spatula. The cooked side should now be the exposed top.
Step 12: Cook the second side
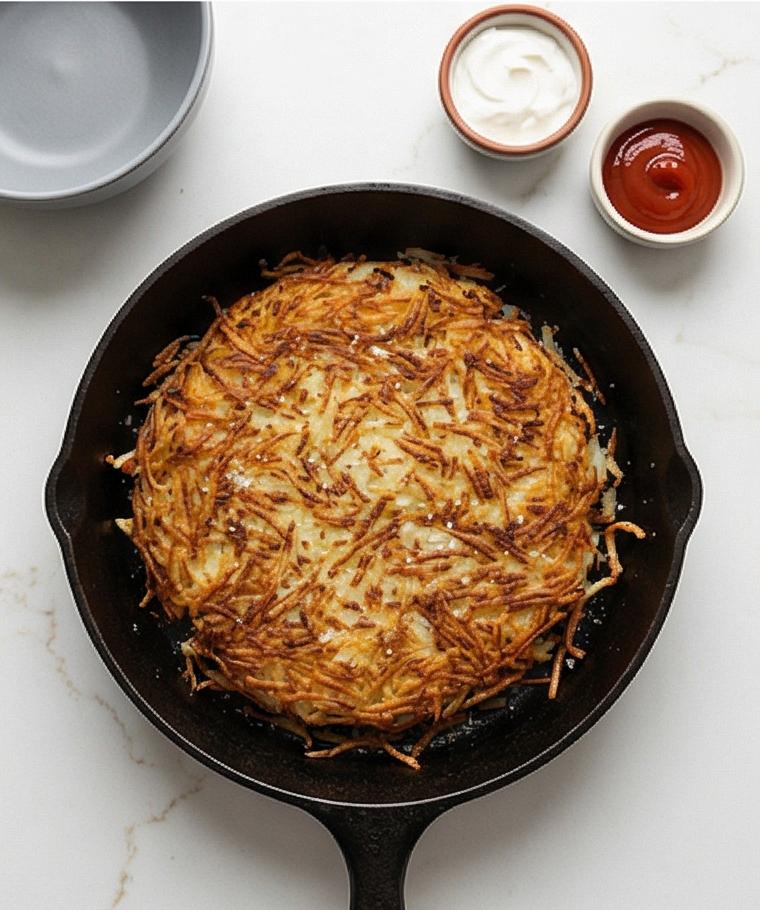
Continue cooking the second side over medium to medium‑low heat until it turns golden brown and the interior is tender, another 6–9 minutes depending on thickness. The finished cake should be uniformly crisp outside and soft inside.
Step 13: Adjust seasoning
Taste a few crisp strands from the edge and sprinkle a small pinch of salt and pepper over the top if needed; let the seasoning sit for 30–60 seconds to adhere to the crust.
Step 14: Rest briefly and garnish
Remove the skillet from the heat and let the hash browns rest for 1–2 minutes so the crust sets slightly. Slide the cake onto a cutting board or serving surface and scatter the finely chopped fresh chives over the top for a fresh green contrast.
Step 15: Serve
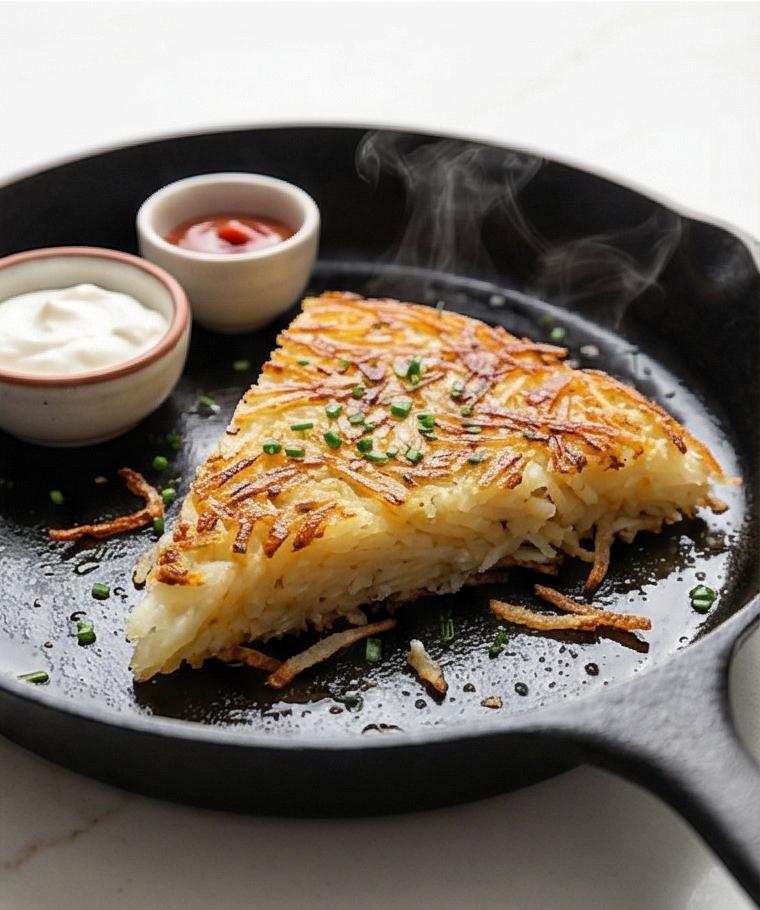
Cut the hash browns into wedges or squares and serve immediately while hot and crisp. Offer the sour cream and ketchup or hot sauce in small bowls on the side for dipping; the finished plate should be steaming, crunchy, and lustrous with tiny golden threads of crisped potato.
Step 16: Make‑ahead tip (optional)
If preparing ahead, shred and rinse the potatoes up to 8 hours in advance and store them submerged in cold water in the refrigerator. When ready, drain, dry thoroughly, and proceed with the squeeze, seasoning, and cooking steps as written.
Making It Your Own
I experiment with this Hash Browns Recipe all the time. Try adding a handful of finely diced onion to the shreds before cooking for a sweeter caramelized note. For a cheesy version, fold in a quarter cup of grated cheddar after squeezing out the moisture and press it into the pan; the cheese gives a nutty sheen and extra hold.
If you want a lighter take, air fry loosely packed patties at high heat until crisp, flipping once. For a spicier, regional twist, stir in a pinch of smoked paprika and top with pickled jalapenos and cilantro. Small swaps make the recipe feel new every time.
How to Serve
When I host brunch, these hash browns are the crowd-pleaser that anchors the plate. For a larger group double the potatoes and cook in two pans simultaneously so each batch stays hot. Serve wedges on a warmed platter with small bowls of sour cream, ketchup, and hot sauce along the side.
To make it a composed plate, pair the hash browns with soft-scrambled eggs and lemony arugula dressed lightly in olive oil. For brunch guests who want protein, offer smoked salmon or crisp bacon. The contrast of textures and a few colorful garnishes makes the dish feel elevated.
Storage and Reheating
Leftover hash browns store well in the refrigerator for up to 3 days in an airtight container. Let them cool to room temperature before sealing to avoid sogginess. Reheat gently in a skillet over medium heat with a tiny splash of oil to restore crispness; a microwave will heat them but will soften the crust.
For freezing, flash cool cooked wedges on a tray, then freeze in a single layer and transfer to a sealed bag. Reheat from frozen in a hot oven or air fryer until crisp and heated through. These methods keep texture and flavor closest to the fresh batch.
Common Slipups and How to Fix Them
The most common mistake is not removing enough moisture. If your hash browns steam instead of crisping, you probably need to squeeze more water from the shreds or lower the pan temperature. Patience here is the trick.
Another slipup is flipping too early. If the cake sticks, give it another minute and test again. Using a heavy skillet and enough fat helps form a crust that releases cleanly.
Final Thoughts
Give this Hash Browns Recipe a try on your next lazy morning or busy brunch day. It rewards the small attentions you give it and always returns warm, crunchy comfort. You’ll love how a few simple ingredients and clear steps turn ordinary potatoes into a breakfast highlight.
Frequently Asked Questions.
- What type of potato works best for hash browns? Russet potatoes are best for the Hash Browns Recipe because they dry out and crisp well. Yukon Golds work if you prefer a creamier interior.
- Can I make the hash browns ahead of time? Yes. Shred and rinse the potatoes up to 8 hours ahead and refrigerate in cold water. Drain, dry thoroughly, and cook when ready.
- How do I keep hash browns crispy when serving a group? Cook in batches and keep finished pieces on a wire rack in a warm oven while you finish remaining pans. This preserves crispness better than a covered dish.
- Can I skip the butter and use only oil? Yes. Using only neutral oil is fine for a lighter flavor and higher smoke point. Butter adds flavor, so I often combine the two.
- How do I prevent my hash browns from sticking when flipping? Use a hot, well-oiled skillet and wait until the underside is a deep golden brown so the crust releases naturally.
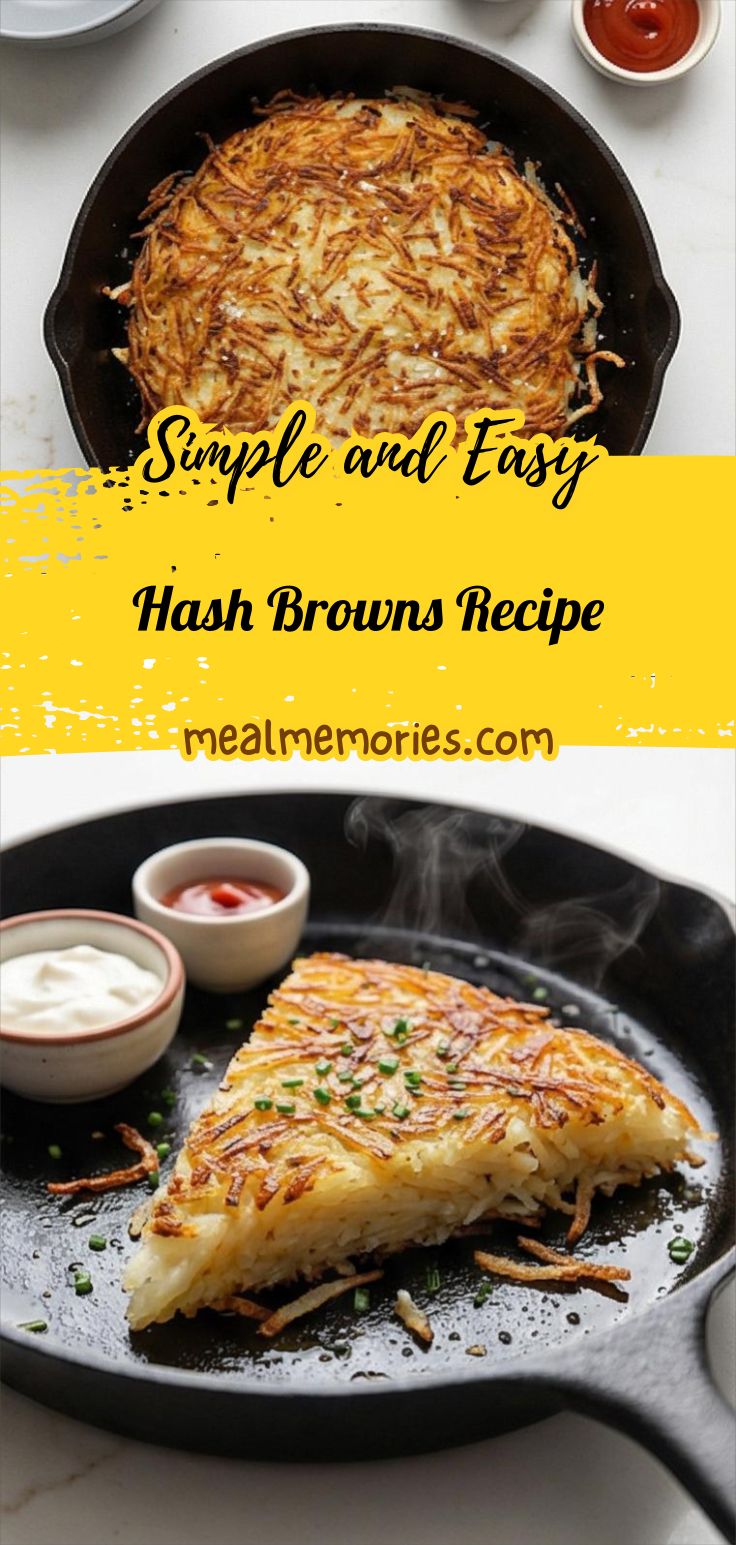
Hash Browns Recipe
Make Hash Browns Recipe now: crisp, golden shredded russet hash browns with a buttery crust.
Ingredients
Instructions
Step 1: Prepare the potatoes: Peel and shred the russets
Peel the russet potatoes immediately and work briskly at the large holes of a box grater to produce long, coarse shreds. Keep the shreds loose in a bowl so they don’t clump — speed matters here to limit oxidation and keep the color bright.
Step 2: Rinse to remove excess starch
Place the coarse shreds into a large mixing bowl and pour in plenty of ice‑cold water. Swish the potatoes for 30–60 seconds until the water clouds; that cloudy water is the surface starch leaving the shreds. Drain and repeat briefly if the rinse water stays very cloudy.
Step 3: Drain the potatoes
Pour the shredded potatoes into a fine‑mesh strainer or colander and shake well to remove most of the rinse water. If any clumps remain, gently tease them apart so the strands are separated and able to crisp independently.
Step 4: Squeeze out moisture
Transfer the drained shreds to a clean kitchen towel or several layers of paper towels, gather the cloth around the potatoes and twist firmly — squeeze out as much liquid as you can. The shreds should feel significantly drier and slightly tacky rather than dripping.
Step 5: Season the potatoes
Return the dried shreds to a dry bowl and sprinkle with the kosher salt, freshly ground black pepper, and the optional garlic powder. Toss gently with a fork or your fingers until the seasoning is evenly distributed and the strands look lightly speckled with seasoning.
Step 6: Preheat the pan and fat
Place a heavy 10–12 inch skillet (cast iron preferred) on the work surface and add the neutral oil and the cold cubed butter; heat the fat until the butter melts and the fat appears hot and shimmering but not smoking — it should glisten and spread easily in the pan.
Step 7: Test for heat
Test the skillet by letting a tiny pinch of shredded potato drop into the fat; if it sizzles briskly the pan is ready. If the pinch barely reacts, warm the fat a little longer and test again.
Step 8: Form the hash browns
Quickly add the seasoned shredded potato to the hot skillet and spread into an even layer. Press down gently with a spatula to compact into a flat cake about 1/2 inch thick so it browns evenly; the surface should look uniform and the strands well compressed.
Step 9: Compress and cook the first side undisturbed
Lower the heat slightly to medium or medium‑low and let the potato cake cook without moving it. Over the next 7–10 minutes the bottom will develop a rich golden crust and the edges will crisp. Keep the surface still so a solid crust can form.
Step 10: Check readiness to flip
Slide a thin spatula under an edge to peek at the underside — when it’s a deep golden brown and releases cleanly, it’s ready. If the cake still clings, give it another minute or two to finish forming that crust.
Step 11: Flip the hash browns
For a single large cake, slide it onto a plate, invert the empty skillet over the plate and flip the whole assembly to return the cake to the pan, browned side up; for smaller portions flip each section with a wide spatula. The cooked side should now be the exposed top.
Step 12: Cook the second side
Continue cooking the second side over medium to medium‑low heat until it turns golden brown and the interior is tender, another 6–9 minutes depending on thickness. The finished cake should be uniformly crisp outside and soft inside.
Step 13: Adjust seasoning
Taste a few crisp strands from the edge and sprinkle a small pinch of salt and pepper over the top if needed; let the seasoning sit for 30–60 seconds to adhere to the crust.
Step 14: Rest briefly and garnish
Remove the skillet from the heat and let the hash browns rest for 1–2 minutes so the crust sets slightly. Slide the cake onto a cutting board or serving surface and scatter the finely chopped fresh chives over the top for a fresh green contrast.
Step 15: Serve
Cut the hash browns into wedges or squares and serve immediately while hot and crisp. Offer the sour cream and ketchup or hot sauce in small bowls on the side for dipping; the finished plate should be steaming, crunchy, and lustrous with tiny golden threads of crisped potato.
Step 16: Make‑ahead tip (optional)
If preparing ahead, shred and rinse the potatoes up to 8 hours in advance and store them submerged in cold water in the refrigerator. When ready, drain, dry thoroughly, and proceed with the squeeze, seasoning, and cooking steps as written.
Notes
- Use a box grater or food processor with a shredding disk for even shreds.
- Squeeze out as much moisture as possible to ensure crispness.
- Keep the skillet hot and resist flipping too early to allow a good crust to form.
- Store leftovers in an airtight container and re-crisp in a skillet or oven.
- For extra flavor, add a small amount of grated cheese to the shreds before cooking.