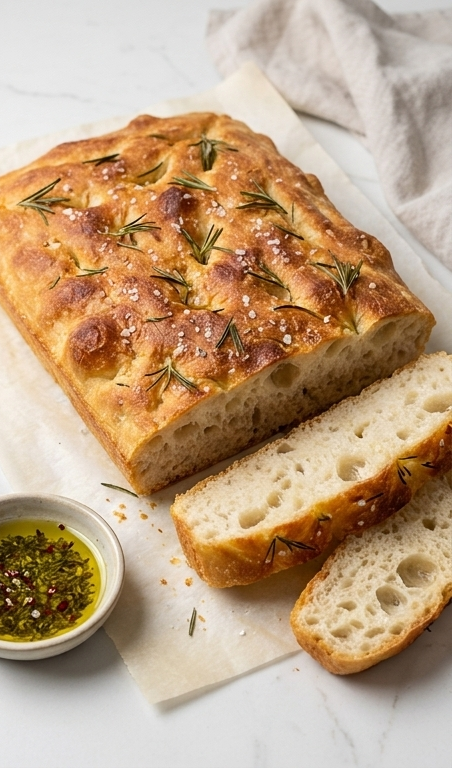
Baked French Toast has been my weekend comfort for years, and it never fails to gather friends to the table. I first learned this baked version when I wanted something hands-off that still felt indulgent, and it quickly became a go-to for slow mornings. The texture is the real winner: golden, slightly crisp peaks with a custardy interior that soaks up maple syrup like a dream. If you love classic breakfast flavors with less fuss, this Baked French Toast is exactly what you need.
How This Recipe Became My Rainy-Day Favorite
I remember the first time I baked this Baked French Toast on a gray, drizzly morning. The house filled with the warm scent of vanilla and cinnamon and the tiny pop of caramelizing sugar at the edges. I sliced thick, crusty sourdough and watched the custard tuck into every crevice as if the bread were sighing with relief. When I pulled the pan from the oven, the top had those toasty, amber spots that made the whole thing feel like a small celebration. We ate straight from the dish, forks clinking, butter melting into warm pockets, and even the rain outside felt like an invited guest. That meal turned a gloomy day into one I still think about, and now whenever the sky clouds over I reach for this recipe first.
Primary Ingredients and Why They Matter
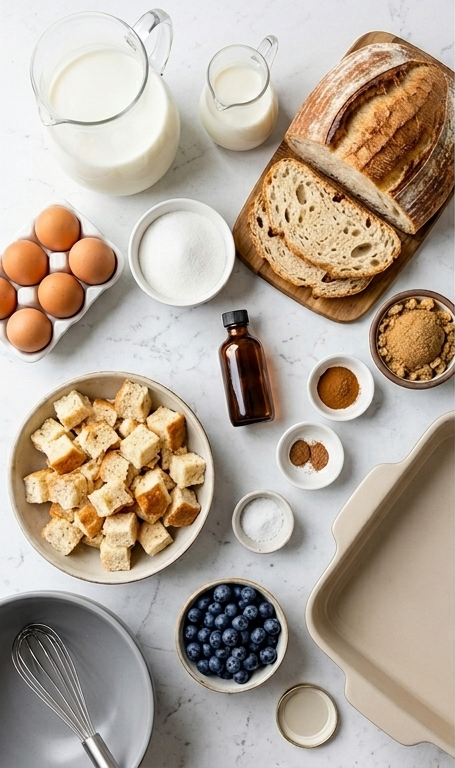
- Crusty artisan sourdough or French bread: The backbone; you want stale or day-old bread so it soaks without becoming mushy. Substitute challah for a richer crumb.
- Eggs: Provide structure and custardy richness; use extra-large eggs for best results.
- Milk (or half-and-half/cream): Controls silkiness; swap in almond or oat milk for dairy-free versions.
- Granulated and brown sugar: Add sweetness and caramel tone; reduce granulated sugar slightly if you prefer less sweet.
- Vanilla: Lifts the whole dish; pure vanilla gives the cleanest flavor.
- Cinnamon and nutmeg: Warm spice duo; try pumpkin pie spice in fall.
- Kosher salt: Balances sweetness and amplifies other flavors.
- Topping sugar and cinnamon: Creates a caramelized crust during baking.
Essential Kitchen Tools and Why They Help
Start with a short list of tools and why they matter. These items keep the process smooth and help the Baked French Toast turn out evenly cooked.
- 9×13-inch baking dish: Creates the shallow bed for even soaking and baking; use a glass or metal pan depending on browning preference.
- Whisk: Ensures the custard is silky and homogenous; a fork works in a pinch.
- Mixing bowl: Large enough to whisk without splashing; stainless steel or ceramic is ideal.
- Measuring cups and spoons: Accurate sugar and spice ratios matter for balance.
- Small bowl or spoon for topping: Helps distribute cinnamon-sugar evenly for an attractive crust.
Step-by-Step Preparation Guide
Step 1: Prepare the pan and bread
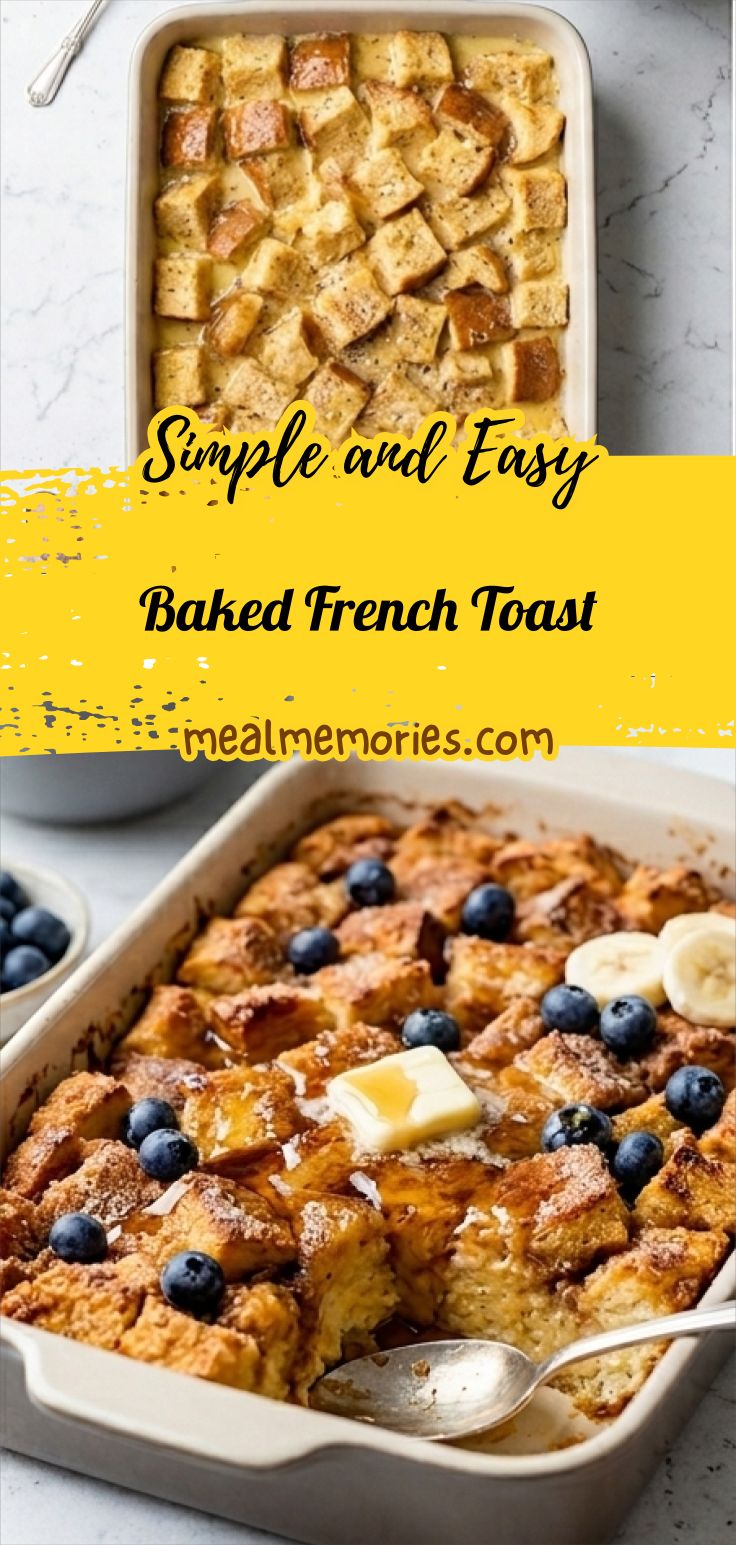
Generously coat a 9×13-inch baking dish with unsalted butter or nonstick spray so the baked custardy edges release easily. Tear or cut the crusty artisan sourdough into roughly 1-inch chunks and scatter them evenly into the prepared pan — you should end up with about nine cups of cubed bread in a single, even layer. This step is all about creating an even bed that will soak uniformly, so spread and nudge pieces until the surface looks balanced and porous.
Step 2: Whisk the custard
In a large matte grey mixing bowl, whisk together the eggs, milk (and optional half-and-half for extra richness), granulated sugar, brown sugar, pure vanilla extract, ground cinnamon, nutmeg, and kosher salt until glossy, homogenous, and slightly aerated. Aim for a silky, pale custard that will cling to bread pockets — the sugars should be mostly dissolved and the spices evenly distributed. Keep the whisk in the bowl when you transfer to the next step so it remains a persistent tool in the scene.
Step 3: Combine and soak
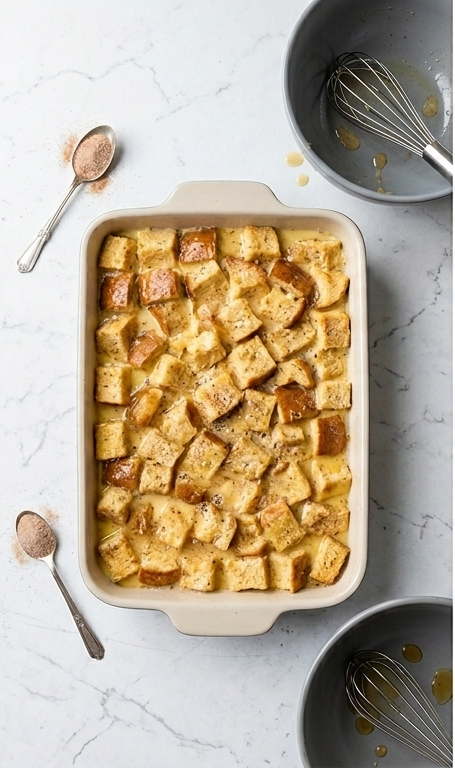
Pour the custard evenly over the bed of bread cubes, then use your fingers to press down and gently toss so every chunk absorbs some liquid and sits in an even layer. Adjust and press pieces so there are no dry pockets; you should see custard pooling between crevices and glossy saturation on exposed crumbs. Let the pan sit at room temperature for 10 minutes to start absorbing, or cover and refrigerate overnight for deeper soak and texture.
Step 4: Add the topping
When you’re ready to bake, stir together the topping sugar and cinnamon in a small bowl; this is a simple crystalline layer that will caramelize on top. Preheat the oven to 350°F (do not show or depict the oven), and with a small spoon scatter the cinnamon-sugar evenly over the soaked bread so the top gets a thin, even dusting that will crisp and brown.
Step 5: Bake until golden and set
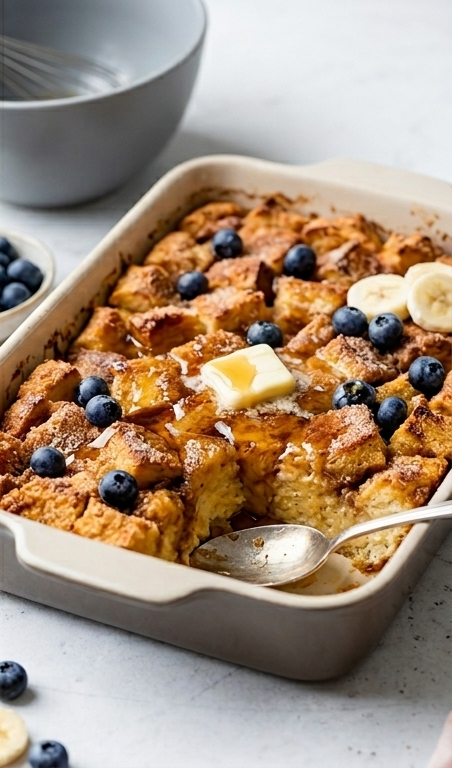
Bake the dish uncovered for 30 to 40 minutes, aiming for a lightly crisp, golden top and a set, no-longer-raw center — about 35 minutes is a sweet spot for a moist interior with crunchy highlights. Look for bubbling custard at the edges and small caramelized spots on the peaks. When done, remove the pan and let it rest briefly so the interior stabilizes and you can either scoop generous portions or slice and serve it like a savory-sweet lasagna.
Step 6: Serve warm and finished
Scoop or slice warm portions directly from the same rectangular baking dish and finish with a pat of butter melting into the warm pockets, a generous drizzle of pure maple syrup, and a scatter of fresh blueberries (or sliced strawberries/bananas). Present in the original 9×13 pan so the rectangular geometry remains intact, with the whisk and mixing bowl nearby as quiet witnesses to the process.
Making It Your Own
I like to experiment with textures and flavors in small ways. Swap challah for a richer loaf or use day-old croissant pieces for a truly decadent take. For a gluten-free option, dense gluten-free bread works well if you reduce the soak time slightly so the pieces keep their shape.
Add fruit into the soaking stage for seasonal flair. Fold sliced apples with a pinch of cardamom in fall, or tuck in lemon zest and blueberries in spring for brightness. If you want a boozy brunch, splash a tablespoon of bourbon or rum into the custard and cut back a touch on the sugar. These tiny experiments make the Baked French Toast feel new each time.
How to Serve
Picture hosting a relaxed brunch: bake the dish and bring it straight to the table with small bowls of toppings lined up. For ten guests, make two 9×13 pans and stagger oven times so both come out warm. If you expect fewer people, half the recipe in an 8×8 dish and shorten bake time slightly.
Layer serving choices for visual impact. Arrange fresh berries down the center or create a grid of warm butter pats that melt into pockets. Offer pure maple syrup, a compote, and a bowl of toasted nuts so guests can customize. The goal is a welcoming spread that invites everyone to build their perfect bite.
Storage and Reheating Tips
Store leftover Baked French Toast covered in the refrigerator for up to 4 days. For the best texture, place a sheet of parchment between layers if stacking portions and seal tightly so the exposed top does not dry out.
Reheat individual portions in a 350°F oven for 8 to 12 minutes until warmed through and the top is refreshed. For a quicker method, use a toaster oven or reheat slices in a skillet over medium-low heat with a cover to steam the center while preserving the crisped top.
Common Mistakes and How to Avoid Them
Under-soaking the bread can leave dry pockets. Press and nudge the pieces so the custard reaches every crevice, and if you have time, refrigerate overnight for a uniformly custardy interior.
Overbaking dries the custard. Aim for the center to be set but still yielding; it will finish setting as it rests. If the top browns too fast, loosely tent with foil for the last 5 to 10 minutes.
Final Thoughts and Invitation
If you try this Baked French Toast, treat it like a ritual more than a recipe: pick good bread, be patient with the soak, and serve it warm with simple toppings that let the custard sing. I hope this becomes one of your cozy go-to recipes.
Frequently Asked Questions.
- Q: Can I make Baked French Toast ahead of time? A: Yes, assemble and refrigerate overnight, then bake when you are ready.
- Q: Can I use stale bread? A: Absolutely, day-old bread is ideal because it soaks without falling apart.
- Q: How do I prevent sogginess? A: Ensure pieces are cut to similar sizes and press them gently so the custard distributes evenly; do not overpour in one spot.
- Q: Can I make this dairy-free? A: Use unsweetened almond or oat milk and a dairy-free butter alternative for greasing.
- Q: What toppings pair best? A: Pure maple syrup, a pat of butter, fresh berries, or lightly caramelized bananas work beautifully.
Baked French Toast
Make Baked French Toast that is custardy, golden, and perfect for weekend brunch.
Ingredients
Instructions
Step 1: Prepare the pan and bread
Generously coat a 9x13-inch baking dish with unsalted butter or nonstick spray so the baked custardy edges release easily. Tear or cut the crusty artisan sourdough into roughly 1-inch chunks and scatter them evenly into the prepared pan — you should end up with about nine cups of cubed bread in a single, even layer. This step is all about creating an even bed that will soak uniformly, so spread and nudge pieces until the surface looks balanced and porous.
Step 2: Whisk the custard
In a large matte grey mixing bowl, whisk together the eggs, milk (and optional half-and-half for extra richness), granulated sugar, brown sugar, pure vanilla extract, ground cinnamon, nutmeg, and kosher salt until glossy, homogenous, and slightly aerated. Aim for a silky, pale custard that will cling to bread pockets — the sugars should be mostly dissolved and the spices evenly distributed. Keep the whisk in the bowl when you transfer to the next step so it remains a persistent tool in the scene.
Step 3: Combine and soak
Pour the custard evenly over the bed of bread cubes, then use your fingers to press down and gently toss so every chunk absorbs some liquid and sits in an even layer. Adjust and press pieces so there are no dry pockets; you should see custard pooling between crevices and glossy saturation on exposed crumbs. Let the pan sit at room temperature for 10 minutes to start absorbing, or cover and refrigerate overnight for deeper soak and texture.
Step 4: Add the topping
When you’re ready to bake, stir together the topping sugar and cinnamon in a small bowl; this is a simple crystalline layer that will caramelize on top. Preheat the oven to 350°F (do not show or depict the oven), and with a small spoon scatter the cinnamon-sugar evenly over the soaked bread so the top gets a thin, even dusting that will crisp and brown.
Step 5: Bake until golden and set
Bake the dish uncovered for 30 to 40 minutes, aiming for a lightly crisp, golden top and a set, no-longer-raw center — about 35 minutes is a sweet spot for a moist interior with crunchy highlights. Look for bubbling custard at the edges and small caramelized spots on the peaks. When done, remove the pan and let it rest briefly so the interior stabilizes and you can either scoop generous portions or slice and serve it like a savory-sweet lasagna.
Step 6: Serve warm and finished
Scoop or slice warm portions directly from the same rectangular baking dish and finish with a pat of butter melting into the warm pockets, a generous drizzle of pure maple syrup, and a scatter of fresh blueberries (or sliced strawberries/bananas). Present in the original 9x13 pan so the rectangular geometry remains intact, with the whisk and mixing bowl nearby as quiet witnesses to the process.
Notes
- Use day-old or slightly stale bread so it soaks without becoming mushy.
- Refrigerate assembled pan overnight for deeper soak and better texture.
- Tent with foil if the top browns too quickly during baking.
- Reheat in a 350°F oven for best texture and even warming.
- Substitute milk with unsweetened plant milk for a dairy-free version.