French Onion Soup Recipe: a bowl that feels like home, rimmed in melted cheese and steeped in slow, sweet onions. I found my groove with this French Onion Soup Recipe during chilly evenings when I wanted something that smelled like the whole house was being hugged. I can still picture the first time I caramelized a mountain of onions until they read mahogany and the kitchen filled with a deep, sweet aroma. This French Onion Soup Recipe is soulful, forgiving, and effortlessly impressive when friends come over.
How This Recipe Became My Rainy-Day Favorite
The first time I made this soup, rain hammered the windows and I had nothing planned for dinner. I remember the sound of slow-slicing onions and a warm, buttered scent taking over the kitchen; it felt like the house was exhaling. As the onions turned from crisp white to glossy ribbons of gold and then to jammy chestnut strands, my impatience turned to calm. I hovered near the pot, stealing a spoonful of the broth that tasted like caramelized sunshine. When I served it to a friend that evening, we both sat quiet until the bowls were cleaned; the warmth in our hands felt like a small ritual against the damp night. That memory still pulls me back to this pot when weather or mood calls for comfort.
The Ingredients That Make It Sing
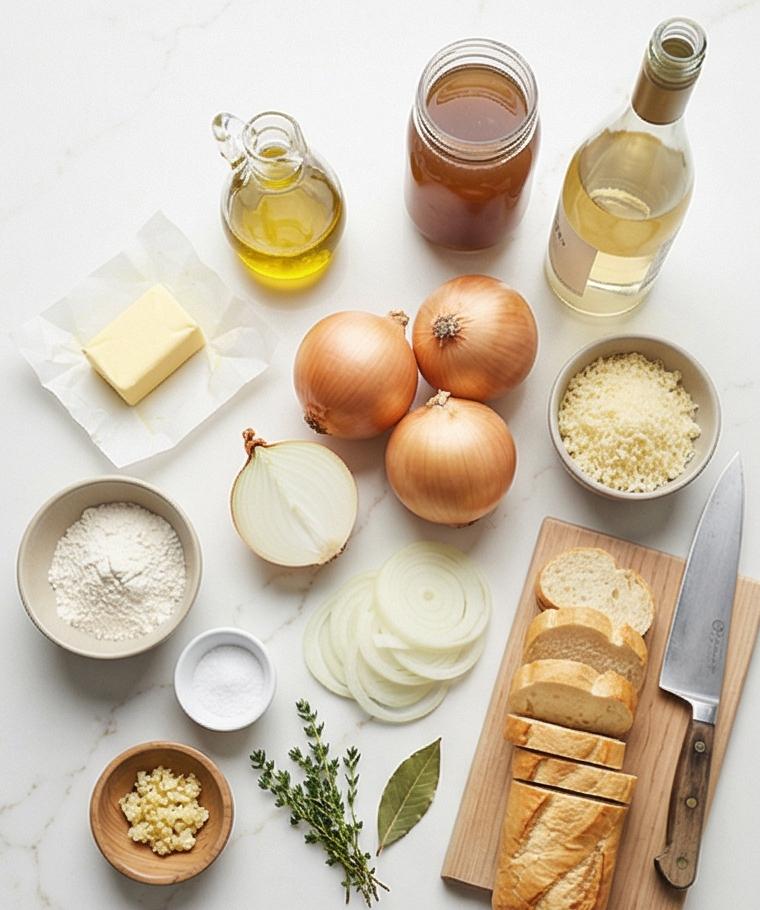
- Yellow Onions: The backbone of the soup; many thin layers caramelize into jammy sweetness. Substitute sweet onions or a mix of yellow and Vidalia if you prefer milder notes. Choose onions that feel heavy for their size and have dry, papery skins.
- Unsalted Butter: Adds richness and helps with browning; use salted butter but reduce added salt. Look for fresh, creamy butter.
- Extra-Virgin Olive Oil: Keeps the butter from burning and adds depth. Substitute neutral oil if needed.
- Beef Stock: Provides savory depth and body; use low-sodium so you can control salt. For a lighter or vegetarian version, use mushroom or vegetable stock.
- Gruyère Cheese: The melty, nutty blanket on top; Swiss or Emmental are good substitutes.
- Baguette: Toasted rounds become the vehicle for cheese; use rustic bread if a baguette is unavailable.
Essential Kitchen Tools and Why They Matter
If you want reliable results, a few solid tools make the process smoother. A heavy-bottomed Dutch oven holds and distributes heat evenly so the onions caramelize without burning. A sharp chef’s knife keeps slices uniform so all the onions cook at the same pace. A wooden spoon helps you stir and scrape gently without damaging the pot. For finishing, ovenproof crocks make broiling the cheese easy and safe; if you do not have them, use a rimmed baking sheet and heatproof bowls. A fine grater yields fluffy cheese that melts evenly, and a silicone spatula helps loosen fond while deglazing.
- Dutch oven: Even heat and good caramelization.
- Chef’s knife: Consistent, safe slicing.
- Wooden spoon: Gentle stirring and scraping.
- Oven-safe crocks or bowls: For gratineed finishing.
- Microplane or box grater: Fluffy, even-grating cheese.
Step-by-Step Preparation Guide
Step 1: Prepare the onions and aromatics
Peel the yellow onions, halve them root-to-tip, and slice them very thin pole-to-pole so the layers hold together during long cooking. Mince the garlic finely and grate the Gruyère and Parmigiano into separate small bowls; set the cheeses and herbs aside. This step is all about clean, consistent cuts and arranging components for quick reaching — the onions should look crisp, pale, and slightly translucent at the cut edges, the garlic discreetly fine, and the cheeses fluffy and airy in their bowls.
Step 2: Sweat the onions until soft and luminous
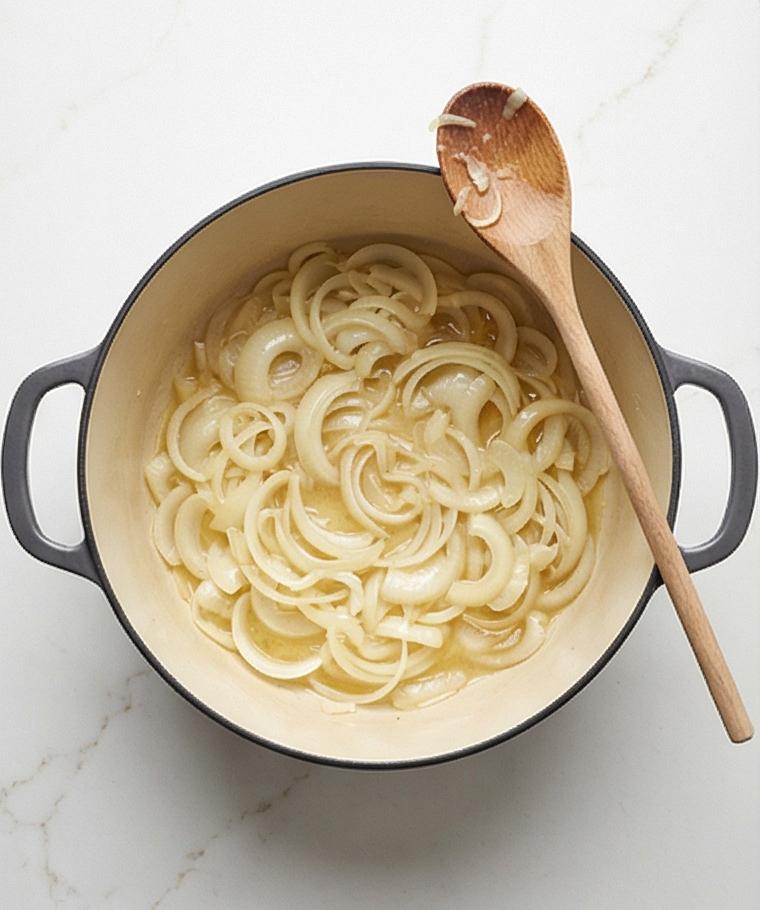
In a heavy, matte charcoal enameled Dutch oven placed on the surface (not on a stove), melt the butter and add the olive oil, then add the thinly sliced onions tossed with kosher salt. Cover briefly so the onion wedges steam and begin to soften; after uncovering they should appear glossy, slightly wilted and releasing pale syrupy liquid — the first visible textural change from raw to tender. The pot interior shows a shallow pool of pale onion liquid and translucent ribbons of onion.
Step 3: Slowly caramelize the onions to jammy deep-golden color
Remove the lid and lower the heat metaphorically — continue cooking the onions in the same matte Dutch oven until they transform into jammy, deeply golden-brown strands, reduced in volume and studded with sticky browned fond. The texture reads as rich, velvety ribbons with edges that are darker, almost mahogany, and a glossy sheen from rendered butter and olive oil. A wooden spoon rests across the pot’s rim, speckled with caramelized streaks.
Step 4: Add herbs, garlic, and build the roux
Nest the thyme sprigs and bay leaf into the jammy onions, stir in the minced garlic briefly until fragrant, then sprinkle the flour over the hot onions and stir until the raw-powder texture disappears and the mixture feels thicker and slightly pasty. Visually, the mass becomes clingy and satin-like, the flour having absorbed the fat to form a roux that coats each caramelized ribbon evenly.
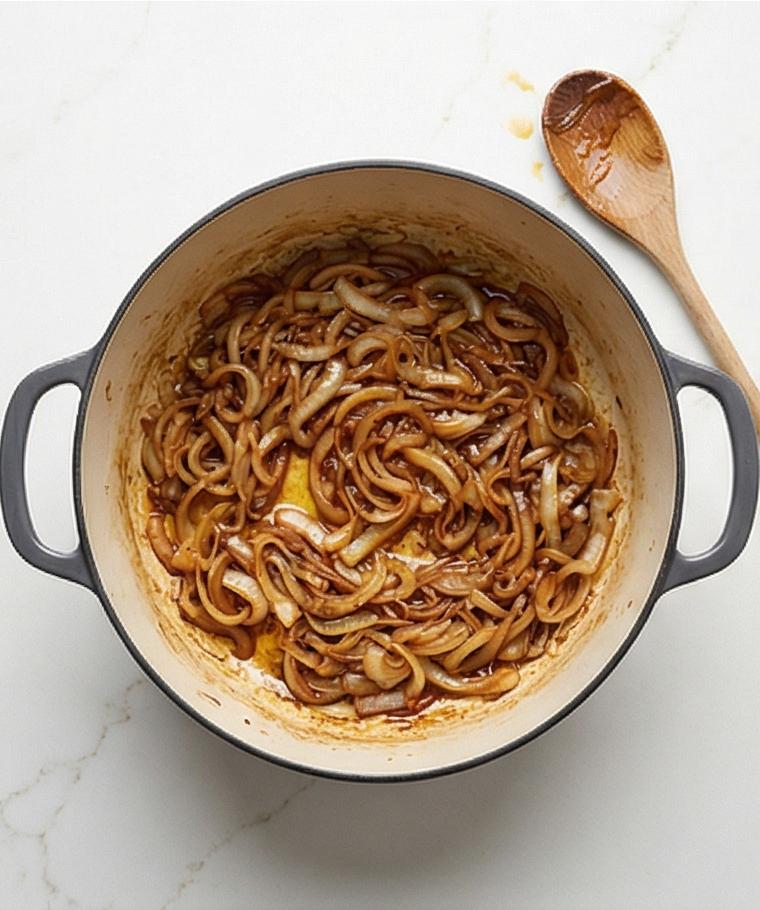
Step 5: Deglaze with white wine and loosen the fond
Pour the dry white wine into the pot and scrape the browned bits from the base; the wine should marry with the roux and dissolved fond to create a glossy, amber-tinted liquid that evaporates slightly and mellows the caramel sweetness. The surface shows tiny, shimmering pools and a thinner, more fluid consistency than the pasty roux, with herb sprigs floating and little suspended droplets of butter.
Step 6: Add stock and simmer to a brothy, velvety consistency
Add the beef stock, Worcestershire sauce, and freshly ground black pepper, stirring to combine. The pot now holds a deep-brown, translucent soup with suspended onion strands and a satin sheen. Simmer gently (no appliance shown) until flavors meld and the broth is brothy but slightly velvety — small concentric ripples and a few slow-moving onion strands indicate the right texture.
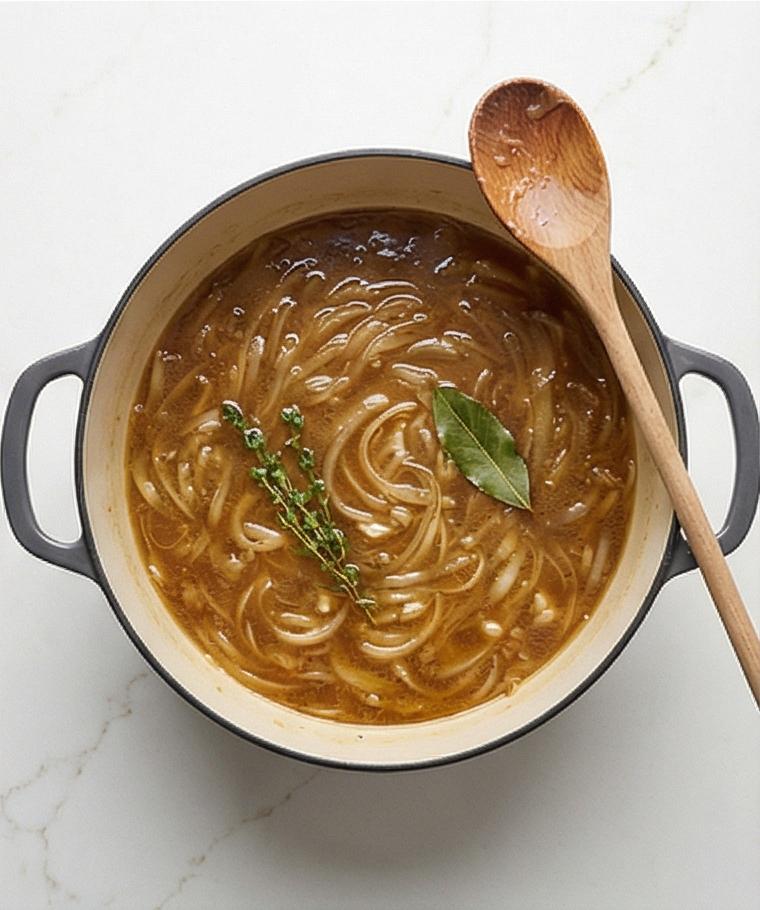
Step 7: Finish, taste, and keep warm while preparing the bread
Turn off heat, remove the thyme sprigs and bay leaf, and taste for salt and pepper, adding brandy or cognac if using. The soup in the pot looks concentrated and glossy, with a balanced color and aroma implied. Keep the pot covered and warm on the surface while you move to toast the bread and assemble bowls.
Step 8: Toast the baguette slices until crisp and golden
Arrange the baguette slices on a baking tray and brush with oil or melted butter, then toast them until crisp with lightly caramelized edges. The finished toast slices appear crisp, pale-golden with crunchy crumb and irregular bronzed edges; stack or fan a few to show their texture and readiness for layering on the soup.
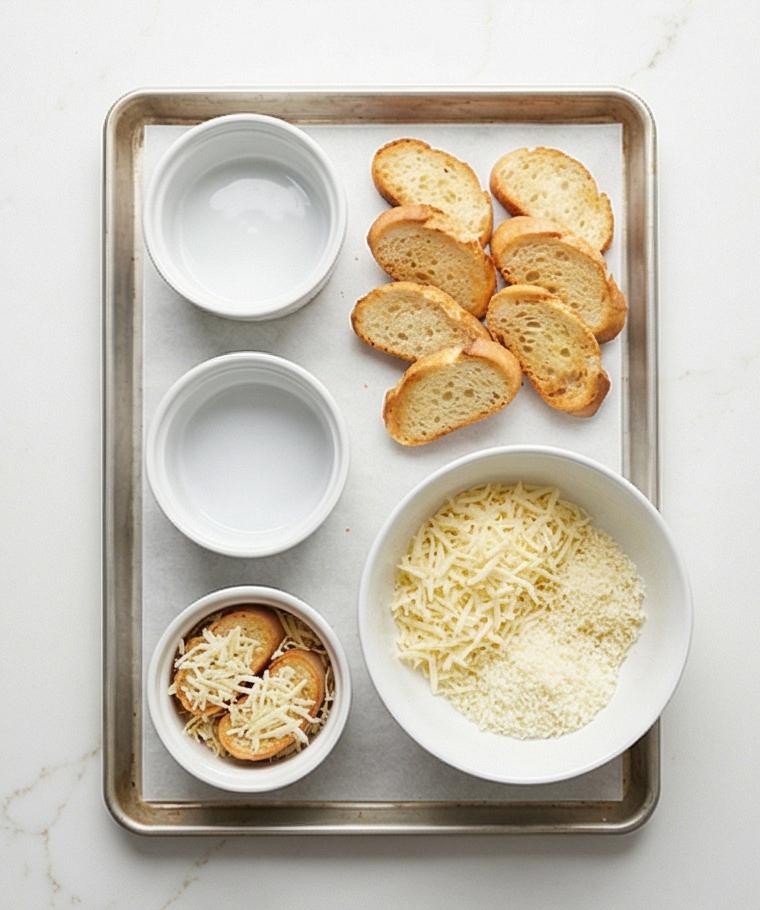
Step 9: Assemble bowls with soup, bread, and heaps of cheese
Ladle the hot soup into a set of identical white oven-safe ceramic crocks placed on a rimmed baking sheet; float the toasted baguette slices on top and pile the grated Gruyère (and a sprinkle of Parmigiano if using) generously over the bread to form a thick, even blanket of cheese. The bowls show a raw, voluminous mound of pale grated cheese ready to melt, with bread peeking through at the edges.
Step 10: Broil to gratinéed perfection, rest, and garnish
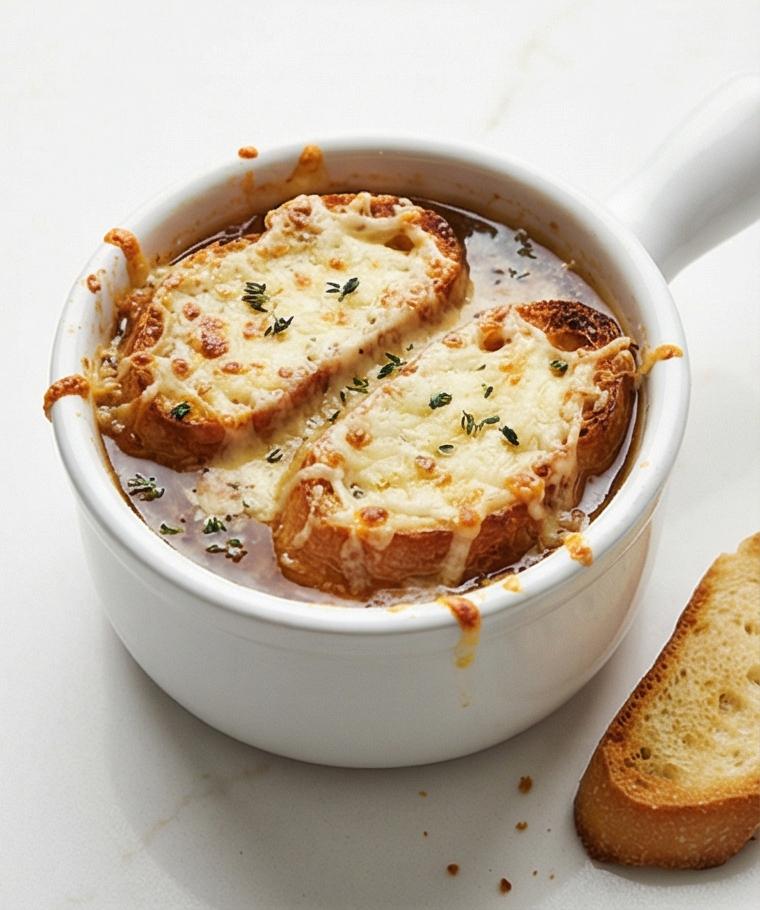
After the cheese has been melted and browned, let the crocks rest briefly; the final presentation is a bubbling, deeply browned, slightly blistered cheese crust that gives way to glossy, onion-strewn broth beneath. Finish each bowl with a tiny scatter of fresh thyme leaves or snipped chives. Serve piping hot with extra toasted slices alongside.
Making It Your Own
Try rotating small experiments each time you make it. For a vegetarian take, swap beef stock for a rich mushroom or roasted vegetable stock and add a splash of soy sauce for umami. In autumn, fold in a spoonful of roasted chestnuts or finish with a drizzle of sherry instead of brandy. For a smoky regional twist, use a little smoked Gruyère or fontina and add 1/2 teaspoon smoked paprika.
If you need it gluten-free, dust the onions with a tablespoon of cornstarch instead of flour and top with gluten-free bread. Small swaps keep the core method intact while letting you match seasonal produce and dietary needs.
How to Serve
When I host, I ladle the French Onion Soup Recipe into identical crocks to create a unified table look. Place crocks on a rimmed baking sheet to catch any bubbling cheese, and serve with extra toasted baguette rounds on the side. For a crowd, keep the main pot covered and warm and broil the crocks in batches.
If you want to scale the recipe up, double the onions and stock proportionally and use two ovens or broil in shifts. For a lighter portion, use smaller bowls and thinner slices of bread. Garnish each bowl with a tiny sprinkle of fresh thyme leaves or snipped chives for color and aroma.
Storage and Reheating Tips
Cool leftover soup quickly and refrigerate in an airtight container for up to 3 days. Keep toasted bread and grated cheese separate so the bread does not go soggy and the cheese melts fresh when serving.
To reheat, gently warm the soup on the stovetop until simmering; assemble bowls, top with toasted slices and grated cheese, then broil briefly until the cheese bubbles and browns. For longer storage, freeze the soup without bread for up to 3 months and thaw in the fridge overnight before reheating.
Common Mistakes and How to Avoid Them
Not cooking the onions long enough is the most frequent error; patience is the secret. Keep the heat low to medium-low and stir occasionally so the onions brown evenly without burning.
Over-salting can happen if your stock is not low-sodium. Always taste near the end and adjust. Finally, do not skip toasting the bread — it gives texture and keeps the cheese-topped rounds from turning to mush.
Ready to Try It?
If you love something slowly made and richly flavored, give this French Onion Soup Recipe a go. It rewards patience, looks gorgeous on the table, and always brings people together. I hope you find it as comforting and impressive as I do.
Frequently Asked Questions
- What makes this the best French Onion Soup Recipe? This version focuses on slow, even caramelization and a good-quality beef stock so the broth is deep and balanced.
- Can I make this vegetarian? Yes, swap the beef stock for a rich mushroom or roasted vegetable stock and add a splash of soy sauce for extra umami.
- How long should I caramelize the onions? Plan for 45 to 75 minutes depending on heat and pan; patience gives the best sweet, jammy texture.
- Do I have to use Gruyère? Gruyère gives classic melting and flavor, but Swiss, Emmental, or a mix with fontina work well too.
- Can I prepare this ahead for guests? Yes, make the soup a day ahead, keep bread and cheese separate, then reheat and broil just before serving.
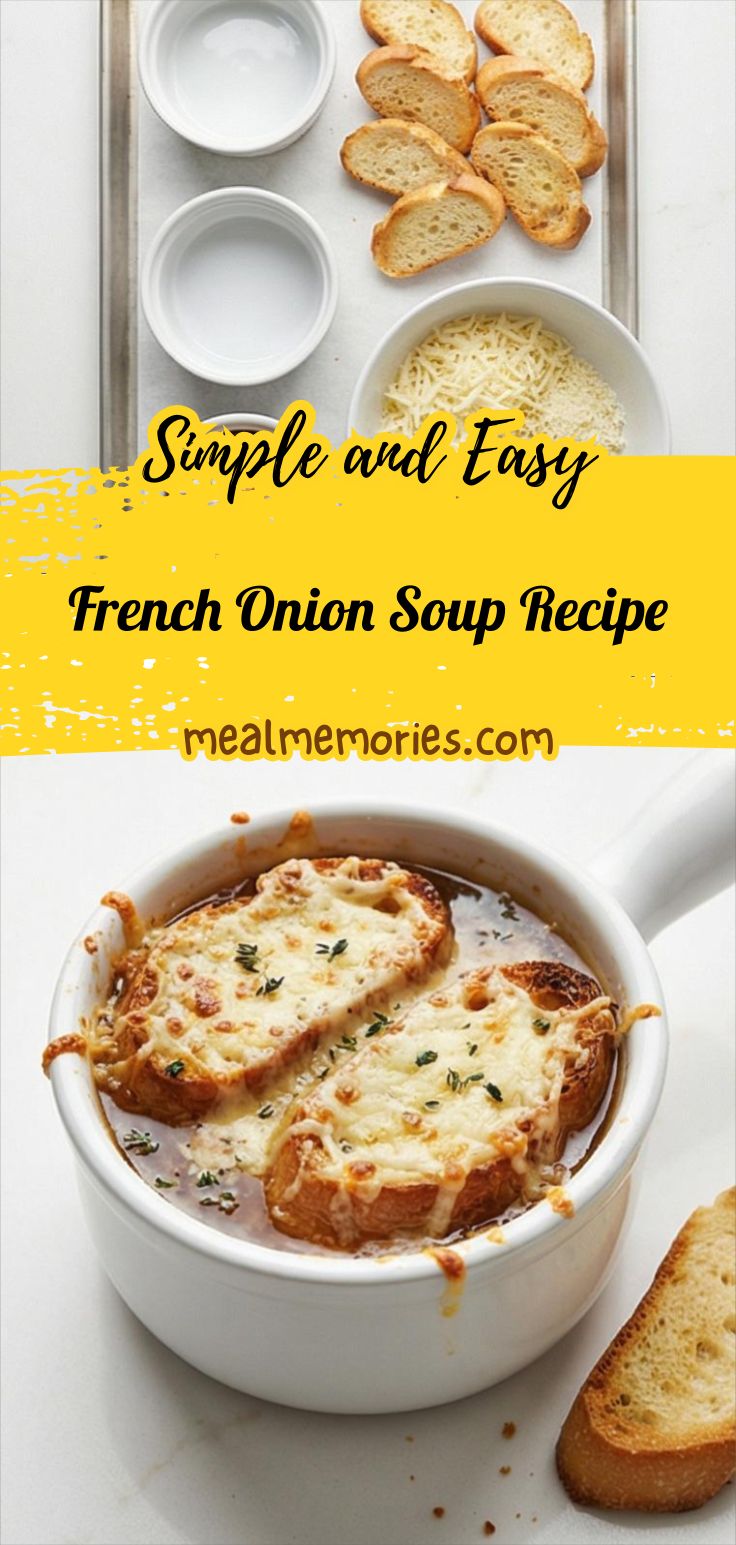
French Onion Soup Recipe
Make the French Onion Soup Recipe: slow-caramelized onions, rich beef broth, and a gooey cheese top — perfect for cozy dinners.
Ingredients
Cook ModePrevent your screen from going darkInstructions
Step 1: Prepare the onions and aromatics
Peel the yellow onions, halve them root-to-tip, and slice them very thin pole-to-pole so the layers hold together during long cooking. Mince the garlic finely and grate the Gruyère and Parmigiano into separate small bowls; set the cheeses and herbs aside. This step is all about clean, consistent cuts and arranging components for quick reaching — the onions should look crisp, pale, and slightly translucent at the cut edges, the garlic discreetly fine, and the cheeses fluffy and airy in their bowls.
Step 2: Sweat the onions until soft and luminous
In a heavy, matte charcoal enameled Dutch oven placed on the surface (not on a stove), melt the butter and add the olive oil, then add the thinly sliced onions tossed with kosher salt. Cover briefly so the onion wedges steam and begin to soften; after uncovering they should appear glossy, slightly wilted and releasing pale syrupy liquid — the first visible textural change from raw to tender. The pot interior shows a shallow pool of pale onion liquid and translucent ribbons of onion.
Step 3: Slowly caramelize the onions to jammy deep-golden color
Remove the lid and lower the heat metaphorically — continue cooking the onions in the same matte Dutch oven until they transform into jammy, deeply golden-brown strands, reduced in volume and studded with sticky browned fond. The texture reads as rich, velvety ribbons with edges that are darker, almost mahogany, and a glossy sheen from rendered butter and olive oil. A wooden spoon rests across the pot’s rim, speckled with caramelized streaks.
Step 4: Add herbs, garlic, and build the roux
Nest the thyme sprigs and bay leaf into the jammy onions, stir in the minced garlic briefly until fragrant, then sprinkle the flour over the hot onions and stir until the raw-powder texture disappears and the mixture feels thicker and slightly pasty. Visually, the mass becomes clingy and satin-like, the flour having absorbed the fat to form a roux that coats each caramelized ribbon evenly.
Step 5: Deglaze with white wine and loosen the fond
Pour the dry white wine into the pot and scrape the browned bits from the base; the wine should marry with the roux and dissolved fond to create a glossy, amber-tinted liquid that evaporates slightly and mellows the caramel sweetness. The surface shows tiny, shimmering pools and a thinner, more fluid consistency than the pasty roux, with herb sprigs floating and little suspended droplets of butter.
Step 6: Add stock and simmer to a brothy, velvety consistency
Add the beef stock, Worcestershire sauce, and freshly ground black pepper, stirring to combine. The pot now holds a deep-brown, translucent soup with suspended onion strands and a satin sheen. Simmer gently (no appliance shown) until flavors meld and the broth is brothy but slightly velvety — small concentric ripples and a few slow-moving onion strands indicate the right texture.
Step 7: Finish, taste, and keep warm while preparing the bread
Turn off heat, remove the thyme sprigs and bay leaf, and taste for salt and pepper, adding brandy or cognac if using. The soup in the pot looks concentrated and glossy, with a balanced color and aroma implied. Keep the pot covered and warm on the surface while you move to toast the bread and assemble bowls.
Step 8: Toast the baguette slices until crisp and golden
Arrange the baguette slices on a baking tray and brush with oil or melted butter, then toast them until crisp with lightly caramelized edges. The finished toast slices appear crisp, pale-golden with crunchy crumb and irregular bronzed edges; stack or fan a few to show their texture and readiness for layering on the soup.
Step 9: Assemble bowls with soup, bread, and heaps of cheese
Ladle the hot soup into a set of identical white oven-safe ceramic crocks placed on a rimmed baking sheet; float the toasted baguette slices on top and pile the grated Gruyère (and a sprinkle of Parmigiano if using) generously over the bread to form a thick, even blanket of cheese. The bowls show a raw, voluminous mound of pale grated cheese ready to melt, with bread peeking through at the edges.
Step 10: Broil to gratinéed perfection, rest, and garnish
After the cheese has been melted and browned, let the crocks rest briefly; the final presentation is a bubbling, deeply browned, slightly blistered cheese crust that gives way to glossy, onion-strewn broth beneath. Finish each bowl with a tiny scatter of fresh thyme leaves or snipped chives. Serve piping hot with extra toasted slices alongside.
Notes
- Use low-sodium stock so you can control final seasoning.
- Caramelize the onions slowly over medium-low heat for best flavor.
- Keep bread and cheese separate until just before broiling to avoid soggy toast.
- Freeze the soup without bread for up to 3 months; thaw overnight in the fridge.
- Taste and adjust salt near the end, especially if your stock is not low-sodium.