Beef Stew Recipe has been my go-to when I want something that feels like a kitchen hug. I remember the first time I made this Beef Stew Recipe: the house filled with a rich, savory smell that made everyone slow down and breathe deeper. I learned to trust long, low heat and a little patience to turn inexpensive chuck into melt-in-your-mouth comfort. If you love one-pot dinners that get better the next day, this Beef Stew Recipe will become one of your favorites soon enough.
How This Beef Stew Recipe Became My Rainy-Day Favorite
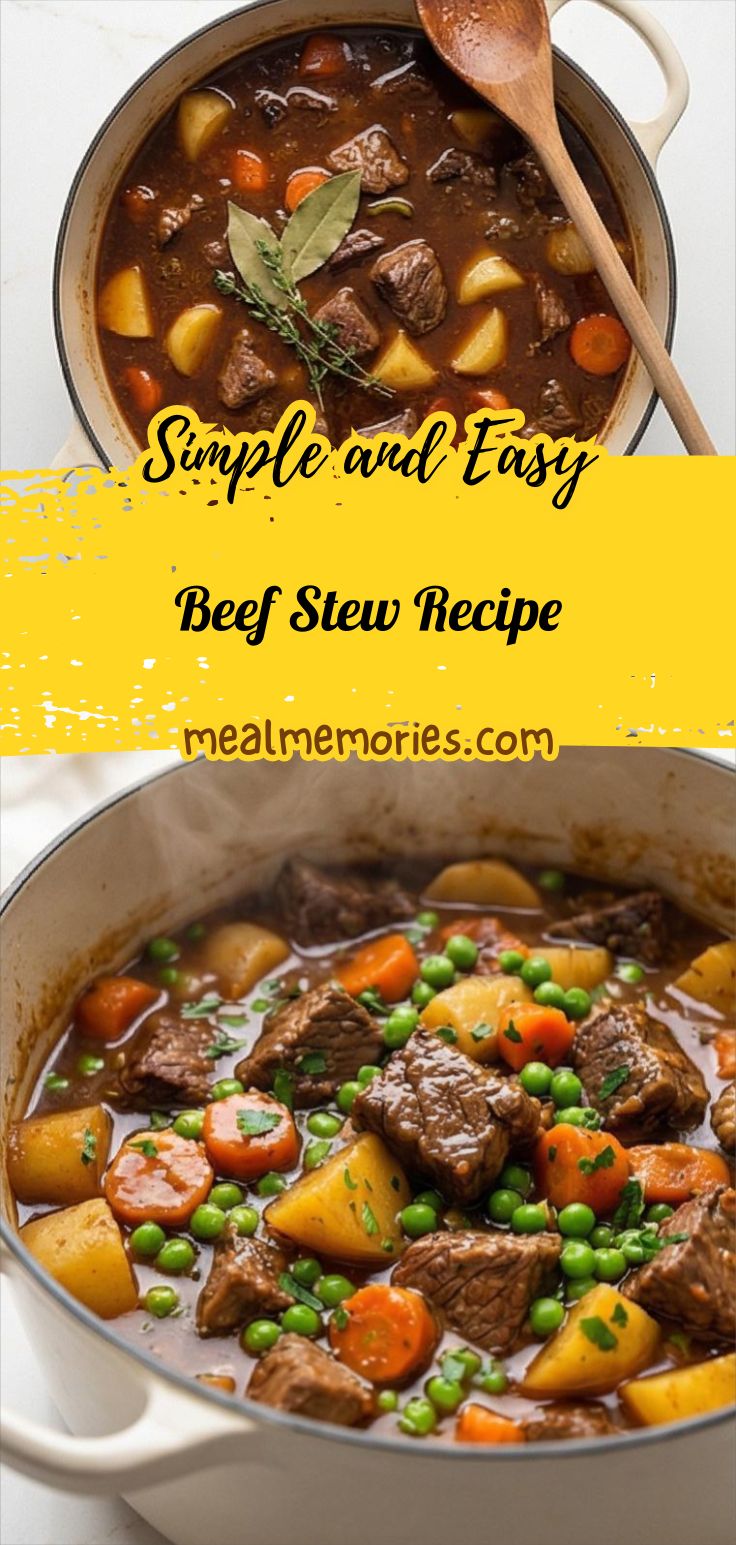
I made this Beef Stew Recipe on a gray Sunday when the rain would not let up. The sound of water on the windows and the slow ritual of searing meat and stirring in tomato paste felt almost meditative. The kitchen turned warm and fragrant: the sweet tang of reduced wine, the perfume of thyme, and the caramelized edges of beef that promised depth. I remember lifting the lid after the first hour and being met with a glossy mahogany surface and the soft hiss of steam. Serving it to friends that evening, everyone paused mid-bite, eyes closing just long enough to tell me it was working. That memory sticks because the stew does more than fill bellies, it makes a small, ordinary night feel like an occasion.
The Ingredients That Do the Heavy Lifting
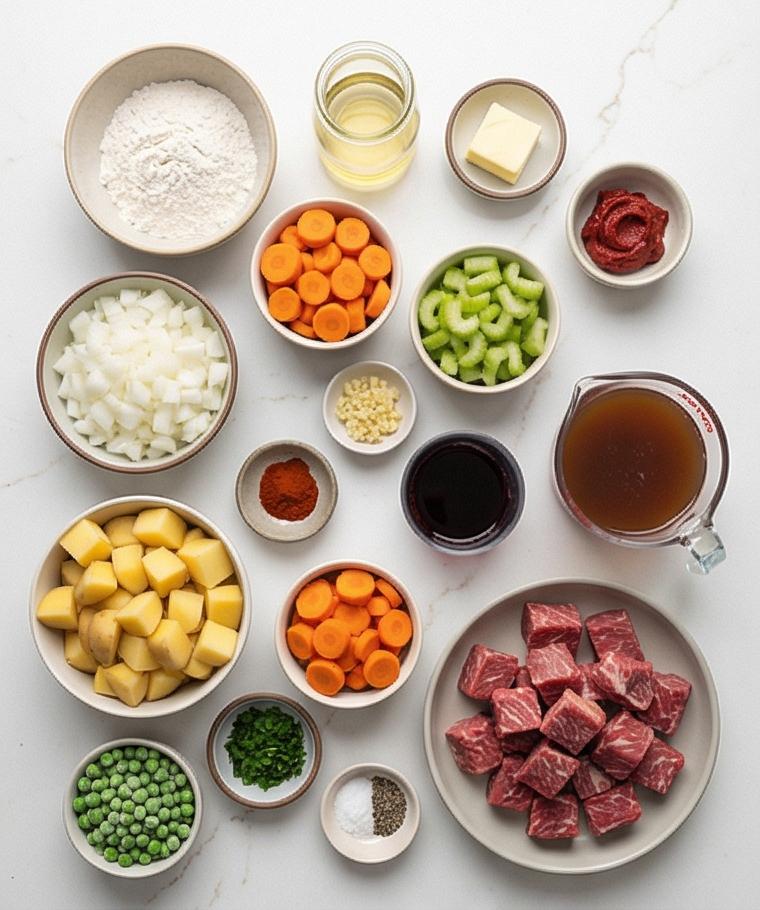
- Boneless Beef Chuck: The star of the show; choose well-marbled chuck for connective tissue that breaks down into silky gelatin. Substitute: short ribs or brisket for richer flavor. Tip: trim excessive fat but keep some for flavor.
- Onions, Carrots, Celery: The aromatic backbone; sweat gently to build sweetness. Substitute: shallots for a sweeter onion note. Tip: uniform dice so everything cooks evenly.
- Tomato Paste and Red Wine: They add acidity and depth. Substitute: extra broth and a splash of balsamic if you skip wine. Tip: brown the paste until it darkens.
- Beef Broth, Bay, Thyme: The braising liquid and seasoning base. Substitute: low-sodium chicken broth in a pinch.
- Potatoes and Peas: Potatoes give body; peas add a bright pop at the end. Substitute: turnips or parsnips for a different root profile.
Essential Kitchen Tools and Why They Matter
A few honest tools make this Beef Stew Recipe easy and enjoyable. A heavy, enameled Dutch oven is the obvious hero because its weight and heat retention let you brown meat then braise with minimal fuss. If you do not have one, use a heavy, lidded oven-safe pot.
- Enameled Dutch Oven or Heavy Pot: Holds heat and creates fond for deep flavor.
- Tongs and Wooden Spoon: Tongs turn beef without tearing, and a wooden spoon scrapes fond without scratching.
- Sharp Knife and Cutting Board: Uniform pieces speed cooking and improve texture.
- Measuring Cups and Small Prep Bowls: Keep mise en place so you do not rush.
If you prefer a slow cooker, you can brown on the stovetop then finish in the slow cooker, though you will lose some of the concentrated fond flavor from oven braising.
Step-by-Step Preparation Guide
Step 1: Warm the oven and prepare the vessel
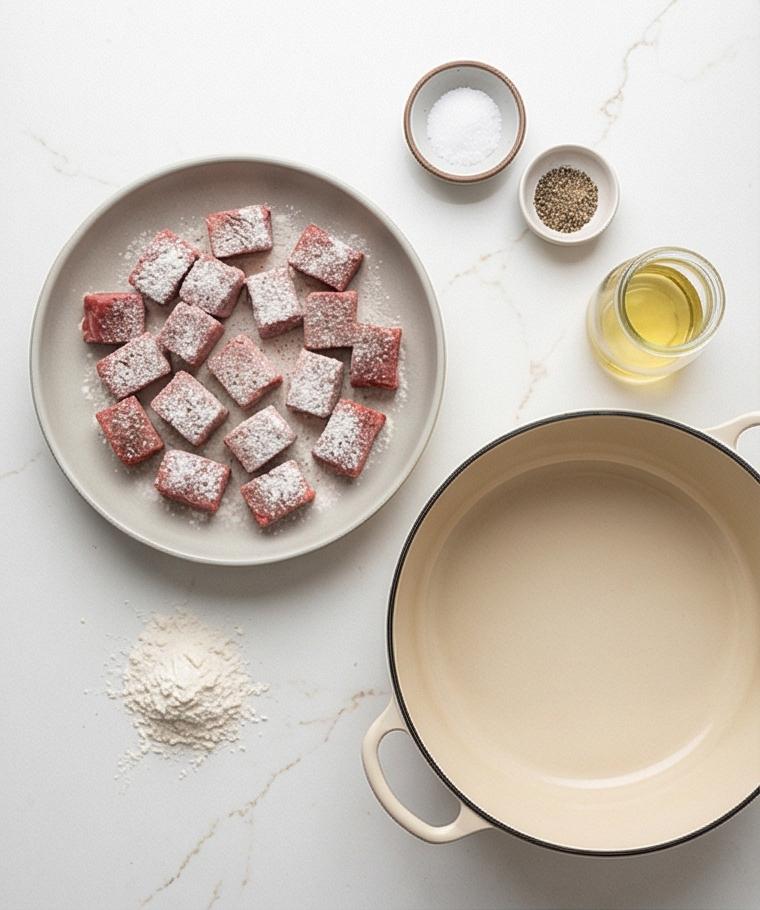
Preheat the oven to 325°F (165°C) and slide a rack into the lower-middle position so the heavy Dutch oven will sit centered during the braise. While the oven comes up to temperature, set your enameled, round Dutch oven and the small prep bowls on the clean quartz surface so everything is within reach — looking ahead, this single pot will carry the dish from browning through to serving.
Step 2: Dry, season, and lightly flour the beef
Pat the beef cubes thoroughly dry with paper towels so they brown properly, then season evenly with kosher salt and freshly ground black pepper. Place the flour in a shallow bowl and gently toss the beef, shaking off any excess so each cube wears a thin, delicate dusting rather than a heavy breading; this thin coat will help develop a crisp, caramelized crust during searing. Arrange the dredged cubes on a tray or bowl to wait for their turn to brown.
Step 3: Brown the beef in batches and reserve the fond
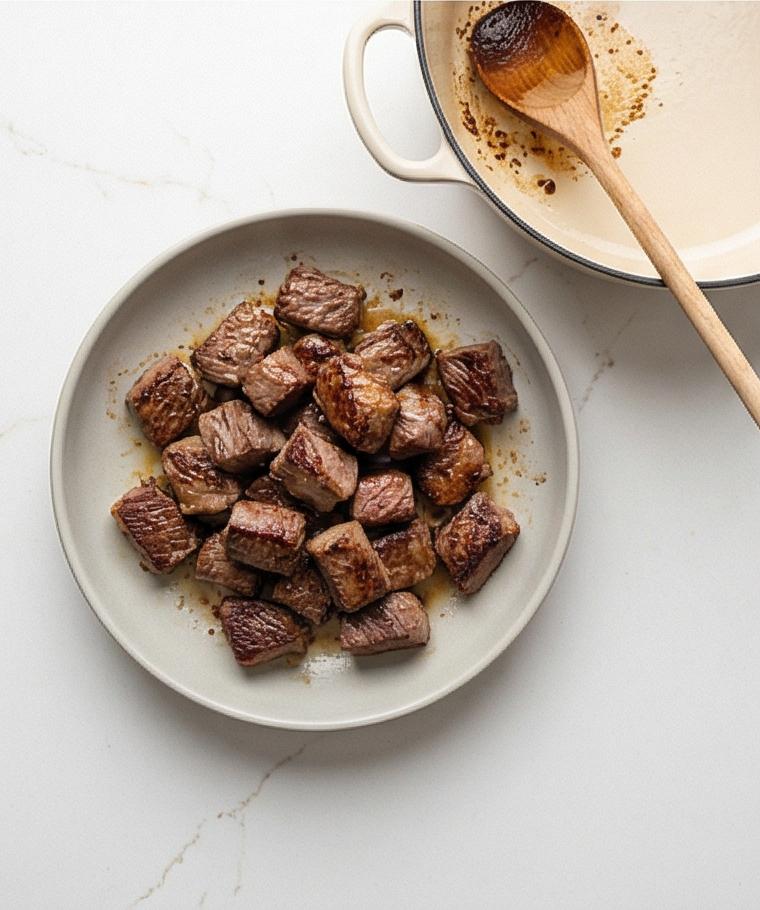
Working in small batches, sear the floured beef until each cube is deeply golden with a concentrated mahogany crust — you want audible sizzles and visible darkened edges, not steamed gray meat. Transfer the browned pieces to a large bowl as they finish so the braising pot keeps the dark caramelized fond. You should see tiny glossy beads of rendered fat and sticky browned bits clinging to the surface of the meat and the pot base; that fond is flavor gold and will be scraped into the sauce.
Step 4: Soften the vegetables, deepen the paste, and deglaze
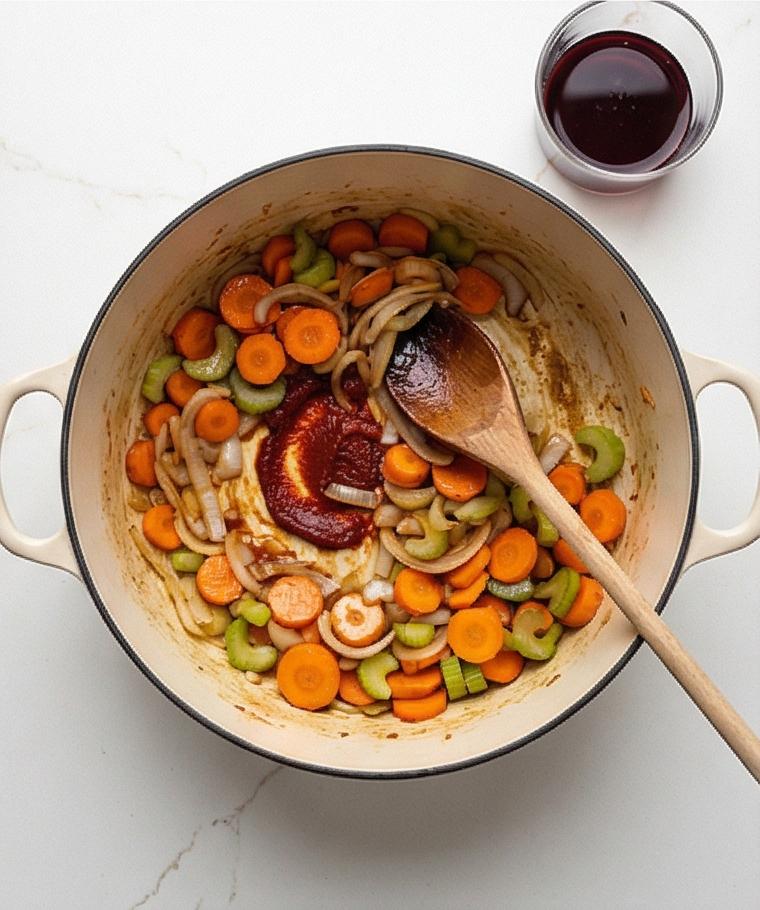
Reduce heat, add a knob of butter, then sweat diced onions, sliced carrots and celery until translucent with some golden edges; the vegetables should look softened and slightly lacquered from the butter and browned bits. Stir in minced garlic, a concentrated smear of tomato paste and smoked paprika until the paste darkens and smells toasty and rich. Pour in the red wine and use a wooden spoon to scrape up every caramelized fleck from the pot so the liquid turns glossy and slightly reduced — fragrant, slightly sweet, and smelling of concentrated beef and tomato.
Step 5: Assemble the braise and transfer to the oven
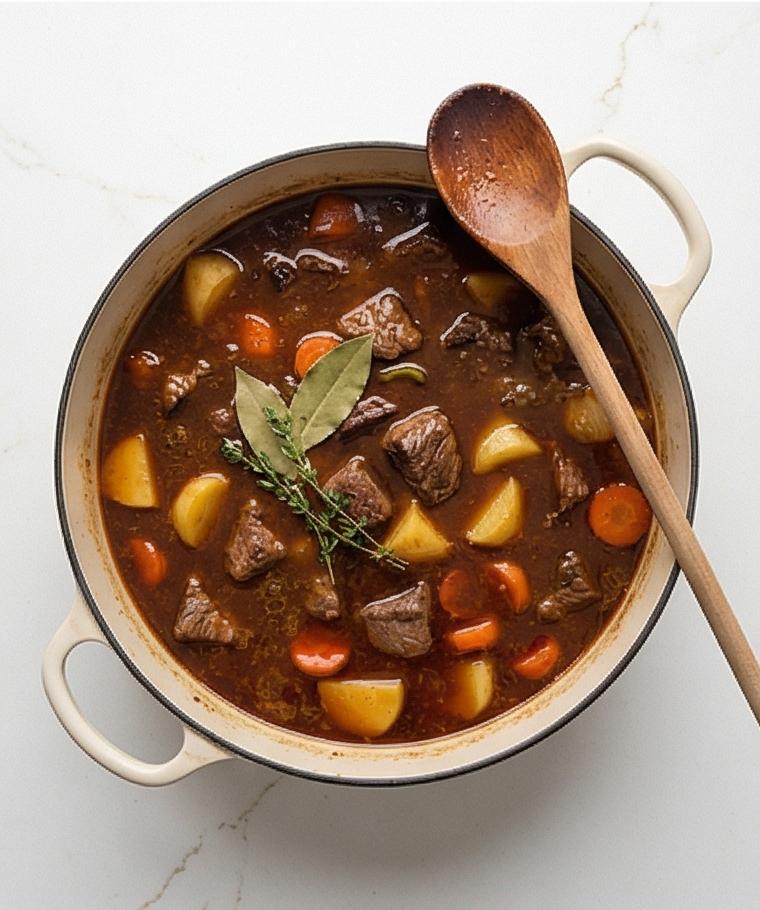
Add beef broth, water, bay leaves, thyme sprigs and Worcestershire sauce, then nestle the reserved browned beef and any collected juices back into the pot. Bring the whole pot up to the edge of a gentle boil, skim any foam, then cover tightly and transfer to the preheated oven to braise for 1½ hours; the liquid should be a deep, glossy mahogany and barely bubbling — the meat will begin to relax and the connective tissue will start dissolving into the sauce.
Step 6: Add potatoes and carrots, finish braising, then stir in peas and herbs
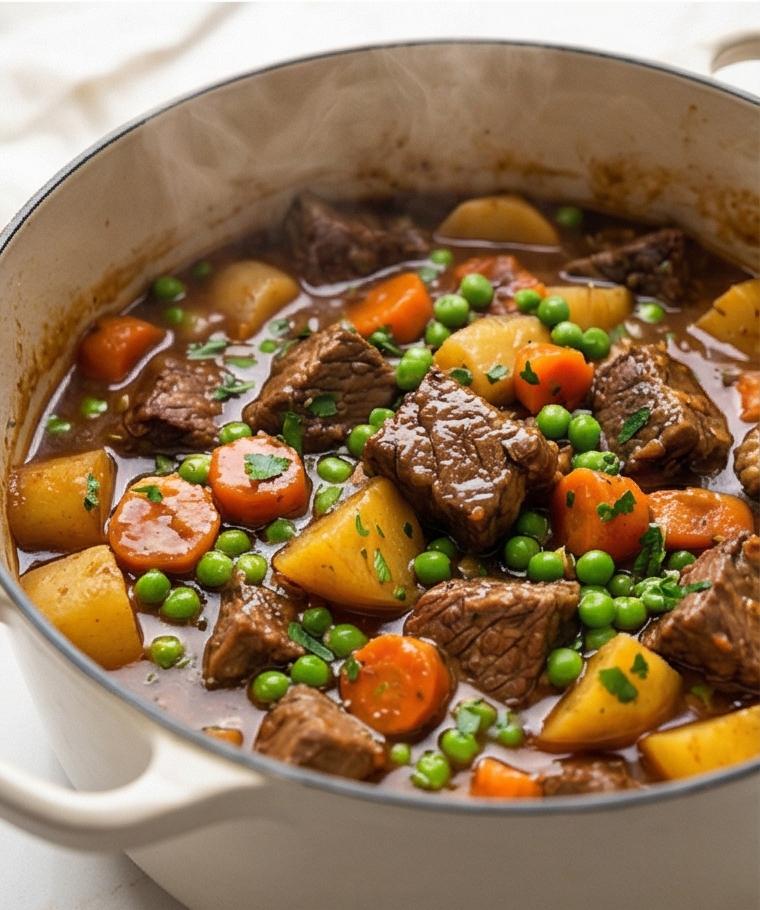
After the first braise, open the pot and add the potato chunks and the extra sliced carrot, making sure the vegetables are mostly submerged; continue braising until the beef becomes fork-tender and the potatoes hold shape but are cooked through. Remove the pot, discard bay leaves and thyme sprigs, then return to low stovetop heat (or keep on the warmed surface) to stir in frozen peas and plenty of chopped parsley — the peas should steam to a bright pop of green and the sauce should be thick and glossy, coating each cube of meat and vegetable.
Step 7: Adjust seasoning, rest, and serve directly from the pot
Taste and correct salt and pepper, add a cornstarch slurry only if the sauce needs thickening, then turn off the heat and let the stew rest for 10–15 minutes to let the sauce settle. To serve, ladle the hot stew directly from the same round Dutch oven into warmed bowls or serve straight from the pot, finishing with a scattering of fresh parsley; the final dish should feel rich, glossy, and comforting.
Making It Your Own
I like to experiment with small swaps to see how they change the personality of the stew. Try substituting half the chuck for short ribs if you want an even more gelatinous mouthfeel. For a lighter, more Mediterranean take, swap thyme for rosemary and add a teaspoon of lemon zest at the end. If you cook vegetarian for some family members, make a version with mushrooms, smoked tempeh, and vegetable broth in a separate pot; it will not be the same as the Beef Stew Recipe but it will be gratifying.
Try seasonal tweaks: in late autumn add parsnips or rutabaga for earthiness. For a spicier regional twist, stir in a teaspoon of harissa or smoked chipotle. Small changes like swapping Yukon golds for baby potatoes keep the texture familiar while shifting flavor.
How to Serve
When I host, I serve the Beef Stew Recipe straight from the Dutch oven so guests can help themselves and the pot stays warm. For six people, the recipe fills bowls generously; if you have more guests, keep the stew warm in a low oven and serve with crusty bread and a big green salad.
To make it feel fancier, spoon stew over creamy mashed potatoes or buttered egg noodles and finish with a scattering of parsley and a few long thyme sprigs. For family-style comfort, place bowls on the table with extra bread and small plates of pickles and mustard to cut through the richness.
Storage and Reheating Tips
Cool the stew quickly by removing it from the hot pot and spreading in a shallow container before refrigerating. Stored in an airtight container, the stew keeps for 3 to 4 days and actually tastes better after a day or two as the flavors meld.
To reheat, warm gently on the stovetop over low heat, stirring occasionally, or microwave individualized portions. If the sauce thickened too much, add a splash of broth or water and stir to loosen. For freezing, divide into meal-sized portions and freeze for up to 3 months.
Common Mistakes and How to Avoid Them
Not drying the beef well before searing will create steam instead of a good crust; pat the pieces thoroughly and do not overcrowd the pan. Brown in batches and resist the urge to rush.
Under-seasoning at the start is another trap because braised dishes need confident salt early and a final adjustment at the end. Taste as you finish and correct seasoning just before serving.
You Should Try This
Give the Beef Stew Recipe a shot this weekend. It is forgiving, makes excellent leftovers, and rewards patience. Once you taste that glossy, deeply flavored sauce and fork-tender beef, you will understand why I return to this recipe again and again.
Frequently Asked Questions.
- Q: Can I use a different cut of beef for this stew?
A: Yes, you can use short ribs or brisket; choose cuts with connective tissue so they become tender when braised. - Q: Do I have to use red wine?
A: No, you can skip wine and use an extra cup of beef broth with a splash of balsamic vinegar for acidity. - Q: How do I thicken the stew if it is too thin?
A: Make a cornstarch slurry with cold water and stir a little in at a time while simmering until you reach the desired thickness. - Q: Can I make this in a slow cooker?
A: Yes, brown the beef and vegetables first, then transfer to the slow cooker and cook on low for 6 to 8 hours. - Q: Will this stew freeze well?
A: Absolutely, portion it into airtight containers and freeze for up to 3 months; thaw in the fridge before reheating.
Beef Stew Recipe
Make this Beef Stew Recipe for a rich, one-pot comfort meal that improves overnight. Try it this weekend.
Ingredients
Instructions
Step 1: Warm the oven and prepare the vessel
Preheat the oven to 325°F (165°C) and slide a rack into the lower-middle position so the heavy Dutch oven will sit centered during the braise. While the oven comes up to temperature, set your enameled, round Dutch oven and the small prep bowls on the clean quartz surface so everything is within reach — looking ahead, this single pot will carry the dish from browning through to serving.
Step 2: Dry, season, and lightly flour the beef
Pat the beef cubes thoroughly dry with paper towels so they brown properly, then season evenly with kosher salt and freshly ground black pepper. Place the flour in a shallow bowl and gently toss the beef, shaking off any excess so each cube wears a thin, delicate dusting rather than a heavy breading; this thin coat will help develop a crisp, caramelized crust during searing. Arrange the dredged cubes on a tray or bowl to wait for their turn to brown.
Step 3: Brown the beef in batches and reserve the fond
Working in small batches, sear the floured beef until each cube is deeply golden with a concentrated mahogany crust — you want audible sizzles and visible darkened edges, not steamed gray meat. Transfer the browned pieces to a large bowl as they finish so the braising pot keeps the dark caramelized fond. You should see tiny glossy beads of rendered fat and sticky browned bits clinging to the surface of the meat and the pot base; that fond is flavor gold and will be scraped into the sauce.
Step 4: Soften the vegetables, deepen the paste, and deglaze
Reduce heat, add a knob of butter, then sweat diced onions, sliced carrots and celery until translucent with some golden edges; the vegetables should look softened and slightly lacquered from the butter and browned bits. Stir in minced garlic, a concentrated smear of tomato paste and smoked paprika until the paste darkens and smells toasty and rich. Pour in the red wine and use a wooden spoon to scrape up every caramelized fleck from the pot so the liquid turns glossy and slightly reduced — fragrant, slightly sweet, and smelling of concentrated beef and tomato.
Step 5: Assemble the braise and transfer to the oven
Add beef broth, water, bay leaves, thyme sprigs and Worcestershire sauce, then nestle the reserved browned beef and any collected juices back into the pot. Bring the whole pot up to the edge of a gentle boil, skim any foam, then cover tightly and transfer to the preheated oven to braise for 1½ hours; the liquid should be a deep, glossy mahogany and barely bubbling — the meat will begin to relax and the connective tissue will start dissolving into the sauce.
Step 6: Add potatoes and carrots, finish braising, then stir in peas and herbs
After the first braise, open the pot and add the potato chunks and the extra sliced carrot, making sure the vegetables are mostly submerged; continue braising until the beef becomes fork-tender and the potatoes hold shape but are cooked through. Remove the pot, discard bay leaves and thyme sprigs, then return to low stovetop heat (or keep on the warmed surface) to stir in frozen peas and plenty of chopped parsley — the peas should steam to a bright pop of green and the sauce should be thick and glossy, coating each cube of meat and vegetable.
Step 7: Adjust seasoning, rest, and serve directly from the pot
Taste and correct salt and pepper, add a cornstarch slurry only if the sauce needs thickening, then turn off the heat and let the stew rest for 10–15 minutes to let the sauce settle. To serve, ladle the hot stew directly from the same round Dutch oven into warmed bowls or serve straight from the pot, finishing with a scattering of fresh parsley; the final dish should feel rich, glossy, and comforting.
Notes
- Brown the beef in batches to avoid steaming and to build fond.
- Brown the tomato paste until it darkens for a richer flavor.
- Add potatoes after the first braise so they keep their shape.
- Cool quickly before refrigerating to preserve texture and safety.
- Adjust seasoning at the end, since flavors concentrate during braising.