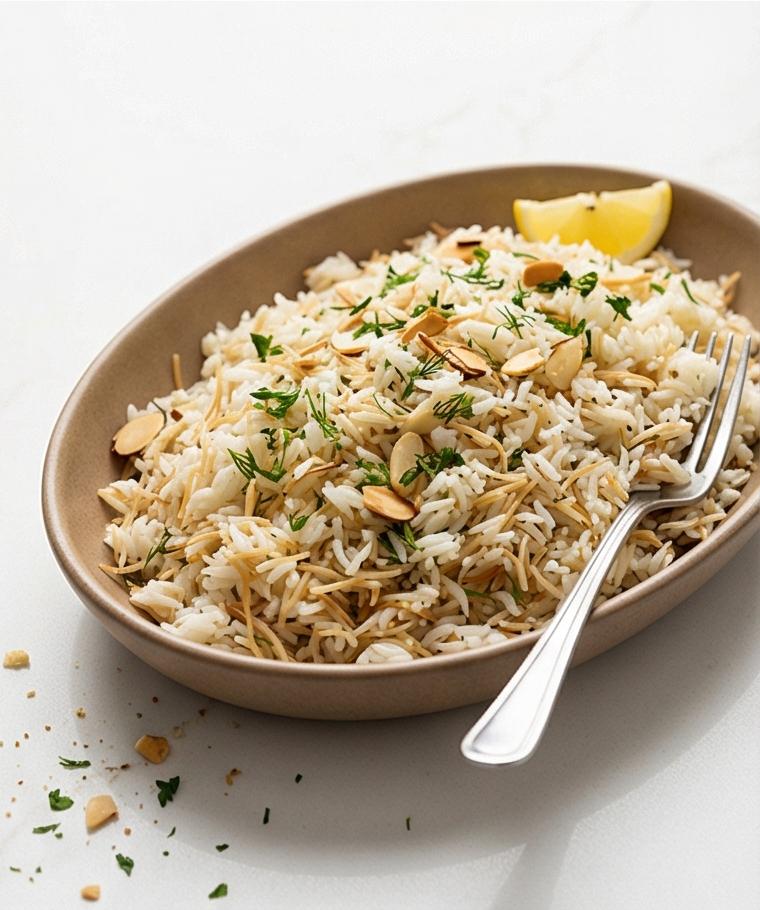
Quinoa Recipe is one of those dishes I make again and again when I want something bright, simple, and reliably comforting. I first learned this Quinoa Recipe from a neighbor who loved to cook for friends, and over the years I’ve nudged it toward my own favorite lemony-herb balance. I use it as a quick weeknight side, a base for a bowl lunch, or the centerpiece of a light dinner when paired with roasted vegetables or grilled fish. It feels both homey and a little elegant, and the lemon-herb finish always makes people ask for seconds.
How This Quinoa Recipe Became My Rainy-Day Favorite
I remember making this Quinoa Recipe on a gray, rainy afternoon when the air smelled like wet stone and coffee. I wanted something warm but bright to cut through the weather, so I browned a little onion in olive oil until the kitchen smelled sweet and savory, then added the rinsed quinoa and toasted it until the grains spoke with a faint nutty scent. As the broth simmered and the steam rose, I grated a lemon until the aroma popped like a small, sunlit memory in the room. When I folded butter and herbs into the finished quinoa, the dish felt like a gentle, comforting hug with a lively finish – cozy but awake. That first bowl made me realize how few ingredients you need for something that feels nourishing and a little celebratory at the same time.
Main Ingredients and What They Do
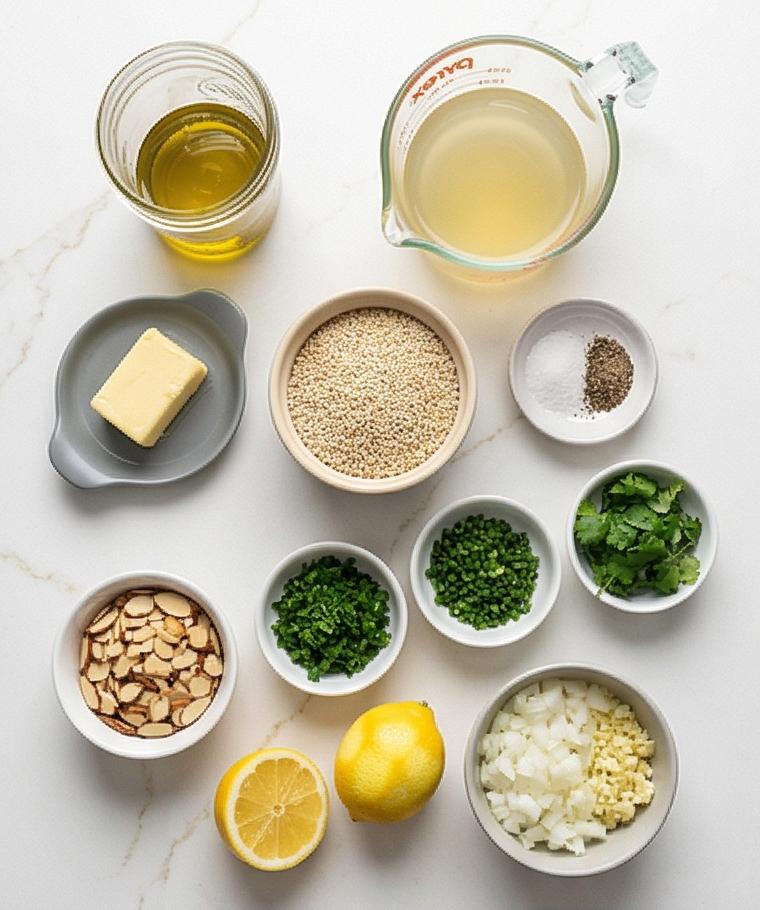
- Extra-virgin olive oil: Provides the initial flavor and helps soften the aromatics; substitute light olive oil or avocado oil if desired.
- Yellow onion: Adds sweet savory depth when soft-sweated; shallot works in a pinch.
- Garlic: Gives bright background savory notes; reduce if you prefer a milder profile.
- White quinoa: The star grain – light, fluffy, and protein-rich; you can try red or tri-color for texture or visual interest.
- Broth: Builds savory backbone; use vegetable broth for a vegan version or chicken broth for extra richness.
- Lemon zest and juice: Brightens and balances the dish; orange or lime can be interesting seasonal swaps.
- Butter or extra olive oil: Adds silkiness; use butter for richness or olive oil to keep it vegan.
- Fresh herbs and almonds: Fresh herbs lift the final flavor; toasted nuts add crunch and contrast.
Essential Kitchen Tools and Why They Matter
A few simple tools will make this Quinoa Recipe easy and consistent. A heavy-bottomed saucepan or small pot helps the quinoa cook evenly and prevents hot spots. A fine-mesh strainer is essential for rinsing quinoa well – it removes the natural saponins so the grain is bright, not bitter. A sturdy wooden spoon or heatproof spatula gives good control when sautéing and folding in butter or herbs.
- Heavy-bottomed saucepan or small pot: Ensures even heat distribution and reduces sticking.
- Fine-mesh strainer: Lets you rinse quinoa thoroughly and drain it well.
- Chef’s knife and cutting board: For even chopping of aromatics and herbs.
- Measuring cups and spoons: Accurate liquid and salt measurements keep results consistent.
- Small bowl or ramekins: For mise en place so everything goes in at the right time.
Step-by-Step Preparation Guide
Step 1: Rinse the quinoa and drain
Place the rinsed quinoa in a fine-mesh strainer and rinse under cold running water, rubbing the grains gently until the water runs clear; drain thoroughly so the grains are free of excess surface water. This small, tactile step leaves the quinoa pearly, slightly damp, and individualized – not sticky – ready to absorb oil and aromatics.
Step 2: Prep the aromatics, citrus, and herbs
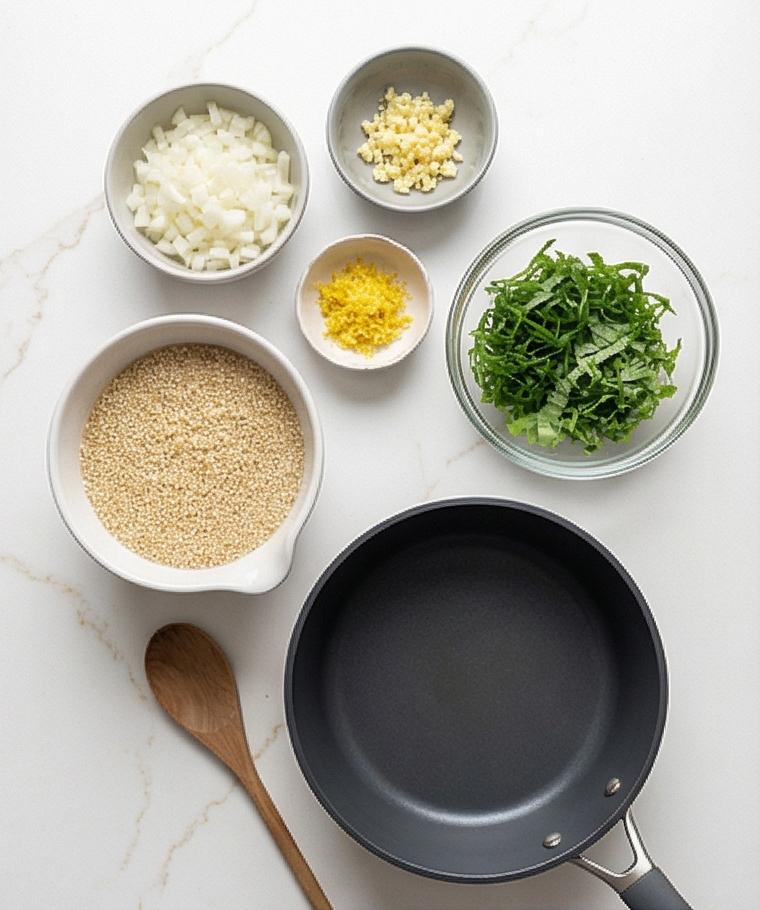
Finely chop the yellow onion until soft, mince the garlic cloves, grate the lemon zest and squeeze the lemon juice, and finely chop parsley, chives, and any additional herbs you choose. Arrange each element in its own small bowl or ramekin so textures read clearly from above: translucent chopped onion, glossy minced garlic, bright feathery herbs, pale grated zest, and a tiny mound of salt and pepper. Keep the butter (or extra oil) in a separate small dish and the broth measured in a clear measuring cup.
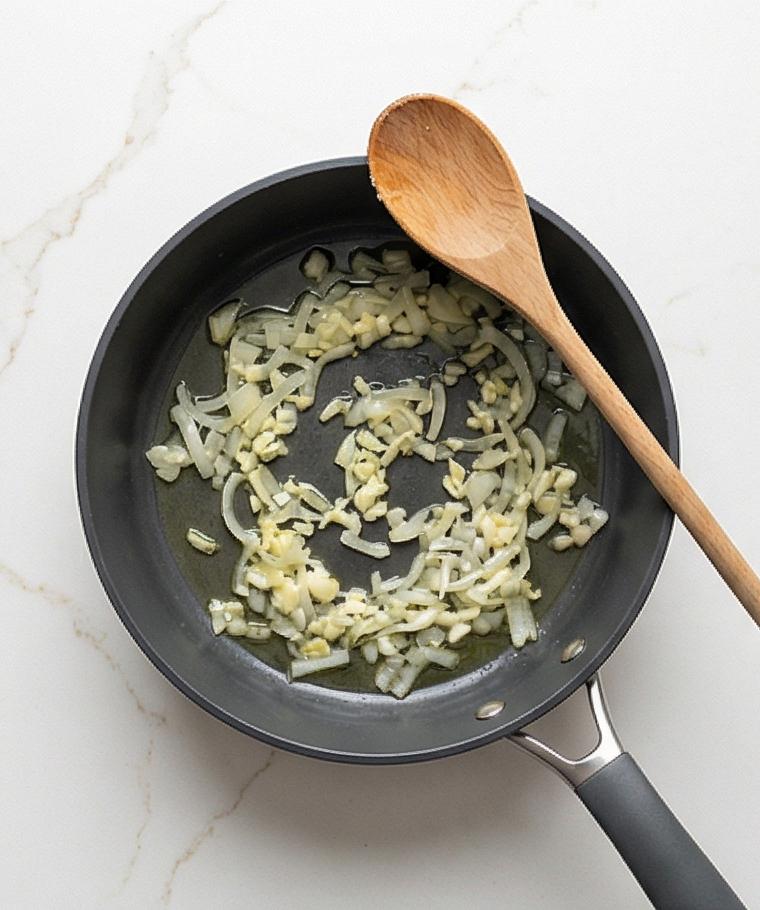
Step 3: Soft-sweat the aromatics (result on the surface)
Show the result of sweating: soft, translucent onion with tiny threads of garlic softened but not browned, sitting in a shallow matte charcoal cooking vessel that still shows a faint sheen of olive oil. The onion pieces are glossy, slightly collapsed, and fragrant – the visual cue that Maillard has not taken over. A small wooden spoon (same spoon used throughout) rests on the rim, lightly streaked with amber oil and onion juices, reinforcing utensil persistence.
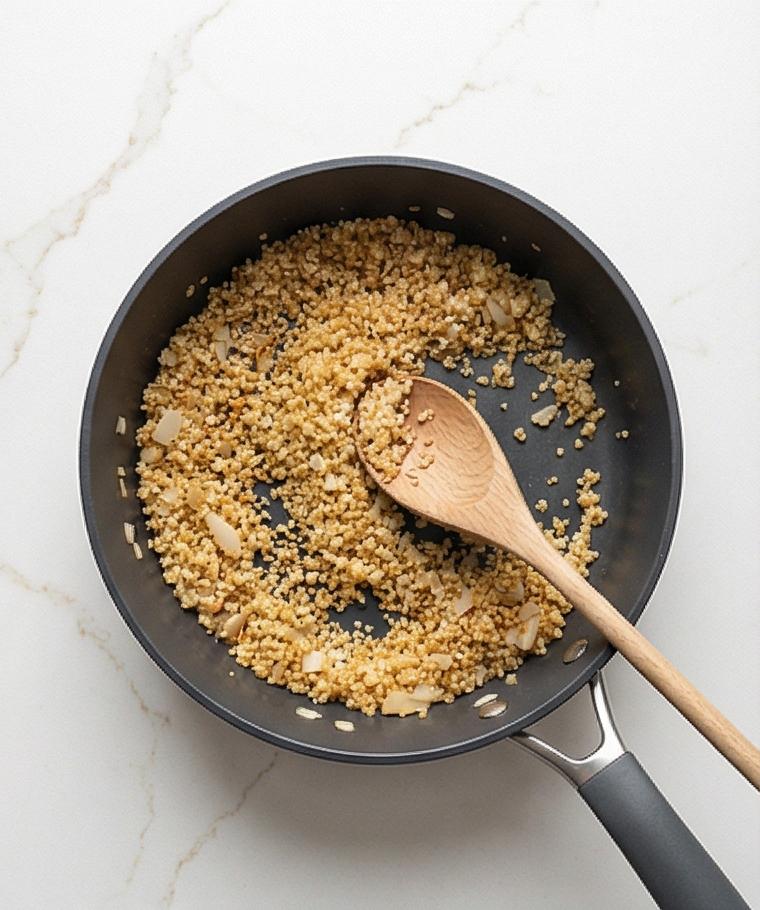
Step 4: Toasted quinoa coated in aromatics
Present the quinoa after it has been added and gently toasted: the grains appear slightly opaque at the edges with a faint golden tint, each kernel separated and coated in a thin film of oil and onion fragments. The matte charcoal pan contains an even layer of evenly toasted grains that show tiny, shiny fractures and a subtle toasty dusting; you can almost hear the gentle crackle. Keep the same spoon nearby, with a few stray grains clinging to it.
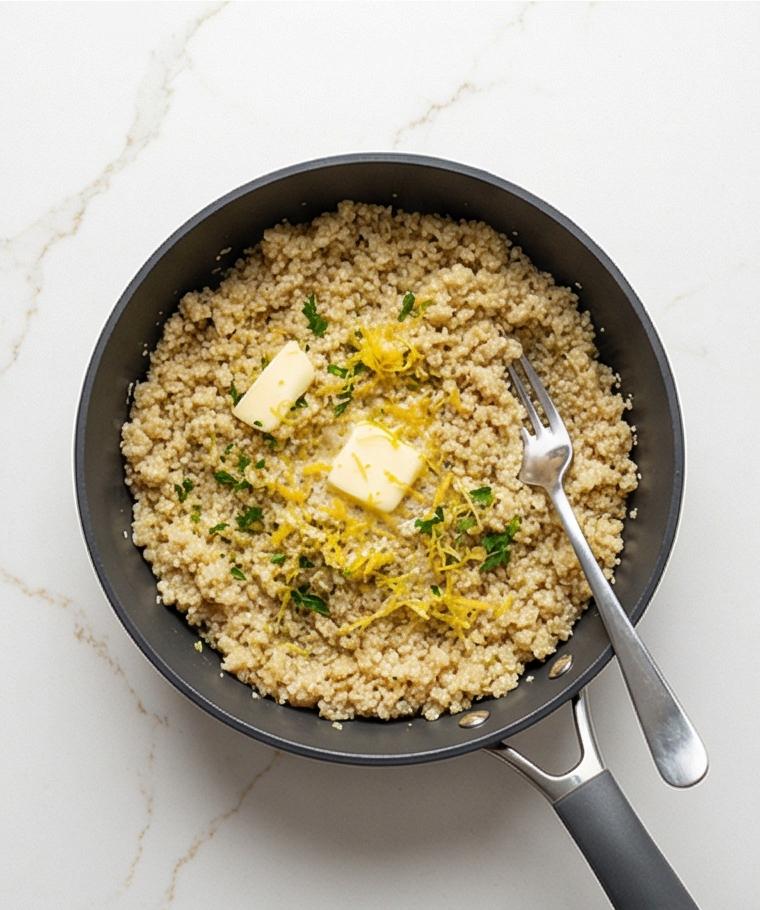
Step 5: Cooked and rested quinoa, butter and lemon folded in
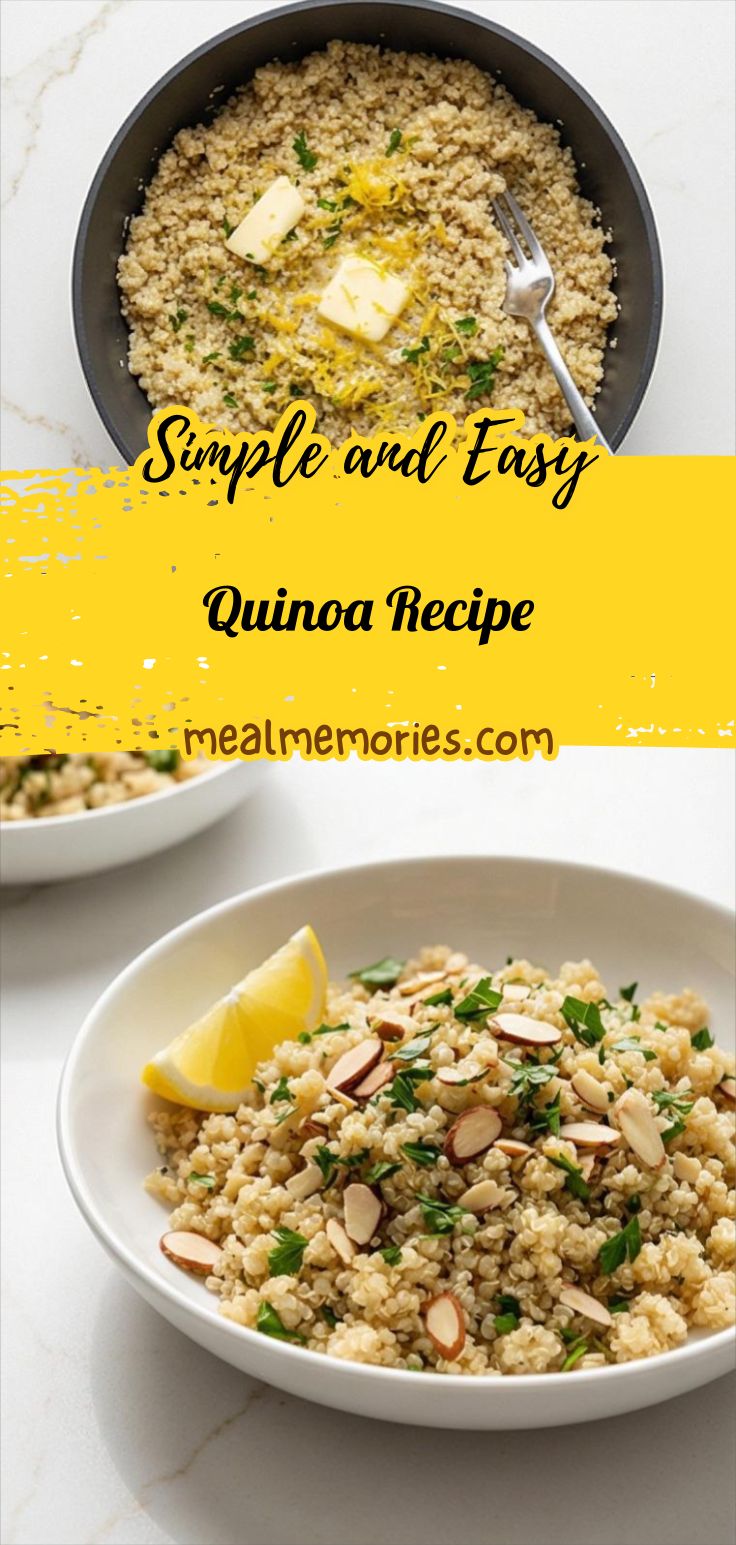
Depict the cooked quinoa after simmering and a brief rest: the liquid fully absorbed, the tiny spiral “tails” visible on many grains, steam dissipated so the surface looks pillowy and matte rather than wet. A small pat of room-temperature butter is partially melted into the warm quinoa, leaving glossy streaks; lemon zest flecks and chopped herbs are folded through, flecking the pale grains with green and yellow. The same matte charcoal vessel holds the finished grain, and a fork with tines full of separated grains rests nearby – poised for transfer.
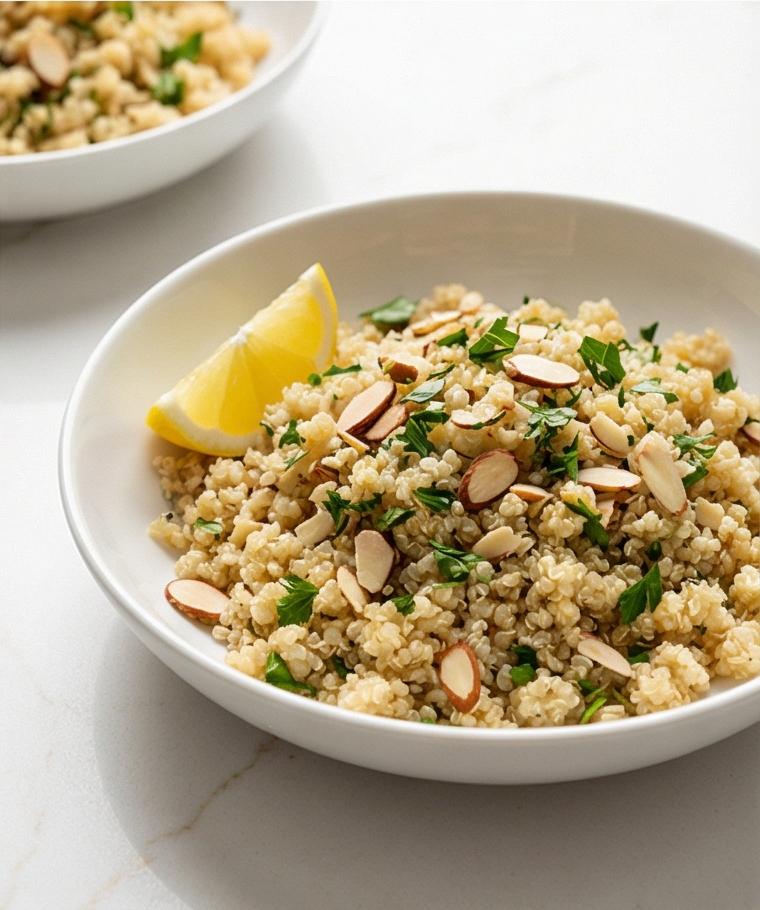
Step 6: Final plated quinoa, finished and garnished
Transfer the quinoa to an elegant shallow white serving bowl (contrasting with the charcoal cooking vessel) and finish with a scatter of toasted sliced almonds, a bright lemon wedge, and a final sprig of parsley and chives; the grains are fluffy, distinct, and glossy where butter has melted, with visible lemon zest flecks and herb ribbons. Serve warm; the close-up, eye-level view shows texture – individual, slightly translucent centers with tiny spiral tails, the crunch of toasted nuts, and the sheen of melted butter and olive oil.
Making It Your Own
Try a Mediterranean twist by stirring in chopped sun-dried tomatoes and crumbled feta for a savory, tangy bowl. For a Middle Eastern angle, add toasted pine nuts, chopped mint, and a pinch of ground cumin. If you want a vegan version, skip the butter and finish with a generous splash of good olive oil and extra herbs. In fall, fold in roasted squash and a dusting of smoked paprika; in spring, mass a handful of peas and thinly sliced radish for color and crunch. Each small swap changes the mood but keeps the core comfort of the Quinoa Recipe.
How to Serve
If you are hosting, serve this Quinoa Recipe from a shallow white bowl with lemon wedges on the side so guests can adjust brightness. For a dinner party, make a large batch and keep it warm in a covered dish or low oven, then scatter toasted nuts and chopped herbs just before serving to maintain texture. To stretch it into a main, top portions with roasted salmon, grilled chicken, or a chickpea and roasted vegetable ragout. For casual meals, turn it into bowls with leafy greens, avocado slices, and a drizzle of tahini or yogurt.
Storage and Reheating Tips
Cool leftovers quickly and store in an airtight container in the refrigerator for up to 3 days. Avoid packing it hot into a sealed container – a brief cool-down helps prevent excess condensation and sogginess.
To reheat, sprinkle a little water or broth over the quinoa and warm gently in a covered skillet over low heat or microwave until just heated through. Stir in a touch of olive oil or a small pat of butter after reheating to restore silkiness.
Common Mistakes and How to Avoid Them
One common slip is under-rinsing the quinoa; don’t skip the fine-mesh rinse or the finished grain can have a slightly bitter edge. Another mistake is boiling too hard – a gentle simmer gives fluffy, separated grains rather than gluey results.
Over-salting can happen if you use a salty broth, so taste before adding extra salt and adjust as needed. Lastly, fold in herbs and lemon at the end so their brightness and color remain vivid.
Let’s Make It Together
I hope this Quinoa Recipe inspires you to make something that feels both effortless and carefully composed. Try it with your favorite herbs and a squeeze of lemon, and let me know which variation becomes your new go-to.
Frequently Asked Questions.
- Q: Can I use other types of quinoa for this Quinoa Recipe?
A: Yes, you can use red or tri-color quinoa; cooking time is similar but texture and color will vary. - Q: Do I have to rinse quinoa before cooking?
A: It is best to rinse quinoa in a fine-mesh strainer to remove natural saponins and prevent a slightly bitter taste. - Q: Can I make this Quinoa Recipe ahead of time?
A: Absolutely – cook and cool it, then store in the refrigerator for up to 3 days and reheat gently with a splash of liquid. - Q: How can I make this recipe vegan?
A: Use vegetable broth and skip the butter, finishing with extra-virgin olive oil for richness. - Q: What pairs well with this Quinoa Recipe?
A: Grilled fish, roasted vegetables, or a lemony chickpea salad are all excellent companions.
Quinoa Recipe
Make Quinoa Recipe now: a lemony, herb-studded quinoa side that is quick, bright, and crowd-pleasing.
Ingredients
Instructions
Step 1: Rinse the quinoa and drain
Place the rinsed quinoa in a fine-mesh strainer and rinse under cold running water, rubbing the grains gently until the water runs clear; drain thoroughly so the grains are free of excess surface water. This small, tactile step leaves the quinoa pearly, slightly damp, and individualized — not sticky — ready to absorb oil and aromatics.
Step 2: Prep the aromatics, citrus, and herbs
Finely chop the yellow onion until soft, mince the garlic cloves, grate the lemon zest and squeeze the lemon juice, and finely chop parsley, chives, and any additional herbs you choose. Arrange each element in its own small bowl or ramekin so textures read clearly from above: translucent chopped onion, glossy minced garlic, bright feathery herbs, pale grated zest, and a tiny mound of salt and pepper. Keep the butter (or extra oil) in a separate small dish and the broth measured in a clear measuring cup.
Step 3: Soft-sweat the aromatics (result on the surface)
Show the result of sweating: soft, translucent onion with tiny threads of garlic softened but not browned, sitting in a shallow matte charcoal cooking vessel that still shows a faint sheen of olive oil. The onion pieces are glossy, slightly collapsed, and fragrant — the visual cue that Maillard has not taken over. A small wooden spoon (same spoon used throughout) rests on the rim, lightly streaked with amber oil and onion juices, reinforcing utensil persistence.
Step 4: Toasted quinoa coated in aromatics
Present the quinoa after it has been added and gently toasted: the grains appear slightly opaque at the edges with a faint golden tint, each kernel separated and coated in a thin film of oil and onion fragments. The matte charcoal pan contains an even layer of evenly toasted grains that show tiny, shiny fractures and a subtle toasty dusting; you can almost hear the gentle crackle. Keep the same spoon nearby, with a few stray grains clinging to it.
Step 5: Cooked and rested quinoa, butter and lemon folded in
Depict the cooked quinoa after simmering and a brief rest: the liquid fully absorbed, the tiny spiral "tails" visible on many grains, steam dissipated so the surface looks pillowy and matte rather than wet. A small pat of room-temperature butter is partially melted into the warm quinoa, leaving glossy streaks; lemon zest flecks and chopped herbs are folded through, flecking the pale grains with green and yellow. The same matte charcoal vessel holds the finished grain, and a fork with tines full of separated grains rests nearby — poised for transfer.
Step 6: Final plated quinoa, finished and garnished
Transfer the quinoa to an elegant shallow white serving bowl (contrasting with the charcoal cooking vessel) and finish with a scatter of toasted sliced almonds, a bright lemon wedge, and a final sprig of parsley and chives; the grains are fluffy, distinct, and glossy where butter has melted, with visible lemon zest flecks and herb ribbons. Serve warm; the close-up, eye-level view shows texture — individual, slightly translucent centers with tiny spiral tails, the crunch of toasted nuts, and the sheen of melted butter and olive oil.
Notes
- Rinse quinoa thoroughly to remove bitter saponins.
- Taste before adding extra salt, especially if using salted broth.
- Toast nuts separately and add just before serving to preserve crunch.
- For vegan finish, replace butter with extra-virgin olive oil.
- Reheat with a splash of broth or water to refresh texture.