Rhubarb Pie has a way of showing up on my table just as the first green stems poke through the garden. I still remember the tart-sweet perfume that filled the kitchen the first time I baked this recipe for friends. It’s one of those desserts that feels both rustic and a little fancy at once, and I find myself reaching for it when I want something honest and bright. Whether you call it a springtime staple or a cozy weekend project, Rhubarb Pie rewards the few simple steps with big flavor.
What makes this Rhubarb Pie special is that it balances tang and sweetness so well that each bite feels like a little surprise. The filling becomes glossy and syrupy without being cloying, and that flaky top crust is the perfect foil for the vibrant filling. If you like desserts that taste like fresh seasons in a forkful, this pie will probably become a go-to.
When This Pie and I First Crossed Paths
The first time I made Rhubarb Pie I was living in a tiny apartment with a window box that stubbornly produced a handful of stalks every spring. I remember standing at the counter, slicing the rhubarb while the rain tapped the window, thinking I was making something wholly practical. By the time the pie came out of the oven, the whole building seemed to smell like the memory of a lemonade stand and a homely bakery combined. I brought a wedge to a neighbor who was recovering from surgery, and watching them smile and close their eyes on that first bite felt like a small, quiet triumph. The sound of the crust cracking as they forked into it still stays with me; it was the sound of ordinary things made lovely. Since then, Rhubarb Pie has followed me to potlucks, birthdays, and late-night tea sessions, always arriving like a bright, comforting hello.
Main Ingredients and Why They Matter
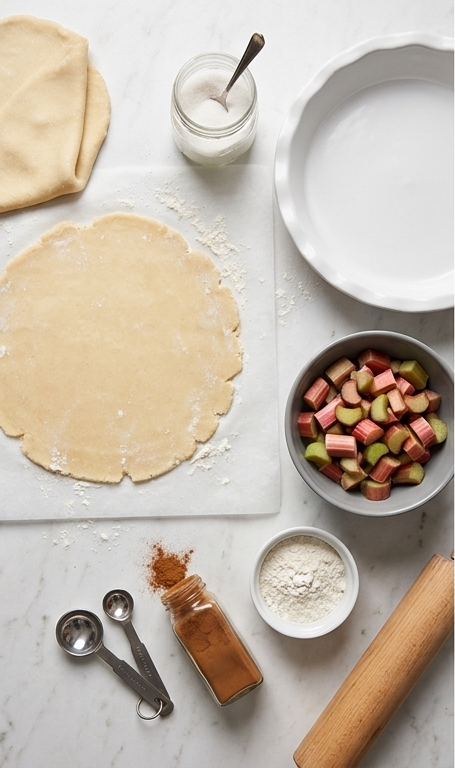
- Double Pie Crust: The vessel for everything, it provides flaky texture and buttery flavor. Use store-bought for speed or homemade for more control; if you want less butter, try a light vegetable shortening crust.
- Granulated Sugar: Sweetens and helps the filling thicken into a glossy syrup. For a less sweet pie, reduce by a couple of tablespoons; for deeper flavor, substitute part with brown sugar.
- All-Purpose Flour: Acts as a thickener so the filling sets without being runny. Arrowroot or tapioca starch can replace it for a clearer filling.
- Rhubarb: The star ingredient, tart and structured. Choose firm, brightly colored stalks and trim any faded ends; both fresh and frozen work, but thaw and drain frozen rhubarb first.
- Cinnamon: A warm background note that ties the filling together. You can omit it or add a pinch of nutmeg for a different spice profile.
Essential Kitchen Tools and Why You Need Them
Even simple recipes benefit from the right tools. Here are the essentials that will make your Rhubarb Pie turn out reliably great, and some easy alternatives if you don’t own every single item.
- 9-inch pie plate: Provides the ideal shape and depth; a glass or ceramic dish heats evenly. If you only have a metal pan, watch the edges so they don’t brown too quickly.
- Rolling pin: For an even crust thickness. A wine bottle or sturdy jar works in a pinch.
- Mixing bowls: You need one large bowl for the filling and a small bowl for the flour-sugar barrier. A large measuring cup can double up if you are short on bowls.
- Parchment paper: Makes rolling and transferring dough so much easier. You can dust the counter with flour instead, but parchment saves cleanup.
- Cooling rack: Allows the pie to cool evenly so the filling sets. If you don’t have one, use an inverted baking sheet.
Step-by-Step Preparation Guide
Step 1: Preheat the oven and prepare to bake
Preheat the oven to 425°F so it’s ready when the assembled pie goes in; this step sets the stage for a quick high-heat start that helps the crust set. While the oven warms, have your 9-inch white ceramic pie dish and parchment ready on the clean surface so you can transfer dough and filling with confidence.
Step 2: Roll and line the bottom crust
Roll half of the double pie crust to about an 1/8-inch thickness on lightly floured parchment. Gently lift and fit this rolled circle into the 9-inch pie plate, smoothing it to the edges and trimming any excess so the bottom layer sits evenly and snugly in the dish.
Step 3: Seal the crust base with a sugar-flour barrier
Combine 1 tablespoon of all-purpose flour with 1 tablespoon of granulated sugar in a small bowl and sprinkle that mixture evenly across the bottom of the lined crust. This thin dry layer helps absorb excess liquid and keeps the bottom crust from becoming soggy as the filling cooks.
Step 4: Mix the rhubarb filling until glossy and evenly coated
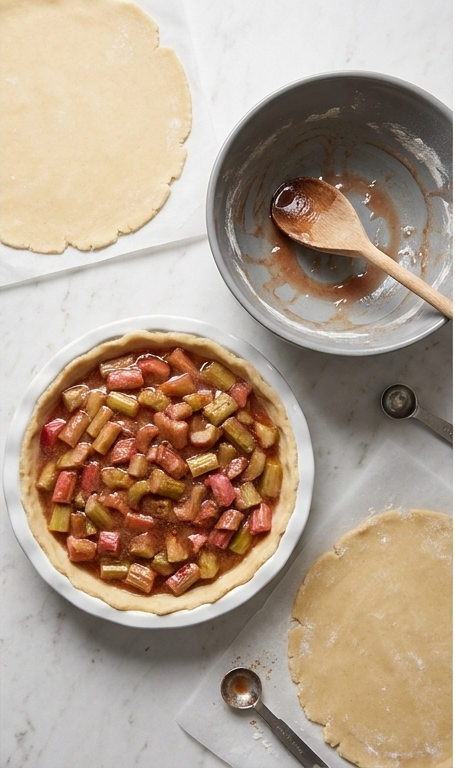
In a large bowl, toss the 6 cups of ½-inch rhubarb pieces with 1 cup granulated sugar, the remaining 6 tablespoons of flour (divided as the recipe directs), and ½ teaspoon cinnamon. Mix gently but thoroughly until every rhubarb piece is evenly coated and the mixture looks glossy, slightly syrupy, and well combined.
Step 5: Transfer the filling into the prepared crust
Spoon the mixed rhubarb filling into the lined pie crust, piling it up slightly in the center so it will settle and bubble as it bakes. Smooth the top just a touch with the back of the spoon so the fruit sits evenly in the shell.
Step 6: Top, seal, and vent the pie
Roll the remaining crust to 1/8-inch thickness and place it over the rhubarb. Crimp the edges to seal the two crusts together and cut a few slits in the top to vent steam (or craft a lattice if you prefer). Make sure the top looks tidy and the vents are clear so the filling can bubble out slowly.
Step 7: Bake until bubbling and golden
Place the assembled pie on the bottom rack and bake for 15 minutes at 425°F to set the crust, then reduce the oven temperature to 350°F and continue baking for 40–50 minutes more until the filling is visibly bubbling through the vents and the crust turns a deep golden brown. The syrup should look thick and glossy and the edges well-browned.
Step 8: Cool, slice, and serve warm with ice cream
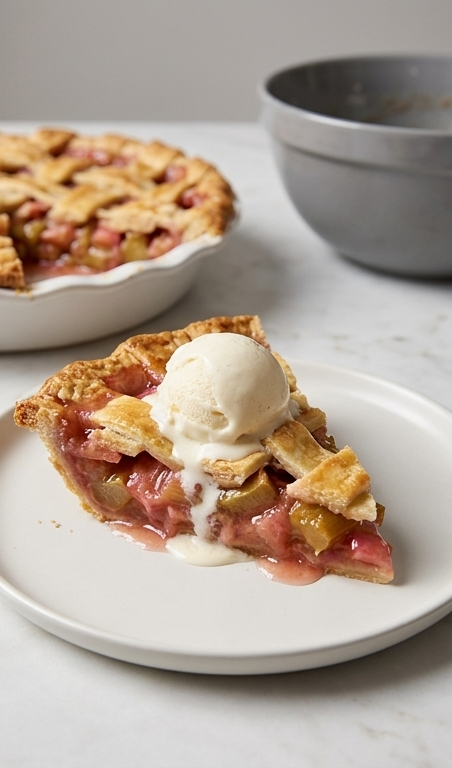
Remove the pie and let it cool on a rack for about 2 hours to allow the filling to set. When ready to serve, slice and plate a wedge, topping it with a generous scoop of creamy vanilla ice cream that will melt slightly into the warm, syrupy rhubarb. Enjoy the contrast of flaky golden crust, tangy-sweet pink-green filling, and cool melting cream.
Making It Your Own
I like to think of variations as gentle experiments rather than drastic rewrites. Try swapping half the granulated sugar for brown sugar and you will notice a deeper, caramel-like flavor that complements the rhubarb’s sharpness. For a gluten-free version, replace the flour in the filling with tapioca starch and use a store-bought gluten-free crust; the texture changes slightly but stays delicious. If you want a fruitier take, fold in a cup of diced strawberries or raspberries with the rhubarb for a classic spring pairing. For a lighter, diabetic-friendly option, cut the sugar by one-third and stir in a little lemon zest to brighten the filling. Small tweaks like a sprinkle of nutmeg or a splash of vanilla extract can make the pie feel new without losing its soul.
How to Serve
When I host, Rhubarb Pie is an easy showstopper. For a casual night, serve warm slices with generous scoops of vanilla ice cream; the melting cream mellows the tartness. If you prefer a plated dessert at a dinner party, add a spoonful of lightly whipped cream and a sprig of mint for color and freshness. For larger gatherings, bake two pies or make one pie and some smaller tartlets to spread around. To stretch servings, cut thinner slices and offer a variety of toppings so guests can customize. If you want a refined look, glaze the top crust with a light apricot jam wash right after baking to give it a glossy sheen.
Storage and Reheating Tips
Leftover Rhubarb Pie keeps well in the refrigerator for up to 4 days. Cover it with plastic wrap or store in an airtight container so the crust does not absorb other flavors. If the crust softens a bit while chilled, a short reheat helps restore texture.
To reheat, place slices on a baking sheet and warm at 325°F for 8 to 12 minutes, or until the filling is warm and the crust has crisped. For a single slice, a 30-second zap in the microwave works in a pinch, but you will lose flakiness. You can also freeze a fully cooled pie wrapped tightly for up to 2 months; thaw overnight in the refrigerator and re-crisp in a 325°F oven for 15 to 20 minutes.
Common Mistakes and How to Avoid Them
One frequent misstep is adding too little thickener so the filling runs when you slice it. Use the specified flour or try a small amount of tapioca for a clearer set. Also toss the rhubarb thoroughly with sugar and flour so every piece is coated.
Another easy pitfall is over-browning the crust before the filling bubbles. Start at high heat, then lower the oven as directed, and tent the edges with foil if they darken too quickly. Patience during the cool-down time helps the filling set properly, so resist the urge to slice it hot.
Final Thoughts and an Invitation
If you love tart-sweet desserts that taste like a fresh season on your plate, give this Rhubarb Pie a try. It is forgiving, full of personality, and perfect for sharing. Bake one this weekend and notice how a simple combination of ingredients becomes something memorable.
Frequently Asked Questions.
- Can I use frozen rhubarb in this Rhubarb Pie? Yes, you can use frozen rhubarb; thaw and drain excess liquid first and adjust thickener if needed.
- How do I prevent a soggy bottom crust? Sprinkle the bottom crust with the sugar-flour mixture and prebake briefly at the higher heat to set the base.
- Can I make the pie ahead of time? Yes, you can assemble it and refrigerate for several hours before baking, or bake and reheat when needed.
- Is there a substitute for all-purpose flour in the filling? Tapioca or cornstarch works as a substitute; use about half the amount for a clearer filling.
- How should I store leftover pie? Refrigerate covered for up to 4 days or freeze tightly wrapped for up to 2 months.
Rhubarb Pie
Make a tangy Rhubarb Pie with a flaky crust and glossy filling; perfect for spring gatherings and cozy desserts.
Ingredients
Instructions
Step 1: Preheat the oven and prepare to bake
Preheat the oven to 425°F so it's ready when the assembled pie goes in; this step sets the stage for a quick high-heat start that helps the crust set. While the oven warms, have your 9-inch white ceramic pie dish and parchment ready on the clean surface so you can transfer dough and filling with confidence.
Step 2: Roll and line the bottom crust
Roll half of the double pie crust to about an 1/8-inch thickness on lightly floured parchment. Gently lift and fit this rolled circle into the 9-inch pie plate, smoothing it to the edges and trimming any excess so the bottom layer sits evenly and snugly in the dish.
Step 3: Seal the crust base with a sugar-flour barrier
Combine 1 tablespoon of all-purpose flour with 1 tablespoon of granulated sugar in a small bowl and sprinkle that mixture evenly across the bottom of the lined crust. This thin dry layer helps absorb excess liquid and keeps the bottom crust from becoming soggy as the filling cooks.
Step 4: Mix the rhubarb filling until glossy and evenly coated
In a large bowl, toss the 6 cups of ½-inch rhubarb pieces with 1 cup granulated sugar, the remaining 6 tablespoons of flour (divided as the recipe directs), and ½ teaspoon cinnamon. Mix gently but thoroughly until every rhubarb piece is evenly coated and the mixture looks glossy, slightly syrupy, and well combined.
Step 5: Transfer the filling into the prepared crust
Spoon the mixed rhubarb filling into the lined pie crust, piling it up slightly in the center so it will settle and bubble as it bakes. Smooth the top just a touch with the back of the spoon so the fruit sits evenly in the shell.
Step 6: Top, seal, and vent the pie
Roll the remaining crust to 1/8-inch thickness and place it over the rhubarb. Crimp the edges to seal the two crusts together and cut a few slits in the top to vent steam (or craft a lattice if you prefer). Make sure the top looks tidy and the vents are clear so the filling can bubble out slowly.
Step 7: Bake until bubbling and golden
Place the assembled pie on the bottom rack and bake for 15 minutes at 425°F to set the crust, then reduce the oven temperature to 350°F and continue baking for 40–50 minutes more until the filling is visibly bubbling through the vents and the crust turns a deep golden brown. The syrup should look thick and glossy and the edges well-browned.
Step 8: Cool, slice, and serve warm with ice cream
Remove the pie and let it cool on a rack for about 2 hours to allow the filling to set. When ready to serve, slice and plate a wedge, topping it with a generous scoop of creamy vanilla ice cream that will melt slightly into the warm, syrupy rhubarb. Enjoy the contrast of flaky golden crust, tangy-sweet pink-green filling, and cool melting cream.
Notes
- Use firm, brightly colored rhubarb stalks for the best tartness and texture.
- If using frozen rhubarb, thaw and drain well to avoid excess liquid in the filling.
- Tent pie edges with foil if they brown too quickly during the long bake.
- Let the pie cool for at least 1.5 to 2 hours so the filling sets before slicing.
- Swap in tapioca or cornstarch as a thickener for a clearer filling.