Crème Brûlée Recipe: a little ritual, a lot of comfort. I first learned this Crème Brûlée Recipe at a small weekend class where caramelized sugar felt like magic and patience tasted like dessert. I make this Crème Brûlée Recipe when I want to impress without fuss; it rewards the quiet time spent stirring and waiting. The contrast of a brittle sugar top and a silky vanilla custard is a tiny, perfect celebration in a ramekin.
There is something about the way steam curls off the baking pan, and how the kitchen smells of warm vanilla, that always brings me back to this recipe. It started as an experiment to coax richer texture from yolks and cream and quickly became my go-to when friends drop by. I love how simple ingredients produce something that feels indulgent; the process is almost meditative and the payoff is immediate when you hear that satisfying tap through the caramel.
How This Recipe Became My Rainy-Day Favorite
The first time I made this Crème Brûlée Recipe it was raining, and the house smelled like wet pavement and vanilla. I remember setting the ramekins into the warm water bath and watching tiny steam rise, like a promise. The custard felt silky between my fingers as I wiped the rims, and the ritual of sprinkling sugar felt oddly ceremonial. When I torched the first top and it pooled into molten amber, the sound of the sugar cracking echoed in the quiet kitchen and I felt strangely triumphant. Sharing the spoonfuls with my partner felt like sharing something earned; we closed our eyes at the first bite, the contrast of textures and the whisper of salt making it unforgettable. Since then, this Crème Brûlée Recipe has accompanied long conversations, celebrations, and the occasional solo treat after a long day.
Primary Ingredients and Why They Matter
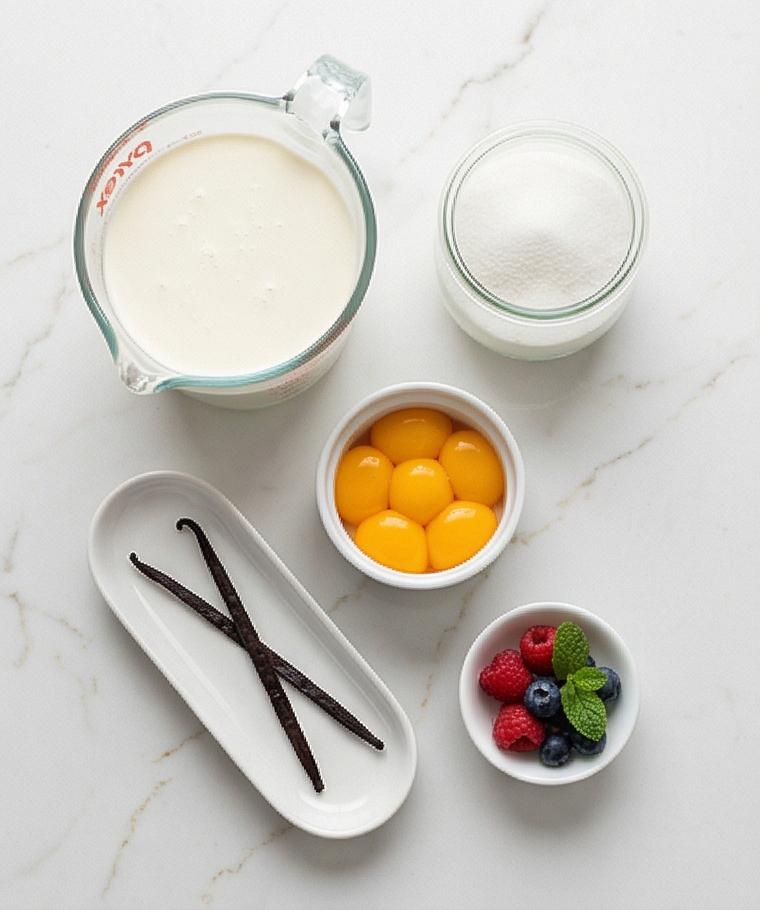
- Heavy Cream (2 1/2 cups / 600 ml): The backbone of the custard, heavy cream gives Crème Brûlée its luxuriously smooth texture and rich mouthfeel. Substitute half-and-half for a lighter version, though the texture will be less lush; choose full-fat cream for the best set.
- Vanilla Bean or Extract: Vanilla is the soul of this dessert. A split vanilla bean gives tiny black flecks and a deeper aroma; if using extract, use pure vanilla extract at room temperature for the cleanest flavor.
- Egg Yolks (6 large): Yolks provide structure and silkiness. Use very fresh eggs at room temperature so they emulsify smoothly.
- Granulated Sugar: Sugar sweetens and, when caramelized on top, creates the signature crisp shell. For the top, use a coating of regular granulated sugar for best caramelization.
- Fine Sea Salt (1/8 tsp): A pinch balances sweetness and enhances the vanilla.
Essential Kitchen Tools and Why They Help
A few simple tools make the Crème Brûlée Recipe easy and reliable. You do not need fancy gear, just the right basics.
- Ramekins: Even 4-ounce porcelain ramekins help portions and baking time stay consistent. If you only have larger dishes, expect longer baking.
- Roasting pan for a water bath: A deep pan that holds hot water gives gentle, even cooking; a towel keeps the ramekins from sliding.
- Fine-mesh sieve: Straining the custard removes foam and ensures a glassy surface.
- Kitchen torch or broiler: A butane torch gives the most control for caramelizing sugar; a hot broiler works in a pinch but watch closely.
- Whisk and heatproof pitcher: A sturdy whisk for the egg yolks and a jug to heat cream make tempering safe and easy.
Step-by-Step Preparation Guide
Step 1: Preheat and set the bain‑marie
Preheat the oven to 300°F (150°C) and place a neatly folded kitchen towel in the bottom of a deep roasting pan. Arrange six 4‑ounce (120‑ml) clean white porcelain ramekins on the towel, spaced evenly so steam and gentle heat will circulate. Set a kettle of water to heat until very hot so it’s ready for the water bath; this step is about setting the gentle, even environment the custards will bake in and making sure your vessels are perfectly steadied and ready on the single surface.
Step 2: Whisk the yolks and sugar to a ribbon
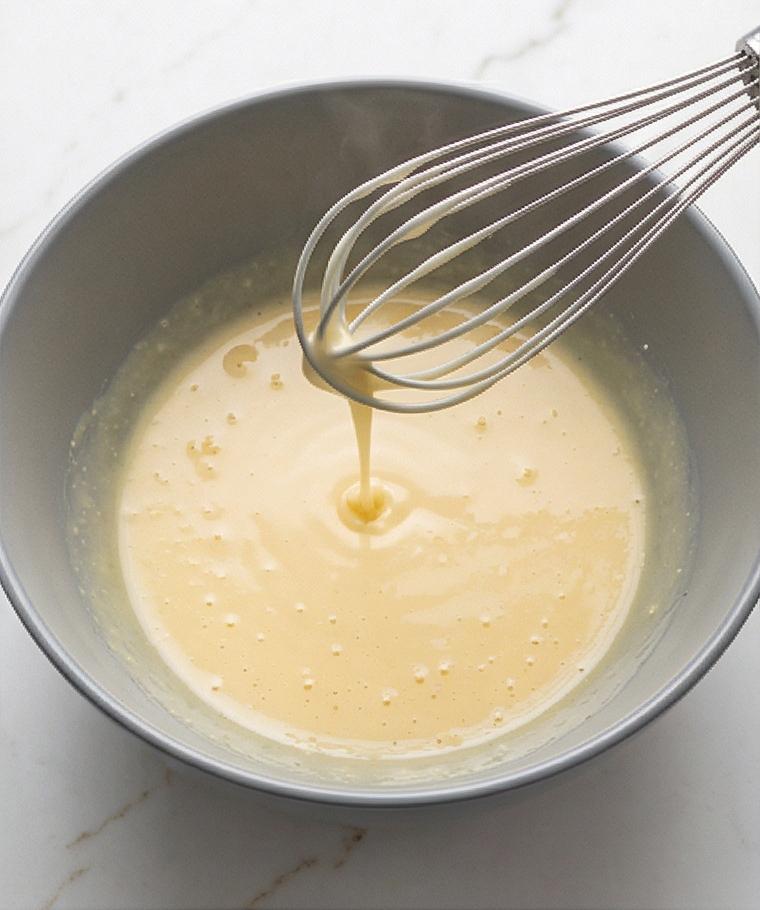
In a modern matte grey ceramic mixing bowl, whisk together six large egg yolks with 1/2 cup (100 g) granulated sugar and 1/8 teaspoon fine sea salt. Vigorously whisk until the mixture becomes silky, pale and slightly thickened – you should be able to lift the whisk and see a slow ribbon that barely holds its shape. Rest the polished stainless whisk across the rim of the bowl, leaving faint streaks of pale custard clinging to the wires; this is the visual of aeration and structure.
Step 3: Warm the vanilla‑flecked cream and temper the yolks
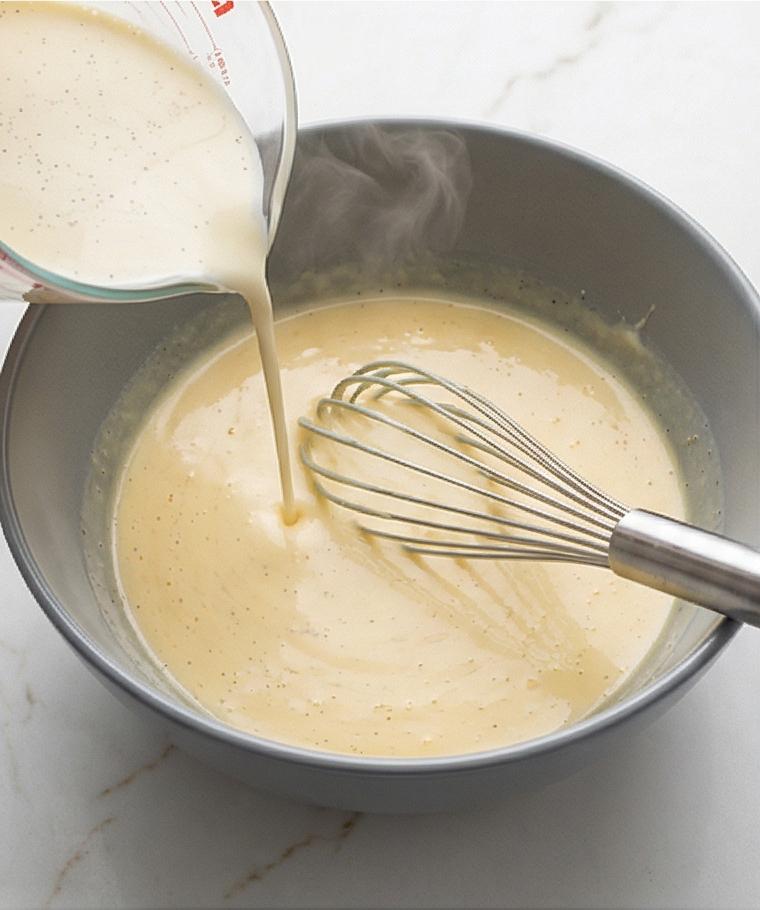
Warm 2 1/2 cups (600 ml) heavy cream in a glass measuring jug or pale enamel pitcher until steaming with tiny bubbles at the edges; if using a vanilla bean, the speckled seeds cling to the cream and the pod rests nearby in a small dish. Remove from heat, let cool a moment, then slowly ladle a thin stream – about 1/2 cup at a time – of the warm cream into the yolk mixture while whisking in the same matte grey bowl until the yolks are gently warmed and loosened. The bowl shows a glossy, ribboned custard now thinned to a silky pourable state, flecked with vanilla.
Step 4: Strain and portion into ramekins, prepare the water bath
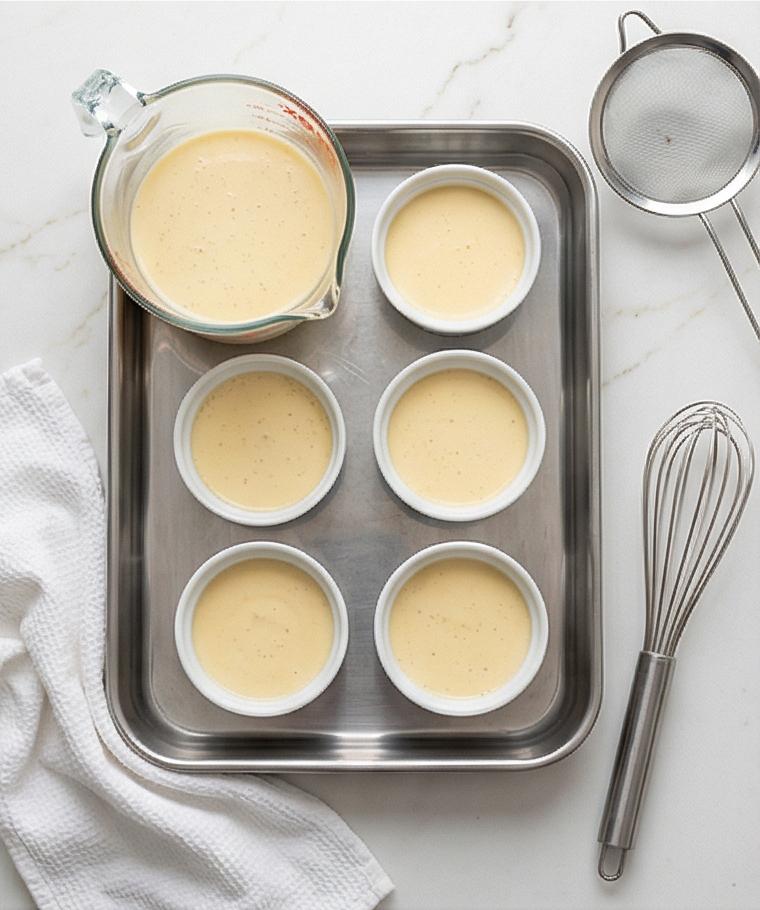
Set a fine‑mesh sieve over a clear measuring jug and pour the custard through to ensure a glassy, bubble‑free texture; skim any foam and discard. Carefully divide the smooth, pale custard evenly among the six white ramekins, filling each to about 1/8 inch (3 mm) below the rim. Place the filled ramekins back into the prepared roasting pan on the towel. Pour very hot water into the pan until it reaches about halfway up the ramekin sides – the calm, reflective water line communicates gentle, even baking. The whisk and the grey bowl remain nearby, tidy and present.
Step 5: Cool, chill, and sugar the tops for caramelizing
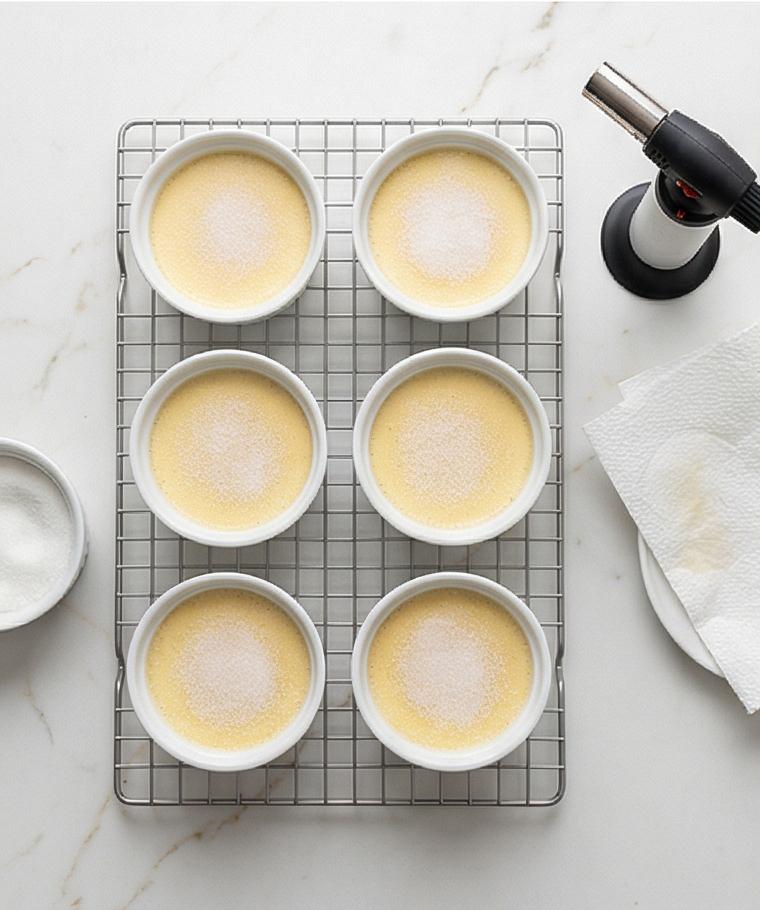
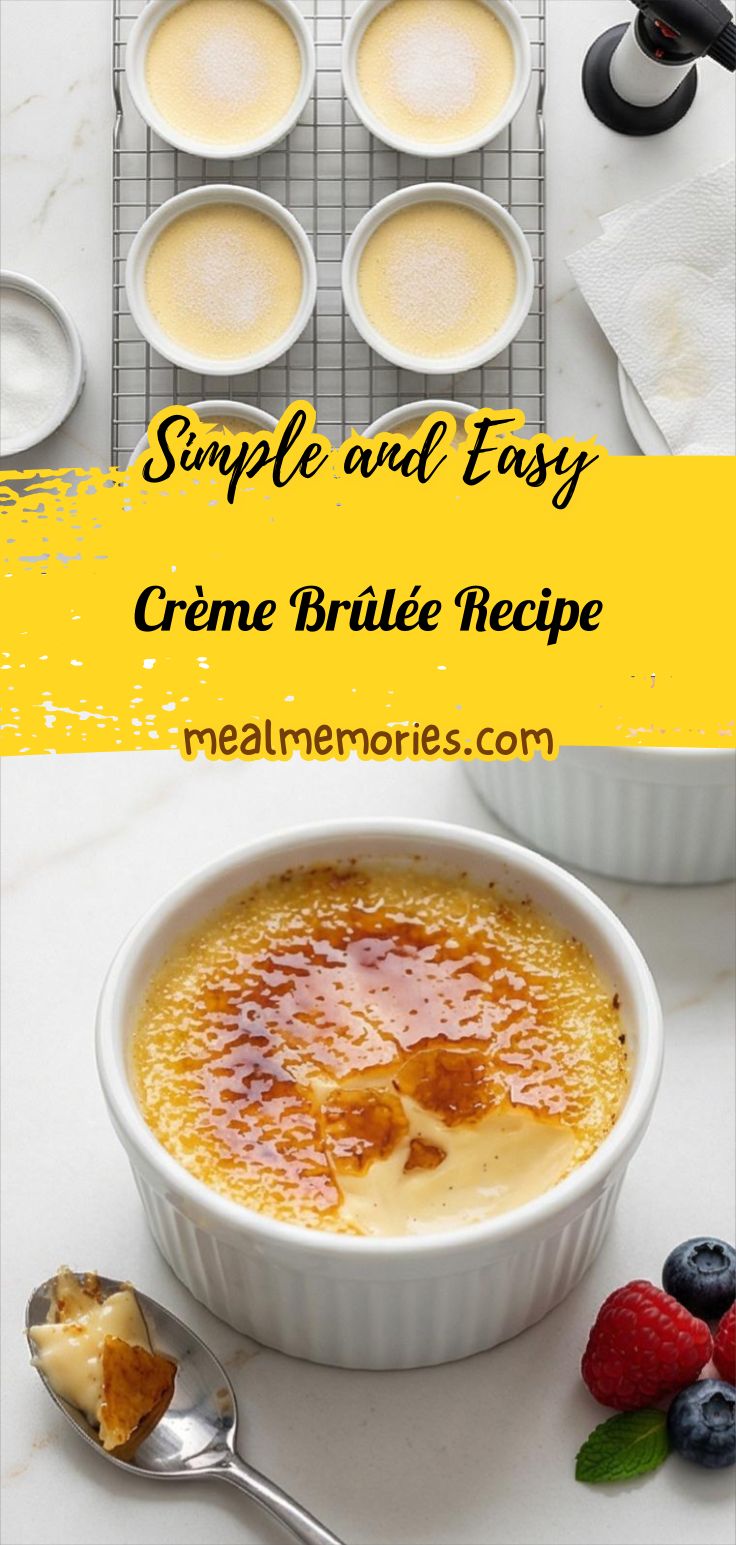
After baking until the edges are set and centers wobble softly, lift the ramekins out of the water bath and let them cool to barely warm on a wire rack on the same surface. Once near room temperature, cover each ramekin with plastic wrap (not touching the custard surface) and refrigerate until fully set, ideally 8-24 hours. Before serving, blot any surface moisture with a paper towel, then evenly sprinkle 1-1 1/2 teaspoons granulated sugar across each top, tilting and tapping to create a thin, uniform crystalline layer. Arrange a small butane torch nearby on the marble surface, ready but not lit – the sugared, matte white tops glisten faintly with raw granules.
Step 6: Caramelize and present the final crème brûlée
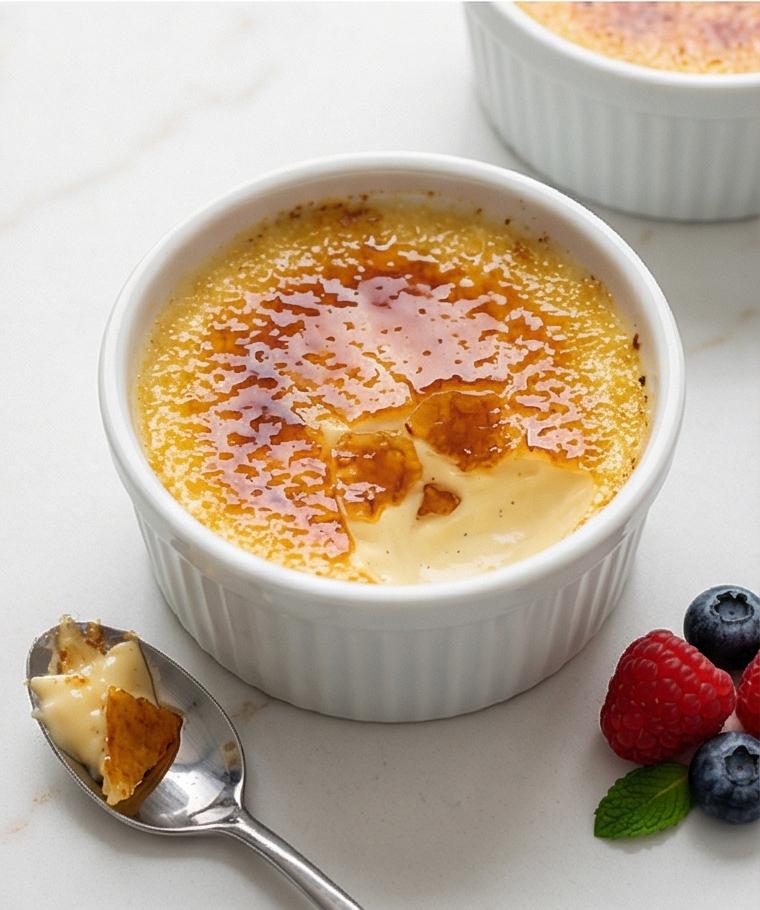
Use a kitchen torch or broiler to melt and caramelize the sugar until a deep golden-amber, glassy shell forms; allow the caramel to cool and harden for a few minutes. Present each ramekin chilled, the cracked, brittle caramel contrasting with the custard’s satin interior. Garnish sparingly with a couple of fresh berries and a tiny mint leaf if desired. The final plating is a very close, eye-level view of a single white porcelain ramekin: a thin, glossy amber dome, hairline crack revealing the creamy pale custard beneath, fine vanilla flecks visible in the custard, and soft luminous highlights on the caramelized surface – the tactile invitation to tap through the shell with a spoon.
Making It Your Own
I experimented by infusing the cream with citrus peels and found a delicate brightness that played well with the vanilla. Try steeping a strip of orange zest for 10 minutes, then remove it before combining with the yolks. For a chocolate twist, whisk 2 ounces of melted dark chocolate into the warm cream and strain as usual – the texture stays silky and the flavor becomes more decadent. If you need a dairy-free option, use full-fat coconut milk, though the taste will be more tropical and the set slightly softer. For a lighter dessert, reduce the sugar in the custard slightly and rely on the caramel top for sweetness; it keeps the classic feel while trimming some calories.
How to Serve
When hosting, serve Crème Brûlée Recipe ramekins chilled and torch them moments before guests arrive for the freshest crack. For a dinner party of six, make one ramekin per person and stagger the torching so each guest gets that freshly broken sugar shell sensation. If you are serving a larger crowd, prepare the custards a day ahead and caramelize in batches as needed.
Place each ramekin on a small dessert plate with a tiny spoon, and garnish with two berries and one mint leaf for color. For a rustic presentation, serve on a wooden board with a linen napkin and a small bowl of extra berries.
Storage and Reheating Tips
Store leftover custards covered in the refrigerator; the custard will keep well for up to 3 days. Keep the caramelized tops separate – they can absorb moisture and lose their crispness if wrapped directly.
If you need to re-crisp the top, sprinkle a thin layer of sugar and use a torch to re-caramelize. Avoid reheating the custard itself – it is best enjoyed cold beneath the warm shell.
Common Mistakes and How to Avoid Them
Underbaking or overbaking are the two most common pitfalls. Pull the custards when the edges are set and the centers still wobble gently – they will firm up while chilling.
Skipping the strain or adding the hot cream too fast can make the custard grainy. Temper slowly and strain well for a silky, uniform texture.
Final Thoughts
Give this Crème Brûlée Recipe a try the next time you want an elegant but simple dessert. It rewards a little patience and delivers a beautiful contrast of textures that almost feels celebratory every time.
Frequently Asked Questions.
- What is the best way to caramelize the sugar on top? – A small butane kitchen torch gives the most control and even caramelization; use a broiler if you do not have a torch, but watch closely.
- Can I make Crème Brûlée Recipe ahead of time? – Yes, make the custards and chill them up to 24 hours before caramelizing the tops, or keep them up to 3 days refrigerated if already torched.
- Why did my custard turn out grainy? – Graininess usually comes from overheating the eggs or adding hot cream too quickly; temper slowly and strain the custard.
- Can I use vanilla extract instead of a bean? – Yes, pure vanilla extract works well; add it at room temperature to preserve the aroma.
- Can I freeze Crème Brûlée Recipe? – Freezing changes the texture and is not recommended; refrigerate instead.
Crème Brûlée Recipe
Make Crème Brûlée Recipe: silky vanilla custard with a crisp caramel top, perfect for elegant weeknight desserts.
Ingredients
Instructions
Step 1: Preheat and set the bain‑marie
Preheat the oven to 300°F (150°C) and place a neatly folded kitchen towel in the bottom of a deep roasting pan. Arrange six 4‑ounce (120‑ml) clean white porcelain ramekins on the towel, spaced evenly so steam and gentle heat will circulate. Set a kettle of water to heat until very hot so it’s ready for the water bath; this step is about setting the gentle, even environment the custards will bake in and making sure your vessels are perfectly steadied and ready on the single surface.
Step 2: Whisk the yolks and sugar to a ribbon
In a modern matte grey ceramic mixing bowl, whisk together six large egg yolks with 1/2 cup (100 g) granulated sugar and 1/8 teaspoon fine sea salt. Vigorously whisk until the mixture becomes silky, pale and slightly thickened — you should be able to lift the whisk and see a slow ribbon that barely holds its shape. Rest the polished stainless whisk across the rim of the bowl, leaving faint streaks of pale custard clinging to the wires; this is the visual of aeration and structure.
Step 3: Warm the vanilla‑flecked cream and temper the yolks
Warm 2 1/2 cups (600 ml) heavy cream in a glass measuring jug or pale enamel pitcher until steaming with tiny bubbles at the edges; if using a vanilla bean, the speckled seeds cling to the cream and the pod rests nearby in a small dish. Remove from heat, let cool a moment, then slowly ladle a thin stream — about 1/2 cup at a time — of the warm cream into the yolk mixture while whisking in the same matte grey bowl until the yolks are gently warmed and loosened. The bowl shows a glossy, ribboned custard now thinned to a silky pourable state, flecked with vanilla.
Step 4: Strain and portion into ramekins, prepare the water bath
Set a fine‑mesh sieve over a clear measuring jug and pour the custard through to ensure a glassy, bubble‑free texture; skim any foam and discard. Carefully divide the smooth, pale custard evenly among the six white ramekins, filling each to about 1/8 inch (3 mm) below the rim. Place the filled ramekins back into the prepared roasting pan on the towel. Pour very hot water into the pan until it reaches about halfway up the ramekin sides — the calm, reflective water line communicates gentle, even baking. The whisk and the grey bowl remain nearby, tidy and present.
Step 5: Cool, chill, and sugar the tops for caramelizing
After baking until the edges are set and centers wobble softly, lift the ramekins out of the water bath and let them cool to barely warm on a wire rack on the same surface. Once near room temperature, cover each ramekin with plastic wrap (not touching the custard surface) and refrigerate until fully set, ideally 8–24 hours. Before serving, blot any surface moisture with a paper towel, then evenly sprinkle 1–1 1/2 teaspoons granulated sugar across each top, tilting and tapping to create a thin, uniform crystalline layer. Arrange a small butane torch nearby on the marble surface, ready but not lit — the sugared, matte white tops glisten faintly with raw granules.
Step 6: Caramelize and present the final crème brûlée
Use a kitchen torch or broiler to melt and caramelize the sugar until a deep golden‑amber, glassy shell forms; allow the caramel to cool and harden for a few minutes. Present each ramekin chilled, the cracked, brittle caramel contrasting with the custard’s satin interior. Garnish sparingly with a couple of fresh berries and a tiny mint leaf if desired. The final plating is a very close, eye‑level view of a single white porcelain ramekin: a thin, glossy amber dome, hairline crack revealing the creamy pale custard beneath, fine vanilla flecks visible in the custard, and soft luminous highlights on the caramelized surface — the tactile invitation to tap through the shell with a spoon.
Notes
- Use full-fat heavy cream for the creamiest texture.
- Temper the egg yolks slowly to avoid curdling and strain the custard for a silky finish.
- Chill custards 8-24 hours for best texture before caramelizing.
- Use a kitchen torch for even caramelization; a broiler works as a backup.
- Store uncaramelized custards covered in the refrigerator for up to 3 days.