Cinnamon Rolls Recipe has been my go-to for cozy weekend mornings and last-minute brunches for years. I first learned this Cinnamon Rolls Recipe in a small kitchen that smelled of vanilla and browned butter; now the recipe lives on at my table whenever friends stop by. The sweet, yeasty aroma as these cinnamon spirals bake always feels like a warm hug. If you like tender layers, gooey centers, and cream cheese icing that melts into every swirl, this Cinnamon Rolls Recipe will make you smile every time.
How This Recipe Became My Rainy-Day Favorite
One rainy afternoon, I decided to bake while a storm rattled the windows and the kettle sang on the stove. I rolled out the dough with flour-dusted hands, and the house filled with the scent of cinnamon and butter. The dough was forgiving under my palms, a soft, elastic promise that relaxed into perfect spirals. A friend arrived unexpected, eyes lighting up at the warm tray I pulled from the oven. We sat with steaming mugs, tearing pieces of roll, the cream cheese icing stretching in slow, glossy ribbons. That moment made me realize food can stitch ordinary days into something remembered. The sensory details still stick with me: the warm tacky dough, the crack of the roll’s edge, the quiet contentment of sharing something homemade. It is why this Cinnamon Rolls Recipe is a comfort and a celebration.
Main Ingredients That Make It Sing
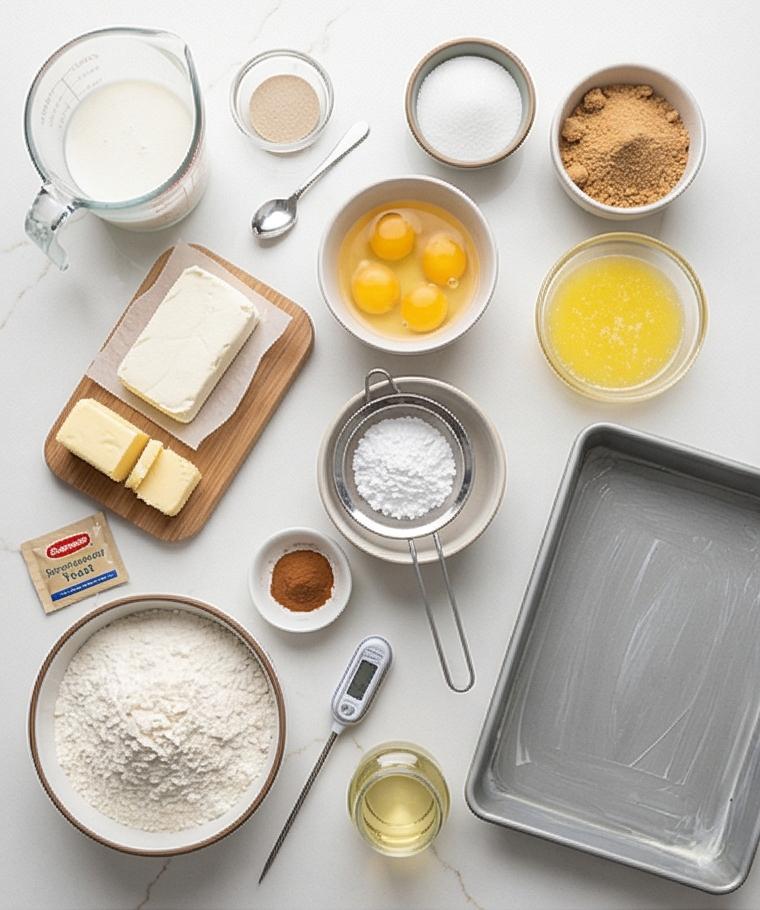
- Whole milk: Warms and activates the yeast, adding tenderness. Substitute with full-fat plant milk for dairy-free tweaks but watch temperature.
- Active dry yeast: The lift and light crumbs come from yeast; fresh packets ensure good rise. Instant yeast can work if reduced by 25% and mixed directly with flour.
- All-purpose flour: Builds structure; choose unbleached for the best flavor and consistent results.
- Unsalted butter: For both dough and filling; salted butter can be used but reduce added salt slightly.
- Ground cinnamon and sugars: The flavor core; swap in cardamom or pumpkin spice for seasonal notes.
- Cream cheese and powdered sugar: Make the glossy icing that melts into the spirals; Greek yogurt offers a tangy, lighter swap.
Essential Kitchen Tools and Why They Matter
A few reliable tools will make this Cinnamon Rolls Recipe smoother and more enjoyable. A bench scraper and rolling pin give clean edges and even thickness during rolling. A stand mixer with a dough hook saves time and builds gluten gently, but a strong wooden spoon and some elbow power will get you there.
- Stand mixer or sturdy spoon: For mixing and kneading the dough; hand-knead if you prefer the tactile control.
- Measuring jug and spoons: Accurate temps and amounts keep yeast happy.
- Rolling pin: Ensures an even 16 x 12-inch rectangle for consistent swirls.
- Offset spatula: For spreading the butter and filling smoothly.
- 9 x 13-inch rectangular pan: Holds the rolls snugly for the second rise and even baking.
- Wire rack: Lets rolls cool without becoming soggy.
Alternatives work fine: a bamboo rolling pin, bowl-scraper or even a food processor for blending dry filling if needed.
Step-by-Step Preparation Guide
Step 1: Activate the yeast and warm the milk
Combine the warm whole milk (105–115°F / 40–46°C) with the active dry yeast and a tablespoon of granulated sugar in a small glass measuring jug. Stir gently until dissolved and leave it to rest until the surface is visibly foamy and fragrant with a mild yeasty aroma. If the mixture doesn’t bubble within 5–10 minutes, it’s a sign the yeast is inactive—discard and start again. This moment is all about a glossy, airy foam sitting in a clear vessel, tiny surfacing bubbles and a slightly domed foam cap.
Step 2: Mix the wet ingredients into a cohesive wet base
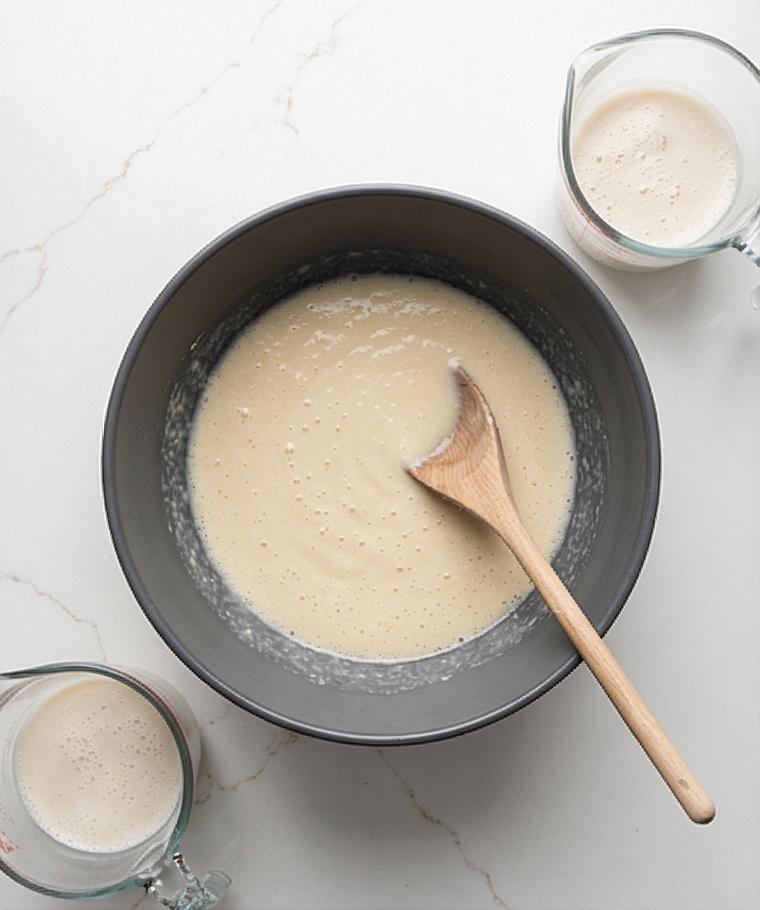
In a single matte charcoal ceramic mixing bowl, lightly beat the room-temperature eggs and stir in the remaining granulated sugar and the slightly cooled melted butter; then pour in the foamy yeast-milk. Mix until the components are smoothly combined—no lumps of butter, just a satiny, pale yellow wet batter that clings to the spoon. The texture here should look wet and cohesive, with a few trailing ribbons where the spoon lifted.
Step 3: Add the dry ingredients and form a shaggy dough
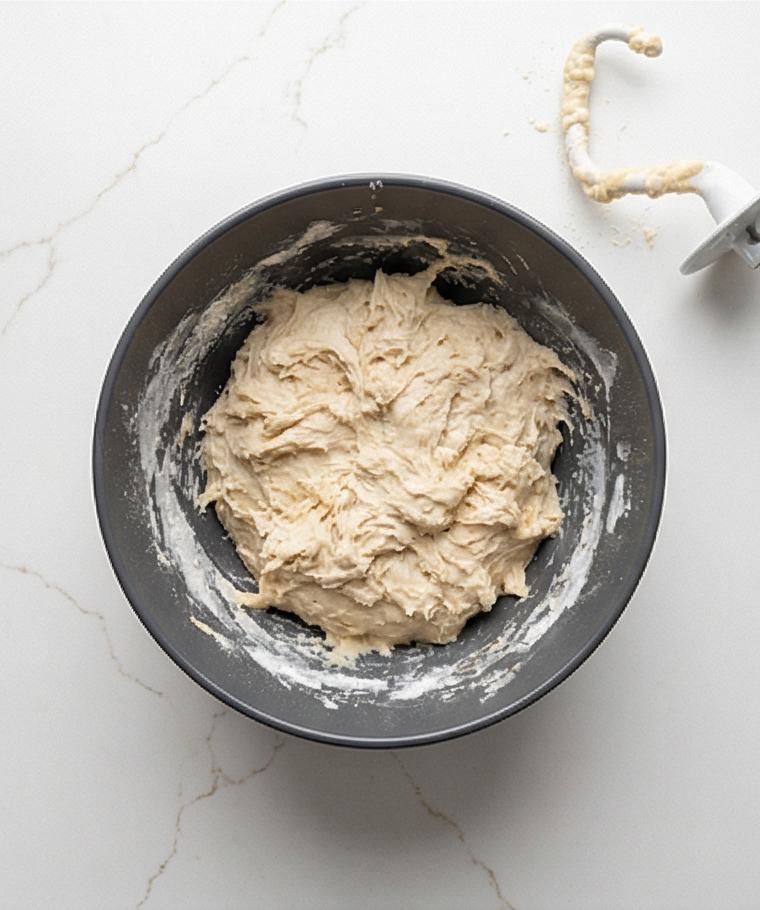
Whisk the flour and fine sea salt together in a separate bowl and add about two-thirds of that flour to the wet mixture. Stir vigorously with a sturdy spoon or the mixer hook until a shaggy, sticky mass forms—uneven surface, flour streaks, and a loose network of gluten beginning to hold. Add the remaining flour gradually until the dough just comes together: rough, slightly tacky, and clearly not yet smooth. This is the tactile, initial dough state that promises elasticity once kneaded.
Step 4: Knead until smooth and elastic, then shape and rest
Knead by hand on a lightly floured surface or in the stand mixer for the recommended time until the dough feels smooth, elastic, and slightly springy—soft, supple, and barely tacky to the touch. Shape the dough into a tight ball and transfer it to the same matte charcoal ceramic bowl lightly coated with oil or butter, turning to coat. Cover tightly—this is the quiet transformation phase where surface tension builds and gluten relaxes before rise.
Step 5: First rise until doubled in a greased bowl
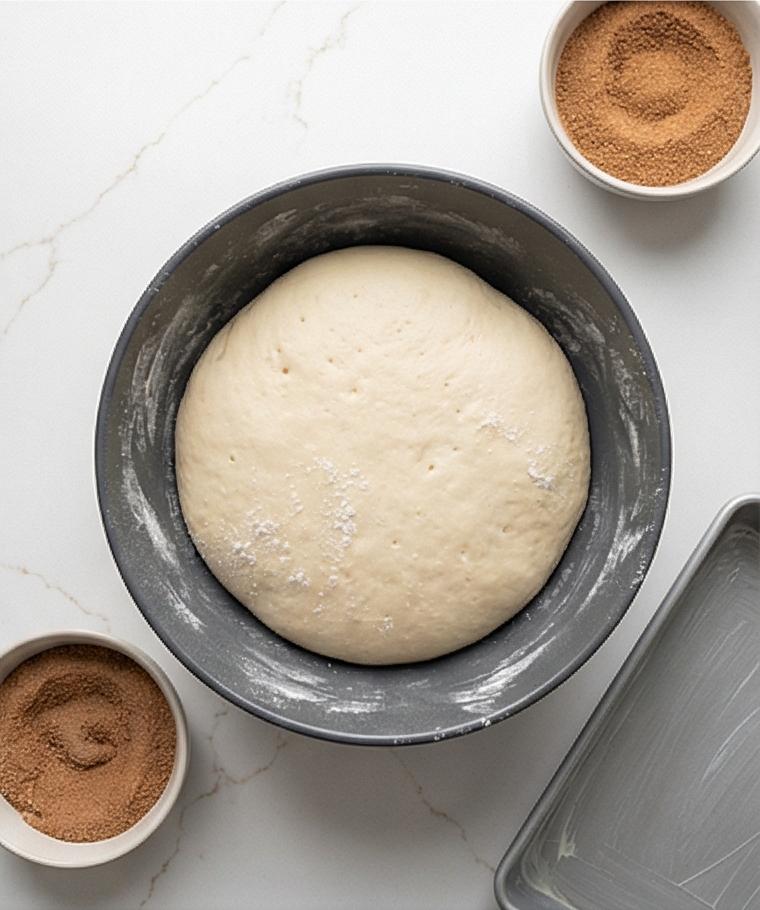
Leave the covered bowl in a warm, draft-free spot until the dough visibly doubles, its surface domed and airy with a slow-springing fingertip indentation. The bowl should show a pronounced, puffy interior mass, smooth on top with tiny pinhole bubbles at the seam—an elastic, pillowy dough that breathes. While the dough rises, prepare the cinnamon-sugar filling in a small ceramic bowl and generously butter the rectangular baking pan so it’s ready.
Step 6: Roll out the dough and assemble the filling
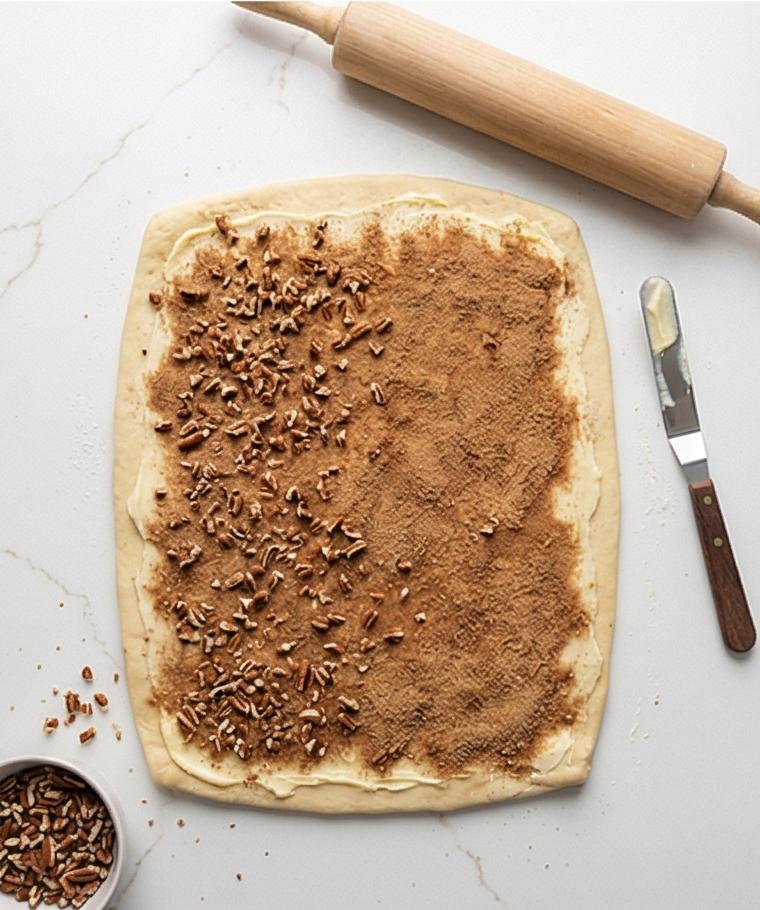
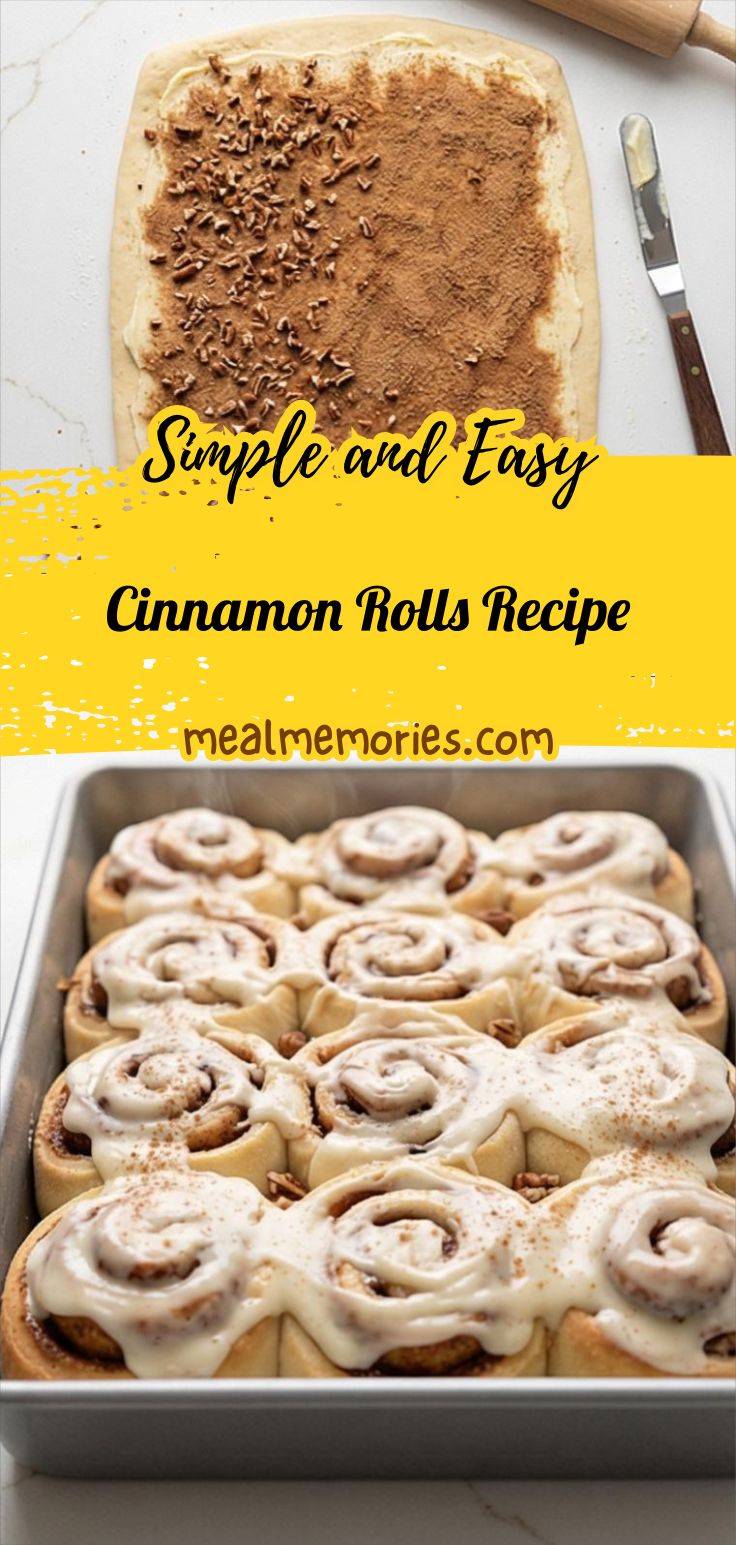
Turn the risen dough onto a lightly floured surface, let it rest briefly, and roll it into an even 16 x 12-inch rectangle about 1/4 inch thick. Spread very soft room-temperature butter evenly across the surface with an offset spatula, leaving a narrow border; then dust liberally and uniformly with the brown sugar + granulated sugar + cinnamon + salt mixture, pressing it gently so it adheres. If using nuts, sprinkle the finely chopped toasted pecans or walnuts evenly. The visual should read as a glossy butter layer beneath a granular, warm-toned cinnamon-sugar carpet.
Step 7: Roll, seal, slice, and arrange in the pan
Starting from the long edge, roll the dough tightly into a uniform log and pinch the seam to seal. Trim the ends and cut into twelve even spirals, exposing the concentric cinnamon swirls and soft dough strata. Arrange the rolls snugly in the prepared rectangular 9 x 13–inch pan in a 3 x 4 grid so they have a little breathing room for the second rise. Cover loosely and let them puff until nearly touching—the pan should now look densely populated with round, doughy spirals.
Step 8: Bake until lightly golden and cool briefly
Bake the pan on the table (the image will show the result; no oven is depicted) until the tops are lightly golden and the centers look set but soft, then transfer the pan to a wire rack to cool for 15–20 minutes. The rolls should appear pillowy, slightly domed, with a thin, delicate crust—subtle color gradients from pale beige to warm gold at the tips of the spirals.
Step 9: Make the cream cheese icing, ice, and serve
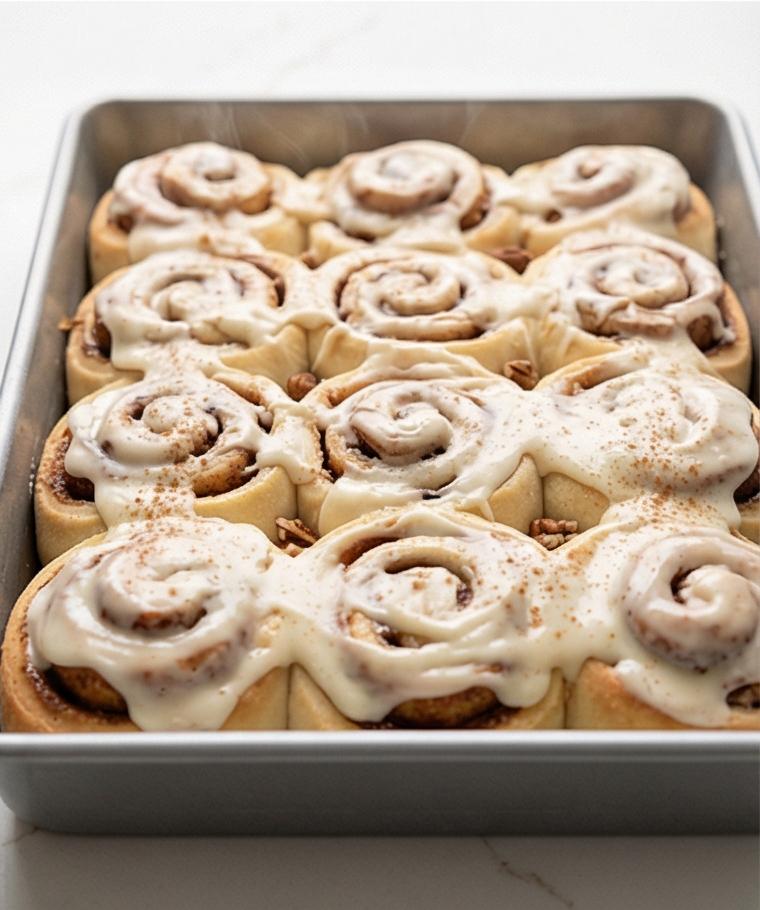
Whip softened cream cheese and butter until perfectly smooth, then beat in sifted powdered sugar, vanilla, salt, and just enough milk or cream to make a silky, slightly pourable frosting. Spoon or spread the icing generously over the warm rolls so it melts into the spirals and waterfalls down the sides; finish with a whisper of ground cinnamon if desired. Serve warm from the same rectangular pan—thick, glossy white icing settling into cinnamon tunnels and glossy butter-streaked dough layers.
Making It Your Own
I often swap the pecans for toasted hazelnuts when I want a deeper, toasty flavor. For a fruit-forward twist, I sprinkle thinly sliced apples and a pinch of nutmeg over the filling in autumn. When I tried a vegan variation, I used a non-dairy milk and a plant-based butter substitute; the texture shifted slightly but the warmth and cinnamon still comforted everyone at the table.
For a lighter loaf-style batch, I press the rolls closer together and bake in a loaf pan, which yields a pull-apart sandwich of swirls. To cut down sugar, I reduce the brown sugar by 20% and add a teaspoon of molasses to keep the caramel notes.
How to Serve
When hosting, I bake the Cinnamon Rolls Recipe shortly before guests arrive so the icing can soften and the rolls are warm. Place the pan in the center of the table on a trivet with a small bowl of extra icing and a sprinkling of chopped nuts for people to customize. For larger brunches, double the recipe and bake in two pans staggered in the oven for even color.
If you need to stretch the batch, serve smaller portions with coffee or add fresh fruit and yogurt on the side. For a dessert-style service, add a scoop of vanilla ice cream and a drizzle of warmed caramel sauce for extra indulgence.
Storage and Reheating Tips
Store cooled rolls in an airtight container at room temperature for up to 2 days; the cream cheese icing will keep them moist. For longer storage, wrap tightly and freeze for up to 1 month. Thaw overnight in the refrigerator and bring to room temperature before reheating.
To reheat, pop individual rolls into a 325°F (160°C) oven for 8 to 10 minutes or microwave a single roll for 15 to 25 seconds to warm the center. Refresh the icing with a spoonful of warmed cream or a quick whisk of powdered sugar and vanilla.
Oops-Proofing: Common Mistakes and How to Avoid Them
Underproofing is the most frequent culprit when rolls feel dense. Give the dough time to double and look for that slow-springing indentation to be sure it is ready. If your kitchen is cold, use a warmed oven (turned off) as a cozy proofing spot.
Too much flour during shaping will yield dry, tight rolls. Keep the working surface lightly dusted and resist adding flour unless the dough is sticking. If the filling starts to leak, chill the log for 10 minutes before slicing.
Final Thoughts
If you try this Cinnamon Rolls Recipe, I hope it becomes a small ritual in your home. The recipe rewards a little patience with big, buttery swirls and a comforting, gooey center. Make a tray for guests or quiet Sunday mornings and enjoy the simple pleasure of baking by hand.
Frequently Asked Questions.
- Q: Can I use instant yeast instead of active dry yeast? A: Yes. Use slightly less instant yeast and mix it with the flour; expect a similar rise but keep an eye on timing.
- Q: How do I know the milk is the right temperature? A: Aim for 105 to 115°F (40 to 46°C). It should feel warm but not hot; too hot will kill the yeast.
- Q: Can I make the dough ahead? A: Absolutely. Refrigerate the shaped rolls for an overnight second rise; remove 30 minutes before baking and bake as directed.
- Q: How do I prevent soggy bottoms? A: Make sure your pan is well-buttered and bake until the centers look set; cooling briefly on a rack helps.
- Q: Can I freeze the baked rolls? A: Yes, cool completely, wrap tightly, and freeze for up to a month. Reheat in a low oven until warmed through.
Cinnamon Rolls Recipe
Bake soft, gooey Cinnamon Rolls Recipe with cream cheese icing for cozy brunches and warm gatherings.
Ingredients
Instructions
Step 1: Activate the yeast and warm the milk
Combine the warm whole milk (105–115°F / 40–46°C) with the active dry yeast and a tablespoon of granulated sugar in a small glass measuring jug. Stir gently until dissolved and leave it to rest until the surface is visibly foamy and fragrant with a mild yeasty aroma. If the mixture doesn’t bubble within 5–10 minutes, it’s a sign the yeast is inactive—discard and start again. This moment is all about a glossy, airy foam sitting in a clear vessel, tiny surfacing bubbles and a slightly domed foam cap.
Step 2: Mix the wet ingredients into a cohesive wet base
In a single matte charcoal ceramic mixing bowl, lightly beat the room-temperature eggs and stir in the remaining granulated sugar and the slightly cooled melted butter; then pour in the foamy yeast-milk. Mix until the components are smoothly combined—no lumps of butter, just a satiny, pale yellow wet batter that clings to the spoon. The texture here should look wet and cohesive, with a few trailing ribbons where the spoon lifted.
Step 3: Add the dry ingredients and form a shaggy dough
Whisk the flour and fine sea salt together in a separate bowl and add about two-thirds of that flour to the wet mixture. Stir vigorously with a sturdy spoon or the mixer hook until a shaggy, sticky mass forms—uneven surface, flour streaks, and a loose network of gluten beginning to hold. Add the remaining flour gradually until the dough just comes together: rough, slightly tacky, and clearly not yet smooth. This is the tactile, initial dough state that promises elasticity once kneaded.
Step 4: Knead until smooth and elastic, then shape and rest
Knead by hand on a lightly floured surface or in the stand mixer for the recommended time until the dough feels smooth, elastic, and slightly springy—soft, supple, and barely tacky to the touch. Shape the dough into a tight ball and transfer it to the same matte charcoal ceramic bowl lightly coated with oil or butter, turning to coat. Cover tightly—this is the quiet transformation phase where surface tension builds and gluten relaxes before rise.
Step 5: First rise until doubled in a greased bowl
Leave the covered bowl in a warm, draft-free spot until the dough visibly doubles, its surface domed and airy with a slow-springing fingertip indentation. The bowl should show a pronounced, puffy interior mass, smooth on top with tiny pinhole bubbles at the seam—an elastic, pillowy dough that breathes. While the dough rises, prepare the cinnamon-sugar filling in a small ceramic bowl and generously butter the rectangular baking pan so it’s ready.
Step 6: Roll out the dough and assemble the filling
Turn the risen dough onto a lightly floured surface, let it rest briefly, and roll it into an even 16 x 12-inch rectangle about 1/4 inch thick. Spread very soft room-temperature butter evenly across the surface with an offset spatula, leaving a narrow border; then dust liberally and uniformly with the brown sugar + granulated sugar + cinnamon + salt mixture, pressing it gently so it adheres. If using nuts, sprinkle the finely chopped toasted pecans or walnuts evenly. The visual should read as a glossy butter layer beneath a granular, warm-toned cinnamon-sugar carpet.
Step 7: Roll, seal, slice, and arrange in the pan
Starting from the long edge, roll the dough tightly into a uniform log and pinch the seam to seal. Trim the ends and cut into twelve even spirals, exposing the concentric cinnamon swirls and soft dough strata. Arrange the rolls snugly in the prepared rectangular 9 x 13–inch pan in a 3 x 4 grid so they have a little breathing room for the second rise. Cover loosely and let them puff until nearly touching—the pan should now look densely populated with round, doughy spirals.
Step 8: Bake until lightly golden and cool briefly
Bake the pan on the table (the image will show the result; no oven is depicted) until the tops are lightly golden and the centers look set but soft, then transfer the pan to a wire rack to cool for 15–20 minutes. The rolls should appear pillowy, slightly domed, with a thin, delicate crust—subtle color gradients from pale beige to warm gold at the tips of the spirals.
Step 9: Make the cream cheese icing, ice, and serve
Whip softened cream cheese and butter until perfectly smooth, then beat in sifted powdered sugar, vanilla, salt, and just enough milk or cream to make a silky, slightly pourable frosting. Spoon or spread the icing generously over the warm rolls so it melts into the spirals and waterfalls down the sides; finish with a whisper of ground cinnamon if desired. Serve warm from the same rectangular pan—thick, glossy white icing settling into cinnamon tunnels and glossy butter-streaked dough layers.
Notes
- Ensure milk is 105–115°F to activate yeast without killing it.
- Allow the dough to double in a warm, draft-free spot for best texture.
- Chill the rolled log briefly if slices are squashing during cutting.
- Store cooled rolls in an airtight container for up to 2 days or freeze for up to 1 month.
- Warm individual portions before serving and add a little extra icing if desired.