I remember the first time I made this Crab Cakes Recipe—my kitchen smelled like summer and the whole house crowded around the stove. I love how simple ingredients can produce something that feels celebratory, and these crab cakes always deliver that golden, briny bite. This Crab Cakes Recipe is one of those dependable recipes I reach for when guests are coming or when I want a small luxury at dinner. You can make them ahead, fry them up in minutes, and everyone always asks for the recipe.
How This Recipe Became My Rainy-Day Favorite
I was home from work during a slow rainy afternoon and decided to try a crab cake idea I’d scribbled on a napkin. The sound of the rain made the kitchen feel cozy as I drained the sweet lump crab meat and mixed the binding ingredients until they glowed. When the first cakes hit the hot skillet, a warm, savory steam rose with a hint of lemon and butter that immediately lifted my mood. I remember the satisfying crisp of the panko crust and the delicate, moist interior—each bite felt like a small reward. From then on, this Crab Cakes Recipe has been my comfort cooking for gloomy days and a guaranteed crowd-pleaser for last-minute guests.
Primary Ingredients and Why They Matter
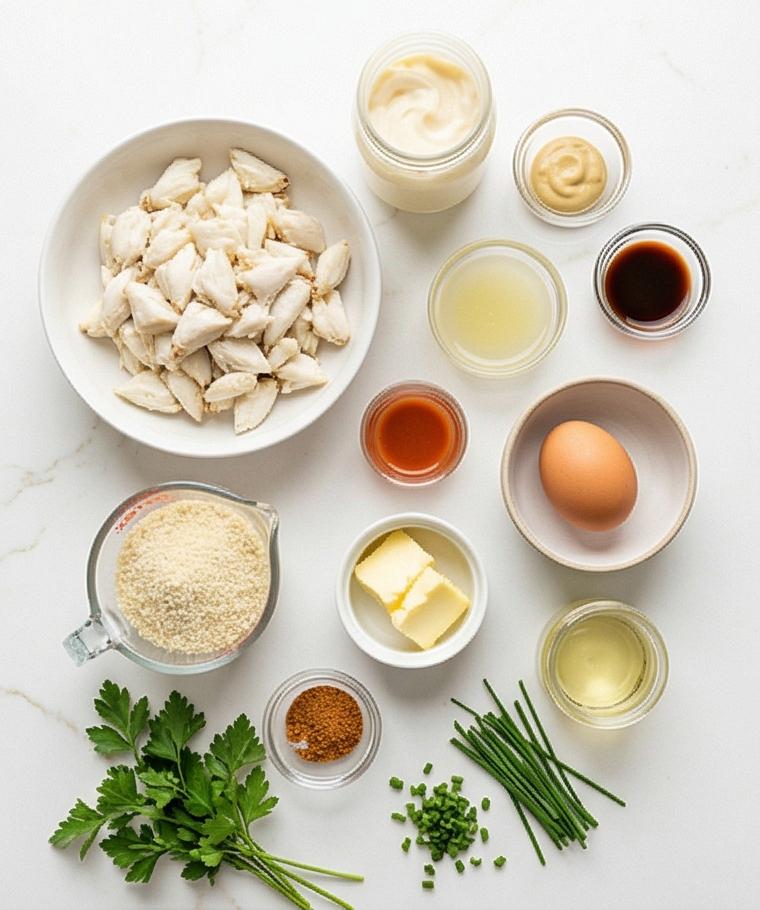
- Lump Crab Meat: The star ingredient that gives the cakes their delicate, sweet seafood flavor and large flaky texture; choose fresh or well-drained frozen lump crab, and remove shells carefully. Sub: good-quality claw meat for a budget-friendly option.
- Egg and Mayonnaise: The binders that lend moisture and structure without weighing the cakes down; use room-temperature egg and full-fat mayo for best texture. Sub: a small amount of Greek yogurt plus an extra egg yolk can work in a pinch.
- Panko Breadcrumbs: Provide light body inside and the crisp coating outside; use fresh panko for airy texture. Sub: crushed saltines for a denser cake.
- Old Bay and Lemon Juice: Seasoning and brightness that lift the crab flavor; adjust Old Bay to taste or use a seafood seasoning blend.
- Fresh Herbs (Parsley, Chives): Add freshness and color; cilantro is an interesting swap for a different profile.
Essential Kitchen Tools Youll Want
Start with a short intro: a few simple tools make these crab cakes easy and consistent.
- Fine-mesh strainer: Helps remove excess liquid from the crab so cakes arent soggy. Sub: a colander lined with paper towels.
- Mixing bowls: One for the binding emulsion and one for folding crab; choose nonreactive bowls. Sub: large glass or stainless steel bowls work fine.
- Rubber spatula: For gentle folding so you dont break up the crab lumps. Sub: large spoon if thats what you have.
- Heavy skillet: Cast iron or stainless gives even heat for a golden crust; a nonstick pan can work for easier flipping.
- Wire rack and baking sheet: Keeps cooked cakes crisp while you finish the rest. Sub: paper towels in a pinch, but you will lose crispness.
- Shallow dish for panko coating: Makes quick, even coating possible. Sub: a wide plate will do.
Using these keeps the process smooth and helps the crab cakes come out restaurant-level every time.
Step-by-Step Preparation Guide
Step 1: Prepare the crab
Place the lump crab meat in a fine-mesh strainer set over a bowl and let excess liquid drain for 5–10 minutes. Gently press with the back of a spoon to coax out remaining moisture, then transfer the crab to a clean mixing bowl and carefully pick through it with your fingers to remove any shells or cartilage, keeping the large flaky lumps as intact as possible. Treat the crab gently so the texture stays lumpy and delicate rather than shredded.
Step 2: Make the binding mixture
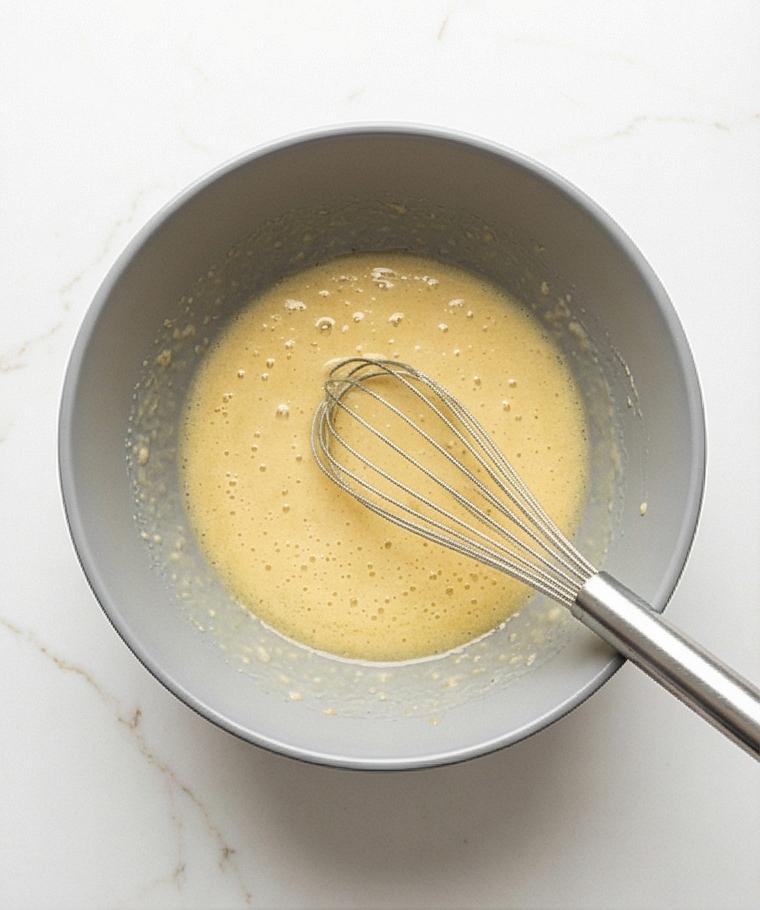
In a large mixing bowl whisk the whole egg, mayonnaise, Dijon mustard, Worcestershire sauce, freshly squeezed lemon juice, and hot sauce (if using) until a glossy, smooth emulsion forms. The mixture should be homogenous and slightly thickened, with a pale yellow sheen and tiny air bubbles from the whisk.
Step 3: Season the base
Add Old Bay seafood seasoning, fine sea salt, and freshly ground black pepper to the wet emulsion, whisking until the spices are evenly distributed. The seasoned base will smell bright and savory—salty, tangy, and briny—ready to carry the crab flavor.
Step 4: Add herbs and initial breadcrumbs
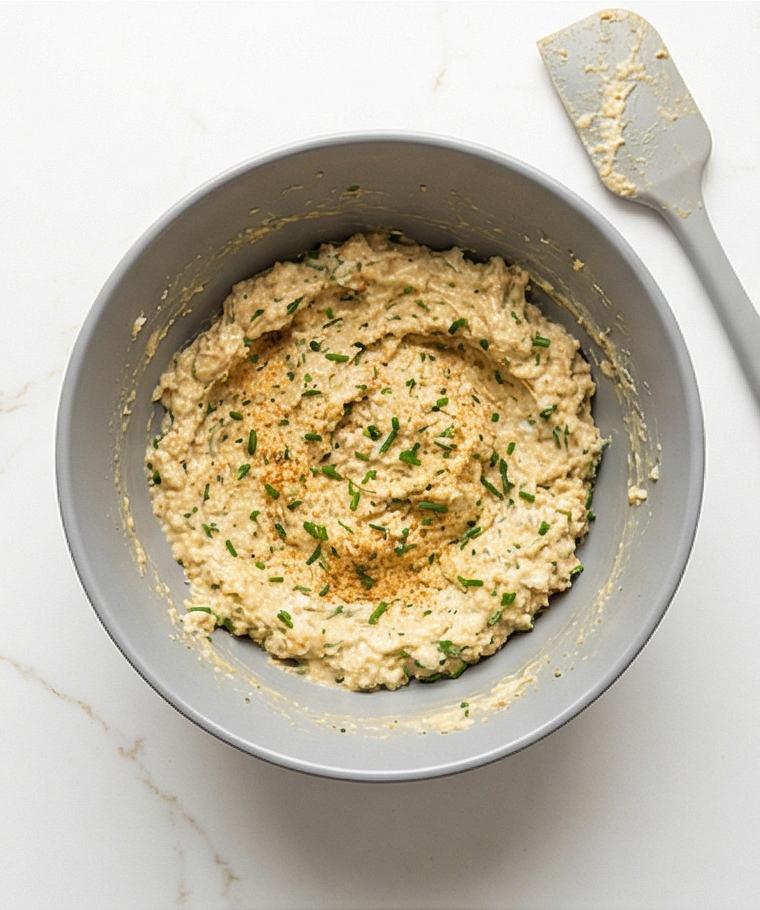
Fold in finely chopped flat-leaf parsley and thinly sliced chives or green onion tops so green flecks are evenly dispersed through the mixture. Add the first portion of panko breadcrumbs and fold gently with a spatula until the crumbs are fully moistened and the mixture becomes thick and spoonable, not runny.
Step 5: Fold in the crab gently
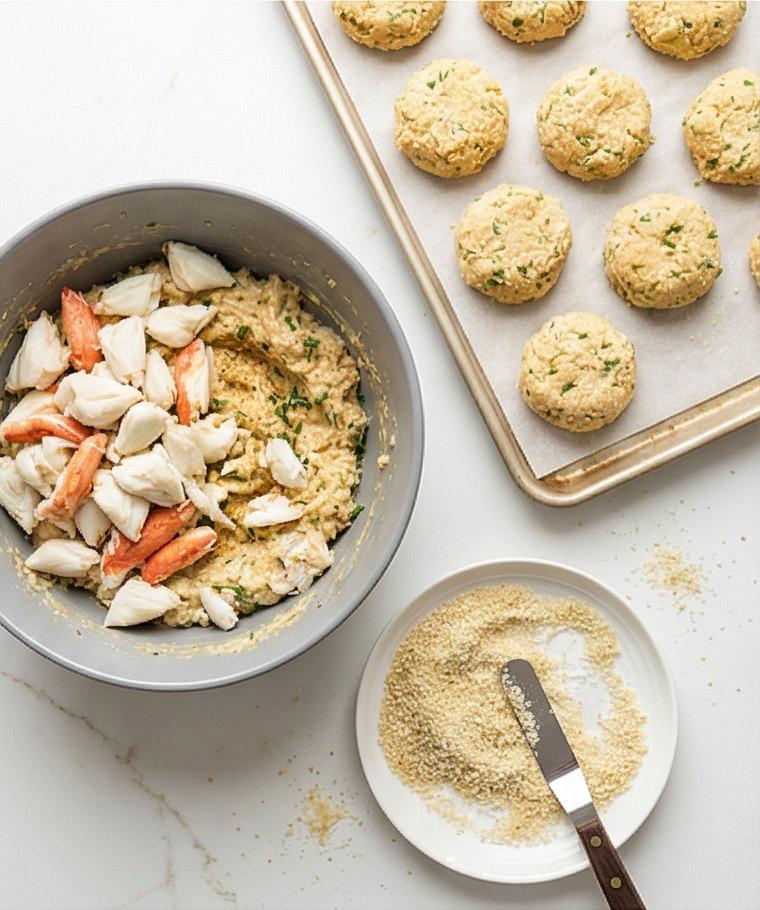
Add the drained, picked-over crab meat to the bowl and using a rubber spatula (or very gently with your hands) fold only until combined. Preserve the larger lumps of crab so the final cakes read as crab-forward. The mixture should hold together when pressed but still show visible pieces of shellfish.
Step 6: Adjust consistency if needed
If a small pressed patty doesn’t hold its shape, sprinkle in up to two more tablespoons of panko, one tablespoon at a time, folding gently after each addition. Stop as soon as the mixture forms a cohesive patty—avoid adding too many crumbs so the cakes stay light and not dry.
Step 7: Shape the crab cakes
Line a baking sheet with parchment paper. Lightly oil your hands and divide the mixture into 8–10 even portions. Gently form each portion into compact patties about 2½–3 inches wide and ¾–1 inch thick, setting them on the parchment as you go. Keep the edges clean and the tops slightly domed.
Step 8: Coat the crab cakes
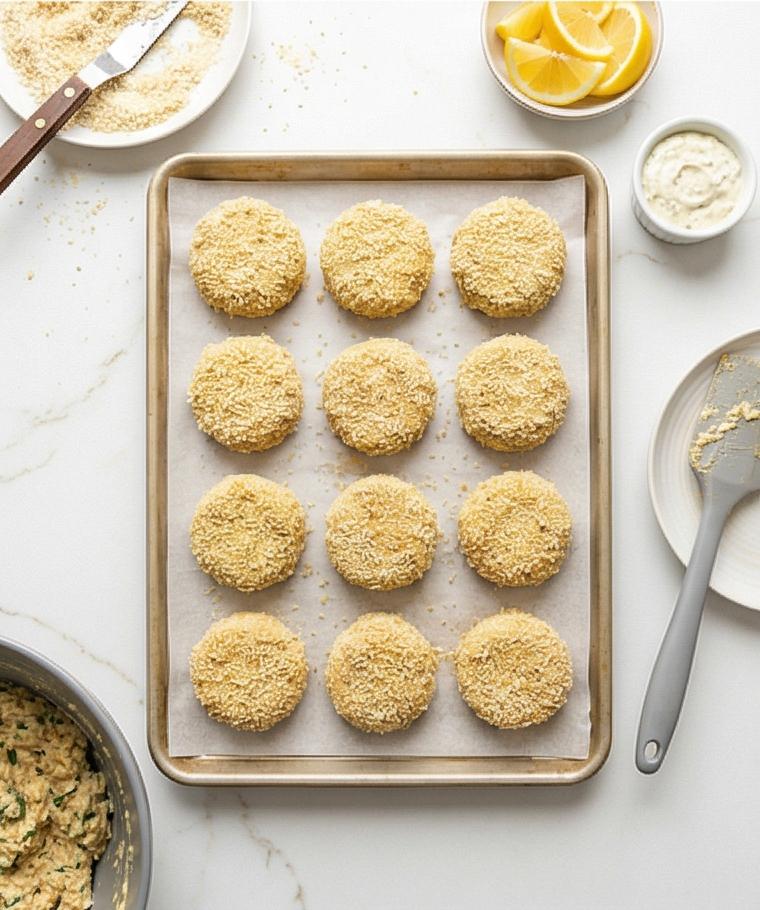
Spread the coating panko in a shallow dish and, one at a time, lightly press the top and bottom of each patty into the crumbs, shaking off excess. Return the lightly coated cakes to the parchment-lined sheet; the crumb layer should be thin and even to deliver a delicate, crisp crust.
Step 9: Chill to set
Cover the tray loosely with plastic wrap and refrigerate the coated cakes for at least 30 minutes and up to 4 hours. Chilling firms the mixture so the cakes hold together during cooking and ensures a tidy, consistent crust.
Step 10: Optional: Preheat a warming oven
If you will cook in batches, preheat a low oven to keep cooked cakes warm on a wire rack set over a baking sheet. This step is optional but helpful for timing when serving many cakes.
Step 11: Preheat the pan and fat
About five minutes before cooking, heat a heavy skillet over medium heat and add neutral oil and chilled pieces of butter, warming until the butter melts and the fat shimmers but doesn’t smoke. You should see a gentle sizzle and a glossy surface in the pan—the ideal frying environment for achieving a golden crust.
Step 12: Fry the first batch
Place several cakes in the hot fat without crowding. Cook the first side 3–4 minutes until the bottom is deep golden brown and the edges look set. Aim for a gradual browning so the crust becomes crisp without burning.
Step 13: Turn and finish cooking
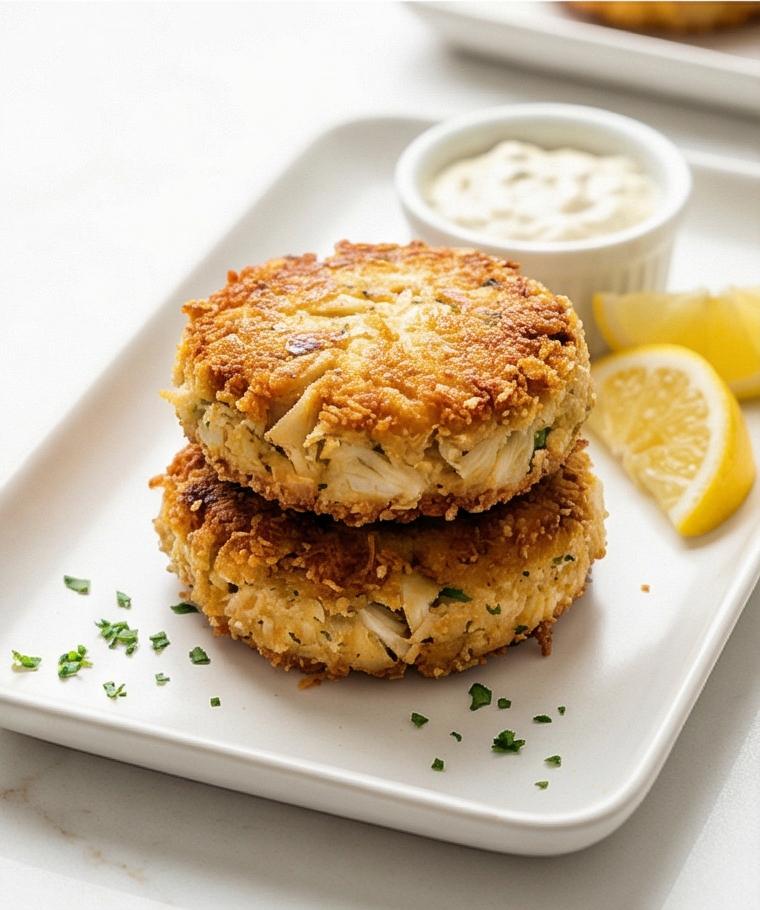
Gently flip each cake with a thin spatula and cook the second side another 3–4 minutes until golden all over and the center is hot. The cakes should be deeply golden, crisp, and still moist inside.
Step 14: Keep warm while cooking remaining cakes
Transfer cooked cakes to the prepared wire-rack tray in the warm oven so they stay crisp while you finish the rest. If the pan darkens, wipe out burnt bits, add a splash more oil and a small piece of butter, and reheat to a gentle sizzle before the next batch.
Step 15: Fry remaining crab cakes
Repeat the frying process until all cakes are cooked through, keeping the oil temperature steady and replenishing fat as needed. Each batch should take roughly the same time to achieve that consistent golden crust.
Step 16: Rest briefly before serving
Let the cooked cakes rest for 3–5 minutes on a rack or paper-towel-lined plate to drain excess surface oil and to allow the crust to stay crisp while the interior settles.
Step 17: Serve and garnish
Arrange warm crab cakes on a serving platter, garnish with extra finely chopped parsley, and serve immediately with lemon wedges and tartar sauce or remoulade in a small ramekin. Enjoy them hot and crisp for the best texture.
Step 18: Serving suggestions and storage
Offer the crab cakes as an appetizer (one or two per person) or a main course with simple sides like a green salad or coleslaw. Refrigerate cooled leftovers, covered, for up to two days and re-crisp in a 350°F oven for 10–12 minutes before serving.
Making It Your Own
I like to treat this Crab Cakes Recipe as a flexible template. For a lighter version, swap half the mayonnaise for Greek yogurt and use claw meat mixed with lump for a wallet-friendly option. To make them gluten-free, use gluten-free panko or crushed gluten-free crackers and skip wheat-based coatings.
Seasonally, add a tablespoon of finely diced red bell pepper or a little roasted corn for summer flair. If I want a richer, southern spin, I stir a touch more Worcestershire and serve with a mustardy remoulade. Each variation keeps the crab central while letting you tailor texture and heat.
How to Serve
When hosting, plan one to two crab cakes per person as an appetizer or three to four as a main with sides. For a dinner party, make the cakes ahead and refrigerate after coating; pan-fry just before guests arrive so theyre hot and crisp when served.
Arrange on a platter with lemon wedges, a small bowl of tartar sauce, and microgreens or extra parsley for color. For a plated main, add a bright green salad, roasted potatoes, or a chilled corn salad to balance the richness. If serving a crowd, keep cooked cakes in a low oven on a wire rack so they stay crisp.
Storage and Reheating Tips
Cool leftovers completely before storing to avoid sogginess. Refrigerate in a single layer separated by parchment for up to two days. For longer storage, freeze uncooked patties on a tray until solid, then bag them for up to one month.
To reheat, place refrigerated cakes on a wire rack over a baking sheet in a 350°F oven for 10–12 minutes until warmed and crisp. For frozen cakes, thaw in the refrigerator before reheating or bake from frozen, adding a few extra minutes.
Common Mistakes and How to Avoid Them
A common mistake is overmixing the crab, which destroys the delicate lumps. Fold gently and stop as soon as the mixture holds together. Another is adding too much panko, making dry, mealy cakes; add crumbs gradually just until cohesive.
Also watch your pan temperature. Too hot and the crust will burn before the center warms, too cool and the cakes will absorb fat. Aim for a steady gentle sizzle for the perfect crust.
Final Thoughts
I hope this Crab Cakes Recipe inspires you to try a small bit of seafood luxury at home. Theyre forgiving, quick to cook, and always a crowd-pleaser. Give them a go this weekend and taste how simple ingredients make a memorable dish.
Frequently Asked Questions.
- Can I use canned crab for this recipe? Yes, canned crab can work in a pinch but choose lump-style canned crab and drain it well for the best texture.
- How do I keep the crab cakes from falling apart? Drain the crab thoroughly, chill the shaped cakes, and dont overhandle the mixture. A brief chill helps them set.
- Can I bake the crab cakes instead of frying? Yes, bake at 400°F for about 12–15 minutes, flipping once, though the crust wont be as deep golden as pan-fried.
- Are these crab cakes freezer-friendly? Freeze the shaped, uncooked patties on a tray, then bag for up to one month. Thaw in the refrigerator before frying or baking.
- What can I serve with these crab cakes? Lemon wedges, tartar sauce or remoulade, a simple green salad, coleslaw, or roasted potatoes all pair nicely.
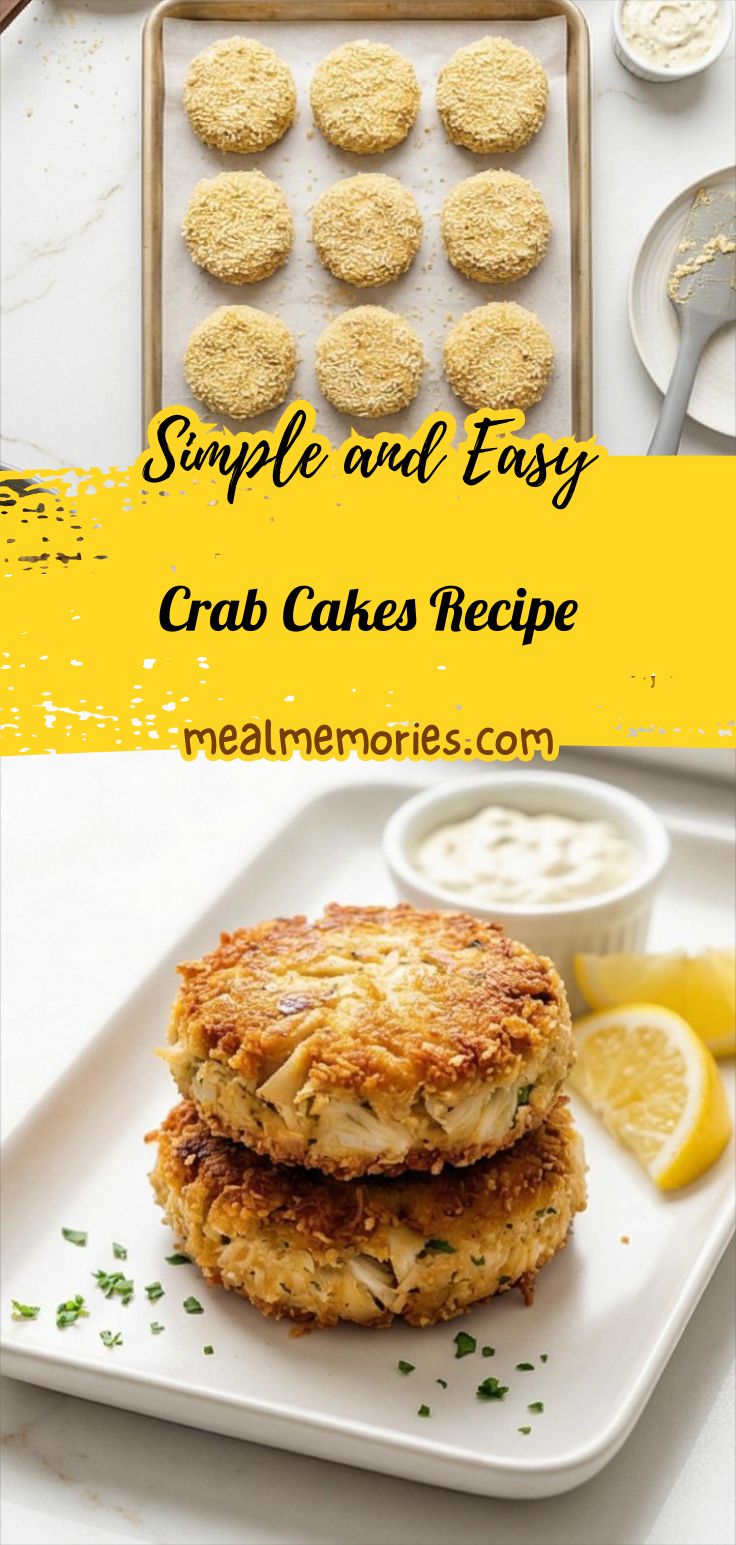
Crab Cakes Recipe
Make this Crab Cakes Recipe for golden, crisp crab cakes with a tender, flaky center—perfect for parties or weeknight dinners.
Ingredients
Instructions
Step 1: Prepare the crab
Place the lump crab meat in a fine-mesh strainer set over a bowl and let excess liquid drain for 5–10 minutes. Gently press with the back of a spoon to coax out remaining moisture, then transfer the crab to a clean mixing bowl and carefully pick through it with your fingers to remove any shells or cartilage, keeping the large flaky lumps as intact as possible. Treat the crab gently so the texture stays lumpy and delicate rather than shredded.
Step 2: Make the binding mixture
In a large mixing bowl whisk the whole egg, mayonnaise, Dijon mustard, Worcestershire sauce, freshly squeezed lemon juice, and hot sauce (if using) until a glossy, smooth emulsion forms. The mixture should be homogenous and slightly thickened, with a pale yellow sheen and tiny air bubbles from the whisk.
Step 3: Season the base
Add Old Bay seafood seasoning, fine sea salt, and freshly ground black pepper to the wet emulsion, whisking until the spices are evenly distributed. The seasoned base will smell bright and savory—salty, tangy, and briny—ready to carry the crab flavor.
Step 4: Add herbs and initial breadcrumbs
Fold in finely chopped flat-leaf parsley and thinly sliced chives or green onion tops so green flecks are evenly dispersed through the mixture. Add the first portion of panko breadcrumbs and fold gently with a spatula until the crumbs are fully moistened and the mixture becomes thick and spoonable, not runny.
Step 5: Fold in the crab gently
Add the drained, picked-over crab meat to the bowl and using a rubber spatula (or very gently with your hands) fold only until combined. Preserve the larger lumps of crab so the final cakes read as crab-forward. The mixture should hold together when pressed but still show visible pieces of shellfish.
Step 6: Adjust consistency if needed
If a small pressed patty doesn’t hold its shape, sprinkle in up to two more tablespoons of panko, one tablespoon at a time, folding gently after each addition. Stop as soon as the mixture forms a cohesive patty—avoid adding too many crumbs so the cakes stay light and not dry.
Step 7: Shape the crab cakes
Line a baking sheet with parchment paper. Lightly oil your hands and divide the mixture into 8–10 even portions. Gently form each portion into compact patties about 2½–3 inches wide and ¾–1 inch thick, setting them on the parchment as you go. Keep the edges clean and the tops slightly domed.
Step 8: Coat the crab cakes
Spread the coating panko in a shallow dish and, one at a time, lightly press the top and bottom of each patty into the crumbs, shaking off excess. Return the lightly coated cakes to the parchment-lined sheet; the crumb layer should be thin and even to deliver a delicate, crisp crust.
Step 9: Chill to set
Cover the tray loosely with plastic wrap and refrigerate the coated cakes for at least 30 minutes and up to 4 hours. Chilling firms the mixture so the cakes hold together during cooking and ensures a tidy, consistent crust.
Step 10: Optional: Preheat a warming oven
If you will cook in batches, preheat a low oven to keep cooked cakes warm on a wire rack set over a baking sheet. This step is optional but helpful for timing when serving many cakes.
Step 11: Preheat the pan and fat
About five minutes before cooking, heat a heavy skillet over medium heat and add neutral oil and chilled pieces of butter, warming until the butter melts and the fat shimmers but doesn’t smoke. You should see a gentle sizzle and a glossy surface in the pan—the ideal frying environment for achieving a golden crust.
Step 12: Fry the first batch
Place several cakes in the hot fat without crowding. Cook the first side 3–4 minutes until the bottom is deep golden brown and the edges look set. Aim for a gradual browning so the crust becomes crisp without burning.
Step 13: Turn and finish cooking
Gently flip each cake with a thin spatula and cook the second side another 3–4 minutes until golden all over and the center is hot. The cakes should be deeply golden, crisp, and still moist inside.
Step 14: Keep warm while cooking remaining cakes
Transfer cooked cakes to the prepared wire-rack tray in the warm oven so they stay crisp while you finish the rest. If the pan darkens, wipe out burnt bits, add a splash more oil and a small piece of butter, and reheat to a gentle sizzle before the next batch.
Step 15: Fry remaining crab cakes
Repeat the frying process until all cakes are cooked through, keeping the oil temperature steady and replenishing fat as needed. Each batch should take roughly the same time to achieve that consistent golden crust.
Step 16: Rest briefly before serving
Let the cooked cakes rest for 3–5 minutes on a rack or paper-towel-lined plate to drain excess surface oil and to allow the crust to stay crisp while the interior settles.
Step 17: Serve and garnish
Arrange warm crab cakes on a serving platter, garnish with extra finely chopped parsley, and serve immediately with lemon wedges and tartar sauce or remoulade in a small ramekin. Enjoy them hot and crisp for the best texture.
Step 18: Serving suggestions and storage
Offer the crab cakes as an appetizer (one or two per person) or a main course with simple sides like a green salad or coleslaw. Refrigerate cooled leftovers, covered, for up to two days and re-crisp in a 350°F oven for 10–12 minutes before serving.
Notes
- Drain crab thoroughly to avoid soggy cakes
- Fold crab gently to preserve large flakes
- Chill shaped cakes to help them hold together while frying
- Re-crisp leftovers in a 350°F oven for 10–12 minutes
- Freeze uncooked patties on a tray, then bag for up to one month