The 7 Layer Dip has been a party staple in my kitchen for years, and it still feels like a little celebration every time I spoon it into a dish. I remember the first time I made this 7 Layer Dip for a casual game night and watched friends go quiet as they dug in. It is the kind of recipe that makes people smile without fuss, with colors and textures that do the talking. You can get it on the table fast, and it always manages to look more impressive than the effort it takes.
I love how this 7 Layer Dip lets you customize each layer, so it fits whatever mood youre in. Whether I am trimming tomatoes on a weeknight or assembling a platter for a crowd, the layers give you options to keep or swap. The simple ingredients come together into something that feels festive, which is exactly why I keep coming back to it.
How This Recipe Became My Rainy-Day Favorite
The first time I made this 7 Layer Dip it was raining and my house smelled like wet leaves and coffee. I had a small stack of tortilla chips, some guacamole in the fridge, and two tired cans of refried beans. As I chopped tomatoes, shredded cheese, and layered the colors into a clear dish, the room brightened; it felt like making a little patch of sunshine on a gray afternoon. There was a moment when the sour cream sat perfectly smooth over the guacamole and the olives and scallions looked almost like confetti. When my neighbor stopped by and we shared the dish between small plates, the rain seemed to soften. The dip warmed us more than the coffee did. Now, whenever the weather turns gloomy, I make the dip and invite someone over. The ritual of preparation, the tactile joy of layering, and the sound of chips cracking with each bite are all part of the comfort it brings.
The Main Ingredients and Why They Matter
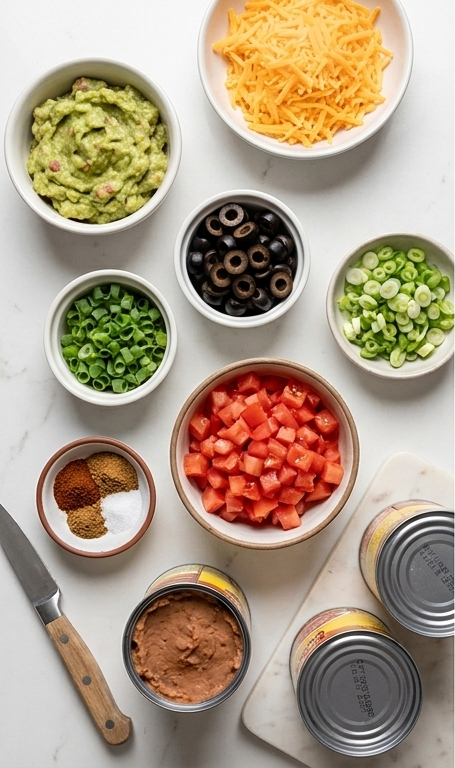
- Tomatoes: Provide bright acidity and juicy texture; Roma or vine-ripened are great. Substitute with canned diced tomatoes drained for convenience and choose firm, ripe fruit for best texture.
- Shredded Cheddar Cheese: Adds a melty, savory finish and color; use sharp cheddar for more punch or Monterey Jack for milder flavor. Freshly shred for lighter texture.
- Sliced Black Olives: Give salty, briny contrast and visual depth; drained canned olives work well. Substitute with pickled jalapenos for heat.
- Green Onions: Add crisp bite and a fresh onion note; thinly slice for even distribution. Use chives if you want a subtler finish.
- Refried Beans: The hearty base that holds it together; choose smooth style for easy spreading. Pinto or black bean refried are both good options.
- Chili Powder, Cumin, Salt: Season the beans for warmth and balance; adjust to taste. Smoked paprika can be swapped for extra depth.
- Guacamole: Brings creaminess and a cool, herbal lift; mash ripe avocados with lime and salt if making fresh. Store-bought is fine in a pinch.
- Sour Cream: Creates a smooth, tangy layer that separates the green and orange strata; Greek yogurt can replace it for a tangier, protein-rich twist.
Essential Kitchen Tools and Why They Help
You do not need a long list of gadgets to make this shine, but a few thoughtful tools make assembly effortless and the presentation neater.
- Mixing Bowls: : Use medium and small bowls to hold prepared toppings separately so assembly is swift and tidy. They keep flavors from mingling early.
- Offset Spatula or Spoon: : A flat edge helps you spread beans, guacamole, and sour cream into clean, even layers; use the back of a spoon if you do not have a spatula.
- Cheese Grater: : Freshly shredded cheddar has better texture and melts more evenly than pre-shredded cheese, which often contains anti-caking agents.
- Colander or Sieve: : Draining diced tomatoes or olives prevents excess moisture from making the layers watery.
- Clear 9×13″ Casserole Dish: : The visual appeal of the layers is part of the dish’s charm, so a clear dish shows off the strata; any shallow serving dish will do.
- Small Ramekins or Prep Bowls: : Keep chopped toppings separated and make final scatterings quicker and more decorative.
Step-by-Step Preparation Guide.
Step 1: Prep the fresh toppings
Dice the tomatoes into small, even cubes so they read bright and juicy on the finished dip. Shred the cheddar until it forms light, feathery ribbons that will scatter and peek through the final layer. Drain the black olives and slice the green onions on the bias into thin rounds. Place each of these prepared components into their own small bowls or ramekins and set them to the side, ready for assembly; this keeps textures separated and neat for an immediate finish.
Step 2: Season and combine the refried beans
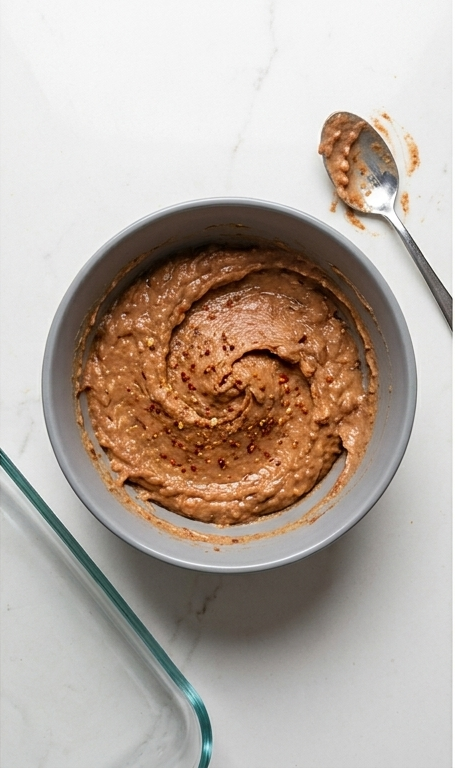
Spoon the refried beans into a medium mixing bowl, sprinkle in the chili powder, cumin, and the pinch of salt, then add the measured water. Stir thoroughly until the spice flecks are evenly distributed and the beans become a cohesive, slightly glossy, spreadable paste. Taste and adjust subtly if desired — you’re aiming for a deeply seasoned, smooth foundation with visible specks of chili and cumin throughout, ready to be layered.
Step 3: Layer the bean base into the casserole
Using an offset spatula or the back of a spoon, spread the seasoned refried beans evenly into the bottom of a clear rectangular 9×13″ glass casserole dish. Smooth the top so the layer is uniform and compact, creating a strong, dark base that will anchor the subsequent green and white layers.
Step 4: Add the creamy middle layers
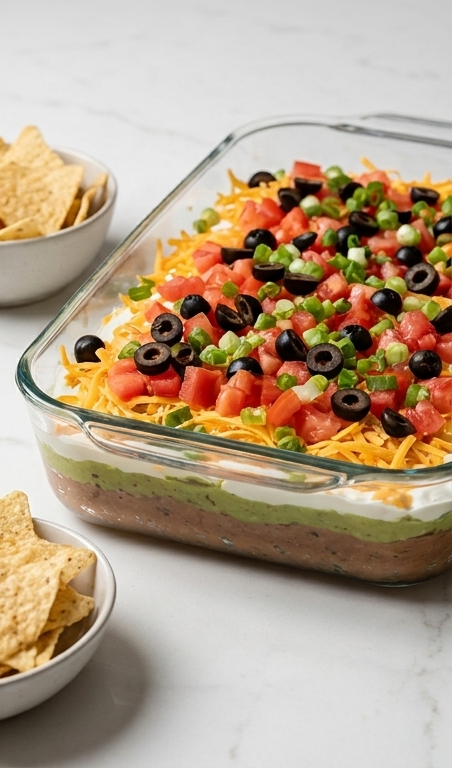
Gently spoon the guacamole across the bean layer and spread it into an even, slightly textured green blanket. Immediately follow with a smooth layer of sour cream, spreading it thin enough to maintain visible separation between the two creamy layers. Aim for clean, distinct strata so each layer can be read through the clear dish.
Step 5: Scatter the cheese
Evenly sprinkle the shredded cheddar across the sour cream, covering the surface with a warm orange field of fine shreds. The cheese should sit loosely on top, creating a soft visual transition between the creamy white and the colorful garnish layer.
Step 6: Finish with the fresh garnish
Top the cheese with the diced tomatoes, drained black olives, and sliced green onions, arranging them so the colors distribute evenly across the surface. The tomatoes should look plump and juicy, the olives glossy and round, and the scallions crisp and bright, giving the dip a lively, textured crown.
Step 7: Serve or chill and present
Serve immediately with a bowl of tortilla chips artfully arranged nearby, or cover and refrigerate until ready. If chilling, let the layers settle but keep the top vibrant; when ready to serve, bring to room temperature briefly so the textures shine and the colors pop.
Making It Your Own
I like to think of variations as happy experiments. For a smoky twist, try adding a layer of smoky black beans or fold a tablespoon of chipotle in adobo into the refried beans for a warm, charred flavor.
If you need this to be vegetarian or vegan, swap the sour cream for a thick cashew cream or coconut yogurt and choose a vegan cheddar. The texture will be slightly different but still delightful.
Seasonal adjustments are simple: in summer use fresh pico de gallo instead of plain diced tomatoes; in winter, try roasted red peppers and a sprinkle of toasted corn for color and sweetness.
How to Serve
When I host, presentation matters as much as flavor. Arrange tortilla chips in a wide, shallow bowl around the casserole, or fan them out on a large board for grazing. Offer small spoons so guests can scoop a tidy portion of each layer.
For a crowd, double the quantities and use two dishes so guests can pick up more easily without crowding one bowl. For a small gathering, halve the recipe and use a smaller dish for a cozier feel. Add small bowls of extra garnishes like extra green onions, sliced jalapenos, and cilantro so people can customize their bites.
If you want to serve as part of a buffet, cut the dip into squares using a spatula and plate individual portions with chips on the side for a neat, party-ready option.
Storage and Reheating Tips
Store leftover 7 Layer Dip covered in the refrigerator for up to 3 days. The top fresh layer will look best the first day, so if you plan to keep it longer, store the guacamole and the fresh tomato/olive garnish separately and add them just before serving.
When you are ready to serve leftovers, let the dish come to room temperature for about 20 minutes. If the beans feel stiff, give them a quick stir and add a teaspoon of water to soften. Avoid microwaving the assembled layered dip, since reheating will blur the layers and change texture.
Common Mistakes and How to Avoid Them
One frequent misstep is using watery tomatoes. Drain diced tomatoes or pat them dry so they do not make the layers soggy. Another is over-layering sour cream; keep it thin so it separates cleanly from the guacamole.
Also be careful with salt. Tasting the seasoned bean layer before assembling helps you avoid an overly salty final dip. If the beans are too salty, add more guacamole or a squeeze of lime to balance.
A Warm Invitation to Try This One
Give this 7 Layer Dip a try the next time you want something that looks festive with minimal fuss. It is forgiving, customizable, and always a crowd pleaser. Gather some chips, invite a friend, and enjoy the ritual of layering — it is as rewarding as the first bite.
Frequently Asked Questions.
- What is the best way to keep guacamole from browning? You can press plastic wrap directly onto the guacamole surface to limit air exposure, or add a thin layer of lime juice; preparing guacamole fresh the same day is ideal.
- Can I make the 7 Layer Dip ahead of time? Yes, you can prepare the bean and cheese layers the day before, but wait to add guacamole and fresh tomatoes until just before serving to keep the colors vibrant.
- Is there a good substitute for refried beans? Smooth black bean puree or a well-spiced bean spread works well if you prefer a different bean base.
- How do I adapt this for a vegan diet? Replace sour cream with cashew cream or a thick plant-based yogurt, use vegan cheese, and ensure any store-bought guacamole has no added dairy.
- Can I turn the 7 Layer Dip into a meal? Yes, serve it with grilled chicken, seasoned ground beef, or roasted vegetables alongside to make it more substantial and plate as a taco bowl style option.
7 Layer Dip
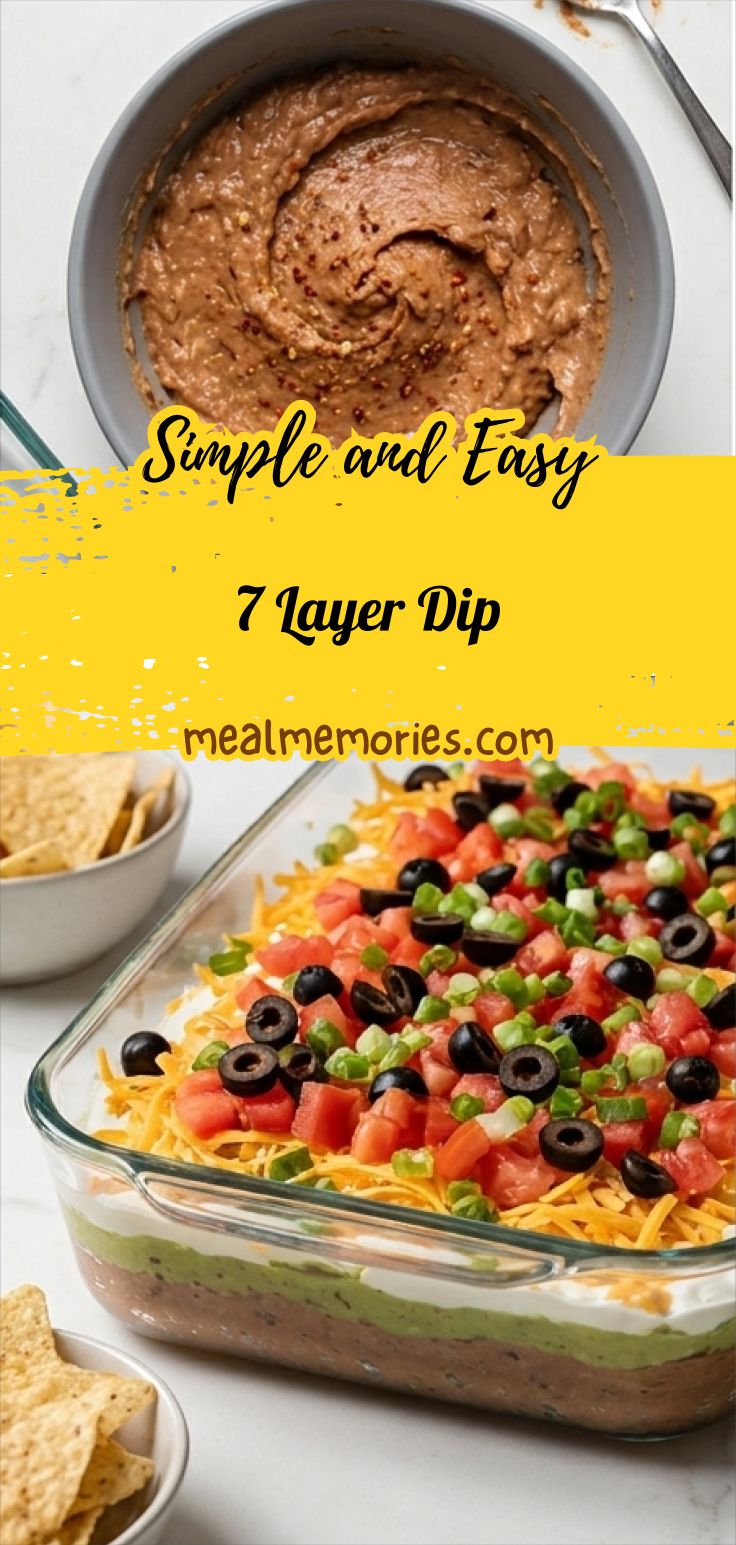
Assemble this colorful 7 Layer Dip for quick, crowd-pleasing snacking that looks impressive and tastes even better.
Ingredients
Instructions
Step 1: Prep the fresh toppings
Dice the tomatoes into small, even cubes so they read bright and juicy on the finished dip. Shred the cheddar until it forms light, feathery ribbons that will scatter and peek through the final layer. Drain the black olives and slice the green onions on the bias into thin rounds. Place each of these prepared components into their own small bowls or ramekins and set them to the side, ready for assembly; this keeps textures separated and neat for an immediate finish.
Step 2: Season and combine the refried beans
Spoon the refried beans into a medium mixing bowl, sprinkle in the chili powder, cumin, and the pinch of salt, then add the measured water. Stir thoroughly until the spice flecks are evenly distributed and the beans become a cohesive, slightly glossy, spreadable paste. Taste and adjust subtly if desired — you're aiming for a deeply seasoned, smooth foundation with visible specks of chili and cumin throughout, ready to be layered.
Step 3: Layer the bean base into the casserole
Using an offset spatula or the back of a spoon, spread the seasoned refried beans evenly into the bottom of a clear rectangular 9x13" glass casserole dish. Smooth the top so the layer is uniform and compact, creating a strong, dark base that will anchor the subsequent green and white layers.
Step 4: Add the creamy middle layers
Gently spoon the guacamole across the bean layer and spread it into an even, slightly textured green blanket. Immediately follow with a smooth layer of sour cream, spreading it thin enough to maintain visible separation between the two creamy layers. Aim for clean, distinct strata so each layer can be read through the clear dish.
Step 5: Scatter the cheese
Evenly sprinkle the shredded cheddar across the sour cream, covering the surface with a warm orange field of fine shreds. The cheese should sit loosely on top, creating a soft visual transition between the creamy white and the colorful garnish layer.
Step 6: Finish with the fresh garnish
Top the cheese with the diced tomatoes, drained black olives, and sliced green onions, arranging them so the colors distribute evenly across the surface. The tomatoes should look plump and juicy, the olives glossy and round, and the scallions crisp and bright, giving the dip a lively, textured crown.
Step 7: Serve or chill and present
Serve immediately with a bowl of tortilla chips artfully arranged nearby, or cover and refrigerate until ready. If chilling, let the layers settle but keep the top vibrant; when ready to serve, bring to room temperature briefly so the textures shine and the colors pop.
Notes
- Drain tomatoes and olives well to prevent a watery dip.
- Freshly shred the cheddar for best texture and melt.
- Store guacamole and fresh toppings separately if keeping leftovers.
- Taste and adjust the seasoned bean layer before assembling.
- Use a clear dish to showcase the layers for best presentation.