Spring Rolls Recipe
I fell for this Spring Rolls Recipe the first time I heard that crisp shell and warm filling together could feel like a tiny, perfect celebration. I make these whenever friends drop by or when I crave something crunchy and fresh that still feels comforting. I love the contrast of bright cabbage and sweet shrimp with a punchy dipping sauce. Over time I refined timing and texture so the rolls are reliably crisp and not soggy.
There is something magnetic about the rhythm of making spring rolls: the chopping, the quick high-heat toss, and the careful rolling. It turns a simple dinner into a hands-on gathering, and that is why I keep returning to this Spring Rolls Recipe. Whether you make a single batch or an assembly-line feast, it rewards patience with a brittle, golden exterior and a warm, savory interior.
How This Recipe Became My Rainy-Day Favorite
The first time I made this Spring Rolls Recipe it was pouring outside and the kitchen filled with steam and ginger aroma. My partner and I took turns rolling on the counter while a playlist hummed in the background. I remember the satisfying sound when the first roll hit the hot oil, the burst of scent as the garlic and ginger woke up, and the relief when the filling stayed crisp rather than weeping into the wrapper. The experience felt intimate, almost ceremonial, and the plate of hot rolls vanished faster than I expected. That evening taught me the importance of cooling the filling fully and keeping the wrappers moist but not wet, small lessons that now make every batch dependable and fun.
Key Ingredients and Why They Matter
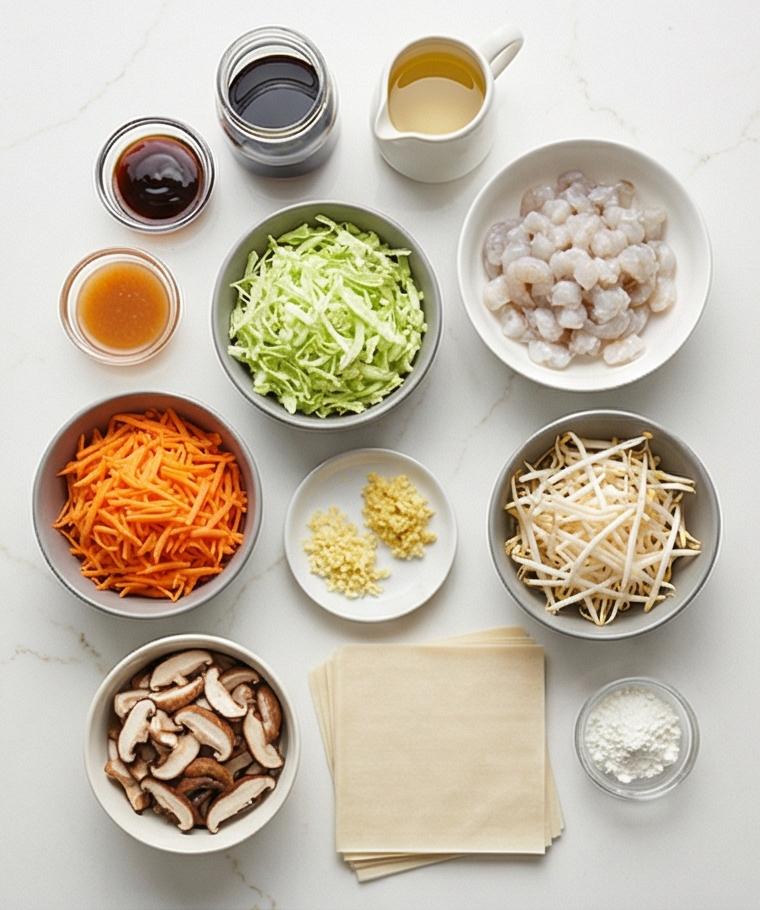
- Neutral Cooking Oil: Provides the frying medium; choose canola, vegetable, or peanut for a high smoke point. Substitute: light olive oil in a pinch, but watch for lower smoke point.
- Garlic and Ginger: Aromatic backbone that brightens the filling; use fresh for best flavor. Substitute: garlic powder and ground ginger if needed, though fresh is superior.
- Shrimp: Adds savory, sweet seafood depth and a tender texture. Substitute: minced chicken, tofu, or shredded pork for different proteins.
- Cabbage and Carrots: Provide crunch and bulk, balancing moisture. Look for firm cabbage and firm carrots. Substitute: napa cabbage or bell pepper for color.
- Bean Sprouts and Shiitake: Add contrasting textures and umami. Fresh sprouts should be crisp and well drained.
- Soy, Oyster, Sesame Oil, Cornstarch, Wrappers: Soy and oyster build savory seasoning; sesame oil is finishing aromatics; cornstarch binds the filling. Use cornstarch or tapioca for slurry.
Essential Kitchen Tools and Why They Help
These tools make the process smoother and the result more consistent. A good wok or large skillet gives fast, even heat so vegetables stay crisp. A sharp chef’s knife speeds prep and keeps ingredient pieces even, which matters for texture. A wire rack prevents fried rolls from steaming and losing crispness. Alternatives: use a large sauté pan if you don’t have a wok, and a baking sheet in place of a wire rack if needed.
- Wok or large skillet: Provides high heat and wide surface for quick toss-frying.
- Sharp chef’s knife: Ensures even, fine cuts for consistent cooking.
- Mixing bowls and plates: For mise en place and rapid cooling of filling.
- Wire rack and baking sheet: Keeps fried rolls crisp while draining.
- Deep-fry thermometer: Helpful to maintain oil temperature, or use a steady medium-high flame and test with a small piece of wrapper.
Step-by-Step Preparation Guide.
Step 1: Prepare the vegetables and shrimp
Begin by finely shredding the cabbage and carrots into thin, ribbon-like strands, thinly slicing the shiitakes and green onions, rinsing and thoroughly draining the bean sprouts, and finely chopping the peeled, deveined shrimp so the bits will cook quickly and distribute evenly. Keep every component separated in small bowls or piles so textures remain distinct , crisp, wet, fibrous, and tender , and the shrimp stays cold and compacted until it hits the pan. This mise en place keeps moisture and cooking time predictable and prevents over-steaming the wrappers later.
Step 2: Sauté the aromatics and cook the shrimp
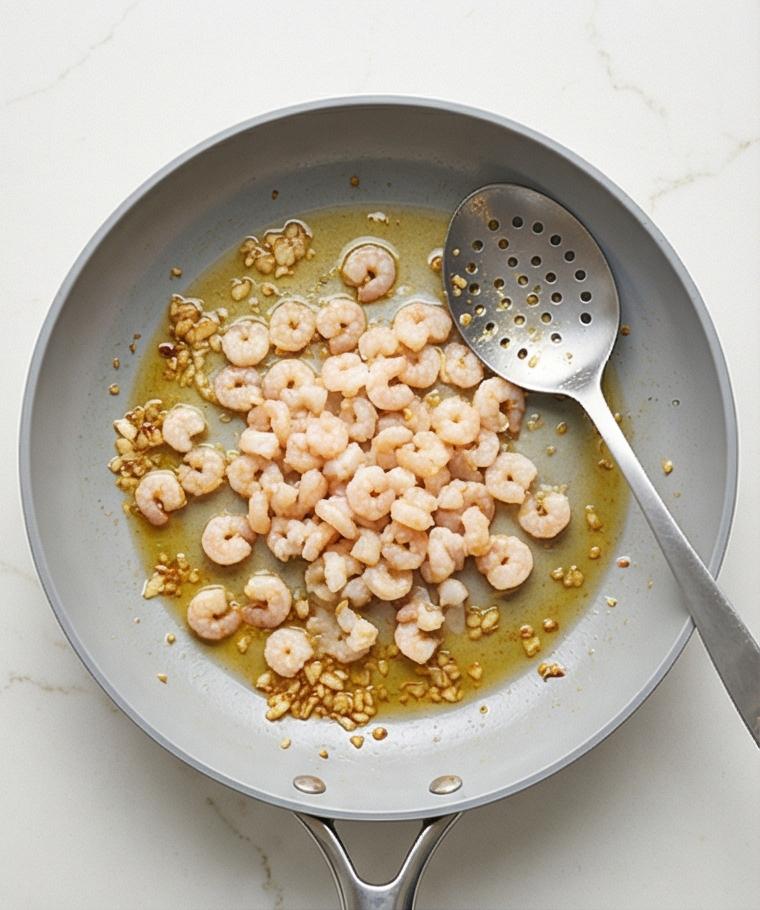
Heat a splash of neutral oil until shimmering, then quickly sauté the finely minced garlic and grated ginger until fragrant but not browned; add the chopped shrimp and stir until just opaque and lightly pink, broken into small, even bits so the final filling is uniformly meaty and tender rather than chunky. Transfer that aromatic shrimp mixture into a shallow wide vessel to rest; you should see tiny glossy droplets and a faint caramelized edge on some bits, aroma rising without burning.
Step 3: Add vegetables and seasoning, stir until crisp-tender
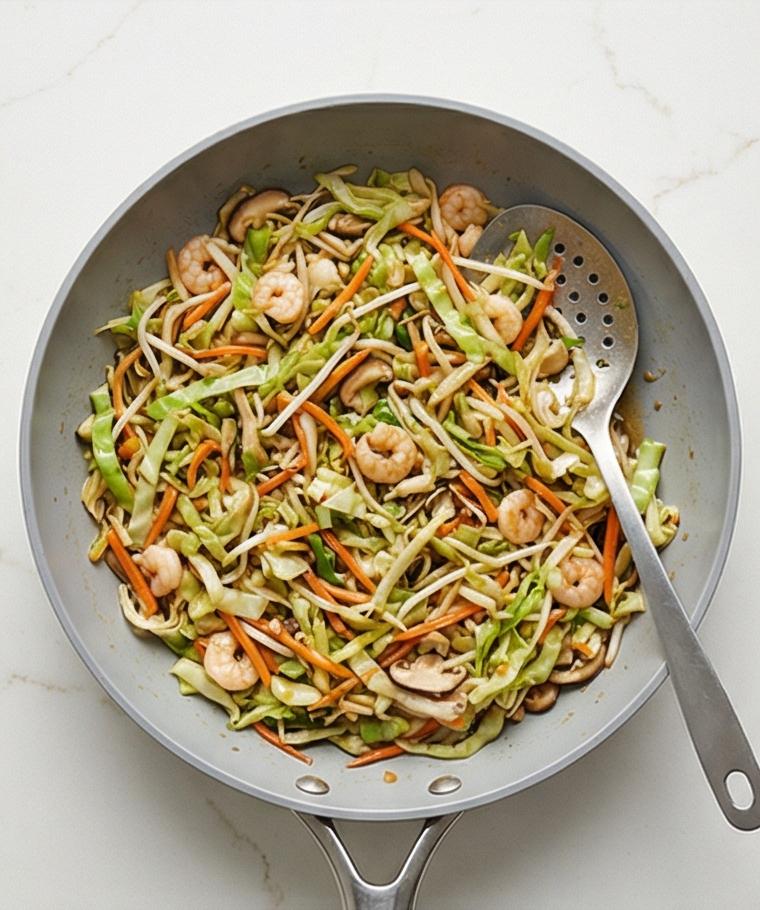
Add the shredded cabbage, carrots, bean sprouts, sliced green onions, and mushrooms to the warm shrimp aromatics and toss briskly over high heat until everything is slightly wilted yet still retaining a bright snap and individual texture , glossy cabbage ribbons, crunchy carrot threads, and springy bean sprouts. Stir in the soy, oyster, sesame oil, white pepper, salt, and sugar so the vegetables take on a unified savory sheen without becoming soggy; the visual result should be layered, glossy, and gently compacted.
Step 4: Thicken the filling and cool it completely
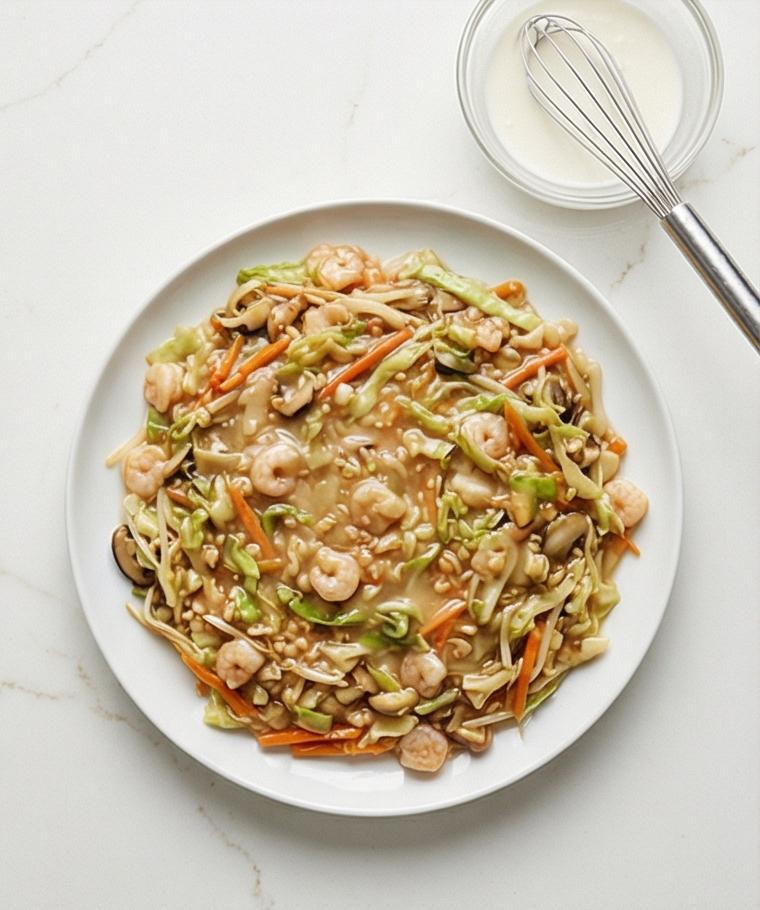
Whisk a smooth cornstarch slurry and pour it into the hot pan while stirring; the released juices should coalesce into a light glaze that clings to the vegetables and shrimp, creating a moist but non-watery filling with a slight elastic sheen. Immediately spread the filling thinly on a plate or shallow pan to accelerate cooling to room temperature — the surface should appear slightly tacky and cohesive but not steaming. Cooling fully prevents wrapper steam-tears and preserves the crisp final shell.
Step 5: Prepare the sealing slurry, set up the rolling station, and wrap
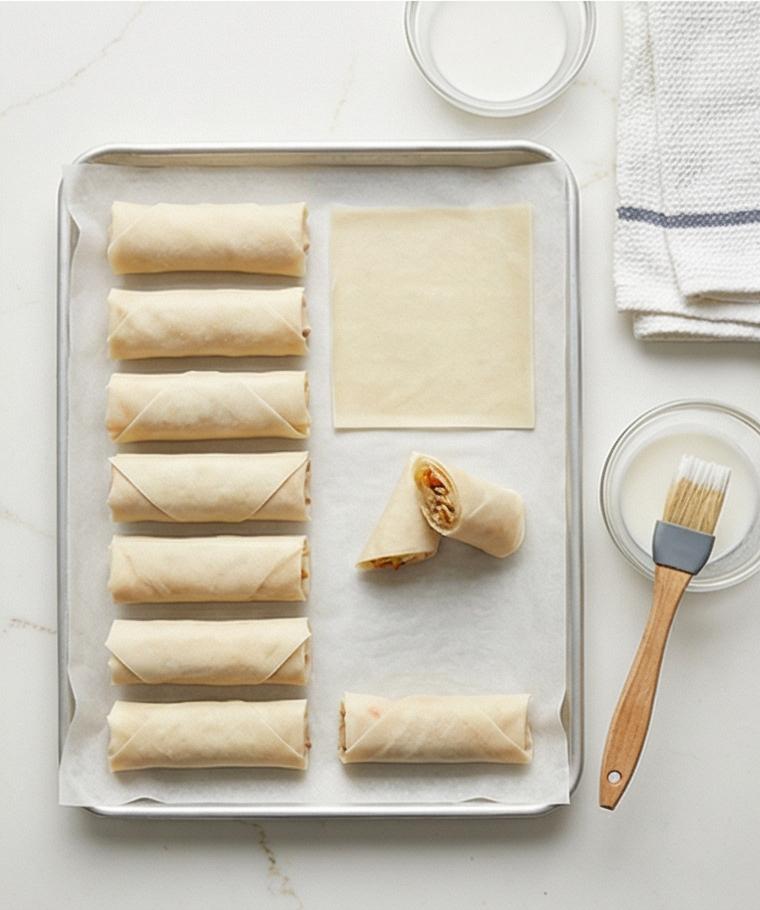
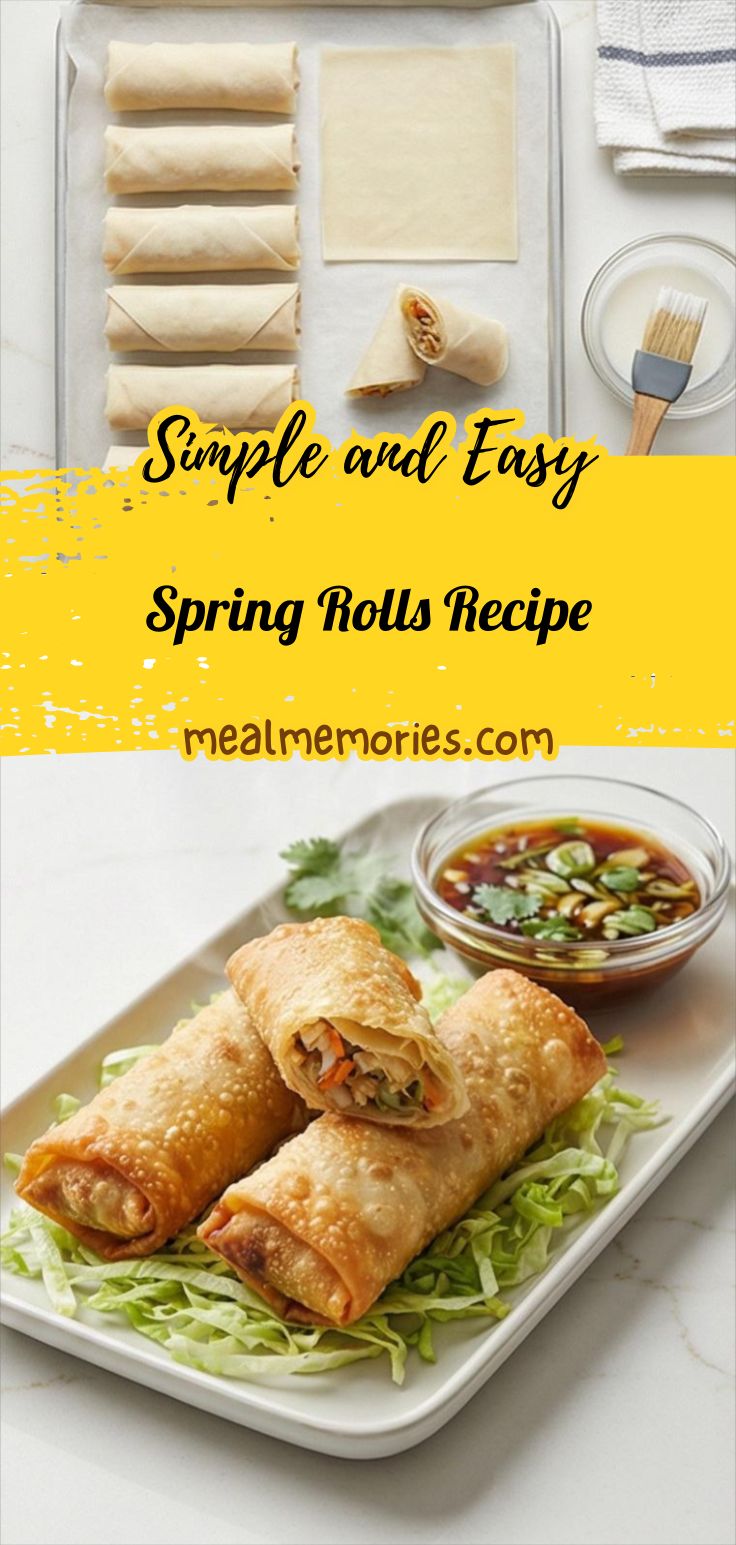
Whisk a second, thicker cornstarch paste for sealing, keep the wrappers covered with a damp towel, and arrange the cooled filling, a small bowl of the slurry, and a tray lined with parchment at your work station. Spoon a measured line of filling onto a square wrapper, fold the bottom corner snugly over, tuck the sides, brush seam with slurry, and roll into tight cylinders — seam-side down on the tray. The rolls should be uniform, taut, and dry-to-the-touch on the surface; spacing keeps air gaps to a minimum.
Step 6: Fry until golden-crisp, make the dipping sauce, and serve
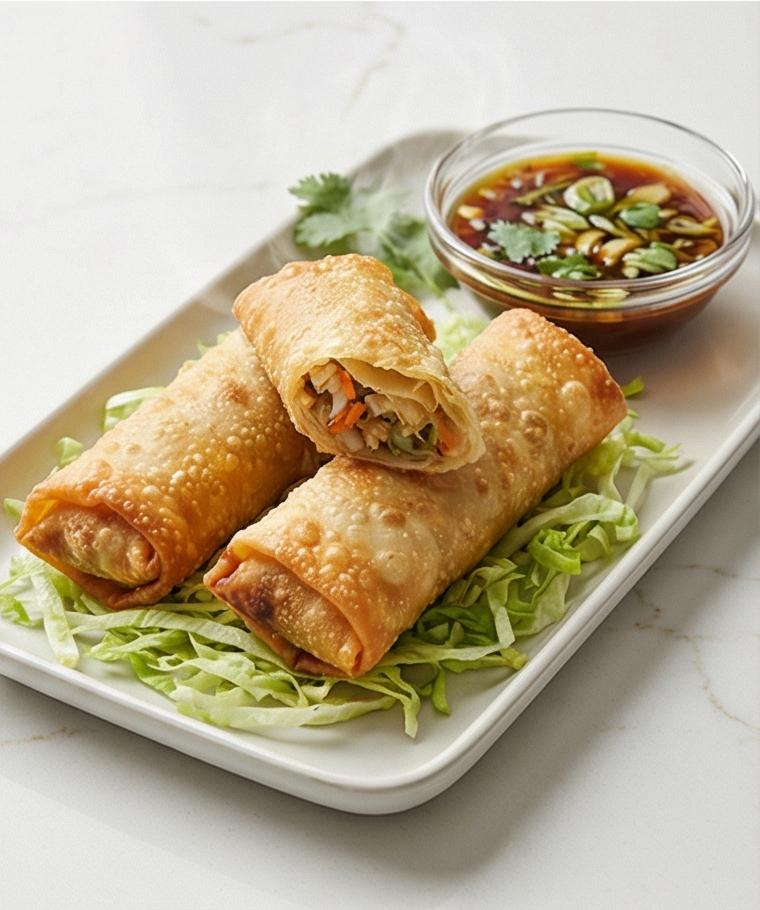
Deep-fry batches until each roll is a shatteringly crisp, deep golden-brown shell that rings faintly when tapped; drain on a wire rack to stay crisp. While they rest, whisk the dipping sauce until sugar dissolves and the aromatics are suspended in a glossy, thin soy-vinegar emulsion, finishing with sliced green onion. Arrange the hot rolls on a shallow rectangular platter over a small bed of shredded lettuce and cilantro, serve immediately with the sauce on the side — the exterior should be brittle and golden, the interior hot, savory, and slightly juicy but not wet.
Making It Your Own
I often swap proteins depending on the season. In spring I use more bean sprouts and light herbs, while in winter I might add shredded roasted sweet potato and smoked tofu for heartiness. For vegetarian guests I replace shrimp with diced firm tofu, pressed and pan-browned, and boost the umami with a splash more soy and a teaspoon of mushroom powder. To make them gluten-free, use tamari and gluten-free wrappers. For a spicy regional twist I fold in finely diced kimchi or a touch of gochujang into the filling, which gives a bright, fermented heat that plays well with the crunchy wrapper.
How to Serve
When hosting, arrange the rolls on a long platter with small bowls of dipping sauce spaced along it so guests can grab and dip. I also like to add small piles of shredded lettuce and cilantro at one end for color and freshness. If serving as an appetizer for a larger party, cut larger rolls in half on the diagonal so each piece is easy to pick up and bite.
For a family meal, pair the Spring Rolls Recipe with steamed rice, a simple cucumber salad, and a light soup to make a full table. To scale up, multiply filling and fry in batches so oil temperature stays steady and rolls cook evenly.
Storage and Reheating Tips
Leftover rolls store best if kept dry and separated. Place them on a tray lined with paper towels and refrigerate in a single layer if possible, covered loosely with foil to avoid trapping steam. They will keep for 2 days in the fridge.
To re-crisp, reheat in a 375 F oven on a wire rack until the shells are sizzling again, about 8 to 12 minutes. Avoid microwaving unless you accept a softer, chewier wrapper.
Common Mistakes and How to Avoid Them
One frequent mistake is wrapping while the filling is still warm, which can steam the wrapper and make it soggy. Cool the filling completely and work with wrappers under a damp towel so they stay pliable but not wet.
Another issue is oil temperature. If the oil is too cool the rolls will absorb oil and get greasy, and if it is too hot they will brown too quickly without heating through. Aim for about 350 to 375 F and fry in small batches.
Final Thoughts and Invitation
I hope this Spring Rolls Recipe inspires you to gather friends or slow down for a satisfying kitchen project. Try a batch this weekend and play with the fillings to find your favorite combo. You’ll love the reward of that first crisp bite.
Frequently Asked Questions.
- Q: Can I make the filling ahead of time, and how long will it keep? A: Yes, you can make the filling a day ahead and refrigerate it in an airtight container for up to 24 hours. Cool it fully before storing.
- Q: Can I bake the spring rolls instead of frying? A: You can bake them at 400 F for about 12 to 18 minutes, turning once, but they will be less uniformly crisp than deep-fried ones.
- Q: What can I use instead of shrimp to make these vegetarian? A: Use pressed, diced firm tofu, shredded jackfruit, or a mix of finely chopped mushrooms and tempeh for savory texture.
- Q: How do I stop the wrappers from tearing while rolling? A: Keep wrappers under a damp towel and avoid overfilling. Fillings should be cool and dry to the touch when you roll.
- Q: Is there a gluten-free option for the dipping sauce? A: Yes, swap regular soy sauce for tamari or a gluten-free soy alternative and use gluten-free oyster sauce or mushroom-based substitutes.
Spring Rolls Recipe
Make crunchy Spring Rolls Recipe with shrimp and crisp veggies, perfect for parties or weeknight dinners.
Ingredients
Instructions
Step 1: Prepare the vegetables and shrimp
Begin by finely shredding the cabbage and carrots into thin, ribbon-like strands, thinly slicing the shiitakes and green onions, rinsing and thoroughly draining the bean sprouts, and finely chopping the peeled, deveined shrimp so the bits will cook quickly and distribute evenly. Keep every component separated in small bowls or piles so textures remain distinct — crisp, wet, fibrous, and tender — and the shrimp stays cold and compacted until it hits the pan. This mise en place keeps moisture and cooking time predictable and prevents over-steaming the wrappers later.
Step 2: Sauté the aromatics and cook the shrimp
Heat a splash of neutral oil until shimmering, then quickly sauté the finely minced garlic and grated ginger until fragrant but not browned; add the chopped shrimp and stir until just opaque and lightly pink, broken into small, even bits so the final filling is uniformly meaty and tender rather than chunky. Transfer that aromatic shrimp mixture into a shallow wide vessel to rest; you should see tiny glossy droplets and a faint caramelized edge on some bits, aroma rising without burning.
Step 3: Add vegetables and seasoning, stir until crisp-tender
Add the shredded cabbage, carrots, bean sprouts, sliced green onions, and mushrooms to the warm shrimp aromatics and toss briskly over high heat until everything is slightly wilted yet still retaining a bright snap and individual texture — glossy cabbage ribbons, crunchy carrot threads, and springy bean sprouts. Stir in the soy, oyster, sesame oil, white pepper, salt, and sugar so the vegetables take on a unified savory sheen without becoming soggy; the visual result should be layered, glossy, and gently compacted.
Step 4: Thicken the filling and cool it completely
Whisk a smooth cornstarch slurry and pour it into the hot pan while stirring; the released juices should coalesce into a light glaze that clings to the vegetables and shrimp, creating a moist but non-watery filling with a slight elastic sheen. Immediately spread the filling thinly on a plate or shallow pan to accelerate cooling to room temperature — the surface should appear slightly tacky and cohesive but not steaming. Cooling fully prevents wrapper steam-tears and preserves the crisp final shell.
Step 5: Prepare the sealing slurry, set up the rolling station, and wrap
Whisk a second, thicker cornstarch paste for sealing, keep the wrappers covered with a damp towel, and arrange the cooled filling, a small bowl of the slurry, and a tray lined with parchment at your work station. Spoon a measured line of filling onto a square wrapper, fold the bottom corner snugly over, tuck the sides, brush seam with slurry, and roll into tight cylinders — seam-side down on the tray. The rolls should be uniform, taut, and dry-to-the-touch on the surface; spacing keeps air gaps to a minimum.
Step 6: Fry until golden-crisp, make the dipping sauce, and serve
Deep-fry batches until each roll is a shatteringly crisp, deep golden-brown shell that rings faintly when tapped; drain on a wire rack to stay crisp. While they rest, whisk the dipping sauce until sugar dissolves and the aromatics are suspended in a glossy, thin soy-vinegar emulsion, finishing with sliced green onion. Arrange the hot rolls on a shallow rectangular platter over a small bed of shredded lettuce and cilantro, serve immediately with the sauce on the side — the exterior should be brittle and golden, the interior hot, savory, and slightly juicy but not wet.
Notes
- Cool the filling completely before wrapping to prevent soggy wrappers.
- Fry in small batches to maintain oil temperature for crisp results.
- Use a wire rack for draining to keep rolls crisp while resting.
- For gluten-free, choose tamari and gluten-free wrappers.
- Re-crisp leftovers in a 375 F oven for best texture.