Garlic Bread Recipe has been a fixture in my kitchen for years, and I still get that warm, buttery thrill each time I pull a tray from the oven. I first learned this version at a friend’s impromptu dinner, and the simple, garlicky perfume filled the room before we even sat down. I love how the crust crisps while the crumb soaks up every bit of garlic‑herb butter, and the whole house feels cozier after a few slices. If you want an easy, showy side that never disappoints, this Garlic Bread Recipe is exactly that.
How This Recipe Became My Rainy-Day Favorite
The first time I made this Garlic Bread Recipe was during a furious rainstorm when the power flickered and then held steady long enough to bake. I remember kneading nothing and simply mashing butter with chopped parsley and a flood of garlic, tasting as I went; the little spoonfuls kept me company while thunder rolled outside. The smell wrapped the apartment in something equal parts nostalgic and indulgent. When the bread came out, steaming and salted, I ate a piece standing at the counter with a cup of tea, and just like that I had a new comfort ritual. It became my go-to for rainy nights, rushed dinners, or when I wanted to lift a friend’s spirits—a small, buttered offering that feels like a hug.
The Ingredients That Make It Sing
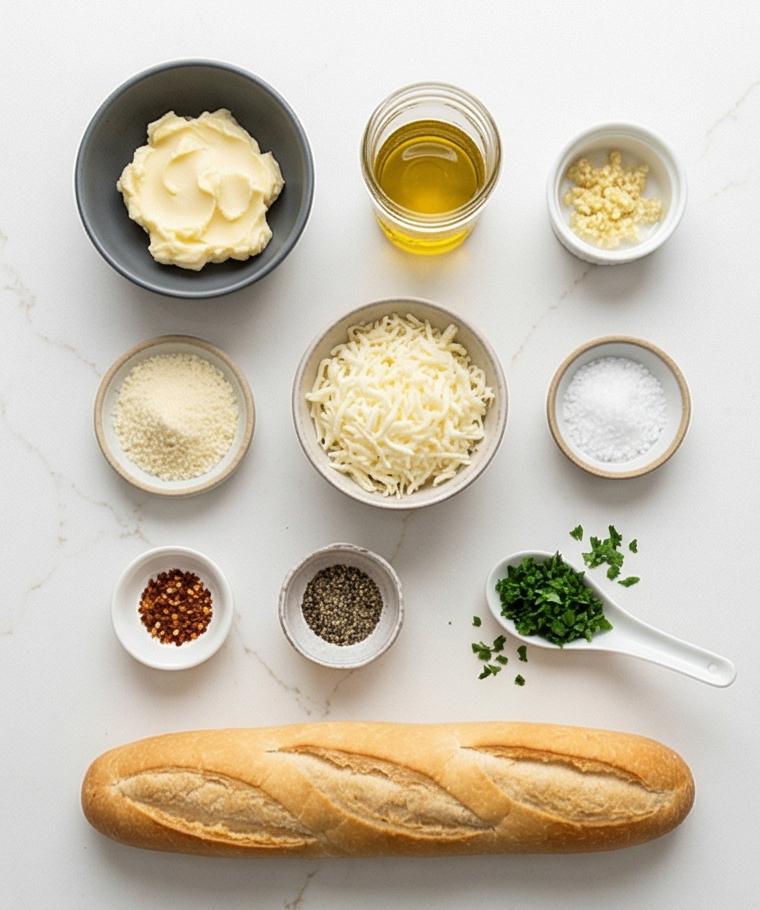
- Unsalted Butter: The base of the flavor and texture, use very soft room‑temperature butter for easy blending; cultured butter works great as a richer substitute.
- Extra‑Virgin Olive Oil: Adds silk and helps the butter remain spreadable; a neutral oil can replace it if you prefer.
- Garlic: The aromatic backbone, finely minced or pressed so it infuses without large bites; roasted garlic is a mellow swap.
- Flat‑leaf Parsley: Freshness and color; cilantro or chives can change the profile.
- Parmesan: Adds umami and toasty crust notes; Pecorino is a bolder alternative.
- Baguette: A crusty 14–16 inch loaf is ideal; swap for sourdough or ciabatta for different crumbs.
Essential Tools for a Smooth Run
A few simple tools make this Garlic Bread Recipe effortless. A small bowl and a fork or spatula let you whip the butter into a silky paste; if you have a microplane it makes grating Parmesan faster and finer. A serrated knife and a sturdy cutting board are essential for halving the loaf cleanly, and an offset spatula is a small luxury for spreading the butter without tearing the crumb. If you don’t have an offset spatula, the back of a spoon works fine.
- Medium bowl: For mixing the butter and garlic; choose ceramic or glass to avoid metallic tastes.
- Microplane or fine grater: For superfine Parmesan that blends smoothly.
- Serrated knife: For cleanly slicing the baguette.
- Offset spatula (or spoon): For smooth, even spreading.
- Baking sheet lined with parchment: For even browning and easy cleanup.
Step-by-Step Preparation Guide
Step 1: Make the garlic‑herb butter
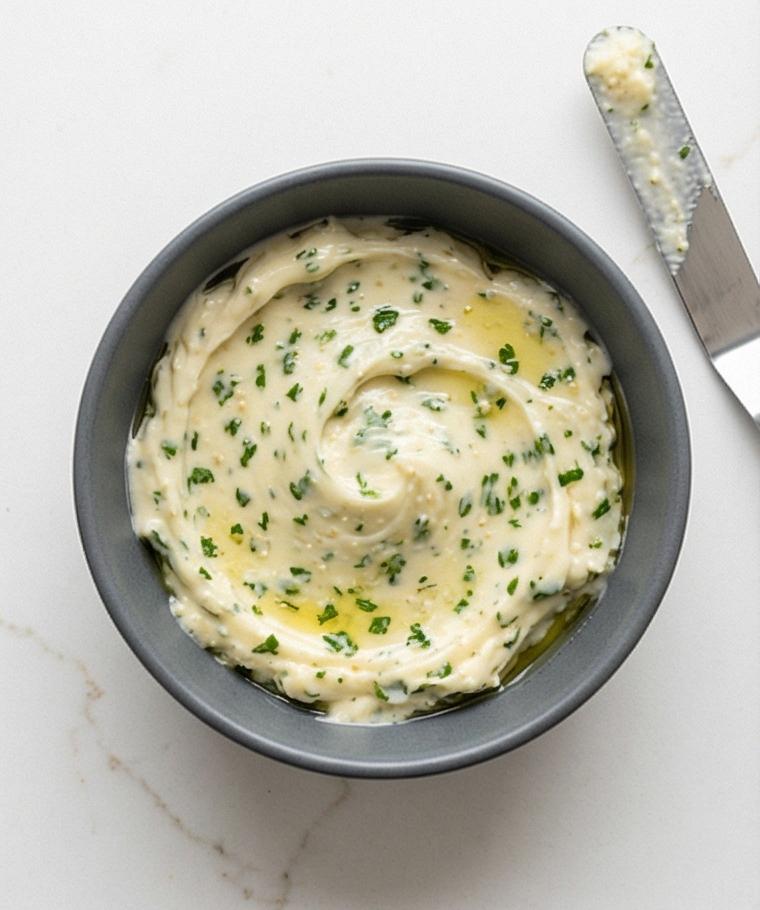
In a medium matte charcoal-grey ceramic bowl, mash the very soft unsalted butter together with the extra‑virgin olive oil until completely smooth and homogenous, then fold in the finely minced garlic, 2 tablespoons of chopped flat‑leaf parsley, 1/4 cup grated Parmesan, fine sea salt, freshly ground black pepper, and the red pepper flakes if using. Stir until the mixture is silky and spreadable, tasting a tiny smear and adjusting salt as needed — the texture should be glossy, creamy, and flecked with tiny green parsley pieces and grated cheese. This is the concentrated savory layer that will melt into the bread and brown at the edges.
Step 2: Halve and score the loaf
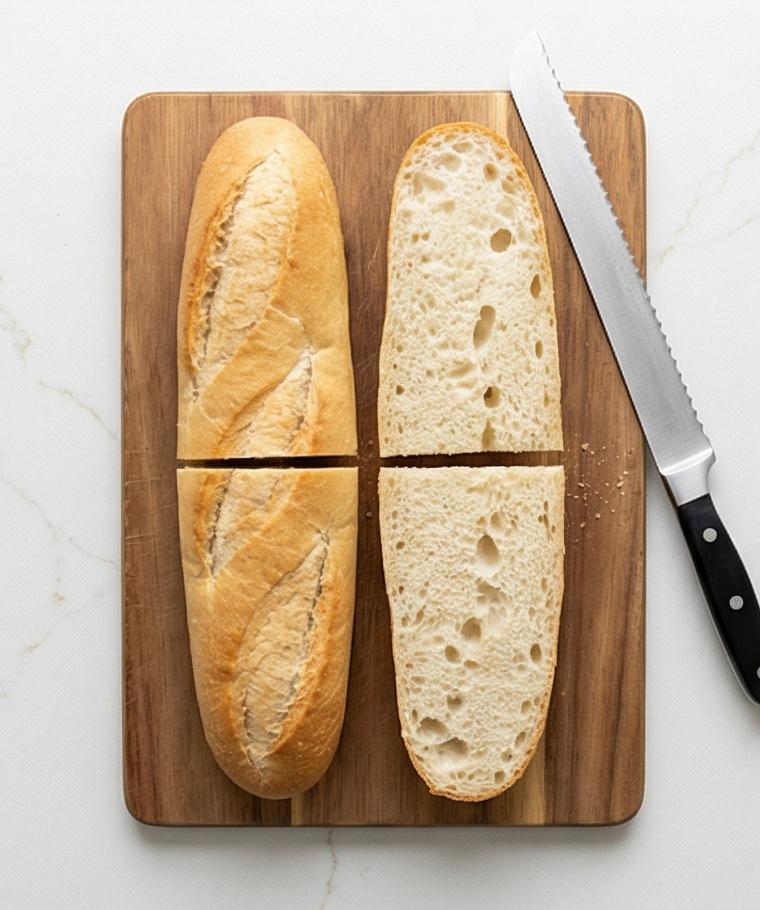
Place the whole baguette on a wooden cutting board and slice it in half lengthwise with a serrated knife so you have two long cut‑sides exposed; optionally score the cut surface into 1–2‑inch serving divisions without cutting through the crust. The visual moment here is the taut, airy crumb contrasted with the crisp golden crust — the interior should look slightly open and pillowy, ready to absorb the butter. Keep the loaf halves resting cut side up, arranged for the next step with no extra clutter.
Step 3: Spread, sprinkle, and top
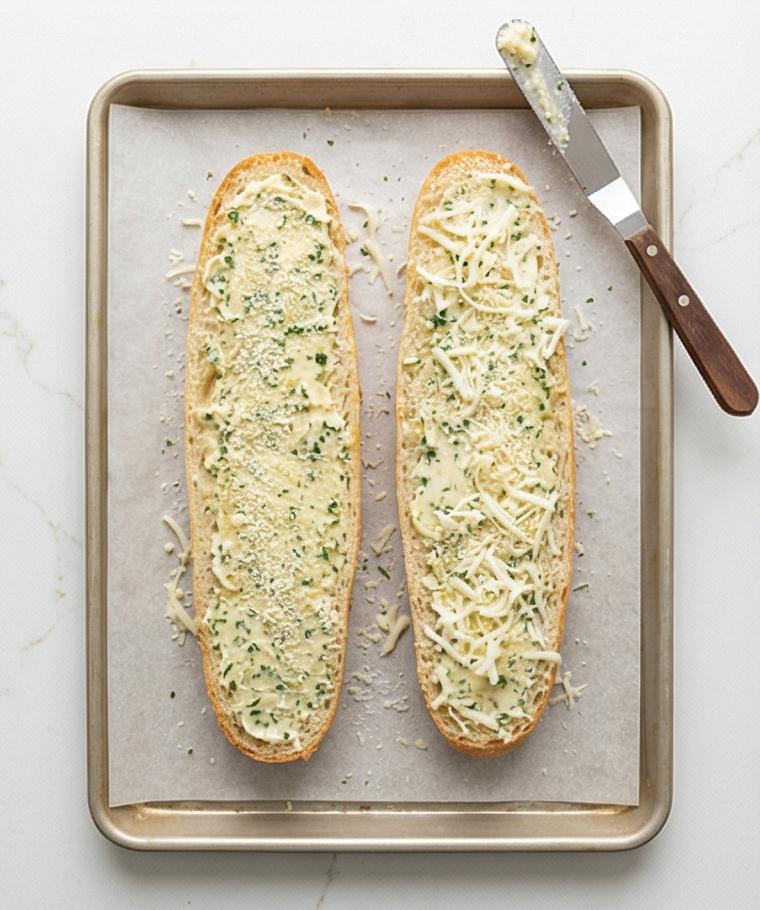
Using an offset spatula (the same one used in the garlic butter bowl), evenly spread a 1/8–1/4‑inch layer of the garlic‑herb butter all the way to the edges of both cut halves so every nook of crumb is coated. Immediately sprinkle the remaining 2 tablespoons of grated Parmesan across the buttered surface; if making cheesy garlic bread, scatter a thin, even layer of shredded low‑moisture mozzarella so it will melt and brown without pooling. The resulting image should show smooth, glossy butter saturated into the crumb, speckles of herb and cheese, and the spatula resting nearby with a smear of butter on its blade.
Step 4: Bake until glossy and bubbling
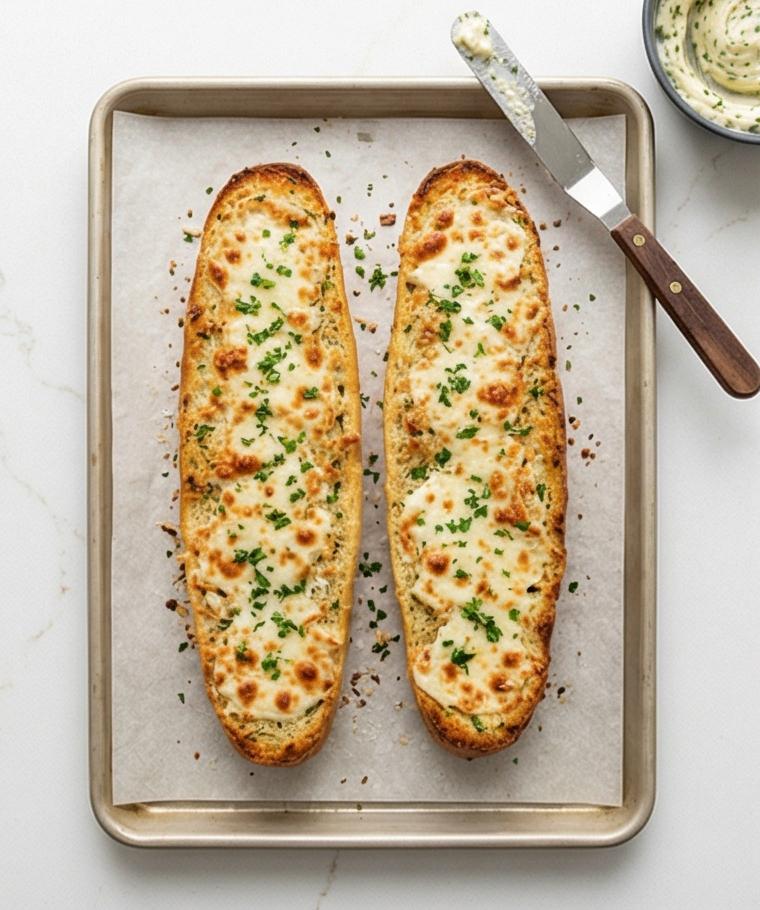
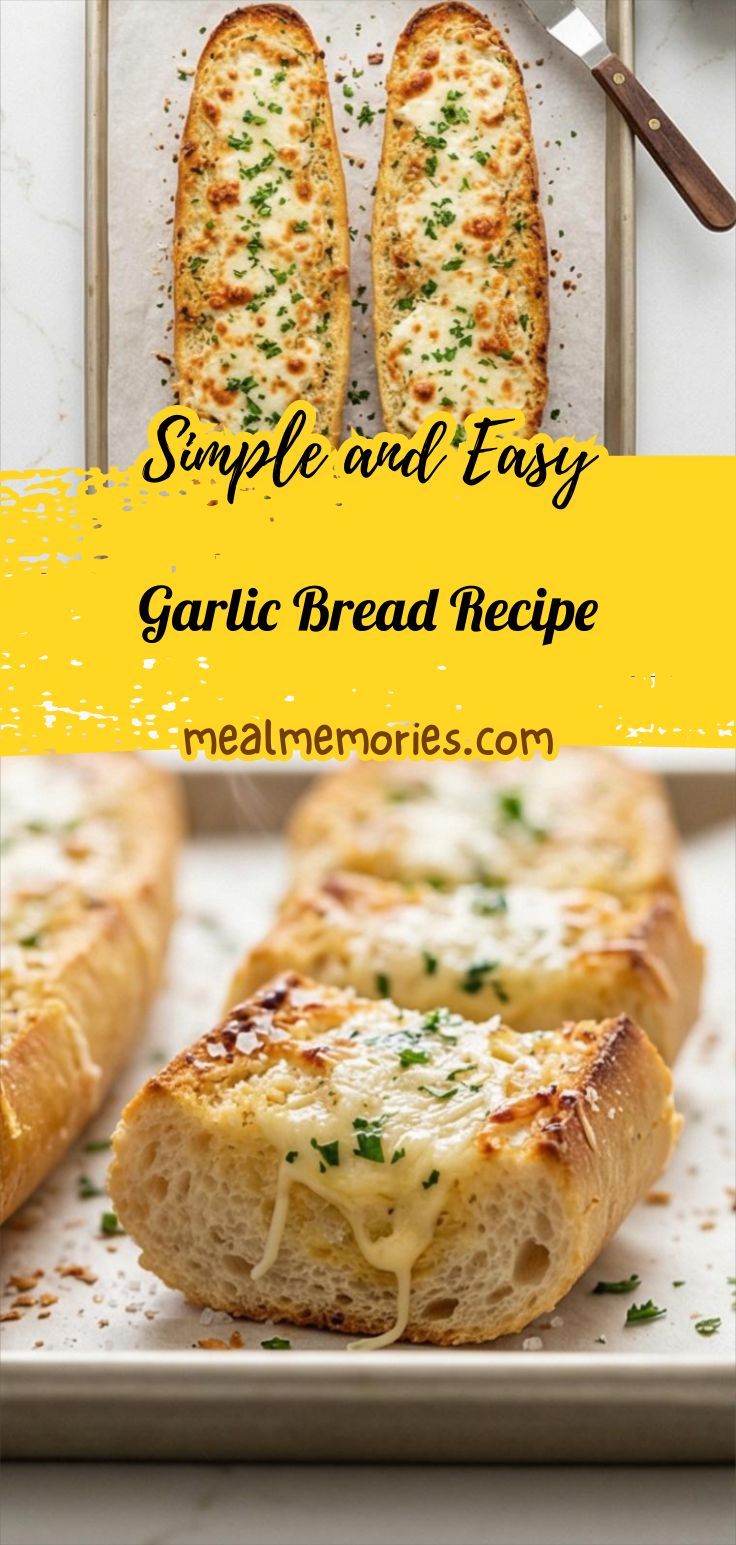
Transfer the prepared halves onto a rectangular parchment‑lined baking sheet and show the post‑bake result: the crust edges crisp and lightly bronzed, the exposed bread golden, the butter completely melted into the crumb, and any mozzarella melted into a thin, bubbling, lightly caramelized sheet with small brown spots. Capture the texture contrasts — crisp rim, tender saturated crumb, glossy melted cheese, and toasted parmesan granules — the baking vessel remains a rectangular sheet so the geometry is preserved for the final presentation.
Step 5: Garnish, rest, and slice to serve
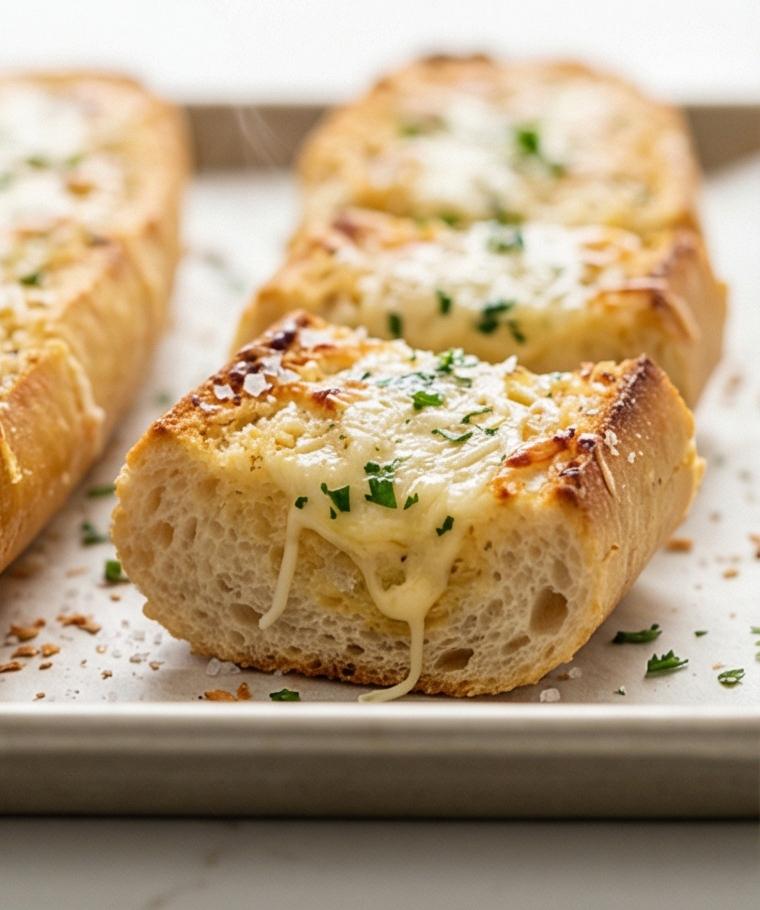
Right after removing from the heat (do not show an oven), sprinkle the remaining tablespoon of chopped parsley and a light dusting of flaky finishing salt across the hot surface; let the bread rest 2–3 minutes so the butter settles and the crust firms, then transfer the whole rectangular oven sheet or a long rectangular serving tray to the surface and slice into 1–2‑inch pieces. The final plated shot will be an eye‑level, very close‑up portrait showing the rectangular geometry retained: bubbling browned cheese, glossy buttered crumb, crisp golden edges, bright parsley flecks, and a scattering of flaky salt — vivid textures and warmth, ready to be served.
Making It Your Own
I like to experiment with the Garlic Bread Recipe depending on the season. In spring I add lemon zest to the butter for a bright lift; in winter I stir in a pinch of smoked paprika for cozy depth. For a spicy twist I swap red pepper flakes for a smear of harissa in the butter. If I want it vegetarian and a touch more herbaceous, I swap half the parsley for basil and finish with a handful of torn basil leaves after baking.
For a gluten‑free version, I use a store bought gluten‑free baguette and follow the same assembly; for dairy‑free, use a plant butter and nutritional yeast in place of Parmesan. Each small change tells a slightly different story while keeping the same comforting core.
How to Serve
If I’m hosting, I arrange the sliced Garlic Bread Recipe on a long wooden board, alternating crusts up and down so guests can grab easily. For a family dinner, I slice thicker pieces and serve alongside a big bowl of tomato soup or a hearty pasta. For a party, I cut the slices into smaller fingers and place toothpicks in them for easy passing.
To adjust quantities, each 14–16 inch baguette serves roughly 8 people as a side; double the butter mix for two loaves or halve it for intimate meals. Add small ramekins of marinara or olive tapenade for dipping if you want to make it feel fancier.
Storage and Reheating Tips
Leftover Garlic Bread Recipe stores well. Cool to room temperature, wrap tightly in foil, and refrigerate for up to 3 days. To reheat, unwrap and warm in a 350 F oven for 6–8 minutes until the butter is once again melty and the crust is crisp.
For longer storage, freeze slices in a single layer on a tray, then transfer to a sealed bag for up to 1 month. Reheat from frozen at 350 F for about 10–12 minutes; cover loosely with foil to prevent burning while ensuring the interior warms through.
Common Mistakes and How to Avoid Them
Under‑seasoning the butter is an easy misstep; taste as you go and remember the bread will mellow the flavors once baked. Use fine sea salt in the butter and finish with flaky salt for pops of seasoning.
Don’t spread the butter on bread that is too cold; the butter should be soft so it soaks in. And avoid piling on too much mozzarella or it can pool rather than form a glossy sheet.
Final Thoughts
Give this Garlic Bread Recipe a try the next time you want something simple that feels celebratory. It’s quick, forgiving, and reliably delicious—perfect for weeknights or when friends drop by.
Frequently Asked Questions
- Q: Can I use roasted garlic instead of raw in this Garlic Bread Recipe? A: Yes, roasted garlic will give a sweeter, milder flavor; reduce additional salt slightly.
- Q: How do I make cheesy garlic bread without it getting soggy? A: Use low‑moisture mozzarella and keep the layer thin so it melts and browns instead of pooling.
- Q: Can I prepare the butter ahead of time? A: Absolutely, make the garlic‑herb butter up to 2 days ahead and keep it refrigerated, then bring to room temperature before spreading.
- Q: What should I do if my bread is too thick to absorb the butter? A: Score the crumb gently to increase surface area or slice thinner so the butter can penetrate.
- Q: Is there a way to make this vegan? A: Yes, swap in a high‑quality plant butter, use olive oil, and sprinkle nutritional yeast for a cheesy note.
Garlic Bread Recipe
Make the Garlic Bread Recipe now: buttery garlic‑herb spread on a crusty baguette for quick, crowd‑pleasing slices.
Ingredients
Instructions
Step 1: Make the garlic‑herb butter
In a medium matte charcoal-grey ceramic bowl, mash the very soft unsalted butter together with the extra‑virgin olive oil until completely smooth and homogenous, then fold in the finely minced garlic, 2 tablespoons of chopped flat‑leaf parsley, 1/4 cup grated Parmesan, fine sea salt, freshly ground black pepper, and the red pepper flakes if using. Stir until the mixture is silky and spreadable, tasting a tiny smear and adjusting salt as needed — the texture should be glossy, creamy, and flecked with tiny green parsley pieces and grated cheese. This is the concentrated savory layer that will melt into the bread and brown at the edges.
Step 2: Halve and score the loaf
Place the whole baguette on a wooden cutting board and slice it in half lengthwise with a serrated knife so you have two long cut‑sides exposed; optionally score the cut surface into 1–2‑inch serving divisions without cutting through the crust. The visual moment here is the taut, airy crumb contrasted with the crisp golden crust — the interior should look slightly open and pillowy, ready to absorb the butter. Keep the loaf halves resting cut side up, arranged for the next step with no extra clutter.
Step 3: Spread, sprinkle, and top
Using an offset spatula (the same one used in the garlic butter bowl), evenly spread a 1/8–1/4‑inch layer of the garlic‑herb butter all the way to the edges of both cut halves so every nook of crumb is coated. Immediately sprinkle the remaining 2 tablespoons of grated Parmesan across the buttered surface; if making cheesy garlic bread, scatter a thin, even layer of shredded low‑moisture mozzarella so it will melt and brown without pooling. The resulting image should show smooth, glossy butter saturated into the crumb, speckles of herb and cheese, and the spatula resting nearby with a smear of butter on its blade.
Step 4: Bake until glossy and bubbling
Transfer the prepared halves onto a rectangular parchment‑lined baking sheet and show the post‑bake result: the crust edges crisp and lightly bronzed, the exposed bread golden, the butter completely melted into the crumb, and any mozzarella melted into a thin, bubbling, lightly caramelized sheet with small brown spots. Capture the texture contrasts — crisp rim, tender saturated crumb, glossy melted cheese, and toasted parmesan granules — the baking vessel remains a rectangular sheet so the geometry is preserved for the final presentation.
Step 5: Garnish, rest, and slice to serve
Right after removing from the heat (do not show an oven), sprinkle the remaining tablespoon of chopped parsley and a light dusting of flaky finishing salt across the hot surface; let the bread rest 2–3 minutes so the butter settles and the crust firms, then transfer the whole rectangular oven sheet or a long rectangular serving tray to the surface and slice into 1–2‑inch pieces. The final plated shot will be an eye‑level, very close‑up portrait showing the rectangular geometry retained: bubbling browned cheese, glossy buttered crumb, crisp golden edges, bright parsley flecks, and a scattering of flaky salt — vivid textures and warmth, ready to be served.
Notes
- Bring butter to room temperature for easy mixing.
- Taste and adjust salt before spreading—the bread will mellow flavors.
- Use low-moisture mozzarella for cheesier, less soggy results.
- Freeze extra slices flat on a tray then bag for 1-month storage.