Flag Cake has a way of making summer gatherings feel instantly celebratory. I first learned this simple assembly at a potluck where everyone brought something elaborate and I showed up with a humble, bright cake that somehow stole the show. The contrast of glossy blueberries, vibrant strawberry stripes, and a soft white cloud of whipped topping is what makes this Flag Cake so much fun to share. It’s an easy, no-fuss dessert that looks like you spent all day, even when you didn’t.
How This Recipe Became My Backyard Hit
The day I first made this Flag Cake I remember the kids shrieking at the sight of the blue and red pattern and grownups remarking on how fresh it tasted. I laid out each strawberry slice like a tiny art project and felt a steady calm as the berries clicked into place. The aroma of baked white cake warmed the kitchen while the cold whipped topping contrasted with the warm afternoon breeze. Serving it with a few extra berries on the side, I watched neighbors gather at the picnic table and felt quietly proud. It’s one of those desserts that brings people together, and every time I make it I’m reminded of that lazy, sunny afternoon and the simple joy of sharing something bright.
Meet the Main Ingredients
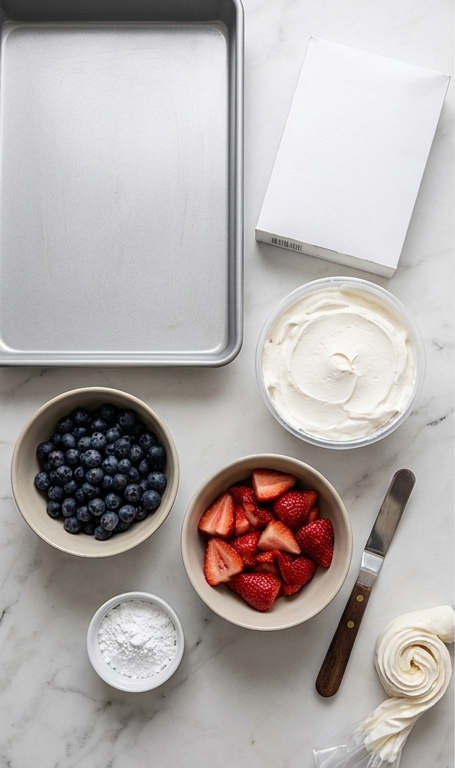
- White Box Cake Mix: The reliable base that bakes into a tender, even crumb, perfect for a flat canvas. Substitute with a homemade white cake or vanilla cake mix if you prefer more control. Choose a high-quality mix for better texture and flavor.
- Whipped Topping: Creates the white field and stripes, giving a silky, stable finish. For a richer result, use stabilized whipped cream or whipped cream from heavy cream and a bit of sugar.
- Fresh Blueberries: Form the star field and add a burst of fresh flavor. Frozen berries will bleed and are not recommended.
- Fresh Strawberries: Provide the vivid red stripes; slice them thin and evenly. You can substitute raspberries for a slightly different texture and tartness.
- Powdered Sugar: A light dusting adds a hint of sweetness and visual polish.
Essential Kitchen Tools and Why They Matter
A few simple tools make this Flag Cake effortless and neater than you might expect. An offset spatula or a sturdy spoon helps spread the whipped topping into a flawless, even field, while a piping bag or zipper bag with a corner snipped keeps the white stripes tidy. A 9×13 metal pan bakes the cake evenly, and a cooling rack prevents steam from softening the top while it firms up. If you don’t have an offset spatula, the back of a large spoon works fine. No piping bag? Use a resealable bag and snip a small corner. These small swaps save time and keep the finished cake looking professional.
Step-by-Step Preparation Guide
Step 1: Bake and Cool the Cake
Preheat and bake the white cake according to the box instructions in a 9×13 metal pan; once baked, remove and allow it to cool completely in the pan until the crumb is set and the top feels room temperature and springy. Take a moment to admire the even, pale golden surface and the fine, tender crumb that will hold the flag decoration, this cooling phase is what keeps your topping from sliding and gives the finished cake a clean, flat canvas.
Step 2: Spread the First Layer of Whipped Topping
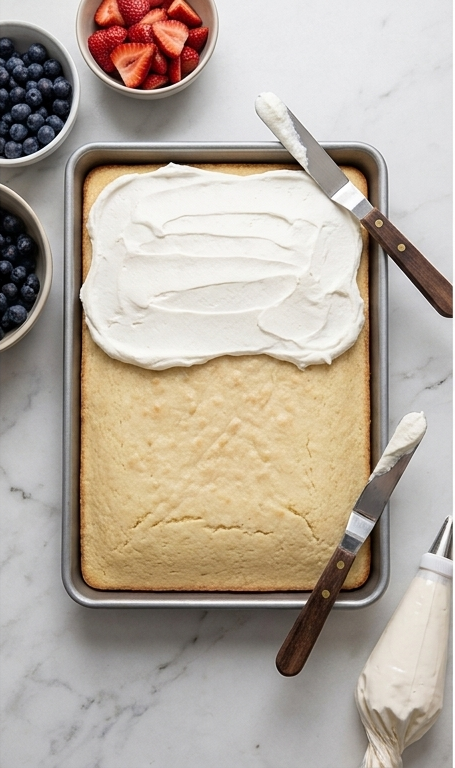
Spoon half of the thawed whipped topping onto the cooled cake and spread it into a smooth, even white layer using an offset spatula or the back of a spoon so the surface is silky and matte; keep the edges neat so the stripes later will read crisp against the white field. Refrigerate briefly if the topping softens, keeping the texture glossy-but-stable for decoration.
Step 3: Place the Blueberry Star Field
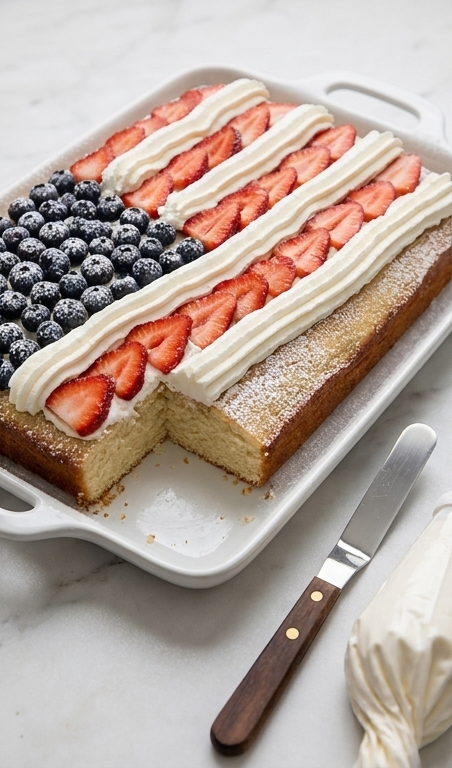
In the upper left-hand corner of the frosted cake, arrange the fresh blueberries into a tight rectangular star field: a neat, compact cluster, evenly spaced so the deep indigo berries pop against the whipped cream. Press each berry slightly to sink it into the topping so they read as a cohesive blue square rather than loose scattered dots.
Step 4: Lay the Strawberry Red Stripes
Use the hulled, sliced strawberries to create five bold red stripes across the remaining surface of the cake, starting at the top edge and finishing at the bottom. Place the slices in slightly overlapping rows so each stripe reads as a continuous band of vibrant red, the glossy flesh and seeded texture should contrast sharply with the smooth white cream.
Step 5: Pipe the White Whipped Cream Stripes
Fit a piping bag or use a small spoon to pipe the remaining whipped topping into four white stripes in the gaps between the strawberry bands, forming clean, slightly peaked ribbons of cream that alternate with the red. Aim for consistent thickness and soft, cloud-like peaks that hold their shape and create an iconic striped rhythm.
Step 6: Dust, Garnish, and Serve
Lightly dust a whisper of powdered sugar over any exposed berry edges if desired, arrange a few whole strawberries beside the cake for serving, then present immediately so the whipped cream stays pristine and the berries remain glossy and fresh.
Making It Your Own
Try a few playful variations to match the season or dietary needs. For a dairy-free twist, use coconut whipped topping and swap in a dairy-free cake mix; the tropical notes change the flavor profile but keep the look. I once replaced strawberries with sliced peaches for a late-summer twist, and the color stayed vibrant while the sweetness softened.
For a lower-sugar option, select a sugar-reduced cake mix and use a light whipped topping, then add a splash of lemon zest to the berries for brightness. If you want to make this more grownup, sprinkle a little orange liqueur over the cake before frosting, then let it rest so the flavors meld. Small experiments like these make the Flag Cake feel personal every time.
How to Serve
When I host, I slice the Flag Cake into squares and place a few extra blueberries and a mint sprig on each plate for a fresh touch. For a crowd, a 9×13 cake typically serves about 12 generous portions or 15 smaller pieces. To make smaller servings, cut 24 petite squares and present them on a long platter for buffet-style grazing.
If you’re aiming for a picnic, keep the whipped topping chilled and transport the cake in a cooler so the cream does not weep. For an indoor party, plate slices on patterned dessert plates and set forks on napkins for an easy, elegant presentation.
Storage and Reheating Tips
Store leftover Flag Cake covered in the refrigerator for up to 2 days to keep the whipped topping stable and the fruit fresh. Press a piece of plastic wrap gently over the surface to reduce drying without squashing the decoration.
This cake is best served chilled rather than reheated; the texture of the whipped topping changes with heat, so avoid microwaving. If you bake the cake ahead, wrap the cooled, unfrosted cake tightly and freeze for up to 1 month, then thaw completely before assembling the Flag Cake.
Common Pitfalls and How to Avoid Them
The most common mistake is frosting a warm cake. If the cake is even slightly warm, the whipped topping will slide and the berries will sink; patience during cooling is your friend. Chill the pan briefly if you need to speed things up.
Another slip is using berries that are too large or wet. Pat them dry and slice strawberries uniformly so the stripes read cleanly. Press the blueberries just enough to secure them, but not so much that they burst.
A Friendly Send-Off
Try this Flag Cake at your next summer gathering and see how easily it becomes a conversation starter. It’s quick, festive, and forgiving, so even if you aren’t aiming for perfection, the final result will bring smiles. I hope it becomes one of your go-to celebratory desserts as it did for me.
Frequently Asked Questions
-
Q: Can I make the cake ahead of time?
A: Yes, bake and cool the cake, then wrap and freeze the unfrosted cake for up to 1 month; thaw completely before frosting and decorating. -
Q: Can I use frozen berries?
A: Frozen berries tend to bleed and release juice, so they are not recommended for the decoration; use fresh berries for the best look. -
Q: How long will the decorated cake keep?
A: Store covered in the refrigerator and enjoy within 2 days for best texture and flavor. -
Q: Can I substitute whipped topping with homemade whipped cream?
A: Yes, stabilized whipped cream works wonderfully and gives a fresher taste, though it requires slightly more effort. -
Q: What if my whipped topping softens while decorating?
A: Pop the cake into the refrigerator for 10 to 15 minutes to firm the topping, then continue decorating.
Flag Cake
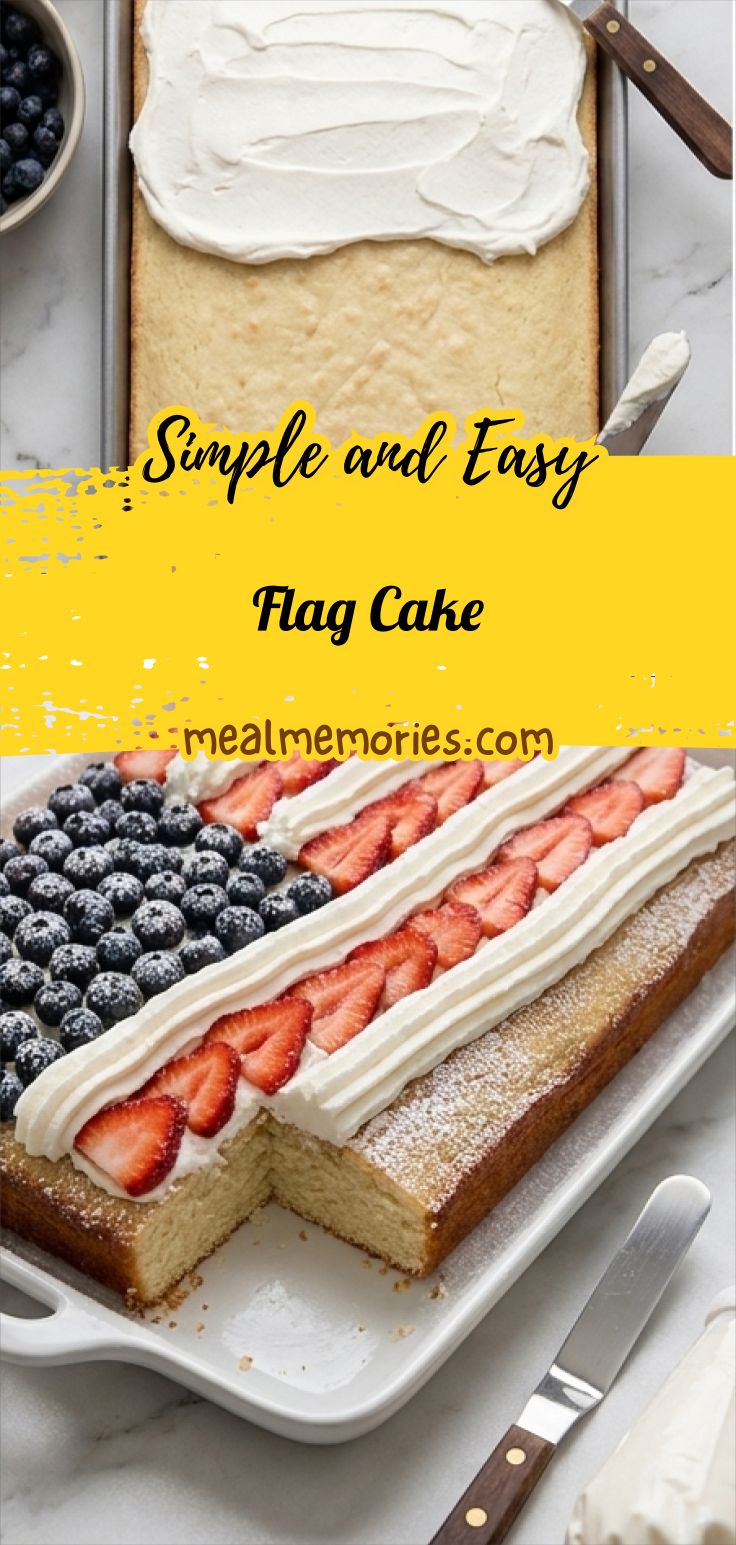
Make Flag Cake: top a white cake with whipped cream, blueberries, and strawberries for a bright, patriotic dessert.
Ingredients
Instructions
Step 1: Bake and Cool the Cake
Preheat and bake the white cake according to the box instructions in a 9x13 metal pan; once baked, remove and allow it to cool completely in the pan until the crumb is set and the top feels room temperature and springy. Take a moment to admire the even, pale golden surface and the fine, tender crumb that will hold the flag decoration — this cooling phase is what keeps your topping from sliding and gives the finished cake a clean, flat canvas.
Step 2: Spread the First Layer of Whipped Topping
Spoon half of the thawed whipped topping onto the cooled cake and spread it into a smooth, even white layer using an offset spatula or the back of a spoon so the surface is silky and matte; keep the edges neat so the stripes later will read crisp against the white field. Refrigerate briefly if the topping softens, keeping the texture glossy-but-stable for decoration.
Step 3: Place the Blueberry Star Field
In the upper left-hand corner of the frosted cake, arrange the fresh blueberries into a tight rectangular star field: a neat, compact cluster, evenly spaced so the deep indigo berries pop against the whipped cream. Press each berry slightly to sink it into the topping so they read as a cohesive blue square rather than loose scattered dots.
Step 4: Lay the Strawberry Red Stripes
Use the hulled, sliced strawberries to create five bold red stripes across the remaining surface of the cake, starting at the top edge and finishing at the bottom. Place the slices in slightly overlapping rows so each stripe reads as a continuous band of vibrant red — the glossy flesh and seeded texture should contrast sharply with the smooth white cream.
Step 5: Pipe the White Whipped Cream Stripes
Fit a piping bag or use a small spoon to pipe the remaining whipped topping into four white stripes in the gaps between the strawberry bands, forming clean, slightly peaked ribbons of cream that alternate with the red. Aim for consistent thickness and soft, cloud-like peaks that hold their shape and create an iconic striped rhythm.
Step 6: Dust, Garnish, and Serve
Lightly dust a whisper of powdered sugar over any exposed berry edges if desired, arrange a few whole strawberries beside the cake for serving, then present immediately so the whipped cream stays pristine and the berries remain glossy and fresh.
Notes
- Chill the cake completely before frosting to prevent slipping
- Pat berries dry to avoid excess moisture on the topping
- Use an offset spatula or the back of a spoon for a smooth finish
- If whipped topping softens, refrigerate the cake briefly before continuing
- For a richer flavor, use stabilized homemade whipped cream instead of store-bought topping