Chocolate Chip Cookies are the ultimate comfort treat that never fails to bring a smile. I love how the buttery dough and melky pockets create a perfect balance of chew and crunch. Every batch feels like a warm hug, especially when the kitchen fills with that sweet aroma. Let’s dive into the magic behind these timeless cookies.
How This Recipe Became My Rainy-Day Favorite
I first discovered these cookies on a drizzly Saturday while staying at my grandma’s cozy cottage. The rain pattered against the windows as we mixed the dough together, laughing over stories of childhood mishaps. The scent of butter and caramelized sugar drifted through the kitchen, making the cold outside feel miles away. When the first batch emerged, golden and soft, we gathered around the table with steaming mugs of tea, savoring each bite as if it were a small celebration. That memory taught me that a simple cookie can turn an ordinary day into a cherished moment, and I’ve been perfecting this recipe ever since.
The Star Ingredients
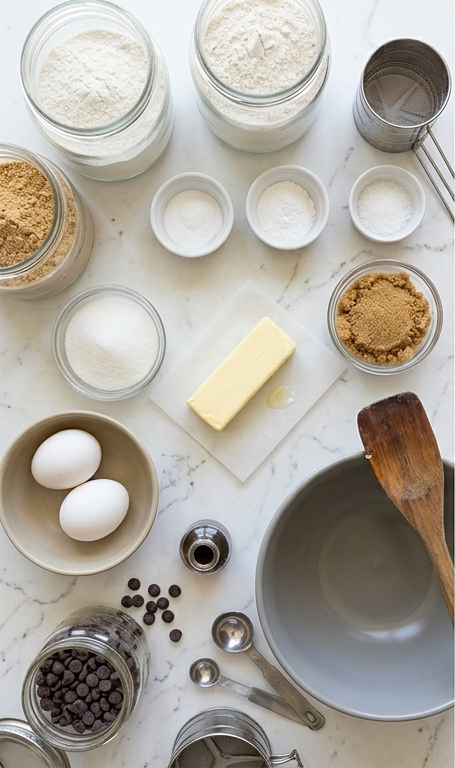
- Cake Flour: Provides a tender crumb; substitute with all‑purpose flour for a slightly denser texture.
- Bread Flour: Adds chewiness; you can use all‑purpose flour if needed.
- Unsalted Butter: Gives richness and flavor; choose high‑quality butter and keep it at room temperature.
- Chocolate Chips: The heart of the cookie; try dark, milk, or white chocolate for variety.
Essential Kitchen Tools
- Stand Mixer or Hand Whisk: For creaming butter and sugars evenly.
- Fine Mesh Sieve: To sift flours and leavening agents for a light dough.
- Silicone Spatula: For folding in chocolate chips without over‑mixing.
- Baking Sheets: Preferably insulated for even browning.
- Wire Rack: To cool cookies without sogginess.
Step-by-Step Preparation Guide
Step 1: Sift and combine the dry ingredients
Sift the cake flour, bread flour, baking soda, baking powder and coarse salt together into a medium bowl until light and even in texture; this aerates the mixture and removes lumps so the cookies bake with an even crumb. Gently stir the sifted mix once more with a dry whisk to ensure the leaveners are fully distributed, then set the bowl aside on the white quartzite surface so it’s ready when the creamed butter is folded in.
Step 2: Cream butter and sugars until fluffy
In a modern matte grey ceramic mixing bowl, beat the room-temperature unsalted butter with the granulated and packed light brown sugars using a paddle attachment (or sturdy wooden spatula) until the mixture is pale, aerated and slightly ribboning, about 3–5 minutes in a stand mixer or by hand. You’ll notice the brown sugar gives a glossy, slightly granular sheen while the butter makes everything pillowy; scrape the bowl down so no streaks remain.
Step 3: Incorporate eggs and vanilla
Reduce the mixer speed and add the eggs one at a time, beating briefly after each addition so the batter regains a smooth, cohesive texture. Stir in the vanilla extract, pausing to scrape the bowl so the mixture stays evenly emulsified — the batter should be glossy, soft, and slightly dense, ready to accept the dry ingredients without collapsing.
Step 4: Add dry ingredients and finish the dough
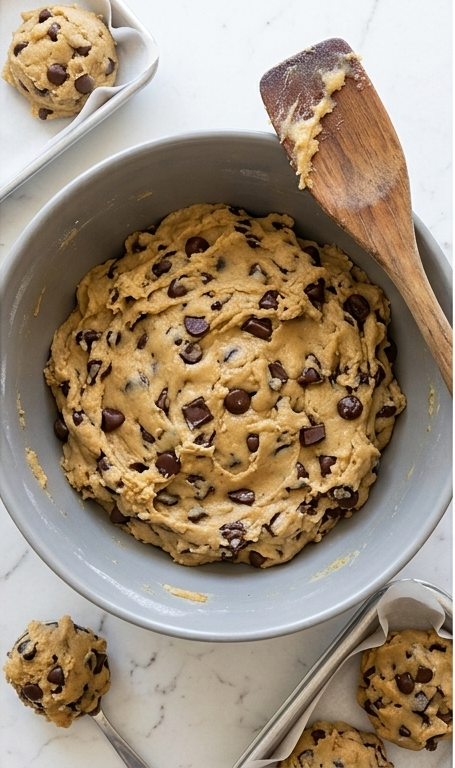
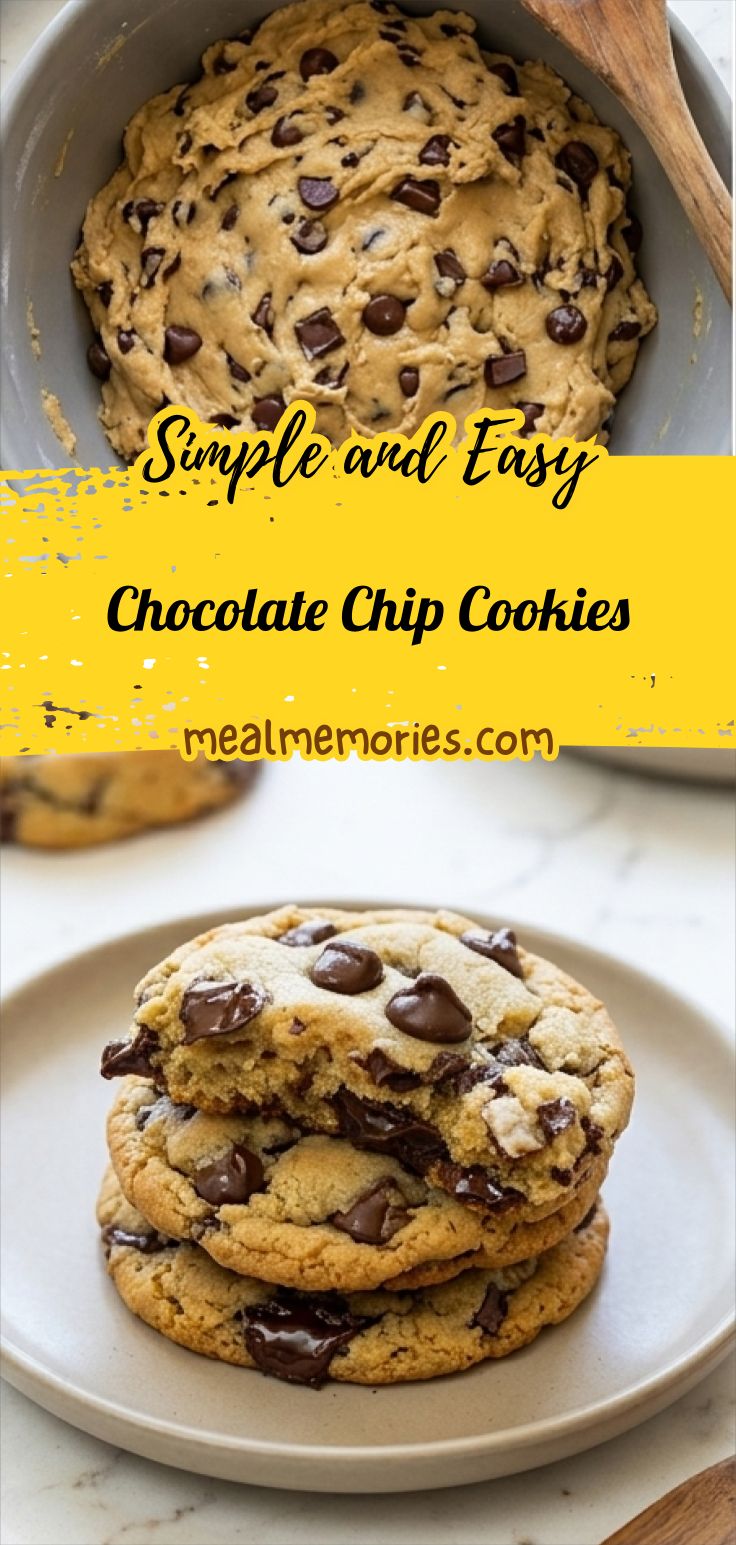
Slowly add the sifted dry mixture to the butter-sugar-egg base, folding or mixing just until the dough comes together and streaks of flour disappear; avoid overworking to keep the cookies tender. The resulting dough will be thick, tacky and slightly sticky, with a deep, warm beige color from the browned sugar. Scrape the dough into the same matte grey bowl and prepare to fold in the chocolate.
Step 5: Fold in chocolate chips and chill
Fold the chocolate chips or chunks in gently by hand until they are evenly distributed — the chips should be partially embedded, some peeking out from the dough surface. Portion the dough into a single mound or scoop into a shallow airtight container, then refrigerate for 24–36 hours; the dough will firm up, flavors will deepen, and the texture will tighten into a dense, scoopable mass. DO NOT SKIP REFRIGERATION — this is critical for spread control and the chewy interior.
Step 6: Bring dough to room temperature and preheat
When ready to bake, remove the chilled dough from the refrigerator and allow it to sit until it loses its hard chill and becomes pliable but still cool to the touch. Preheat your oven to 350°F while the dough relaxes; the dough should feel slightly firm yet yielding when you portion it, signaling it’s at the right temperature to hold shape and still spread gradually.
Step 7: Portion and bake until edges are golden
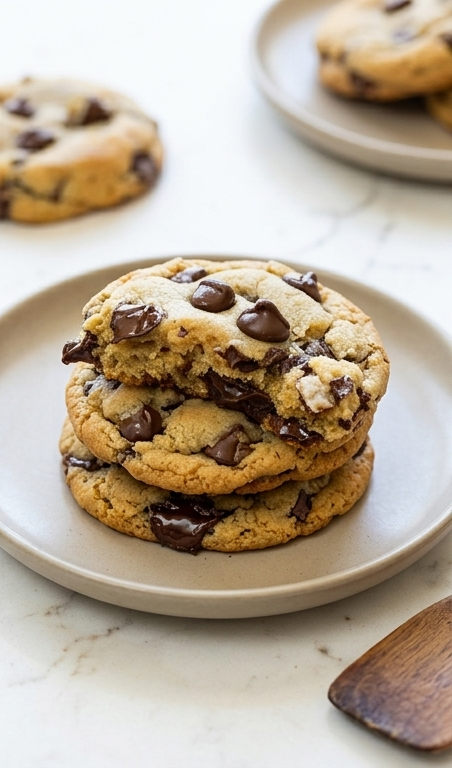
Using 2–3 tablespoon scoops, drop spoonfuls of dough onto a lined baking sheet leaving space for gentle spread. Bake until the outer edges are golden-brown but centers still look slightly underbaked — about 10–12 minutes — so the cookies keep a soft, chewy interior. The tops will crack slightly, exposing glossy chocolate pockets.
Step 8: Cool and present the cookies
Transfer baked cookies to a wire rack to cool briefly so the interiors set but the chocolate remains glossy and slightly melty. Serve warm or at room temperature stacked on a shallow matte ceramic plate, revealing a contrast of crisp, caramelized edges and soft, tender centers studded with semi-melted chocolate.
Making It Your Own
I love experimenting with add twists. Adding a pinch of espresso powder intensifies the chocolate flavor, while a swirl of caramel creates a gooey surprise. For a healthier spin, swap half the butter for coconut oil and use dark chocolate chips. Seasonal variations like chopped dried cherries or toasted walnuts bring a festive touch.
How to Serve
When hosting, arrange the cookies on a rustic wooden board with fresh berries and a dusting of powdered sugar. Pair them with vanilla ice cream for a quick sundae, or break them into bite‑size pieces for a dessert platter. For larger gatherings, double the recipe and bake on two sheets, keeping the extra dough chilled until needed.
Storing and Reheating
Store cooled cookies in an airtight container at room temperature for up to a week; they stay soft thanks to the moisture from the brown sugar. For longer storage, freeze in a zip‑top bag for up to three months and thaw at room temperature before serving. To revive freshness, warm them in a 300°F oven for 5 minutes or microwave for 10 seconds.
Common Mistakes and How to Avoid Them
Over‑mixing the dough can develop gluten and make the cookies tough—mix just until combined. Skipping the chill step leads to excessive spread and a thin texture; the dough needs time to firm up. Using cold butter results in a lumpy dough that doesn’t blend evenly.
Final Thoughts
Give these Chocolate Chip Cookies a try and experience the perfect blend of chew and crunch. The simple steps and thoughtful ingredients make them a reliable crowd‑pleaser every time.
Frequently Asked Questions
- Can I use all‑purpose flour instead of the flour? Yes, but the texture will be slightly denser and less tender.
- Do the cookies need to chill for 24–36 hours? The chill deepens flavor and controls spread; a minimum of 2 hours works if you’re short on time.
- What’s the best way to store them? Keep them in an airtight container at room temperature; they stay fresh for about a week.
- Can I make them gluten‑free? Substitute the flours with a gluten‑free blend and add a tablespoon of xanthan gum for structure.
- How do I get a softer center? Bake until the edges are golden but the centers are still soft; they’ll finish cooking on the hot cookie sheet.
Chocolate Chip Cookies
Chocolate Chip Cookies: bake chewy, golden‑brown delights with rich chocolate pockets in just 32 minutes.
Ingredients
Instructions
Step 1: Sift and combine the dry ingredients
Sift the cake flour, bread flour, baking soda, baking powder and coarse salt together into a medium bowl until light and even in texture; this aerates the mixture and removes lumps so the cookies bake with an even crumb. Gently stir the sifted mix once more with a dry whisk to ensure the leaveners are fully distributed, then set the bowl aside on the white quartzite surface so it's ready when the creamed butter is folded in.
Step 2: Cream butter and sugars until fluffy
In a modern matte grey ceramic mixing bowl, beat the room-temperature unsalted butter with the granulated and packed light brown sugars using a paddle attachment (or sturdy wooden spatula) until the mixture is pale, aerated and slightly ribboning, about 3–5 minutes in a stand mixer or by hand. You'll notice the brown sugar gives a glossy, slightly granular sheen while the butter makes everything pillowy; scrape the bowl down so no streaks remain.
Step 3: Incorporate eggs and vanilla
Reduce the mixer speed and add the eggs one at a time, beating briefly after each addition so the batter regains a smooth, cohesive texture. Stir in the vanilla extract, pausing to scrape the bowl so the mixture stays evenly emulsified — the batter should be glossy, soft, and slightly dense, ready to accept the dry ingredients without collapsing.
Step 4: Add dry ingredients and finish the dough
Slowly add the sifted dry mixture to the butter-sugar-egg base, folding or mixing just until the dough comes together and streaks of flour disappear; avoid overworking to keep the cookies tender. The resulting dough will be thick, tacky and slightly sticky, with a deep, warm beige color from the browned sugar. Scrape the dough into the same matte grey bowl and prepare to fold in the chocolate.
Step 5: Fold in chocolate chips and chill
Fold the chocolate chips or chunks in gently by hand until they are evenly distributed — the chips should be partially embedded, some peeking out from the dough surface. Portion the dough into a single mound or scoop into a shallow airtight container, then refrigerate for 24–36 hours; the dough will firm up, flavors will deepen, and the texture will tighten into a dense, scoopable mass. DO NOT SKIP REFRIGERATION — this is critical for spread control and the chewy interior.
Step 6: Bring dough to room temperature and preheat
When ready to bake, remove the chilled dough from the refrigerator and allow it to sit until it loses its hard chill and becomes pliable but still cool to the touch. Preheat your oven to 350°F while the dough relaxes; the dough should feel slightly firm yet yielding when you portion it, signaling it's at the right temperature to hold shape and still spread gradually.
Step 7: Portion and bake until edges are golden
Using 2–3 tablespoon scoops, drop spoonfuls of dough onto a lined baking sheet leaving space for gentle spread. Bake until the outer edges are golden-brown but centers still look slightly underbaked — about 10–12 minutes — so the cookies keep a soft, chewy interior. The tops will crack slightly, exposing glossy chocolate pockets.
Step 8: Cool and present the cookies
Transfer baked cookies to a wire rack to cool briefly so the interiors set but the chocolate remains glossy and slightly melty. Serve warm or at room temperature stacked on a shallow matte ceramic plate, revealing a contrast of crisp, caramelized edges and soft, tender centers studded with semi-melted chocolate.
Notes
- Keep butter at room temperature for easy creaming.
- Chill dough for at least 2 hours if you skip the long 24‑hour rest.
- Use a silicone spatula to fold chips without over‑mixing.
- For crispier edges, bake a minute longer.
- Freeze leftovers on a tray before transferring to a bag.