How To Make Mimosas is one of those simple pleasures I keep coming back to on slow weekend mornings and celebratory evenings alike. I love how a few chilled ingredients can transform ordinary moments into something a little more festive. Over the years I’ve tweaked proportions and presentation until the method felt effortless, and it’s become my go-to for brunches. Whether you’re hosting a crowd or pouring a single glass, this guide will help you make the perfect, bright, bubbly mimosa every time.
How This Recipe Became My Sunny Brunch Staple
I remember the first time I made How To Make Mimosas for a group of friends: the kitchen smelled like citrus, the glasses caught the morning light, and laughter felt louder than usual. That day I learned to slow down while pouring, to appreciate the tiny beads of bubbles, and to let the orange juice sit cold enough to sing against the wine. It became less about precision and more about the feeling—warm and easy. Now, whenever I open a chilled bottle of sparkling wine and crack an orange, I’m transported back to that early morning glow and the soft clink of glasses, grateful for how a simple cocktail can hold so much memory.
Ingredients That Make the Magic
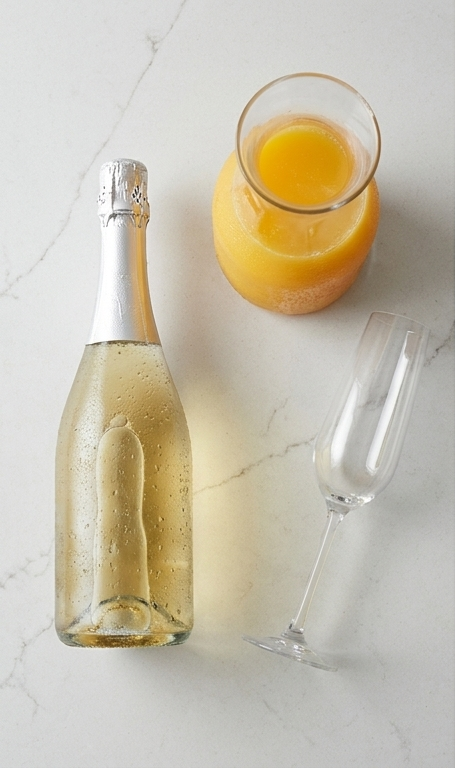
- Dry sparkling wine: The star that brings the bubbles and body. Look for a Brut or Extra Dry for crisp structure; Prosecco, Cava, or a good NV Champagne work well. Choose a bottle you enjoy sipping.
- 100% orange juice: Fresh-squeezed gives brightness and texture, but a high-quality pasteurized juice works for convenience. If oranges are out of season, try a cold-pressed tangerine or blood orange juice for a twist.
- Optional garnish: orange slices: Add aroma and color. Use thin wheels or small wedges; avoid heavy fruit that sinks.
Essential Kitchen Tools and Why They Matter
Start with a short list: the right tools keep the ritual simple and the results consistent. Every item below helps preserve bubbles, control pouring, and present the drink beautifully.
- Champagne flutes: Narrow glasses show off the streams of bubbles and concentrate aroma. If you don’t have flutes, use tulip glasses or narrow wine glasses.
- A chilled bottle opener and cooler: Keep the sparkling wine cold until the last second to protect carbonation. An ice bucket or chilled refrigerator works fine.
- A clear glass pitcher: For batches, a wide-mouth pitcher makes assembly easy without splashing. You can also use a large measuring cup as an alternative.
Step-by-Step Preparation Guide.
Step 1: Pour the sparkling wine into the flute
Slowly tilt a clean champagne flute and gently pour chilled dry sparkling wine until the glass is about two thirds full. Aim for a steady, thin stream so the bubbles form a lively column and cling to the glass walls; this preserves carbonation and creates that delicate bead of microbubbles along the rim. Keep the flute on the white quartzite surface while pouring — no stirring, no toppings yet — and enjoy how the pale gold liquid looks against the smooth matte stone.
Step 2: Top with fresh orange juice to finish the single serving
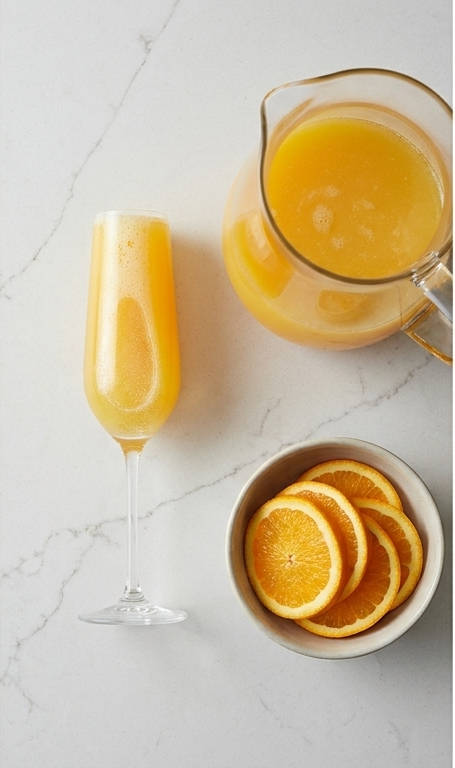
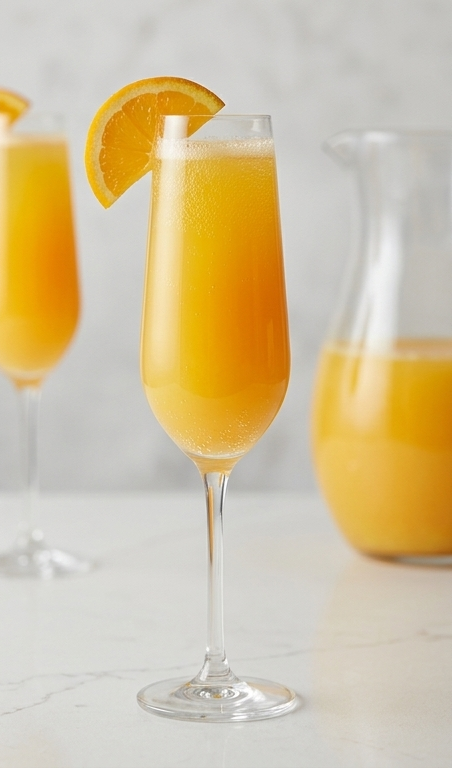
Carefully top the wine with chilled 100% orange juice, pouring just enough to fill the flute and create a soft gradient from straw-gold to bright citrus orange. Pour slowly so you get a gentle layering and a faint foam crown where juice meets bubbles. Do not stir; let the effervescence mingle on its own. If desired, rest a single thin orange slice on the rim or float a tiny wheel on top for a bright, aromatic garnish — simple, elegant, instant refreshment.
Step 3: Assemble a pitcher for multiple servings
For a pitcher, place a large clear glass pitcher on the quartzite and slowly pour the chilled sparkling wine into it, then add 1 ½ to 3 cups of chilled orange juice depending on how citrus-forward you want the batch. Aim for about 1½ cups as a balanced starting point. Combine the liquids gently by pouring so carbonation is preserved; do not stir vigorously. Cover and refrigerate the pitcher briefly (up to 10 minutes) if you want it extra cold before serving.
Step 4: Pour from the pitcher and serve the finished mimosas
When ready, pour the chilled mimosa from the pitcher into identical elegant tapered champagne flutes, filling each glass to the rim so the gradient and bubbles are showcased. Place a thin orange slice on the rim of each flute as an optional garnish. Serve immediately on the white quartzite surface so the bright orange hue and the sparkling texture read crisp and celebratory.
Making It Your Own
I love experimenting with How To Make Mimosas by swapping juices and infusions. Try a 50/50 mix of orange and blood orange juice for deeper color and a hint of tartness.
For a floral note, add a splash of elderflower liqueur or lavender syrup to the pitcher before gently combining; keep it light so bubbles stay prominent.
For a nonalcoholic version, use a high-quality sparkling water or nonalcoholic sparkling wine with the same chilled orange juice ratio for the same celebratory feel.
How to Serve
If you’re hosting, plan for about one bottle of sparkling wine per six to eight guests when paired with orange juice. For a small brunch, assemble a pitcher so guests can pour as they please; for a formal brunch, pre-fill flutes right before guests arrive. Garnish options change the vibe: thin orange wheels feel casual, while peeled citrus twists read slightly more elegant. Match glassware for a polished look and keep an ice bucket nearby to rotate bottles and ensure every pour stays crisp.
Storage and Reheating Tips
You can store leftover assembled mimosas in the fridge for a short time, but expect carbonation to fade after a few hours. Keep the pitcher covered and cold; the drink is best within an hour of mixing.
If you need to prepare ahead, keep wine and juice chilled separately and combine right before serving. There’s no reheating; serve cold and fresh for the best texture and flavor.
Mistakes People Make and How to Avoid Them
The most common misstep is using warm ingredients. Keep both wine and juice chilled so you don’t lose bubbles on contact. Another frequent error is over-stirring; mix gently or not at all to preserve effervescence.
Don’t drown the wine in juice. Start with the recommended ratio and adjust to taste; slow pouring keeps the layers and the delicate foam crown intact.
Why You Should Try This Today
Making How To Make Mimosas is quick, forgiving, and instantly elevates a simple moment. Try it this weekend—the ritual of chilling, pouring, and sharing is a small, joyful habit that makes mornings feel special.
Frequently Asked Questions.
- How much sparkling wine should I use per serving? I usually fill a flute two thirds full with sparkling wine, then top with orange juice to taste.
- Can I use store-bought orange juice? Yes, high-quality 100% juice works fine, but fresh-squeezed will give brighter flavor and aroma.
- What sparkling wines are best for mimosas? Brut or Extra Dry styles, Prosecco, or Cava are great affordable options; use a favorite bottle if you want more complexity.
- How far ahead can I mix a pitcher? Mix just before serving for best bubbles; you can combine and refrigerate for up to 30 minutes but expect some carbonation loss.
- How do I make a nonalcoholic mimosa? Substitute sparkling water or a nonalcoholic sparkling wine for the bubbly and keep the same juice ratio.
How To Make Mimosas
How To Make Mimosas: Mix chilled sparkling wine and orange juice for an effortless, celebratory brunch drink.
Ingredients
Instructions
Step 1: Pour the sparkling wine into the flute
Slowly tilt a clean champagne flute and gently pour chilled dry sparkling wine until the glass is about two thirds full. Aim for a steady, thin stream so the bubbles form a lively column and cling to the glass walls; this preserves carbonation and creates that delicate bead of microbubbles along the rim. Keep the flute on the white quartzite surface while pouring — no stirring, no toppings yet — and enjoy how the pale gold liquid looks against the smooth matte stone.
Step 2: Top with fresh orange juice to finish the single serving
Carefully top the wine with chilled 100% orange juice, pouring just enough to fill the flute and create a soft gradient from straw-gold to bright citrus orange. Pour slowly so you get a gentle layering and a faint foam crown where juice meets bubbles. Do not stir; let the effervescence mingle on its own. If desired, rest a single thin orange slice on the rim or float a tiny wheel on top for a bright, aromatic garnish — simple, elegant, instant refreshment.
Step 3: Assemble a pitcher for multiple servings
For a pitcher, place a large clear glass pitcher on the quartzite and slowly pour the chilled sparkling wine into it, then add 1 ½ to 3 cups of chilled orange juice depending on how citrus-forward you want the batch. Aim for about 1½ cups as a balanced starting point. Combine the liquids gently by pouring so carbonation is preserved; do not stir vigorously. Cover and refrigerate the pitcher briefly (up to 10 minutes) if you want it extra cold before serving.
Step 4: Pour from the pitcher and serve the finished mimosas
When ready, pour the chilled mimosa from the pitcher into identical elegant tapered champagne flutes, filling each glass to the rim so the gradient and bubbles are showcased. Place a thin orange slice on the rim of each flute as an optional garnish. Serve immediately on the white quartzite surface so the bright orange hue and the sparkling texture read crisp and celebratory.
Notes
- Chill both wine and juice before assembling
- Adjust orange juice to taste, start with 1 ½ cups for a pitcher
- For best bubbles, combine gently and serve immediately
- Use fresh-squeezed orange juice for brighter flavor
- Keep a backup bottle chilled for refills