Juicy Grilled Burgers Recipe is the one I reach for when friends drop by and the sky looks like a promise. I remember the sizzle, the smoky notes, and the little cloud of steam when I first flipped a patty that actually behaved. I still grin when the cheese melts into a glossy blanket and the bun gets those tiny golden toasts. This Juicy Grilled Burgers Recipe is simple, forgiving, and endlessly customizable, so you can make it your own tonight.
How This Recipe Became My Backyard Classic
One summer evening years ago I brought this Juicy Grilled Burgers Recipe to a potluck and watched strangers become instant fans. The grill smelled like wood smoke and caramelized beef; the char on the crust had a faint bitter-sweet edge while the interior stayed soft and pink. I remember the first bite as if it were a movie scene: juice pooling on my thumb, the warm cheese stretching, and someone asking for the recipe between mouthfuls. That shared surprise solidified it for me. Since then, I make these burgers for birthdays, lazy Sundays, and the occasional rainy-weekend escape, and every time they bring the same warm, noisy joy.
Why These Ingredients Matter
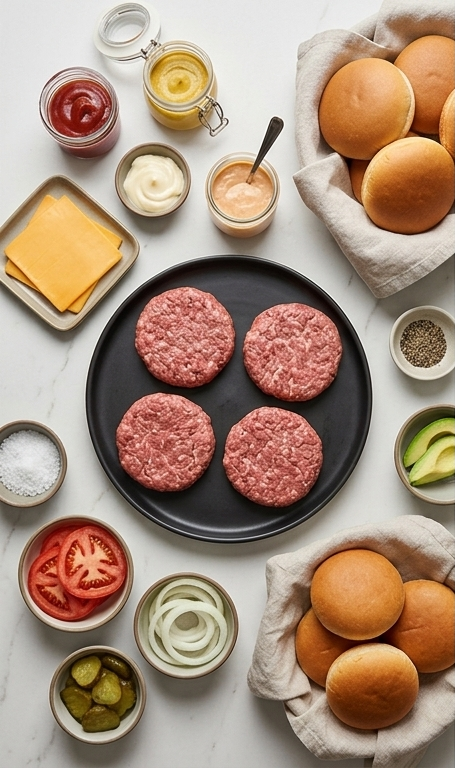
- Ground Chuck (80/20): The star of the show; fat equals flavor and moisture. Substitute a blend of chuck and short rib for extra richness. Look for a fresh, bright red grind and keep it cold.
- Kosher Salt: Enhances beef flavor and creates a simple crust. Use flaky or coarse salt and salt just before cooking.
- Freshly Ground Pepper: Adds bright heat and texture. Grind fresh for best aroma and taste.
- Cheese: Melts into a silky blanket; cheddar, American, or Swiss all work. Choose slices that melt well.
- Burger Buns: Buttery, toasted buns add texture and hold the juices. Brioche or potato rolls are excellent choices.
Essential Kitchen Tools and Why They Matter
To make these Juicy Grilled Burgers Recipe-worthy, the right tools make the job easier and the results more consistent. A hot, clean grate gives you the sear and char that define a great burger. An instant-read thermometer keeps you from guessing doneness, especially if you like a precise finish. A sturdy spatula makes flipping simpler, and small bowls for toppings keep assembly fast when guests are ready. If you don’t have a grill, a cast-iron skillet or a heavy griddle on the stovetop works well as an alternative.
- Grill or Cast-Iron Skillet: For even searing and char.
- Instant-Read Thermometer: To check internal temperature accurately.
- Sturdy Spatula: For confident flipping without breaking the patty.
- Small Bowls and Plates: For mise en place and quick assembly.
- Tongs and Basting Brush: For handling and toasting buns.
Step-by-Step Preparation Guide
Step 1: Form the Patties
Divide the ground chuck into four equal 5‑ounce portions. Gently press each portion into a round patty about ½‑inch thicker than the bun diameter and roughly ½‑inch thick overall, handling the meat as little as possible to keep it tender. Press a shallow indentation around the edge of each patty (a subtle moat) so the center won’t puff up while cooking. Arrange the four raw patties on a matte dark ceramic plate or a sheet of parchment on the same plate and set them aside on the white quartzite surface while you prepare the rest.
Step 2: Season the Patties
Generously season both sides of each patty with kosher salt and freshly ground black pepper just before cooking; the coarse grains should sit visibly on the meat surface. Leave the seasoned patties on the same matte ceramic plate so the visual vessel remains consistent — salt flakes, pepper specks, and the raw beef’s soft marbling are all clearly visible from the top‑down flatlay.
Step 3: Prepare the Grill (Read the Cues)
Light your charcoal and wait until the coals are glowing and covered with a grayish ash, then spread hot coals to one side of the firebed and replace the grate. Preheat, then clean and oil the grate. (This step is procedural — we do not depict the stove/grill in the photos; it’s a functional pause between seasoning and cooking.)
Step 4: Sear and Finish with Cheese
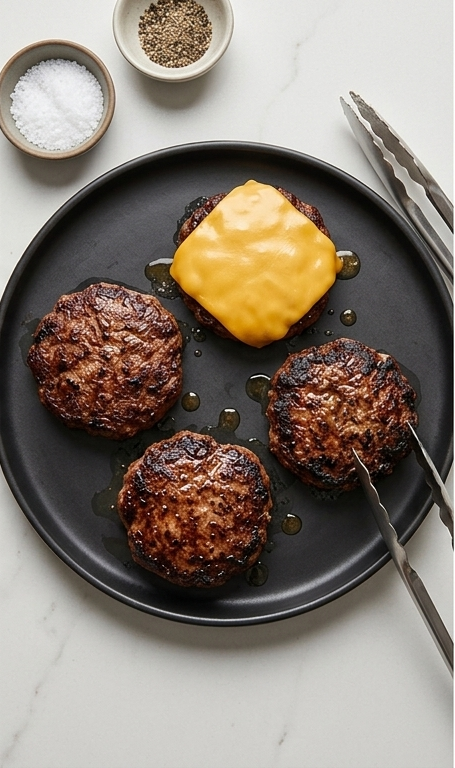
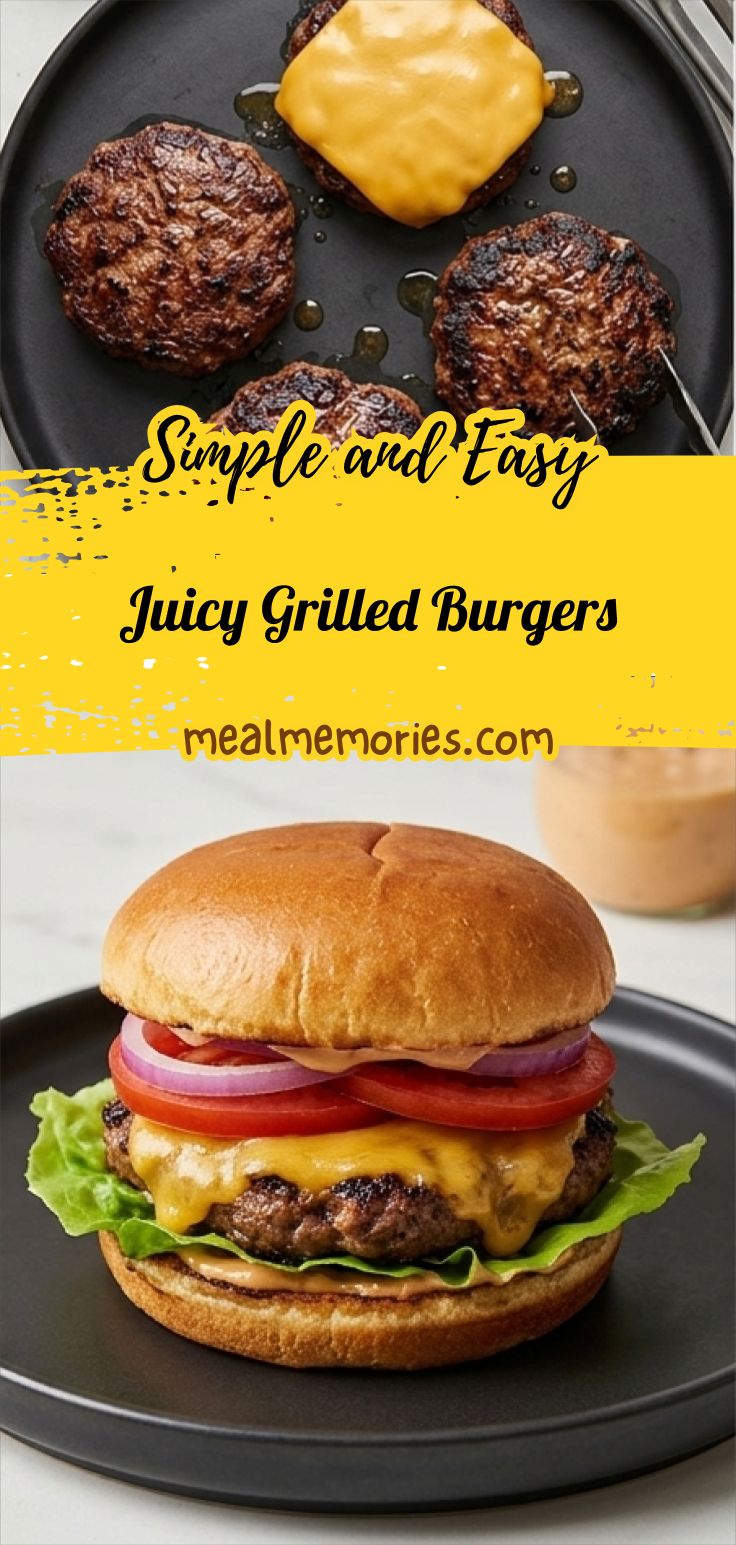
Place the patties over the hottest part of the fire to sear: cook while turning and flipping often so you develop an even seared crust and those dark char edges, cooking until the center reads about 145°F. Move the patties to the cooler side of the grill, place a slice of cheese on each, and let the residual heat melt the cheese until the internal temp reaches about 155°F and the cheese becomes silky and glossy. Transfer the hot patties to the matte ceramic plate.
Step 5: Rest the Burgers
After cooking, loosely tent the patties with foil and let them rest briefly on the same plate so juices redistribute; the crust firms slightly while the interior relaxes. Keep your small condiment bowls nearby (jars of mustard, ketchup, and mayonnaise in glass vessels) and the toppings in ceramic dishes for quick assembly.
Step 6: Assemble and Serve
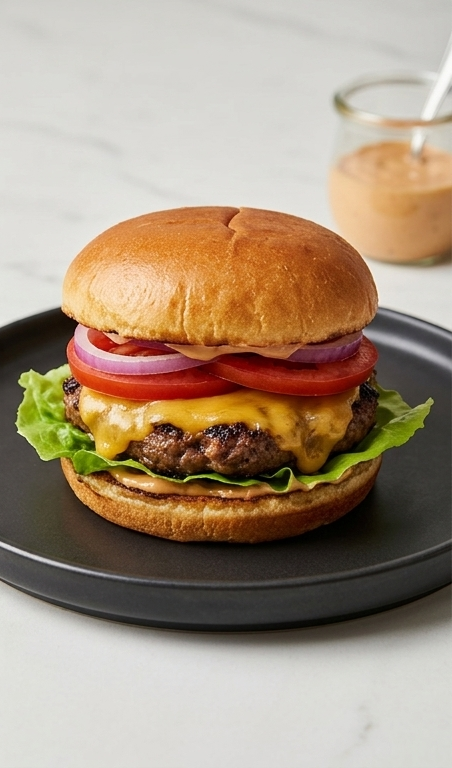
Butter and toast the buns until golden and slightly crisp, then build the burgers: bottom bun, crisp lettuce leaf, the rested patty with melted cheese, a round of ripe tomato, a few onion rings, dill pickles if desired, and a smear of burger sauce or mayo on the top bun. Present the finished burger on the same matte dark ceramic plate used earlier, with a small jar of sauce and a tidy stack of extra toppings in glass/ceramic vessels nearby — eye‑level close‑up to showcase the melted cheese, juicy interior, charred edges, and toasted bun.
Making It Your Own
I love experimenting with this Juicy Grilled Burgers Recipe by swapping cheeses, sauces, and buns. For a smoky tropical spin, try a grilled pineapple ring and pepper jack; for a creamy twist, mash avocado into a quick guacamole. If you need a lighter version, use a leaner grind but add a tablespoon of olive oil to keep the patty moist. Go regional by adding chorizo to the mix or topping with pickled jalapenos and cotija for a Southwest feel. Small changes like swapping brioche for a whole wheat bun shift the vibe while keeping that juicy center intact.
How to Serve
When hosting, set out a toppings station so guests can personalize their Juicy Grilled Burgers Recipe plates. For four people, plan one patty each and offer 3 to 4 topping choices per person. If you are feeding a crowd, keep patties warm on a low oven tray loosely tented with foil and let people assemble to order. Pair the burgers with crispy fries, a simple slaw, or a bright green salad. For a casual barbecue, arrange buns, plates, and condiments on a long table so everyone can build their own masterpiece.
Storage and Reheating Tips
Leftover patties keep well refrigerated for up to 3 days in an airtight container. To freeze, flash cool them, wrap individually in plastic, then place in a freezer bag for up to 3 months. When reheating, use a low oven at 300°F to warm through gently so you do not overcook the interior.
For the best texture, toast buns fresh and add cheese near the end of reheating so it melts without drying the patty. Avoid microwaving if possible; it tends to make the meat rubbery. If you must microwave, do short intervals and finish with a quick skillet sear.
Common Slip-Ups and How to Dodge Them
Overworking the meat is a frequent mistake. Handle the ground chuck as little as possible when forming patties; gentle shaping keeps them tender.
Cooking too hot for too long can dry the interior. Sear to build crust, then move to a cooler spot to finish cooking gently. Use an instant-read thermometer to hit the right temp.
Skipping a rest period steals juicy flavor. Even a brief 3 to 5 minute rest lets juices redistribute and keeps the burger from squirting all over your plate.
Final Thoughts
Give the Juicy Grilled Burgers Recipe a try this weekend. It rewards simple care, a hot grate, and your favorite toppings, and it tends to be a crowd pleaser whether you are cooking for two or twelve. Enjoy the process, and tweak small things until it feels like home.
Frequently Asked Questions
- Q: How do I keep burgers from falling apart?
A: Handle the meat gently and avoid overmixing. Form patties loosely and keep them cold until cooking. - Q: What internal temperature should I aim for?
A: Cook to about 155°F for a juicy, slightly pink center as suggested in the recipe; sear first then finish on a cooler part of the grill. - Q: Can I make these on a stovetop?
A: Yes. Use a hot cast-iron skillet and follow the same sear-then-finish method, using oven heat if needed. - Q: How do I prevent the center from puffing up?
A: Press a shallow indentation around the edge of each patty when forming to keep the center flat while cooking. - Q: What cheese melts best?
A: American, cheddar, and Swiss all melt nicely; American gives the creamiest, most nostalgic melt.
Juicy Grilled Burgers Recipe
Make the Juicy Grilled Burgers Recipe for melty cheese, charred crust, and juicy centers in under 30 minutes.
Ingredients
Instructions
Step 1: Form the Patties
Divide the ground chuck into four equal 5‑ounce portions. Gently press each portion into a round patty about ½‑inch thicker than the bun diameter and roughly ½‑inch thick overall, handling the meat as little as possible to keep it tender. Press a shallow indentation around the edge of each patty (a subtle moat) so the center won’t puff up while cooking. Arrange the four raw patties on a matte dark ceramic plate or a sheet of parchment on the same plate and set them aside on the white quartzite surface while you prepare the rest.
Step 2: Season the Patties
Generously season both sides of each patty with kosher salt and freshly ground black pepper just before cooking; the coarse grains should sit visibly on the meat surface. Leave the seasoned patties on the same matte ceramic plate so the visual vessel remains consistent — salt flakes, pepper specks, and the raw beef’s soft marbling are all clearly visible from the top‑down flatlay.
Step 3: Prepare the Grill (Read the Cues)
Light your charcoal and wait until the coals are glowing and covered with a grayish ash, then spread hot coals to one side of the firebed and replace the grate. Preheat, then clean and oil the grate. (This step is procedural — we do not depict the stove/grill in the photos; it’s a functional pause between seasoning and cooking.)
Step 4: Sear and Finish with Cheese
Place the patties over the hottest part of the fire to sear: cook while turning and flipping often so you develop an even seared crust and those dark char edges, cooking until the center reads about 145°F. Move the patties to the cooler side of the grill, place a slice of cheese on each, and let the residual heat melt the cheese until the internal temp reaches about 155°F and the cheese becomes silky and glossy. Transfer the hot patties to the matte ceramic plate.
Step 5: Rest the Burgers
After cooking, loosely tent the patties with foil and let them rest briefly on the same plate so juices redistribute; the crust firms slightly while the interior relaxes. Keep your small condiment bowls nearby (jars of mustard, ketchup, and mayonnaise in glass vessels) and the toppings in ceramic dishes for quick assembly.
Step 6: Assemble and Serve
Butter and toast the buns until golden and slightly crisp, then build the burgers: bottom bun, crisp lettuce leaf, the rested patty with melted cheese, a round of ripe tomato, a few onion rings, dill pickles if desired, and a smear of burger sauce or mayo on the top bun. Present the finished burger on the same matte dark ceramic plate used earlier, with a small jar of sauce and a tidy stack of extra toppings in glass/ceramic vessels nearby — eye‑level close‑up to showcase the melted cheese, juicy interior, charred edges, and toasted bun.
Notes
- Let burgers rest 3 to 5 minutes before assembling.
- Use 80/20 ground chuck for best juiciness and flavor.
- Season just before cooking to avoid drawing out moisture.
- Press a shallow indentation in each patty to prevent doming.
- Use an instant-read thermometer to check for 155°F for a juicy finish.