Yeasted Waffles have been my weekend ritual for years. I love how a little patience overnight turns simple batter into airy, crisp waffles with deep flavor. These Yeasted Waffles are forgiving, slightly tangy, and perfect for piling high with fruit and syrup. Over the years I have learned small tricks that make the texture consistently light and the exterior satisfyingly crisp.
What makes these Yeasted Waffles worth the wait is the overnight fermentation. That slow rest builds flavor and creates tiny bubbles that give the interior an open, tender crumb while the exterior crisps beautifully. You get a breakfast that tastes like it took all morning, even if most of the time was hands-off.
How This Recipe Became My Rainy-Day Favorite
I first made these Yeasted Waffles on a rainy Saturday when I wanted something cozy and slightly indulgent. I remember the warm, yeasty scent that filled the kitchen as the batter bubbled faintly in the fridge overnight, and how the house felt softer the next morning. The first crisp bite released steam and the gentle tang of fermentation, and I felt like I had discovered a small luxury I could create at home. Making a batch became a ritual: the soft whisk of egg whites, the patient folding, the hiss of the waffle iron. Each step felt meditative, and sharing the golden waffles with friends made the day feel slow and full.
Why These Ingredients Matter
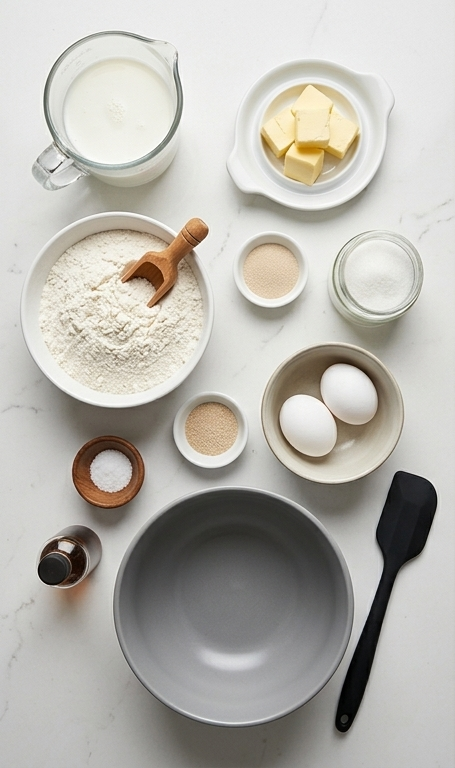
- Milk: The liquid backbone; whole milk gives richness while 2% keeps it lighter. Substitute with a nut milk in equal measure for a dairy-free twist, though texture will be slightly different.
- Unsalted Butter: Adds flavor and tenderness; melt and cool so it wakes the yeast without shock. Use vegan butter if needed.
- Granulated Sugar: Feeds the yeast and adds a touch of sweetness; honey can work but reduce other liquids slightly.
- All-Purpose Flour: Provides structure; for a slightly chewier waffle try half bread flour.
- Salt: Enhances flavor; never skip it.
- Instant Yeast: The rising agent that gives the batter its airy texture; active dry yeast can be used but bloom it first.
- Eggs: Yolks enrich and whites add lift; separate them for the lightest result.
- Baking Soda: Adds a last-minute lift when combined with the yolks.
- Vanilla Extract: Rounds the flavor; lemon zest can be used for a brighter profile.
Essential Kitchen Tools
A few reliable tools make these Yeasted Waffles simple and enjoyable to prepare. Invest in what you use most, and don’t worry if you substitute.
- Waffle Iron: The star tool. A nonstick iron with adjustable heat makes crisp waffles; a well-seasoned cast iron press also works.
- Mixing Bowls: Use a large bowl for the initial batter and another for whipping whites; glass or stainless are ideal.
- Whisk and Spatula: A whisk for smoothing batter and a silicone spatula for gentle folding will protect the airy structure.
- Electric Mixer or Balloon Whisk: An electric mixer speeds up whipping the egg whites, but you can whisk by hand for a bit of arm exercise.
- Measuring Cups and Spoons: Accurate measurements help the yeast do its job; weigh flour if you can.
Step-by-Step Preparation Guide
Step 1: Warm the milk and melt the butter
Gently warm the milk with the cubed unsalted butter in a microwave-safe bowl (or a pot) just until the butter melts; you want the mixture lukewarm to the touch so it will wake the yeast without killing it. Let the jug/bowl cool on the counter until it is no longer hot, then set it aside in the same vessel to use when combining with the dry ingredients.
Step 2: Combine dry ingredients and incorporate the milk mixture
In a large modern matte grey ceramic mixing bowl, stir together the all-purpose flour, salt, granulated sugar and instant yeast until evenly mixed. Gradually whisk in the cooled milk-and-butter mixture until a loose, slightly sticky batter forms—scrape the bowl sides with a spatula so everything is fully incorporated and the texture is smooth but still soft.
Step 3: Rest the batter overnight
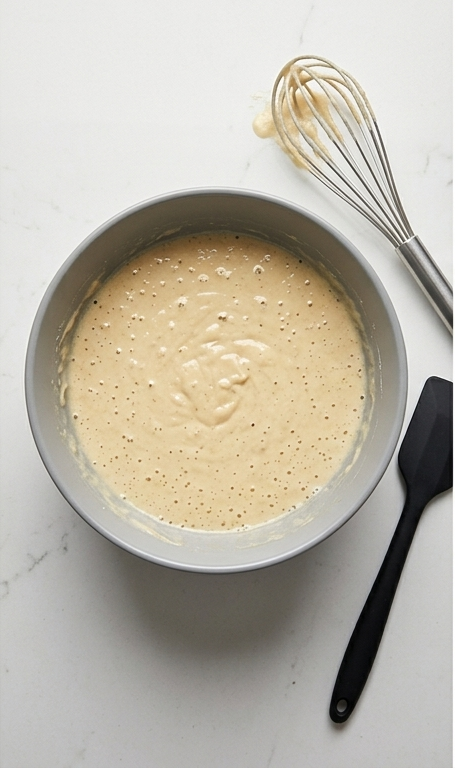
Cover the mixing bowl tightly and refrigerate the batter overnight (6 to 24 hours). During this cold rest the yeast develops flavor and the batter will become slightly aerated and dotted with tiny bubbles; you should notice a relaxed, pillowy texture and deeper aroma when you uncover it the next day.
Step 4: Enrich the batter with yolks and leavening
When ready to cook, separate the eggs into yolks and whites. Whisk the yolks together with the baking soda and vanilla until smooth, then stir the yolk mixture gently into the chilled, risen batter. The batter will relax further and smell faintly of vanilla and fermented sweetness.
Step 5: Whip whites, fold gently, and cook
Beat the egg whites to stiff, glossy peaks and fold them carefully into the batter in light, sweeping motions so you retain as much air as possible—the batter should look airy, with visible ribbons from the whipped whites. Spoon the batter into a greased waffle iron and cook until each waffle is golden-brown and crisp on the outside, with an open, airy interior.
Step 6: Plate and serve warm with berries and syrup
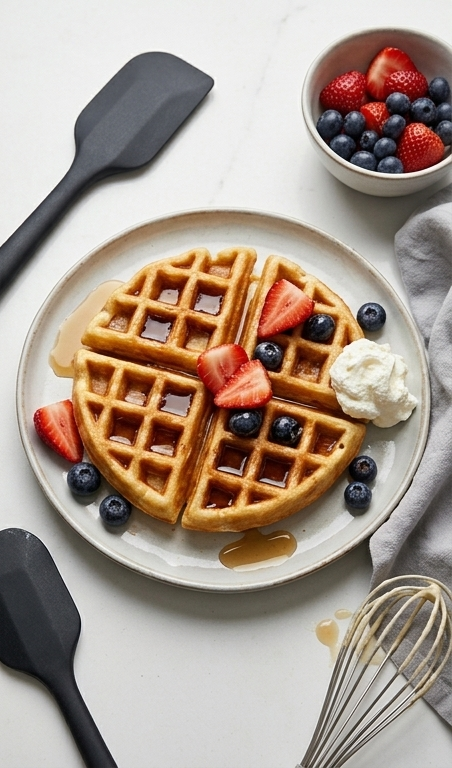
Arrange the hot waffles on a light gray rustic plate, cut into quarters and fanned in a circular pattern. Top with sliced strawberries, plump blueberries, a generous drizzle of syrup pooling in the deep waffle pockets, and a dollop of whipped cream. Serve immediately, or keep warm briefly in a low oven if needed, and enjoy the contrast of crisp exterior and tender, aerated crumb.
Making It Your Own
I like to experiment by swapping a cup of flour for whole wheat in cooler months to add nutty depth. For a gluten-free version, I replace the flour with a 1-to-1 gluten-free blend and add an extra egg white for structure. On summer mornings I fold in lemon zest and top with macerated berries for a bright contrast to the yeast flavor.
If you want a richer waffle, try using half cream and half milk, or fold in a tablespoon of browned butter for a toasty note. For a vegan approach I have experimented with aquafaba for whipped whites and a reliable vegan butter; results are slightly denser but still delightful.
How to Serve
When hosting, I arrange Yeasted Waffles buffet-style so guests can assemble their own plates. Keep waffles warm in a 200 F oven on a rack so they stay crisp. For a large brunch multiply the batter and keep extras in a shallow pan in a low oven while you finish cooking the rest.
For a plated presentation, stack two waffles, add a smear of lemon curd or whipped mascarpone between layers, then top with fresh berries and a scatter of mint. To scale down for two, halve the batter and cook fresh; for a crowd, prepare multiple pans and reheat briefly on a hot griddle before serving.
Storage and Reheating Tips
Store leftover Yeasted Waffles in an airtight container in the refrigerator for up to 3 days. To freeze, place cooled waffles in a single layer on a baking sheet until firm, then transfer to a freezer bag for up to 2 months.
Reheat from frozen in a toaster or toaster oven for best texture; a 350 F oven for 8 to 10 minutes also works. Avoid microwaving unless you plan to finish in a hot oven or pan, since the microwave makes them soft.
Common Mistakes and How to Avoid Them
Not cooling the milk mixture enough before mixing with the yeast can kill the yeast or lead to inconsistent rise; always check that it feels lukewarm. Overmixing after adding the whites will deflate the batter, so fold gently until you see ribbons.
Skipping the cold rest shortchanges flavor and texture. Even a six hour rest improves the waffles, but the longer, calmer ferment between 12 and 24 hours gives the best depth.
Final Thoughts
If you try these Yeasted Waffles you will likely find, as I did, that a little patience rewards you with a breakfast that tastes special. They are worth the overnight wait and they reliably bring joy to morning gatherings.
Frequently Asked Questions.
- What if I only have active dry yeast? Use active dry yeast but dissolve it in a small amount of warm water or milk first and let it bloom for 5 to 10 minutes before adding to the dry ingredients.
- Can I make the batter in the morning and cook the same day? Yes, you can rest the batter at room temperature for a shorter period, but it will be less developed than an overnight cold rest.
- How do I keep waffles crisp when serving for a crowd? Keep them on a rack in a 200 F oven and avoid stacking; re-crisp briefly under the broiler if needed.
- Can I prepare the batter gluten-free? Yes, use a reliable 1-to-1 gluten-free flour blend and consider an extra egg white for structure; texture will be slightly different.
- Are Yeasted Waffles suitable for make-ahead breakfasts? Absolutely. Freeze cooked waffles and reheat in a toaster for a quick, restaurant-style breakfast.
Yeasted Waffles
Make Yeasted Waffles ahead for airy, crisp breakfast waffles topped with berries and syrup.
Ingredients
Instructions
Step 1: Warm the milk and melt the butter
Gently warm the milk with the cubed unsalted butter in a microwave-safe bowl (or a pot) just until the butter melts; you want the mixture lukewarm to the touch so it will wake the yeast without killing it. Let the jug/bowl cool on the counter until it is no longer hot, then set it aside in the same vessel to use when combining with the dry ingredients.
Step 2: Combine dry ingredients and incorporate the milk mixture
In a large modern matte grey ceramic mixing bowl, stir together the all-purpose flour, salt, granulated sugar and instant yeast until evenly mixed. Gradually whisk in the cooled milk-and-butter mixture until a loose, slightly sticky batter forms—scrape the bowl sides with a spatula so everything is fully incorporated and the texture is smooth but still soft.
Step 3: Rest the batter overnight
Cover the mixing bowl tightly and refrigerate the batter overnight (6 to 24 hours). During this cold rest the yeast develops flavor and the batter will become slightly aerated and dotted with tiny bubbles; you should notice a relaxed, pillowy texture and deeper aroma when you uncover it the next day.
Step 4: Enrich the batter with yolks and leavening
When ready to cook, separate the eggs into yolks and whites. Whisk the yolks together with the baking soda and vanilla until smooth, then stir the yolk mixture gently into the chilled, risen batter. The batter will relax further and smell faintly of vanilla and fermented sweetness.
Step 5: Whip whites, fold gently, and cook
Beat the egg whites to stiff, glossy peaks and fold them carefully into the batter in light, sweeping motions so you retain as much air as possible—the batter should look airy, with visible ribbons from the whipped whites. Spoon the batter into a greased waffle iron and cook until each waffle is golden-brown and crisp on the outside, with an open, airy interior.
Step 6: Plate and serve warm with berries and syrup
Arrange the hot waffles on a light gray rustic plate, cut into quarters and fanned in a circular pattern. Top with sliced strawberries, plump blueberries, a generous drizzle of syrup pooling in the deep waffle pockets, and a dollop of whipped cream. Serve immediately, or keep warm briefly in a low oven if needed, and enjoy the contrast of crisp exterior and tender, aerated crumb.
Notes
- Let the milk-and-butter mixture cool until lukewarm to protect the yeast.
- Refrigerate the batter 6 to 24 hours for best flavor and texture.
- Fold whipped egg whites gently to keep the batter airy.
- Reheat frozen waffles in a toaster for best crispness.
- Use whole milk for richer flavor or 2% for a lighter waffle.