Marry Me Chicken Recipe has been a go-to when I want a meal that feels special but is utterly doable on a weeknight. I still remember the first time I made the Marry Me Chicken Recipe for friends and watched everyone hover over the skillet, forks poised. It feels fancy because of the silky sun-dried tomato cream sauce, but it is honest home cooking at its best. I cook it when I want something comforting that also impresses.
How This Dish Became a Small Celebration
I first learned this version of Marry Me Chicken Recipe on a rainy evening when my oven and I needed a truce. The house smelled of butter and toasted garlic, and the sun-dried tomatoes lent bright tomato sweetness against the cream. As I seared the chicken, the kitchen filled with the sound of a happy sizzle and the faint nuttiness of browned flour. When I slid the breasts back into the glossy sauce and sprinkled basil over the top, I felt pleased in a quiet, domestic way. We ate with crusty bread and laughed, and I noticed how a simple skillet could change the tone of a night. That memory is why I reach for this recipe when I want food that comforts and celebrates at once, warm on the plate and easy on the timeline.
The Ingredients That Make This Sing
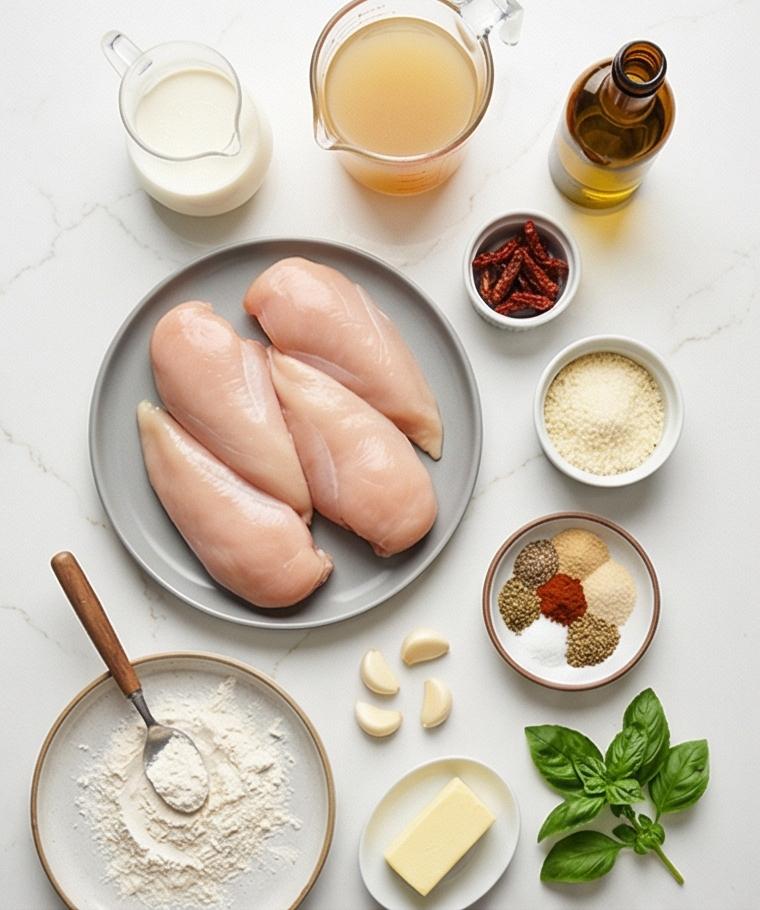
- Boneless, Skinless Chicken Breasts: The protein anchor; choose even-sized pieces for uniform cooking. Substitute with boneless thighs for juicier, more forgiving results. Pat very dry before searing.
- Garlic: Provides aromatic depth; use roasted garlic for a mellower, sweeter note.
- Sun-Dried Tomatoes: Deliver concentrated tomato flavor and chew; fresh tomatoes are not a direct substitute, but slow-roasted cherry tomatoes can work.
- Heavy Cream and Parmesan: Create the silky, clingy sauce; use half-and-half plus a touch of cream cheese in a pinch.
- Basil and Lemon Juice: Brighten and finish the sauce; fresh basil is essential for the aromatic lift.
Essential Tools That Make the Process Smoother
A few reliable tools will keep this recipe simple and give you better results. An oven-safe skillet is the hero since it takes you from stovetop to oven without a transfer. A good pair of tongs helps flip and nestle the chicken without tearing it. A microplane or fine grater keeps the Parmesan light and meltable. A whisk makes the sauce glossy and lump-free, and a sturdy spatula helps scrape up browned bits when you deglaze.
- Oven-safe 10-12 inch skillet: For searing, saucing, and baking; use a Dutch oven if you do not have a skillet.
- Tongs: For confident flipping and transferring; a spatula works in a pinch.
- Microplane or grater: For finely grating Parmesan; pre-grated cheese will not melt as smoothly.
- Whisk: To emulsify the cream and cheese into a silky sauce.
- Measuring cups and spoons: For consistent seasoning and liquid ratios.
Step-by-Step Preparation Guide
Step 1: Preheat and Ready the Skillet, Trim and Dry the Chicken
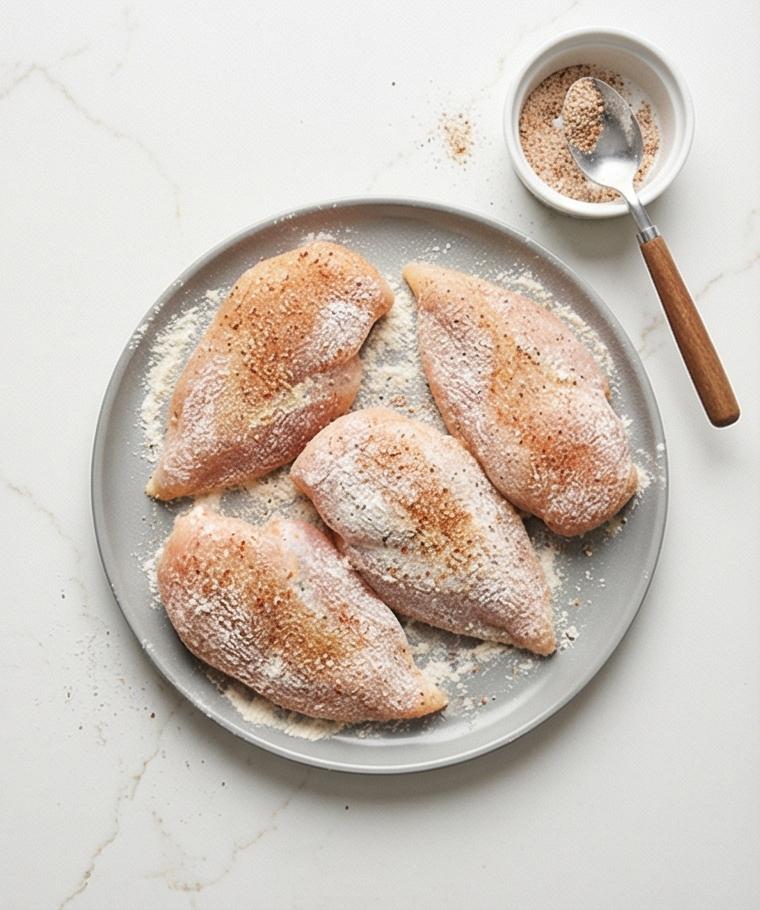
Preheat the oven to 375°F (190°C) and set an oven-safe 10–12 inch skillet to the side; this will be the primary cooking and serving vessel. On a clean cutting board, trim any excess fat from the four boneless, skinless chicken breasts and, if any pieces are unevenly thick, butterfly or gently pound them to an even thickness. Pat each piece very dry with paper towels — the drying is key for a deep, even brown crust. In a small bowl mix the salt, freshly ground black pepper, garlic powder, sweet paprika and crushed red pepper flakes; season both sides of each breast, pressing the rub into the meat. Lightly dredge each seasoned breast in a thin coating of all-purpose flour, shaking off the excess so only a whisper of flour remains on the surface. This yields dry, evenly seasoned, lightly-dusted cutlets ready to brown.
Step 2: Sear to a Deep Golden Crust and Rest
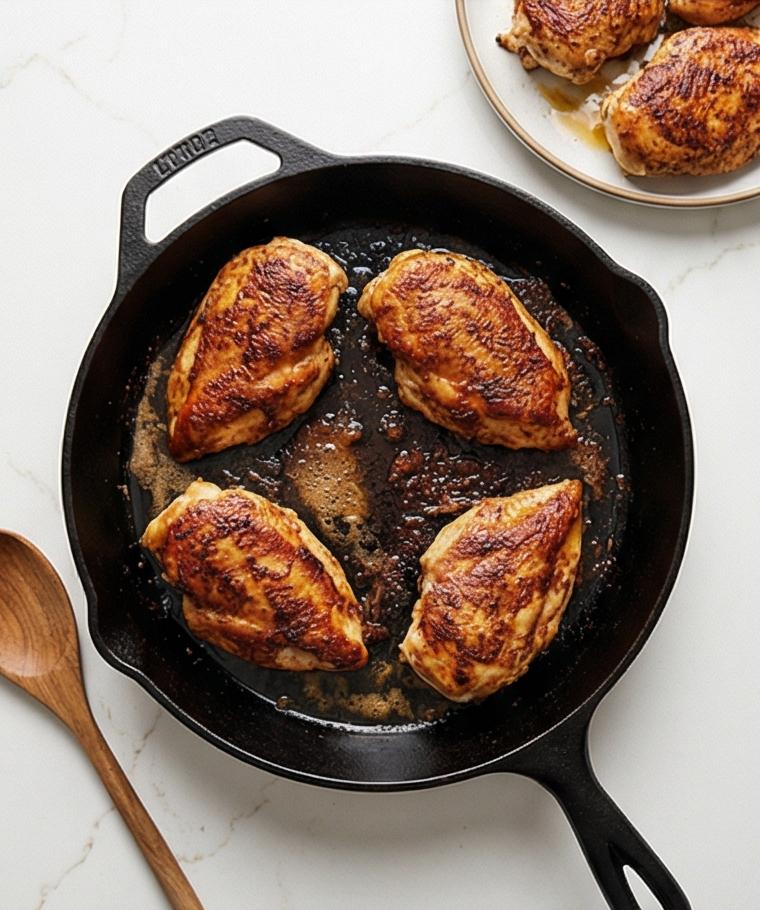
Heat 2 tablespoons extra-virgin olive oil and 1 tablespoon butter in the skillet until the fat shimmers, then lay the floured cutlets in a single layer without crowding. Sear undisturbed until a deep, caramelized golden edge forms (about 4–5 minutes), flip and sear the second side until both faces are richly browned but not cooked through. Transfer the seared breasts to a plate and tent loosely with foil to rest; the surface will show a crisp, bronzed crust with tiny flour-caramelized textures and a slight sheen from the fond and pan fats.
Step 3: Build an Aromatic, Emulsified Cream Sauce
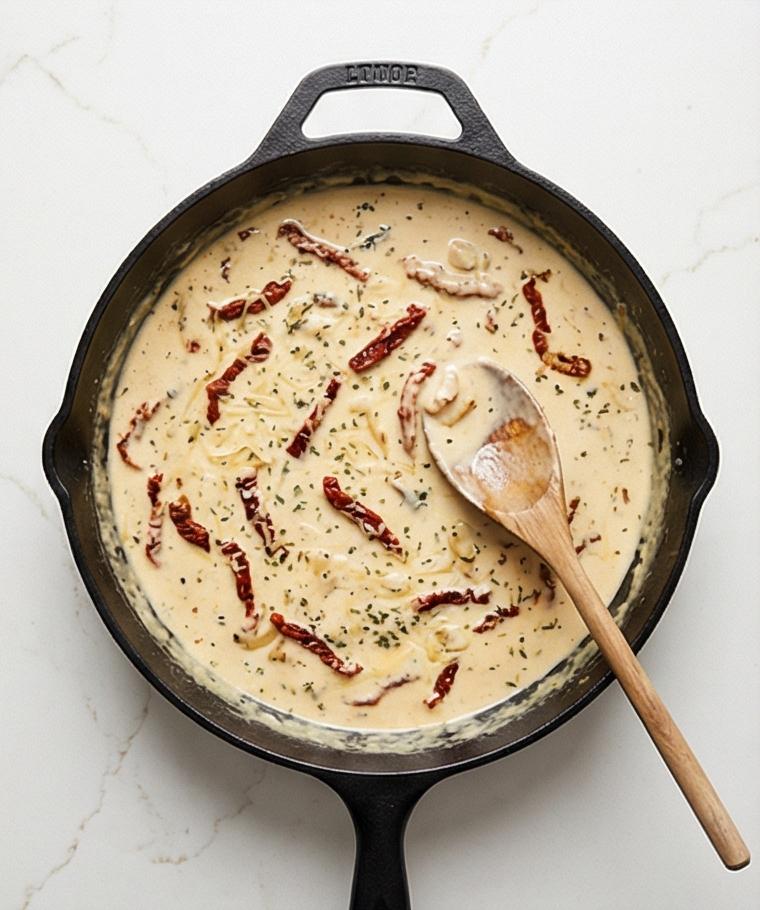
Reduce heat to medium, add the remaining butter and a pile of minced garlic; sweat the garlic just until fragrant — glossy, tiny translucent pieces suspended in melting butter. Deglaze with chicken broth, scraping the skillet’s fond until the liquid smells nutty and concentrated and has reduced slightly. Lower the heat and stir in heavy cream, then fold in thinly sliced sun-dried tomatoes, dried oregano and thyme so the sauce becomes a pale, tomato-flecked cream. Bring to a gentle simmer until it thickens enough to coat the back of a spoon. Lower the heat and whisk in freshly grated Parmesan a handful at a time until fully melted into a silky, slightly glossy sauce that clings and stretches in thin strings. Taste and brighten with a little lemon juice if you like — the sauce should feel rich, tangy, and balanced.
Step 4: Nestle the Chicken Back into the Sauce and Prepare to Bake
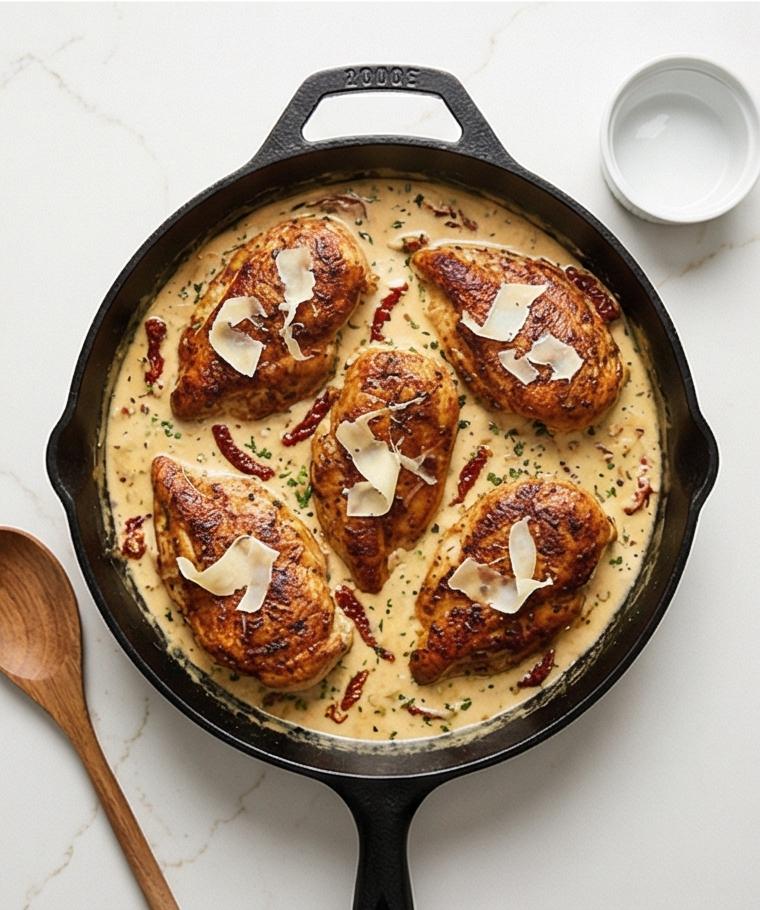
Slide the seared breasts back into the skillet, nestling each piece into the warm cream so the sauce laps up around their edges. Spoon extra sauce over each crown so the top is lightly coated and the sun-dried tomato slivers and flecks of herb are visible on the meat. The skillet now reads as a single composed unit — bronzed poultry sitting in a glossy, herb-flecked cream with parmesan melting at the seams — ready for finishing in the oven.
Step 5: Finish, Rest, and Garnish for Serving
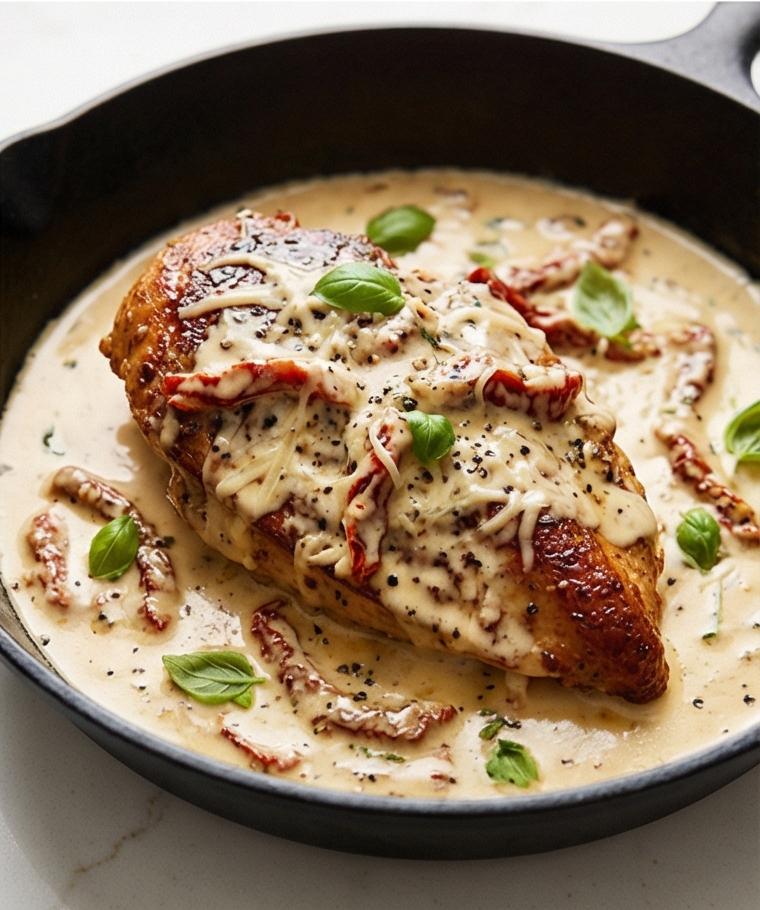
Bake until just cooked through (the chicken should be springy and cooked to a safe doneness); remove the hot skillet to a heatproof surface and stir in chopped fresh basil, loosening the sauce with a splash of hot water or broth if necessary to retain a silky pourable consistency. Let the chicken rest in the molten sauce for a few minutes so juices redistribute, then finish with an extra dusting of freshly grated Parmesan, a few small basil leaves, and a light grind of black pepper. Serve the skillet directly on the countertop as a single, round composed dish, spooning sauce over each breast and offering pasta, mashed potatoes, or crusty bread alongside to soak up the glossy sauce.
Making It Your Own
I like to experiment with this Marry Me Chicken Recipe depending on season and mood. For a lighter summer version I swap heavy cream for half-and-half and add a splash of white wine when I deglaze, then fold in a handful of fresh cherry tomatoes at the end. When I want more rustic comfort I use boneless, skinless thighs and a spoonful of sun-dried tomato pesto for extra umami. For a dairy-free version I replace cream and Parmesan with coconut cream and nutritional yeast, and I add extra lemon to balance the richness. Small changes let you tailor the dish to your pantry or guests without losing what makes it special.
How to Serve
This skillet is perfect for casual dinners or small celebrations. If you are hosting four, serve the skillet straight to the table with a platter of buttered pasta tossed in olive oil and parsley so guests can spoon the sauce over their pasta. For a romantic two-person dinner, halve the portions and plate each breast on a bed of creamy mashed potatoes with a few basil leaves atop. When feeding a crowd, keep the chicken warm in a low oven and offer bowls of grated Parmesan, lemon wedges, and chopped basil so guests can personalize their plates.
Storage and Reheating Tips
Cool the leftover chicken to room temperature within two hours, then transfer to an airtight container and refrigerate for up to 3 days. The sauce firms as it cools; this is normal.
To reheat, gently warm on the stovetop over low heat with a splash of broth or water to loosen the sauce, stirring until hot and glossy. If you prefer the oven, cover the skillet with foil and bake at 300°F (150°C) until just warmed through.
Whoops-Proofing: Common Mistakes and How to Avoid Them
Overcrowding the pan prevents a good sear; cook the breasts in a single layer and give them space so they brown instead of steam. If they stick, wait another 30 seconds and they will release when properly caramelized.
Adding cheese too quickly into very high heat causes clumping; remove from direct high heat and whisk the Parmesan in gradually so it melts into a silky sauce. Finally, do not skip patting the chicken dry before dredging; moisture kills the crust.
Final Thoughts and an Invitation
If you try this Marry Me Chicken Recipe, start simple and then make it your own. The combination of seared chicken, sun-dried tomatoes, and Parmesan cream is reliably comforting and always seems to make ordinary nights feel a little more special. Let me know which variation becomes your favorite.
Frequently Asked Questions.
- What temperature should the chicken reach when finished? The chicken is done at 165°F (74°C); it should be springy and juices should run clear.
- Can I use chicken thighs instead of breasts? Yes, boneless thighs work well and are more forgiving; reduce bake time slightly if pieces are smaller.
- Can I make the sauce ahead? You can make the sauce up to a day ahead and gently rewarm, then nestle freshly seared chicken into it before finishing in the oven.
- Is there a dairy-free version that still tastes good? Use coconut cream and nutritional yeast for a dairy-free sauce, and increase lemon for brightness.
- What should I serve with Marry Me Chicken Recipe? Pasta, mashed potatoes, or crusty bread are classic choices to soak up the sauce.
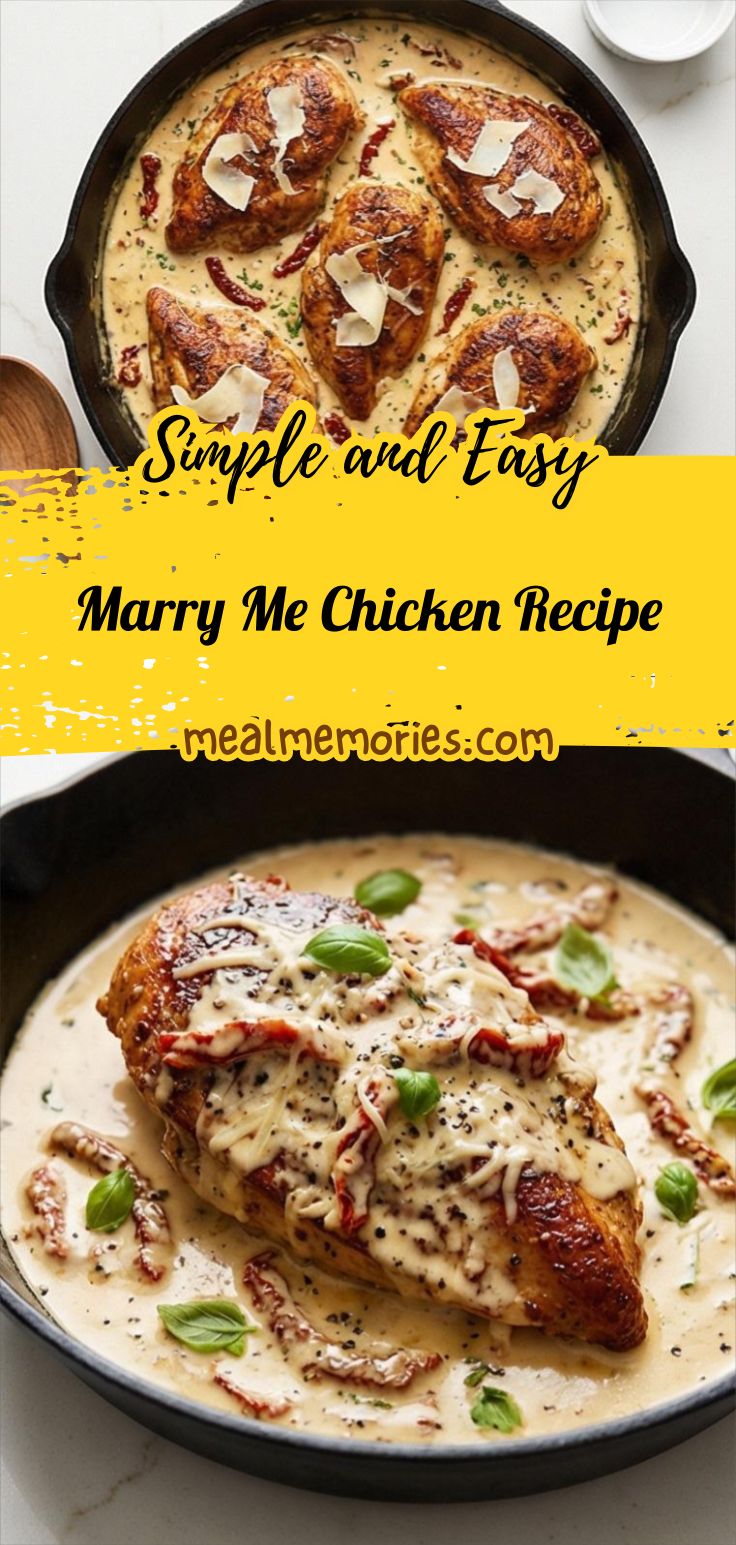
Marry Me Chicken Recipe
Make Marry Me Chicken Recipe tonight: seared chicken in a sun-dried tomato cream sauce, ready in under an hour.
Ingredients
Instructions
Step 1: Preheat and Ready the Skillet, Trim and Dry the Chicken
Preheat the oven to 375°F (190°C) and set an oven-safe 10–12 inch skillet to the side; this will be the primary cooking and serving vessel. On a clean cutting board, trim any excess fat from the four boneless, skinless chicken breasts and, if any pieces are unevenly thick, butterfly or gently pound them to an even thickness. Pat each piece very dry with paper towels — the drying is key for a deep, even brown crust. In a small bowl mix the salt, freshly ground black pepper, garlic powder, sweet paprika and crushed red pepper flakes; season both sides of each breast, pressing the rub into the meat. Lightly dredge each seasoned breast in a thin coating of all-purpose flour, shaking off the excess so only a whisper of flour remains on the surface. This yields dry, evenly seasoned, lightly-dusted cutlets ready to brown.
Step 2: Sear to a Deep Golden Crust and Rest
Heat 2 tablespoons extra-virgin olive oil and 1 tablespoon butter in the skillet until the fat shimmers, then lay the floured cutlets in a single layer without crowding. Sear undisturbed until a deep, caramelized golden edge forms (about 4–5 minutes), flip and sear the second side until both faces are richly browned but not cooked through. Transfer the seared breasts to a plate and tent loosely with foil to rest; the surface will show a crisp, bronzed crust with tiny flour-caramelized textures and a slight sheen from the fond and pan fats.
Step 3: Build an Aromatic, Emulsified Cream Sauce
Reduce heat to medium, add the remaining butter and a pile of minced garlic; sweat the garlic just until fragrant — glossy, tiny translucent pieces suspended in melting butter. Deglaze with chicken broth, scraping the skillet’s fond until the liquid smells nutty and concentrated and has reduced slightly. Lower the heat and stir in heavy cream, then fold in thinly sliced sun-dried tomatoes, dried oregano and thyme so the sauce becomes a pale, tomato-flecked cream. Bring to a gentle simmer until it thickens enough to coat the back of a spoon. Lower the heat and whisk in freshly grated Parmesan a handful at a time until fully melted into a silky, slightly glossy sauce that clings and stretches in thin strings. Taste and brighten with a little lemon juice if you like — the sauce should feel rich, tangy, and balanced.
Step 4: Nestle the Chicken Back into the Sauce and Prepare to Bake
Slide the seared breasts back into the skillet, nestling each piece into the warm cream so the sauce laps up around their edges. Spoon extra sauce over each crown so the top is lightly coated and the sun-dried tomato slivers and flecks of herb are visible on the meat. The skillet now reads as a single composed unit — bronzed poultry sitting in a glossy, herb-flecked cream with parmesan melting at the seams — ready for finishing in the oven.
Step 5: Finish, Rest, and Garnish for Serving
Bake until just cooked through (the chicken should be springy and cooked to a safe doneness); remove the hot skillet to a heatproof surface and stir in chopped fresh basil, loosening the sauce with a splash of hot water or broth if necessary to retain a silky pourable consistency. Let the chicken rest in the molten sauce for a few minutes so juices redistribute, then finish with an extra dusting of freshly grated Parmesan, a few small basil leaves, and a light grind of black pepper. Serve the skillet directly on the countertop as a single, round composed dish, spooning sauce over each breast and offering pasta, mashed potatoes, or crusty bread alongside to soak up the glossy sauce.
Notes
- Pat the chicken very dry before seasoning to ensure a deep, even sear.
- Use freshly grated Parmesan for the smoothest, creamiest sauce.
- Loosen the sauce with a splash of hot broth or water when reheating to restore a silky texture.
- For extra heat, increase crushed red pepper flakes to 1/2 teaspoon or add a pinch of red pepper when deglazing.
- Let the chicken rest in the sauce for a few minutes after baking so juices redistribute.