Fudge Recipe has been in my rotation for years, and I still get a small thrill every time the sugars snap, the chocolate melts, and the kitchen fills with that warm, nostalgic aroma. I first learned this Fudge Recipe from a friend who swore by the marshmallow creme trick, and it immediately became my go-to for gifts and last-minute gatherings. I love how forgiving it is: a few careful minutes at the stove and you have glossy, creamy squares that everyone fights over. If you want a simple showstopper that feels a bit celebratory, this is it.
How This Fudge Recipe Became My Rainy-Day Favorite
There was a rainy afternoon when I needed something to lift a gray mood, so I dug through the pantry and made this Fudge Recipe on a whim. The house smelled like caramelized sugar within minutes, clouds pressed up against the windows, and I kept sneaking tastes as the mixture cooled. I remember the satisfying, slightly sticky texture as I folded in the marshmallow creme and the way the chocolate sheen shifted to a satiny matte as it set. The first batch disappeared in an hour, and that day taught me that this recipe is really about comforting ritual as much as dessert. Since then I bring it to potlucks, wrap it in wax paper for neighbors, and make it when I want a small, reliably joyful ceremony.
The Ingredients That Make It Sing
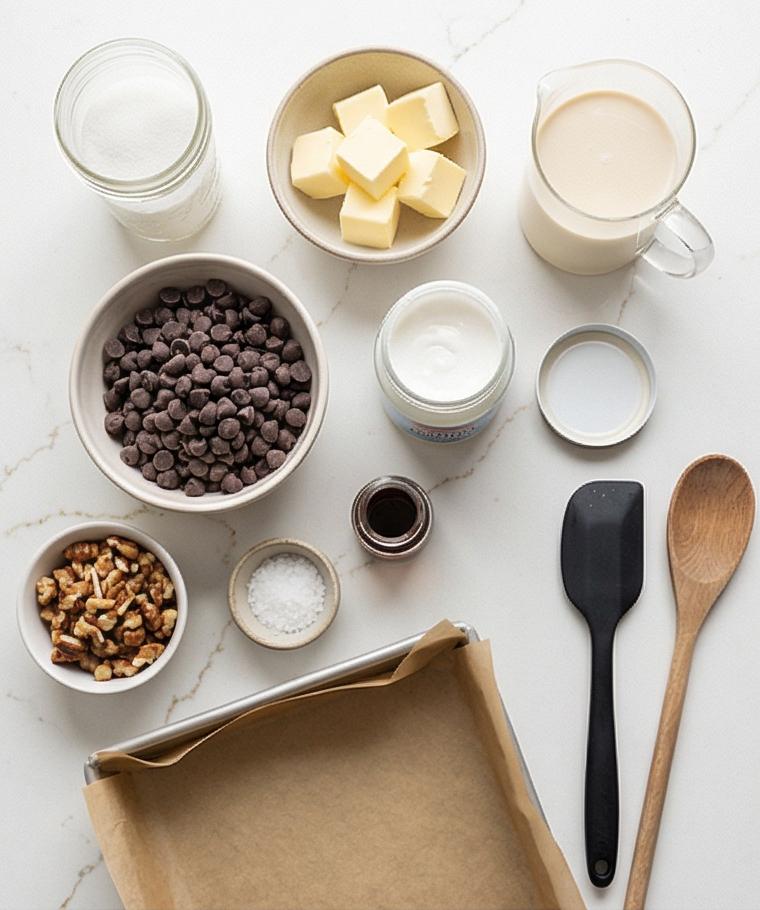
- Granulated Sugar: The backbone of texture and sweetness; use good white sugar and avoid substitutes for the classic set.
- Unsalted Butter: Adds richness and helps with texture; browned butter is a deeper option but watch the timing.
- Evaporated Milk: Gives body without extra sweetness; do not replace with sweetened condensed milk.
- Semi-Sweet Chocolate: The flavor anchor; use chips for convenience or finely chopped bar for silkier melt.
- Marshmallow Creme: Stabilizes and softens the fudge; a little goes a long way for that classic chew.
- Nuts (optional): Walnuts or pecans add crunch; toast lightly and chop coarsely for best texture.
Essential Tools For Smooth Fudge-Making
A few reliable tools make this Fudge Recipe easy and predictable. A heavy-bottomed saucepan spreads heat so the sugar cooks evenly and reduces hot spots. A candy thermometer takes the guesswork out of reaching the soft-ball stage; if you do not have one, a cold-water test works but is less precise. Use a heat-resistant spatula for stirring and a parchment-lined 8-inch square pan for easy removal. A small dry skillet for toasting nuts brings out their oils and aroma. For slicing, a long sharp knife wiped between cuts gives clean edges. Alternatives like a silicone spatula or metal pan work, but adjust times and watch closely.
Step-by-Step Preparation Guide.
Step 1: Prepare the pan and toast the nuts
Line an 8-inch (20 cm) square baking pan with a parchment sling, leaving a generous 2-inch overhang on two sides and lightly grease the parchment and any exposed pan sides with a smear of neutral oil or softened butter. If using nuts, toast them in a dry skillet until fragrant and lightly browned, then cool and coarsely chop—this adds a warm, toasty crunch that will punctuate the final creamy squares.
Step 2: Combine sugar, butter, and evaporated milk
In a medium heavy-bottomed saucepan combine the granulated sugar, room-temperature cubed butter, and well-shaken evaporated milk. Stir with a heat-resistant spatula or wooden spoon just until the sugar is evenly moistened and the butter is distributed; the mixture will look grainy but uniformly damp and pale. Keep your tools close and steady—the texture at this stage is loose and wet, a precursor to the glossy caramelization to come.
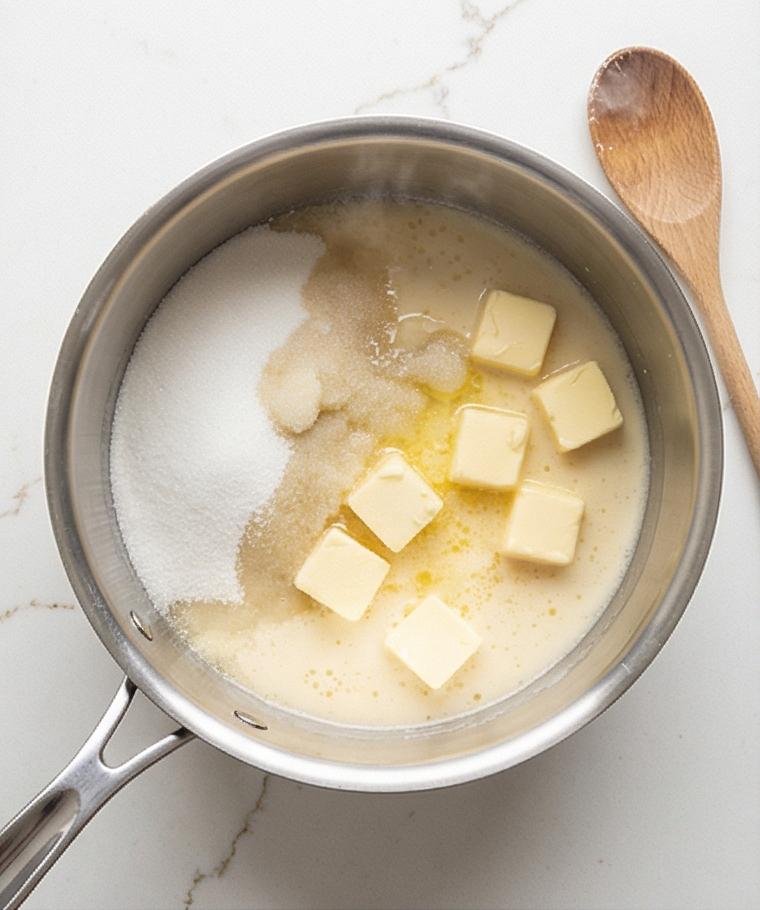
Step 3: Heat to a full rolling boil and cook to soft‑ball stage
Place the saucepan over heat (stove omitted from imagery) and stir constantly, scraping the bottom and sides, until the mixture comes up to a vigorous, full rolling boil. Attach a candy thermometer (tip not touching the bottom) and continue stirring until the mixture thickens, becomes noticeably glossy and syrupy, and reaches the soft‑ball stage; the surface will be covered with lively, churning bubbles and the syrup will cling more heavily to the spoon—this is the decisive Maillard and sugar-concentration transformation.
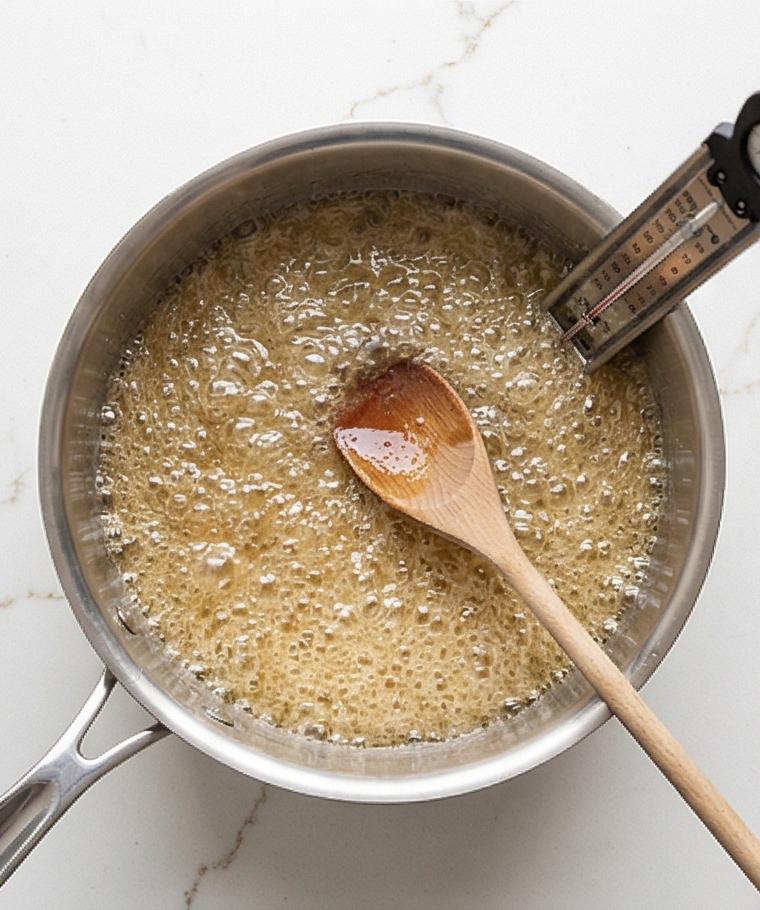
Step 4: Remove from heat and melt in the chocolate
As soon as the sugar syrup reaches the target stage, remove the pan from the heat and set it on a heat-safe trivet. Immediately scatter the semi‑sweet chocolate chips into the hot syrup and let them sit for 20–30 seconds to start melting, then stir vigorously with your greased spatula until the chocolate is completely melted and the mixture appears smooth, glossy, and unified—thick, satin-like, and losing some initial sheen as it cools.
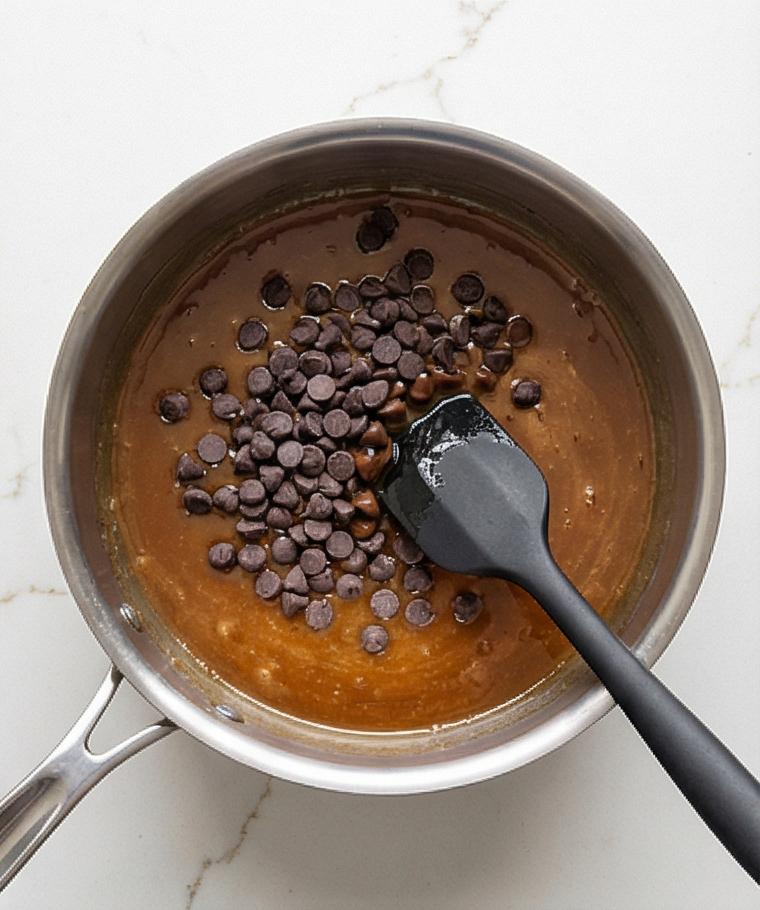
Step 5: Fold in marshmallow creme, vanilla, salt, nuts and transfer to the pan
Stir in the marshmallow creme, vanilla extract, and fine salt, folding energetically until the marshmallow is fully incorporated and the fudge takes on a dense, slightly tacky texture that resists the spoon. Quickly fold in the toasted chopped nuts if using, then immediately scrape and spread the warm, pliable fudge into the prepared parchment‑lined 8-inch square pan with the greased spatula, pressing gently to smooth the surface. If desired, finish with a light scattering of flaky sea salt across the warm top for a glossy, crunchy contrast.
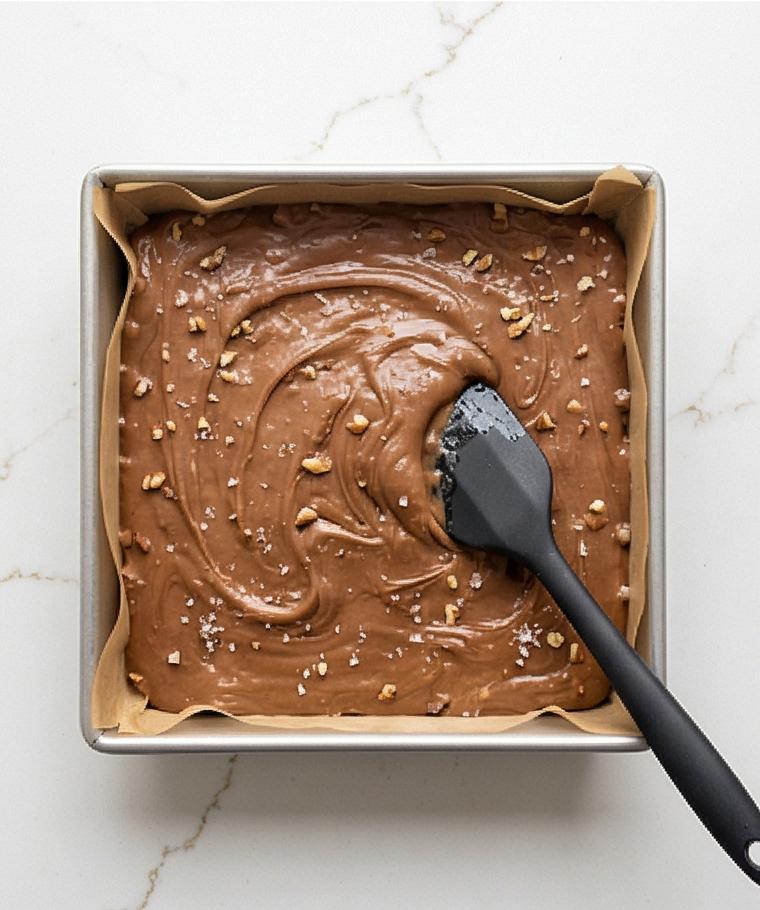
Step 6: Cool, cut, and present the squares
Allow the fudge to cool and set at room temperature until firm, then use the parchment sling to lift the slab from the pan and place it on a cutting surface. Using a long sharp knife wiped with a warm damp cloth between cuts, slice into clean 1-inch squares. Arrange the neat, dense squares back in the square pan or on the parchment for serving—the cut edges should be satin‑smooth, the interior creamy, and the nut pieces visible as textural islands on the surface.
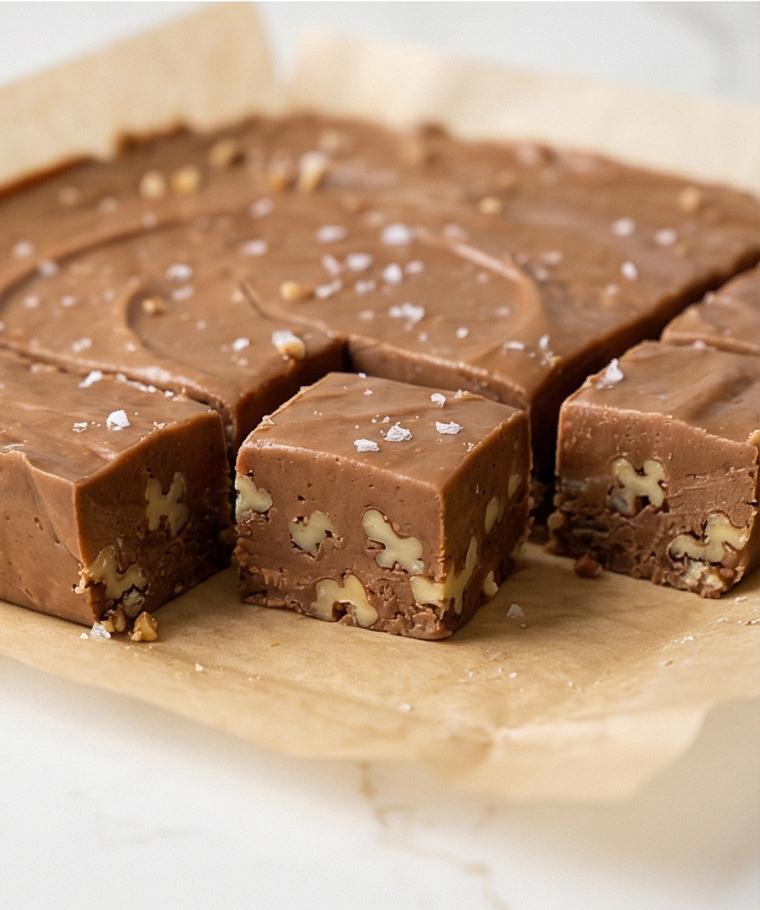
Making It Your Own
I like to swap half the semi-sweet chocolate for chopped dark chocolate when I want more bitter depth. For a nut-free house, I leave the walnuts out and fold in toasted coconut for a crunchy contrast. Around the holidays I swirl in a tablespoon of peppermint extract and press crushed candy canes on top. For a caramel twist, fold in a ribbon of soft caramel before the fudge fully sets. If you need a vegan version, try a vegan chocolate and full-fat coconut evaporated-style milk alternative and skip the marshmallow creme or use a vegan marshmallow product. These experiments are small, reversible tweaks that sing.
How to Serve
When I host, I arrange the fudge squares on a small platter layered with parchment and garnish some with a sprinkle of flaky salt and others with a dusting of cocoa for visual contrast. For a dessert buffet, set a bowl of assorted toppings nearby so guests can pick favorites. To stretch servings, cut into slightly smaller pieces and serve alongside espresso or a sharp cheese plate to balance sweetness. If gifting, stack squares in a small box separated by parchment and tie with twine; a dozen squares fits neatly in standard small tins.
Storage and Reheating Tips
Store the fudge in an airtight container at room temperature for up to 2 weeks; separate layers with parchment to prevent sticking. If your kitchen is warm, refrigerate to keep the texture firm, but bring pieces to room temperature before serving so the flavors bloom.
For longer storage, freeze wrapped squares in a single layer for up to 3 months, then thaw in the fridge overnight and come to room temperature before serving. Avoid reheating fudge; instead, gently let it soften at room temperature if it becomes too firm.
Common Snafus and How to Avoid Them
A common mistake is rushing the boil stage or not stirring enough, which can lead to grainy fudge. Use a steady stirring motion and a reliable thermometer to hit the soft-ball stage accurately.
Another pitfall is adding the chocolate while the syrup is too cool; add it immediately off the heat so it melts smoothly. If your nuts go in too warm they can sink, so fold them in quickly and transfer to the pan without delay.
Final Thoughts
Give this Fudge Recipe a try the next time you want a small, showy treat that feels like a celebration. It is forgiving, adaptable, and rewarding, and once you make it a couple of times you will find your favorite tweaks. Happy cooking and enjoy every glossy, chocolatey square.
Frequently Asked Questions.
- What is the best chocolate to use for this fudge? Use good-quality semi-sweet chocolate chips or finely chopped semi-sweet chocolate; chopped bars melt more uniformly for a silkier texture.
- Can I use sweetened condensed milk instead of evaporated milk? No, sweetened condensed milk will make the fudge overly sweet and change the set; stick with evaporated milk for balance.
- How do I know when the mixture reaches the soft-ball stage? Use a candy thermometer and aim for the soft-ball temperature, or drop a small amount into cold water and see if it forms a soft, pliable ball.
- Can I make this without marshmallow creme? The marshmallow creme helps texture and chew; you can omit it but expect a firmer, less yielding fudge.
- How long does the fudge keep? Stored in an airtight container at room temperature, the fudge keeps up to 2 weeks, or freeze for up to 3 months.
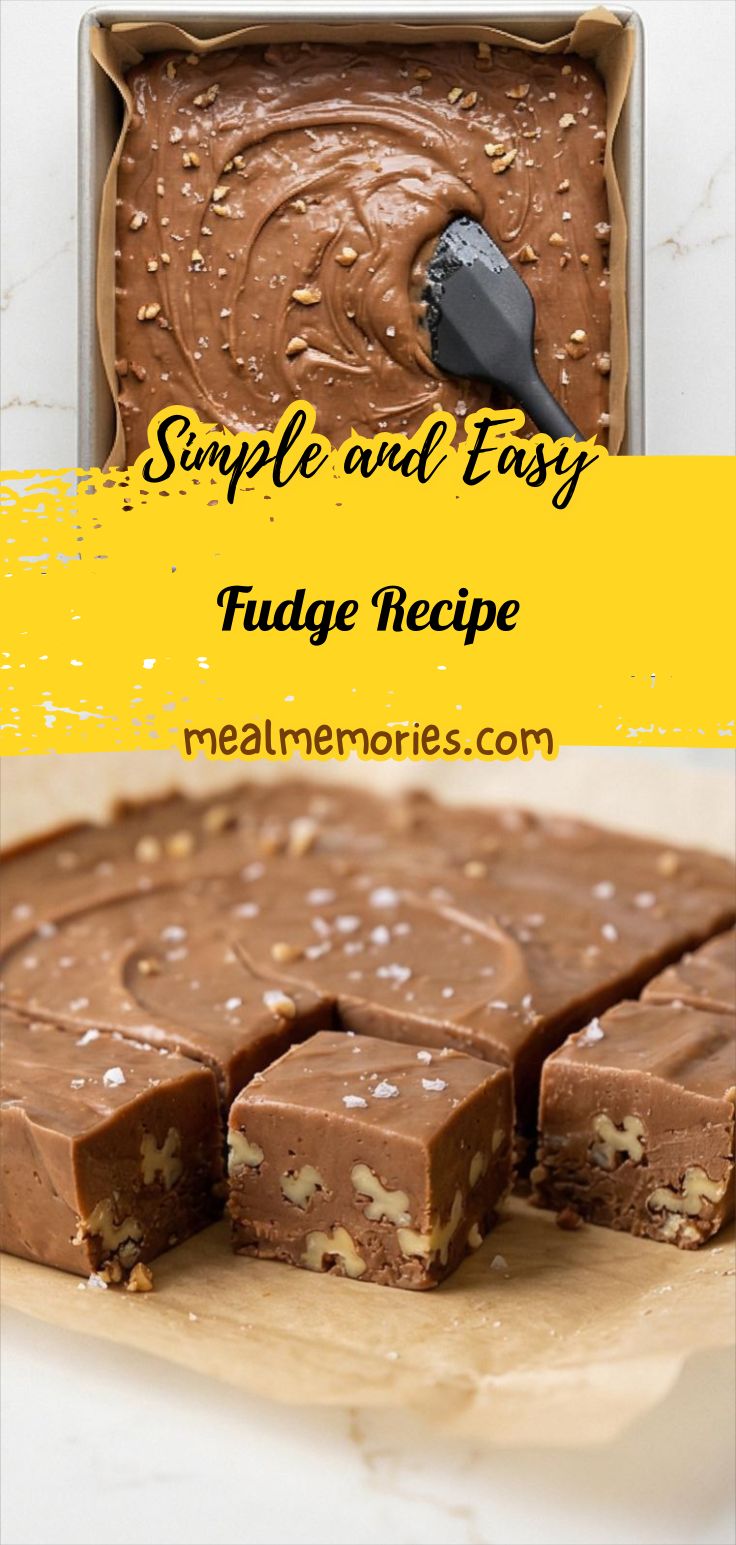
Fudge Recipe
Make Fudge Recipe now: rich, creamy chocolate squares with toasted nuts, ready in about 35 minutes.
Ingredients
Instructions
Step 1: Prepare the pan and toast the nuts
Line an 8-inch (20 cm) square baking pan with a parchment sling, leaving a generous 2-inch overhang on two sides and lightly grease the parchment and any exposed pan sides with a smear of neutral oil or softened butter. If using nuts, toast them in a dry skillet until fragrant and lightly browned, then cool and coarsely chop—this adds a warm, toasty crunch that will punctuate the final creamy squares.
Step 2: Combine sugar, butter, and evaporated milk
In a medium heavy-bottomed saucepan combine the granulated sugar, room-temperature cubed butter, and well-shaken evaporated milk. Stir with a heat-resistant spatula or wooden spoon just until the sugar is evenly moistened and the butter is distributed; the mixture will look grainy but uniformly damp and pale. Keep your tools close and steady—the texture at this stage is loose and wet, a precursor to the glossy caramelization to come.
Step 3: Heat to a full rolling boil and cook to soft‑ball stage
Place the saucepan over heat (stove omitted from imagery) and stir constantly, scraping the bottom and sides, until the mixture comes up to a vigorous, full rolling boil. Attach a candy thermometer (tip not touching the bottom) and continue stirring until the mixture thickens, becomes noticeably glossy and syrupy, and reaches the soft‑ball stage; the surface will be covered with lively, churning bubbles and the syrup will cling more heavily to the spoon—this is the decisive Maillard and sugar-concentration transformation.
Step 4: Remove from heat and melt in the chocolate
As soon as the sugar syrup reaches the target stage, remove the pan from the heat and set it on a heat-safe trivet. Immediately scatter the semi‑sweet chocolate chips into the hot syrup and let them sit for 20–30 seconds to start melting, then stir vigorously with your greased spatula until the chocolate is completely melted and the mixture appears smooth, glossy, and unified—thick, satin-like, and losing some initial sheen as it cools.
Step 5: Fold in marshmallow creme, vanilla, salt, nuts and transfer to the pan
Stir in the marshmallow creme, vanilla extract, and fine salt, folding energetically until the marshmallow is fully incorporated and the fudge takes on a dense, slightly tacky texture that resists the spoon. Quickly fold in the toasted chopped nuts if using, then immediately scrape and spread the warm, pliable fudge into the prepared parchment‑lined 8-inch square pan with the greased spatula, pressing gently to smooth the surface. If desired, finish with a light scattering of flaky sea salt across the warm top for a glossy, crunchy contrast.
Step 6: Cool, cut, and present the squares
Allow the fudge to cool and set at room temperature until firm, then use the parchment sling to lift the slab from the pan and place it on a cutting surface. Using a long sharp knife wiped with a warm damp cloth between cuts, slice into clean 1-inch squares. Arrange the neat, dense squares back in the square pan or on the parchment for serving—the cut edges should be satin‑smooth, the interior creamy, and the nut pieces visible as textural islands on the surface.
Notes
- Use a candy thermometer for consistent results.
- Toast nuts lightly to enhance flavor and texture.
- Do not substitute sweetened condensed milk for evaporated milk.
- Use a parchment sling for easy removal and clean slices.
- Bring refrigerated fudge to room temperature before serving.