Teriyaki Salmon Recipe has been a weeknight lifesaver in my kitchen for years. I stumbled into this version while chasing a glossy, sticky glaze that clings to crisped skin, and I never looked back. The balance of sweet, salty, and toasty sesame makes this dish feel special without fussy techniques, so it’s become my go-to when I want dinner to feel a little celebratory. I love how the sauce can be made ahead, which means you can focus on a perfect sear and a fast roast when guests arrive.
How This Recipe Became My Rainy-Day Favorite
I remember the first time I made this Teriyaki Salmon Recipe for a friend during a slow, rainy evening. The kitchen smelled of warm honey and ginger as steam rose from the pan. We opened a bottle of wine, and the sound of rain on the windows made everything feel softer. When the salmon came out with crisp skin and a glassy glaze, the first bite prompted an audible “wow” from the table. That warm, slightly sweet glaze and the snap of the skin became something I chased in other recipes. This dish now carries a little memory of that night: comfort, a touch of ritual, and the kind of easy elegance that turns a simple dinner into an event. Each time I make the Teriyaki Salmon Recipe I find myself slowing down to appreciate the sizzle, the aroma, and the bright pop of sliced scallions on top.
Primary Ingredients and What They Do
- Salmon fillets (skin-on): The star of the Teriyaki Salmon Recipe. Pick firm, glossy fillets with bright flesh and intact skin for crisping. Substitute trout for a lighter option.
- Low-sodium soy sauce: Provides savory umami backbone. Use tamari for gluten-free adjustments.
- Mirin: Adds sweetness and shine; sub a mix of rice vinegar plus a touch of sugar if you don’t have mirin.
- Sake or dry white wine: Deepens flavor; plain water works in a pinch.
- Honey (or light brown sugar): Sweetener that carmelizes; use maple syrup for a different warmth.
- Toasted sesame oil: Small amount for toasty aroma; omit if you prefer a neutral finish.
- Garlic and fresh ginger: Fresh is essential for bright, aromatic notes; powdered versions are weaker.
- Cornstarch and water: Make the glossy, clingy sauce; arrowroot works as a substitute.
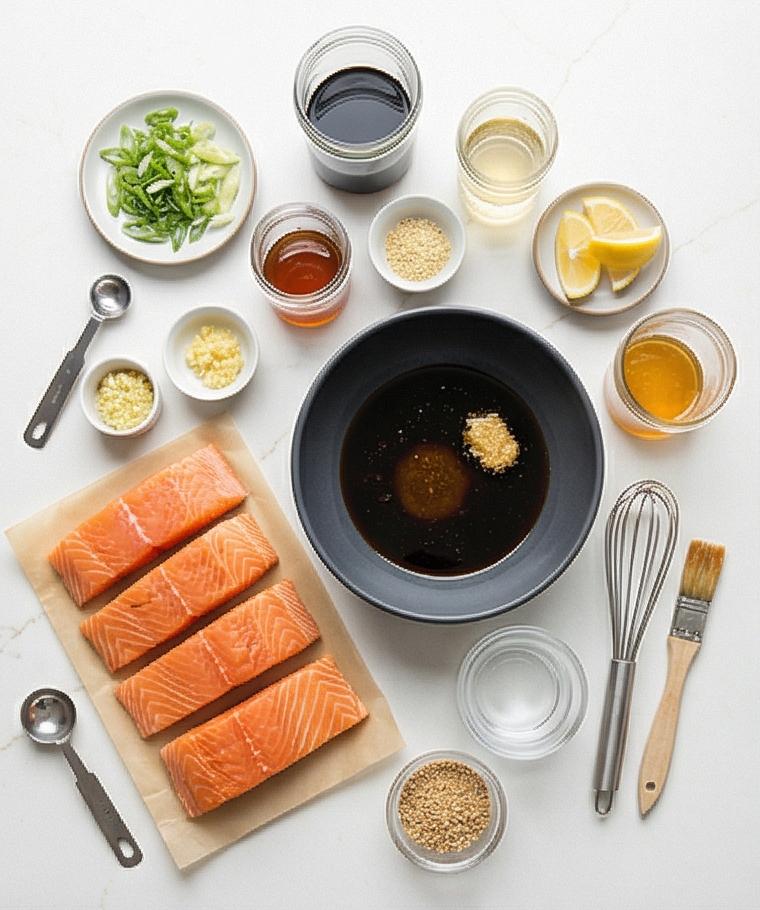
Essential Kitchen Tools and Why They Matter
A few reliable tools really lift this Teriyaki Salmon Recipe. A heavy skillet (preferably stainless steel or cast iron) gives a steady sear and even browning, while a thin metal fish spatula makes flipping delicate fillets easy without tearing the skin. A small saucepan is handy for thickening the teriyaki so you get that glossy finish. A silicone brush spreads the reserved glaze cleanly and precisely. If you don’t have a fish spatula, use a thin, wide turner; if you lack a heavy skillet, a nonstick pan will do but expect slightly less crisp skin.
- Heavy skillet (stainless or cast iron): For even heat and a crisp skin.
- Metal fish spatula or thin turner: For safe, confident flips.
- Small saucepan: To reduce and thicken the sauce.
- Silicone brush: To apply glaze without scratching.
- Measuring spoons and cup: For consistent sauce balance.
Step-by-Step Preparation Guide
Step 1: Season and rest the fillets
Pat each salmon fillet completely dry on all sides with paper towels, then sprinkle evenly with fine sea salt and freshly ground black pepper. Let the seasoned fillets sit at room temperature for about 10–15 minutes while you build the sauce; this brief rest brings the flesh closer to cooking temperature so the fillets sear evenly and the skin tightens for a crisp finish.
Step 2: Whisk the teriyaki and reserve a glaze portion
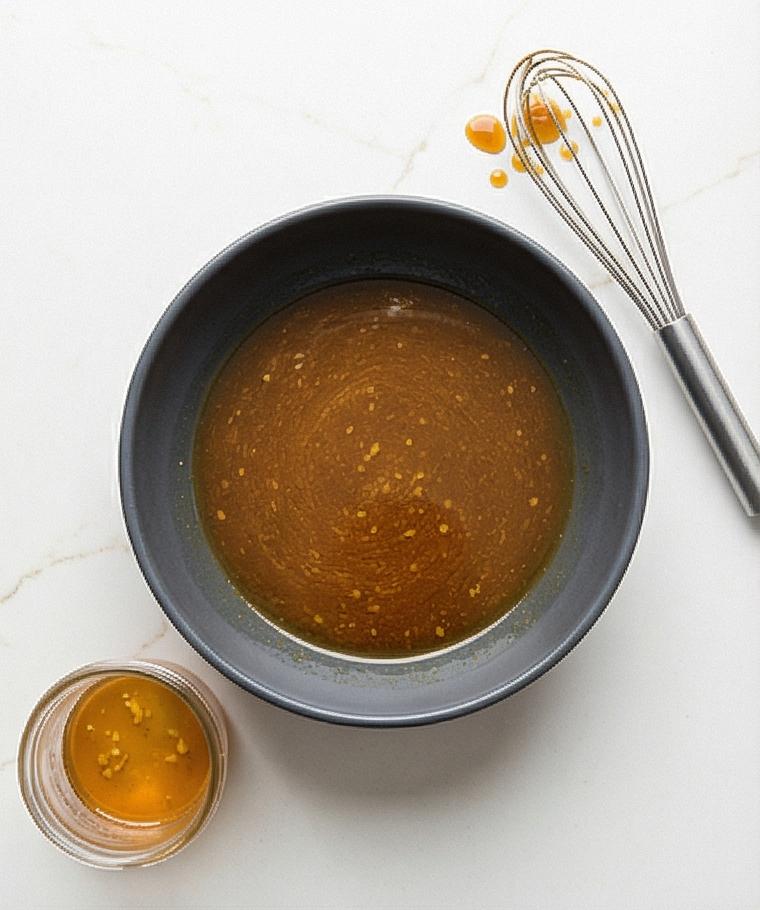
In a single medium matte charcoal ceramic bowl, whisk together low-sodium soy sauce, mirin, sake (or water), honey, toasted sesame oil, rice vinegar, finely minced garlic and freshly grated ginger until the honey is fully dissolved and the mixture is smooth and glossy. Spoon out exactly 1/4 cup of this mixture into a small clear glass jar and set it aside as the reserved glaze you’ll brush on the fish later; leave the larger bowl with the remaining sauce visually intact so it reads as the primary mixing vessel.
Step 3: Make the cornstarch slurry and thicken the sauce
Stir the cornstarch into room-temperature water in a small white ramekin until perfectly smooth, then pour the larger portion of the teriyaki from the charcoal bowl into a shallow stainless steel saucepan (all on the countertop — remember we’re only showing results). Heat until just simmering, whisk in the slurry gradually, and cook briefly until the sauce becomes glossy, syrupy and viscous — it should cling to the back of a spoon in a uniform ribbon. Transfer the still-warm, syrupy teriyaki back into the same saucepan left on the surface so the utensil and vessel continuity is preserved.
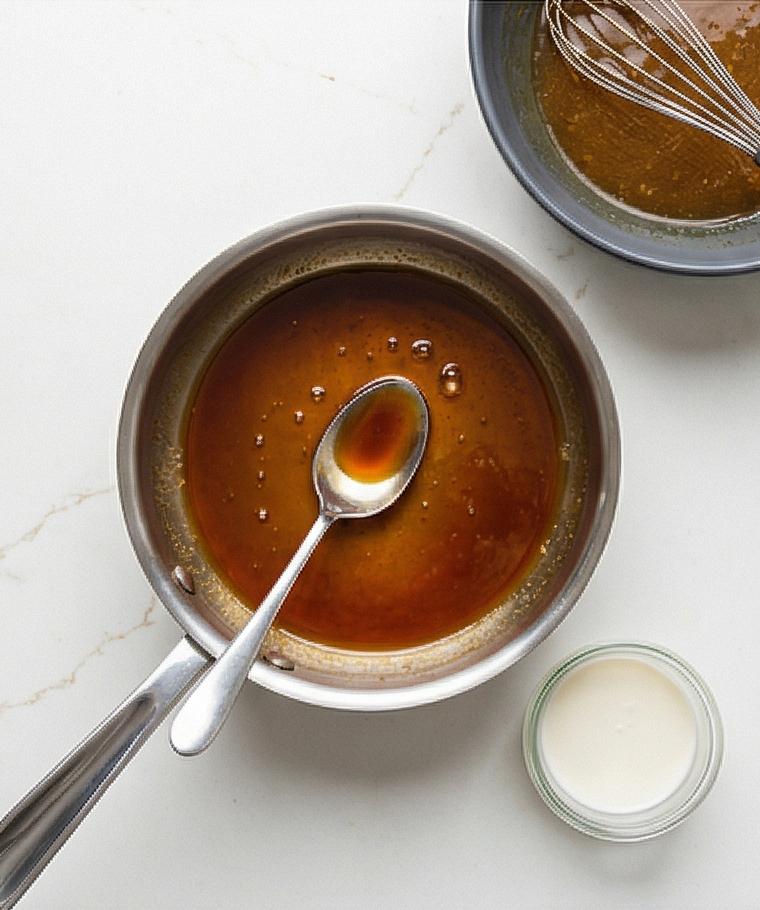
Step 4: Sear and glaze the fillets (result shown)
Heat a tablespoon of neutral oil until shimmering, then sear the salmon skin-side down until the skin is crisp and the flesh edges go opaque about one-third up. Flip, immediately brush the top and sides with about half of the reserved 1/4 cup glaze to set a sticky sheen, and let the fillets rest briefly on the skillet so the glaze adheres. Show the skillet with crisply seared skin (or nicely browned presentation side), a metal fish spatula tucked beside the fillets, and a small glaze brush with sticky amber droplets — the visual should read as the immediate post-sear, pre-roast state.
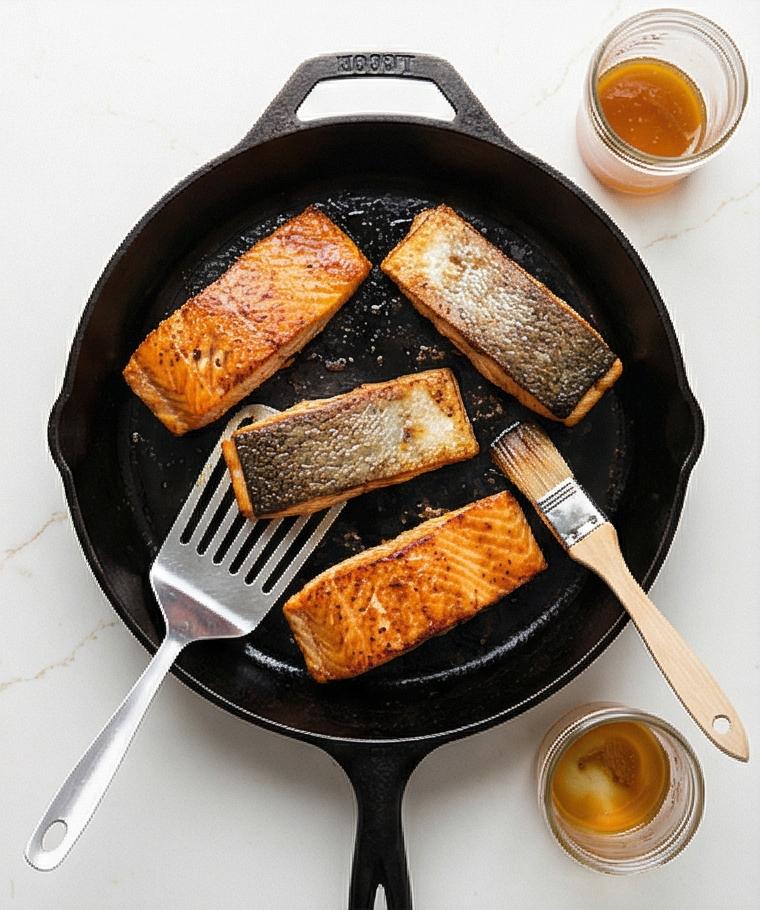
Step 5: Roast, finish with warm sauce, and rest
After setting the glaze, transfer the fillets (glazed side up) onto a rimmed rectangular baking sheet if needed and roast until just cooked through but still moist in the center; keep the same rectangular geometry for continuity. Briefly rewarm the thickened teriyaki in the saucepan until fluid and glossy, then spoon a tablespoon or two over each fillet and let the salmon rest for three minutes so the glaze relaxes and the juices redistribute. Show the roasted fillets on the rimmed rectangular pan with glossy pooling sauce, a small saucepan with a spoon showing a syrupy ribbon, and a ramekin of sesame seeds and thinly sliced scallions nearby.
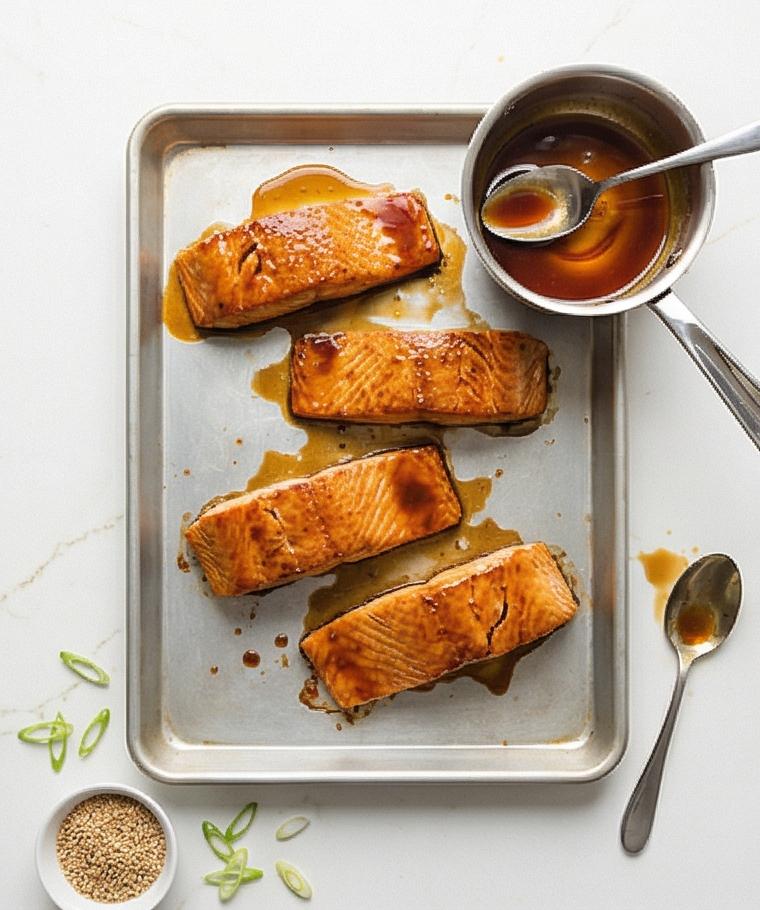
Step 6: Plate, garnish and serve (final close-up)
Transfer each glazed fillet to a warm rectangular serving platter (matching the baking geometry), nestle it beside a neat mound of steamed rice and a few steamed greens if desired, then spoon any remaining glossy teriyaki over the top. Finish with a scattering of toasted sesame seeds, delicate diagonal slices of green onion, and a lemon wedge on the side. The final image is a very close, eye-level shot emphasizing the caramelized glaze, moist flake, crisp skin edge, and glossy sauce cascading down the filet.
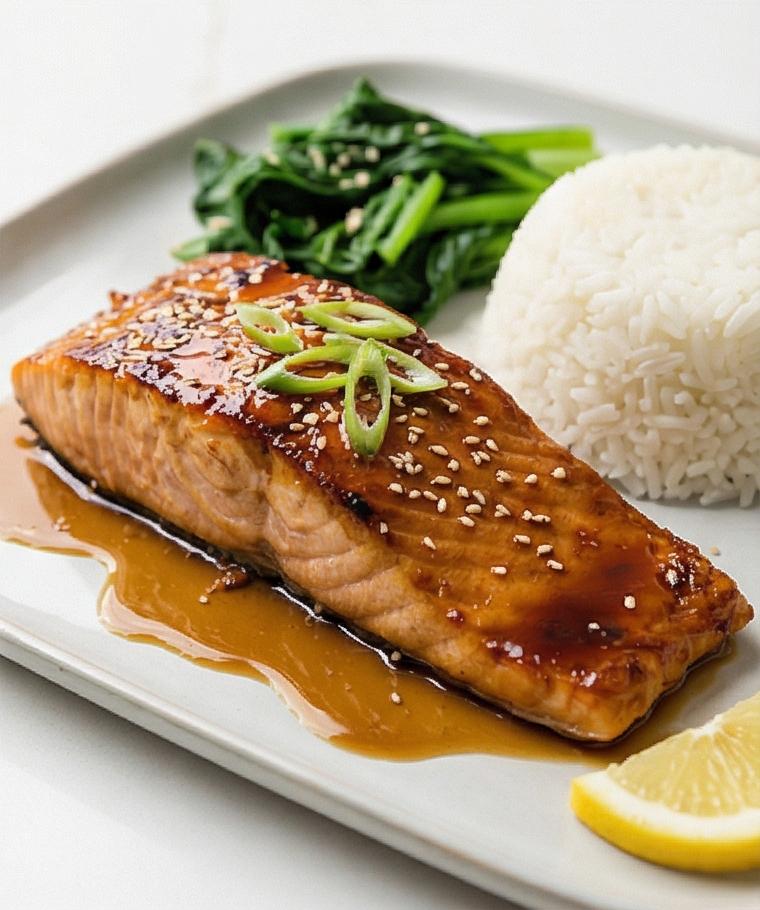
Making It Your Own
I often experiment with small swaps depending on what’s in the pantry. For a gluten-free version I use tamari and a gluten-free mirin substitute, and the salmon still sings. When I want a deeper caramelized edge I add a splash more honey to the reserved glaze and brush twice. For a lighter summer twist, I swap honey for a thinner maple syrup and finish with a squeeze of lime for brightness. I’ve also tried smoked salt on the skin for a subtle campfire note, and it was surprisingly nice. Each tiny change shifts the mood without breaking the core Teriyaki Salmon Recipe identity.
How to Serve
If I’m hosting, I warm plates in the oven so the salmon stays hot when it hits the table. Pair the Teriyaki Salmon Recipe with steamed white rice or a nutty brown rice and make a long platter of steamed greens like bok choy or broccolini for guests to share. For a casual family meal, serve individual bowls with rice, flaked salmon, and a pile of quick-pickled cucumbers. To scale up, double the sauce but sear fillets in batches to keep that crisp skin. Garnish with toasted sesame seeds and sliced scallions right before serving so they stay vibrant.
Storage and Reheating Tips
Cool leftover salmon to room temperature within an hour, then store uncovered in the refrigerator for up to 2 days in an airtight container. Keep excess sauce in a separate small jar so the fillets don’t get soggy.
When reheating, gently warm in a low oven (275 F / 135 C) for 8 to 10 minutes to preserve moisture and help the glaze relax. Alternatively, reheat briefly in a nonstick skillet over low heat with a splash of water, covered, until warmed through. Spoon a little warmed teriyaki over the top to revive the gloss.
Common Mistakes and How to Avoid Them
A common error is overcrowding the pan when searing. Give each fillet room so steam can escape and the skin crisps properly. If the pan is crowded you end up steaming instead of searing.
Another pitfall is over-thinning the glaze. Use the cornstarch slurry carefully and stop when the sauce coats the back of a spoon. If it gets too thick, whisk in a teaspoon of warm water at a time until it loosens enough to spoon.
Final Thoughts
I hope this Teriyaki Salmon Recipe encourages you to try bold, simple flavors at home. It rewards a quick bit of attention at the stove and makes a weekday feel special without fuss. Have fun with the glaze and enjoy the crisp skin and glossy sauce.
Frequently Asked Questions.
- Q: Can I use frozen salmon for this Teriyaki Salmon Recipe? A: Yes, but thaw it fully in the refrigerator and pat very dry before seasoning so you get a good sear.
- Q: How long will leftovers keep? A: Stored in an airtight container, leftovers keep 2 days in the refrigerator; keep sauce separate if possible.
- Q: Can I make the sauce ahead? A: Absolutely. The teriyaki sauce can be made up to 3 days ahead and refrigerated; rewarm gently before glazing.
- Q: What if I don’t have mirin or sake? A: Use water plus a teaspoon of sugar for mirin, and water for the sake; flavor will be slightly flatter but still tasty.
- Q: How do I get crisp skin every time? A: Dry the skin very well, heat the pan until the oil shimmers, and avoid moving the fillet until the skin releases easily.
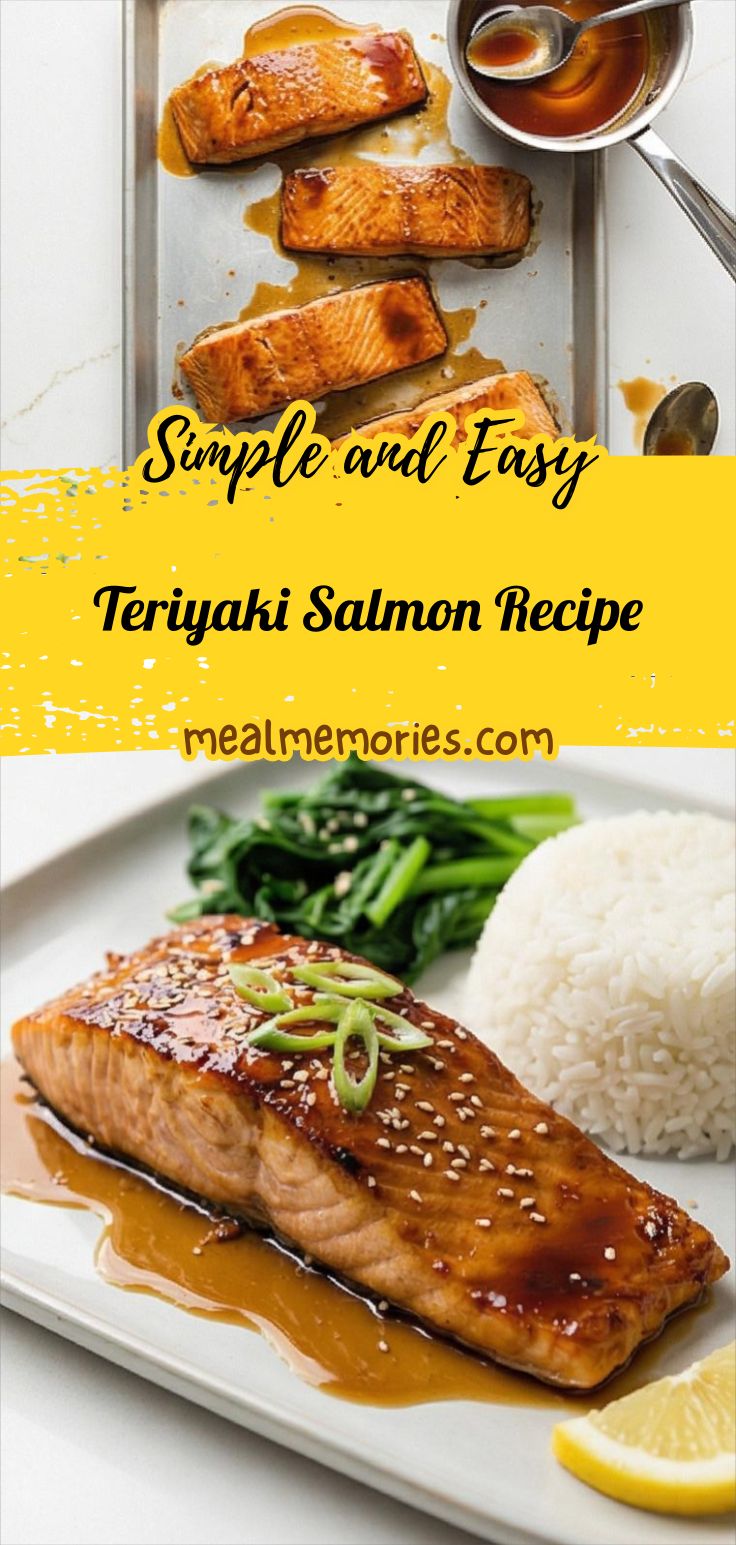
Teriyaki Salmon Recipe
Make Teriyaki Salmon Recipe tonight: seared, glazed fillets with glossy teriyaki in about 30 minutes.
Ingredients
Instructions
Step 1: Season and rest the fillets
Pat each salmon fillet completely dry on all sides with paper towels, then sprinkle evenly with fine sea salt and freshly ground black pepper. Let the seasoned fillets sit at room temperature for about 10–15 minutes while you build the sauce; this brief rest brings the flesh closer to cooking temperature so the fillets sear evenly and the skin tightens for a crisp finish.
Step 2: Whisk the teriyaki and reserve a glaze portion
In a single medium matte charcoal ceramic bowl, whisk together low-sodium soy sauce, mirin, sake (or water), honey, toasted sesame oil, rice vinegar, finely minced garlic and freshly grated ginger until the honey is fully dissolved and the mixture is smooth and glossy. Spoon out exactly 1/4 cup of this mixture into a small clear glass jar and set it aside as the reserved glaze you’ll brush on the fish later; leave the larger bowl with the remaining sauce visually intact so it reads as the primary mixing vessel.
Step 3: Make the cornstarch slurry and thicken the sauce
Stir the cornstarch into room-temperature water in a small white ramekin until perfectly smooth, then pour the larger portion of the teriyaki from the charcoal bowl into a shallow stainless steel saucepan (all on the countertop — remember we’re only showing results). Heat until just simmering, whisk in the slurry gradually, and cook briefly until the sauce becomes glossy, syrupy and viscous — it should cling to the back of a spoon in a uniform ribbon. Transfer the still-warm, syrupy teriyaki back into the same saucepan left on the surface so the utensil and vessel continuity is preserved.
Step 4: Sear and glaze the fillets (result shown)
Heat a tablespoon of neutral oil until shimmering, then sear the salmon skin-side down until the skin is crisp and the flesh edges go opaque about one-third up. Flip, immediately brush the top and sides with about half of the reserved 1/4 cup glaze to set a sticky sheen, and let the fillets rest briefly on the skillet so the glaze adheres. Show the skillet with crisply seared skin (or nicely browned presentation side), a metal fish spatula tucked beside the fillets, and a small glaze brush with sticky amber droplets — the visual should read as the immediate post-sear, pre-roast state.
Step 5: Roast, finish with warm sauce, and rest
After setting the glaze, transfer the fillets (glazed side up) onto a rimmed rectangular baking sheet if needed and roast until just cooked through but still moist in the center; keep the same rectangular geometry for continuity. Briefly rewarm the thickened teriyaki in the saucepan until fluid and glossy, then spoon a tablespoon or two over each fillet and let the salmon rest for three minutes so the glaze relaxes and the juices redistribute. Show the roasted fillets on the rimmed rectangular pan with glossy pooling sauce, a small saucepan with a spoon showing a syrupy ribbon, and a ramekin of sesame seeds and thinly sliced scallions nearby.
Step 6: Plate, garnish and serve (final close-up)
Transfer each glazed fillet to a warm rectangular serving platter (matching the baking geometry), nestle it beside a neat mound of steamed rice and a few steamed greens if desired, then spoon any remaining glossy teriyaki over the top. Finish with a scattering of toasted sesame seeds, delicate diagonal slices of green onion, and a lemon wedge on the side. The final image is a very close, eye-level shot emphasizing the caramelized glaze, moist flake, crisp skin edge, and glossy sauce cascading down the filet.
Notes
- Pat salmon very dry to ensure crisp skin.
- Reserve 1/4 cup of the sauce for glazing during searing.
- Don’t overcrowd the pan; sear in batches if needed.
- Rewarm sauce gently if refrigerated before brushing.
- Store sauce separately from salmon to avoid sogginess.