One-pan Chicken And Rice Recipe is one of those dinners I make when I want comfort without fuss. I figured out a simple rhythm for it years ago, and it still pulls people to the table every time. The dish is hands-off once it goes in the oven, but it rewards a little attention up front with crisp skin and deeply flavored rice. If you like a golden, one-pan meal that cleans up fast and tastes like it took longer, this One-pan Chicken And Rice Recipe will become a weekday favorite.
How This Dish Became My Rainy-Day Favorite
I remember the first time I tried this One-pan Chicken And Rice Recipe on a stormy evening when friends were due over. The rain tapped at the windows and the whole kitchen smelled like toasty, browned chicken and warm rice as it baked. I stood at the counter, stirring the rice in the skillet, and felt oddly proud as the aroma filled the house. When it came out of the oven the skin was crackling and the rice was glossy with little pools of herb-speckled broth. We ate by lamplight, squeezing lemon over the thighs and trading stories, and the meal felt like a small ritual that made a wet night feel cozy. That memory keeps me returning to this recipe whenever I want food that feels like home.
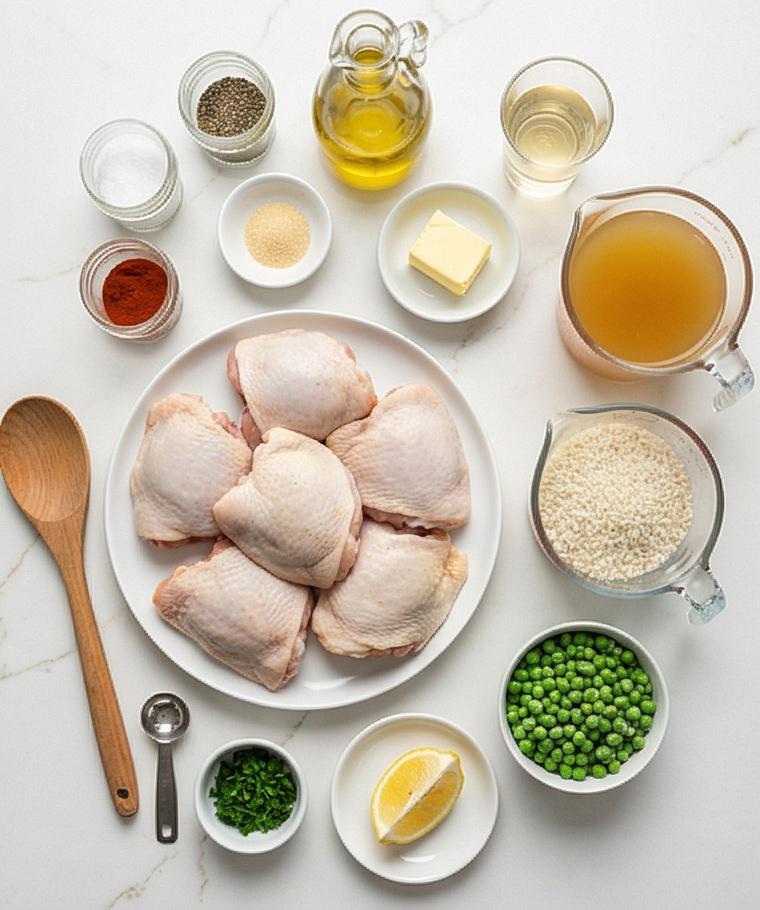
Ingredients Spotlight
- Chicken Thighs: The star of the One-pan Chicken And Rice Recipe. Bone-in, skin-on thighs give flavor and stay juicy; substitute bone-in breasts if you prefer, but watch cooking time.
- Long-grain White Rice: Absorbs the broth and stays fluffy; basmati or jasmine are great. Rinse until water runs clear to remove excess starch.
- Chicken Broth: Builds depth. Use low-sodium so you can control salt, or homemade for extra richness.
- Aromatics (Onion, Garlic, Carrot): Provide sweetness and fragrance; shallots and celery also work well.
- Olive Oil and Butter: For searing and flavor. Use all oil for a dairy-free version.
- Wine or Extra Broth: Deglazes the pan and adds brightness; skip the wine for a nonalcoholic route.
Essential Kitchen Tools and How to Use Them
A few simple tools make this One-pan Chicken And Rice Recipe effortless. A heavy, oven-safe 12-inch skillet spreads heat evenly and gives you that crisp skin edge; if you don’t have one, a Dutch oven works great. A sturdy spatula or tongs helps you sear the thighs without tearing the skin. A fine-mesh sieve comes in handy for rinsing rice so it cooks up separate. An instant-read thermometer takes the guesswork out of doneness, so you hit 165 F for the thigh meat. If you need alternatives, a large sauté pan plus an ovenproof baking dish will do, and a sheet of foil can substitute for a tight-fitting lid.
- 12-inch oven-safe skillet or Dutch oven: For even searing and baking.
- Tongs or spatula: To turn chicken without tearing.
- Fine-mesh sieve: For rinsing rice.
- Instant-read thermometer: To check chicken temperature.
- Wooden spoon or spatula: For deglazing and stirring.
Step-by-Step Preparation Guide
Step 1: Season the chicken and let it rest
Pat the six bone-in, skin-on chicken thighs very dry and trim any excess fat, then rub them evenly with 1 teaspoon kosher salt (of the total), 3/4 teaspoon freshly ground black pepper, 1 teaspoon sweet paprika, and 1/2 teaspoon garlic powder. Lay the seasoned thighs skin-side up on a small plate and let them come to room temperature for 10–15 minutes; this brief rest helps the meat cook more evenly and lets the rub sit on the skin so it crisps convincingly later.
Step 2: Sear the thighs until the skin is deeply golden and crisp
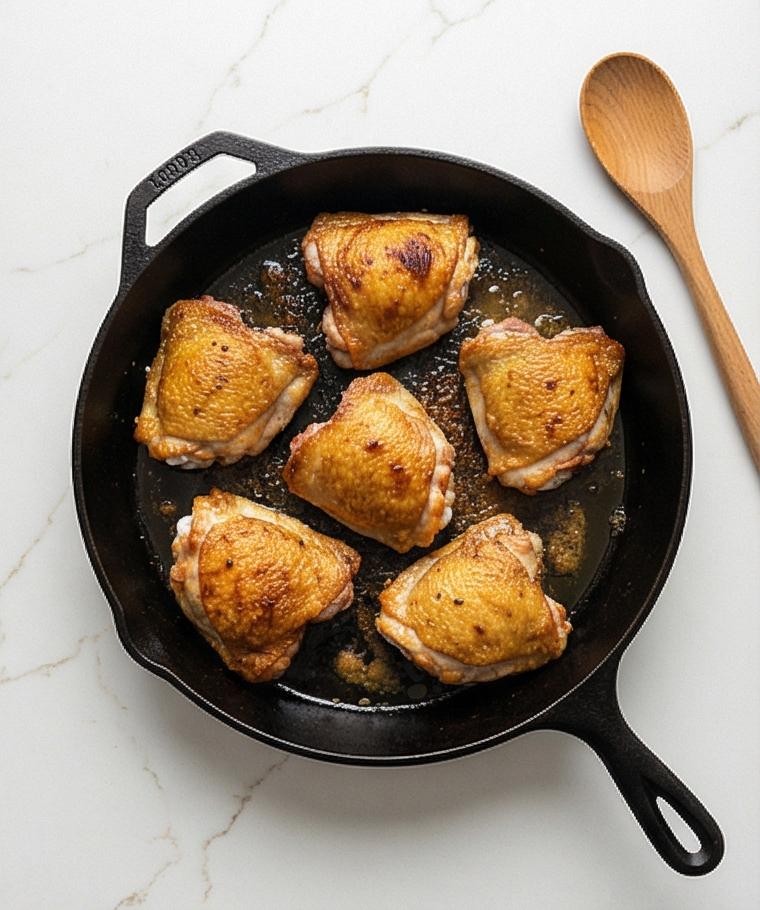
Heat 2 tablespoons olive oil and 1 tablespoon unsalted butter in your large 12-inch oven-safe skillet until the fat is shimmering. Place the thighs skin-side down and sear without moving until the skin is a deep golden-brown and visibly crisp, then flip briefly to brown the undersides. Remove the seared thighs to a plate, leaving the rendered fat and browned fond in the pan; the result should be richly caramelized, taut, bronzed skin with visible tiny blistered pores and a small pool of golden fat.
Step 3: Soften the aromatics and toast the rice in the flavored fat
Reduce heat and add the finely chopped yellow onion and the diced carrot to the skillet, stirring and scraping up the brown bits until the vegetables are softened and edged with light gold. Add the minced garlic until fragrant, then stir in the well-drained long-grain rice and the remaining 1/2 teaspoon kosher salt and optional turmeric; toss the rice so every grain is slick with fat and toasted to a pale nutty beige with tiny translucent onion flecks — each grain should look separate, glossy, and slightly toasted.
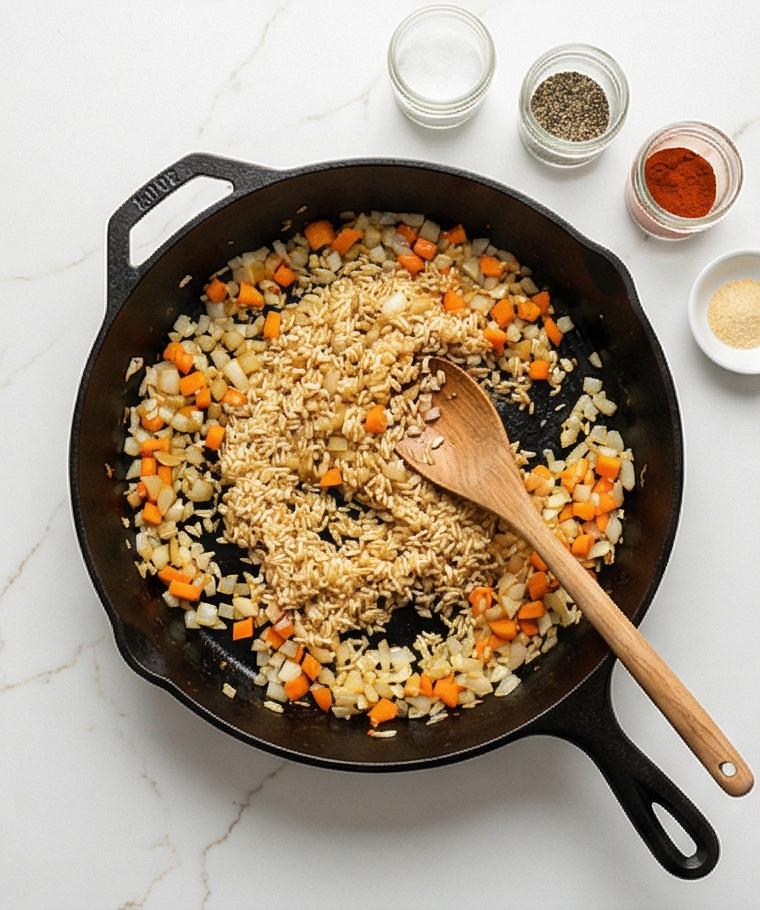
Step 4: Deglaze and build the simmering broth
Pour the 1/2 cup dry white wine (or extra broth) into the rice, scraping the pan to lift all those caramelized bits, then let the wine reduce by about half so the rice smells wine-bright and nutty. Stir in 2 1/2 cups room-temperature chicken broth, the bay leaf, thyme, and a pinch of crushed red pepper flakes if using; raise the heat just to a gentle boil, taste and adjust seasoning — the liquid should gloss the rice and present visible herbs and a single bay leaf floating in the amber broth.
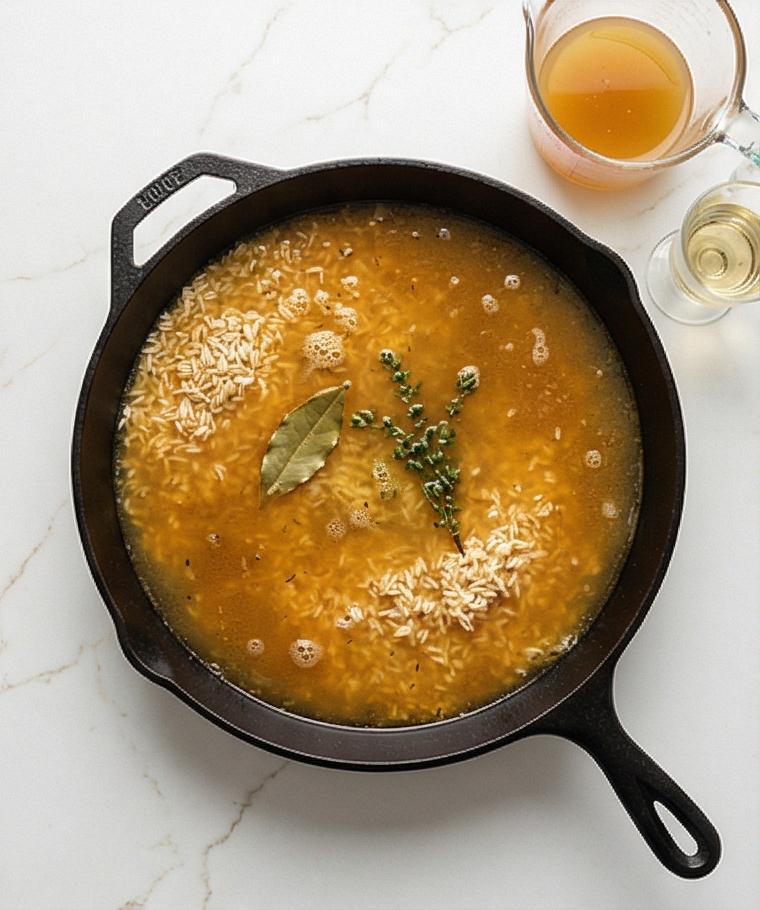
Step 5: Nest the seared thighs into the rice and seal for the oven
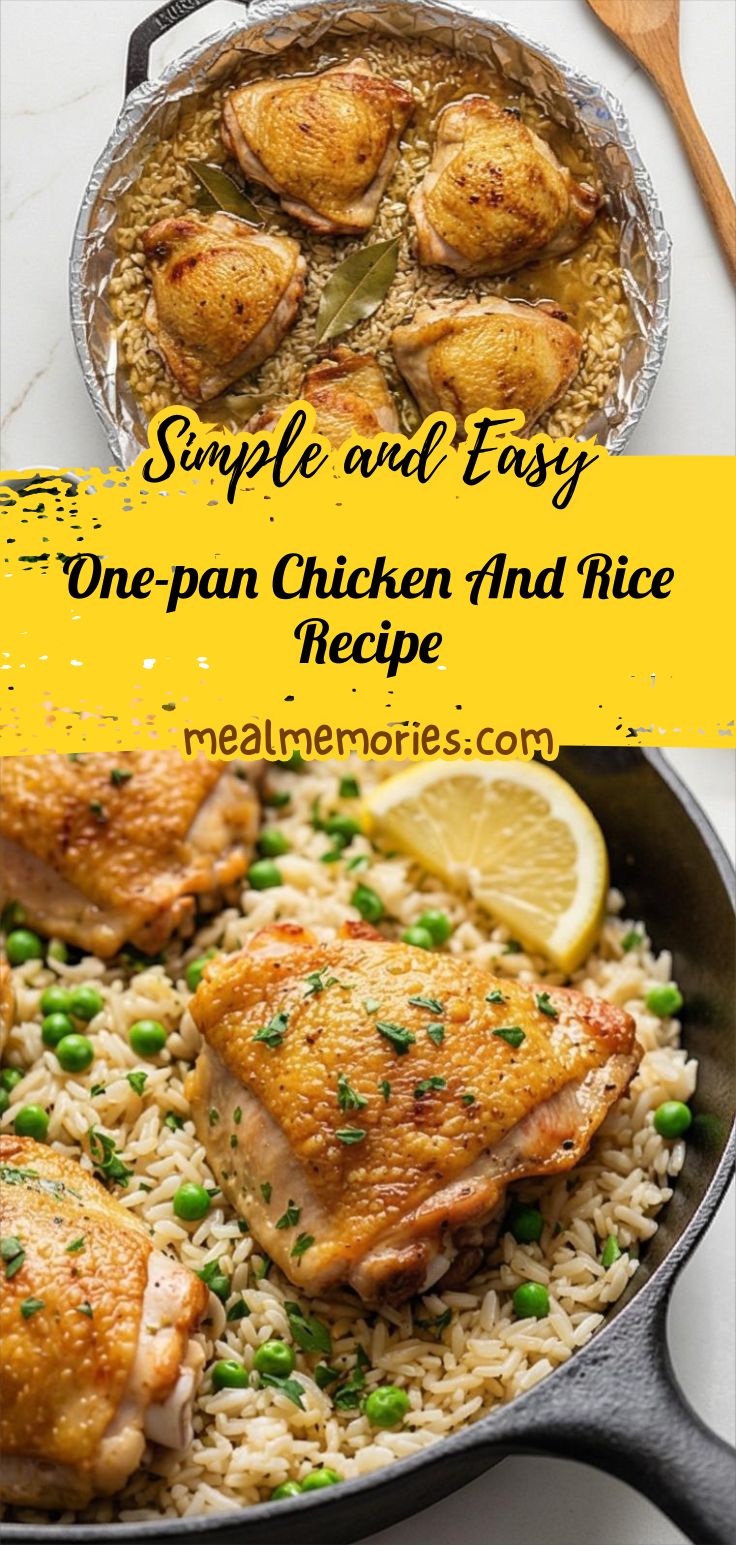
Turn off the heat and nest the seared thighs, skin-side up, into the rice so the skin sits mostly above the liquid; the rice surrounds the thighs like a shallow moat. Seal the skillet tightly with its lid or with a double layer of crimped aluminum foil so steam will cook the rice evenly. The assembled pan on the marble surface should read as a self-contained unit: a round heavy skillet filled with glossy broth-soaked rice, bay leaf and thyme visible, and bronzed thighs peeking out.
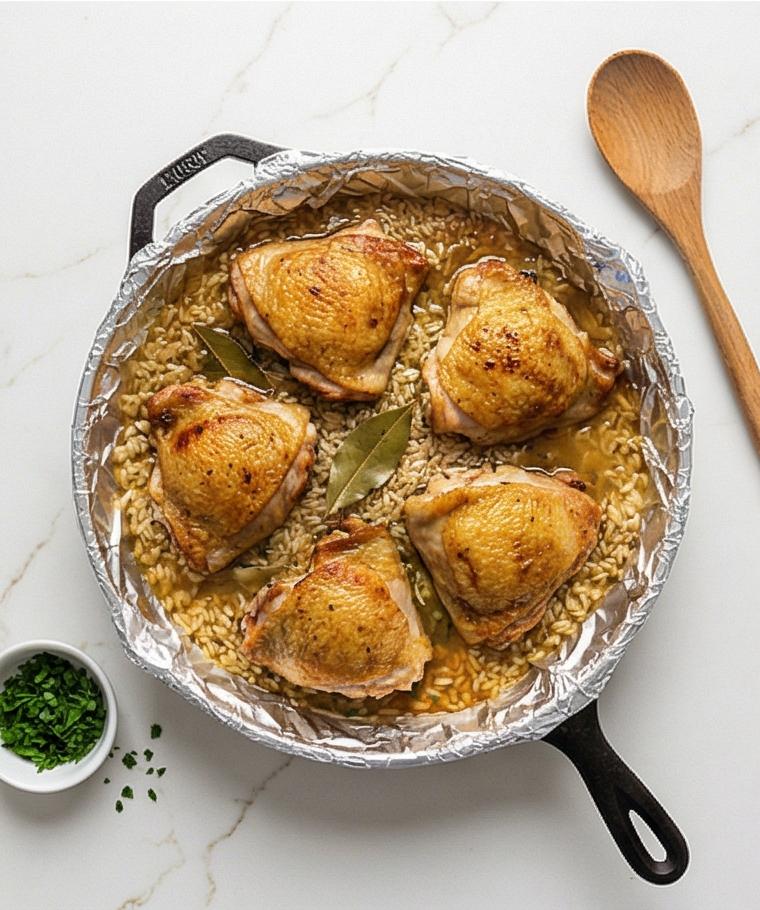
Step 6: Finish baking, rest briefly, then add bright accents
After baking and the final uncovered bake, remove the skillet and let it rest uncovered for 5–10 minutes so the rice relaxes and becomes fluffy. Remove the bay leaf, scatter thawed peas if using, then sprinkle 2 tablespoons finely chopped parsley and drizzle 1 tablespoon freshly squeezed lemon juice over the rice; gently fluff with a fork so the grains stay separate and the herbs and peas sit dispersed in the warm golden rice.
Step 7: Taste, adjust, and plate from the same round skillet
Taste and adjust salt, pepper, or more lemon juice to brighten. Serve directly from the same round oven-safe skillet (or a round shallow serving dish that retains the skillet’s geometry) so the presentation preserves the cooking vessel’s shape and the layered textures — crisp skin on top, fluffy shimmering rice beneath, scattered green peas and parsley, and lemon wedges on the side.
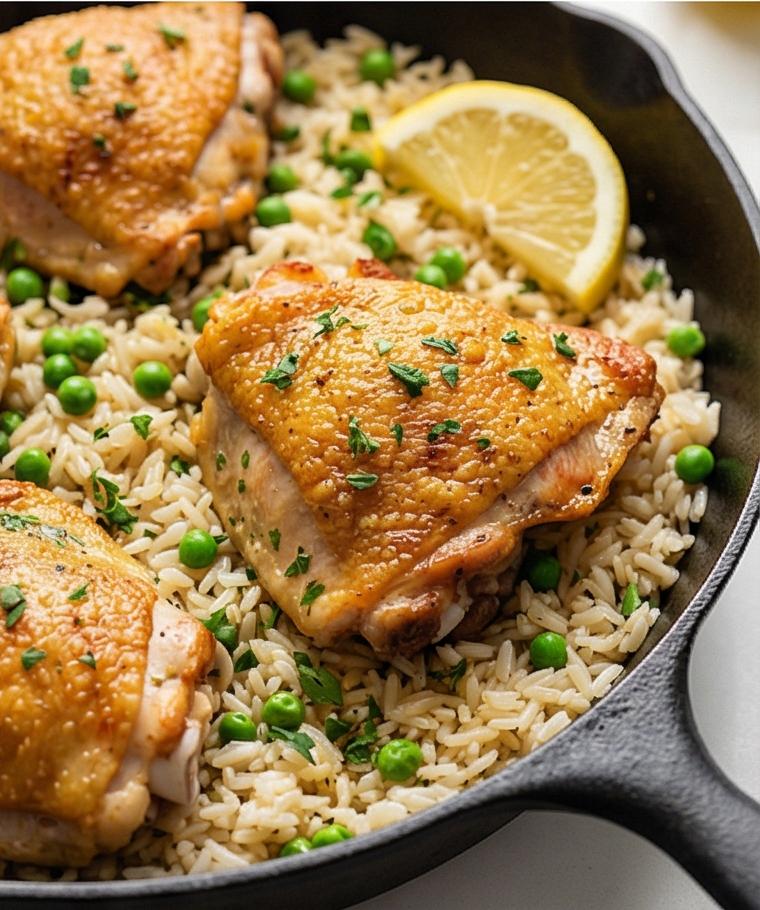
Making It Your Own
I like to experiment with this One-pan Chicken And Rice Recipe depending on the season. In spring I fold in asparagus tips toward the end for a green pop. In autumn I swap carrots for diced butternut squash and add a pinch of smoked paprika for warmth. If you want a lighter, low-carb option, try serving the seared thighs over cauliflower “rice” that you simmer briefly in the pan juices.
For a dairy-free version, skip the butter and use a neutral oil. For a herb-forward Mediterranean twist, stir in chopped oregano and a handful of kalamata olives just before serving. These small changes keep the core technique but let you tailor the dish to what’s in your pantry.
How to Serve
If I’m hosting, I serve the One-pan Chicken And Rice Recipe straight from the skillet so guests can help themselves to those crispy tops and steamy rice. For a casual dinner, pair it with a simple green salad and warm crusty bread to mop up the broth. For a more formal meal, spoon the rice onto warm plates, place a thigh on each mound, and garnish with extra parsley and lemon wedges.
To scale up, use two skillets or a large Dutch oven and add more broth in proportion to rice. For smaller portions, halve the recipe and bake in an 8-inch skillet. Keep lemon wedges and a small bowl of flaky salt on the table so people can finish their plates to taste.
Storage and Reheating
Cool leftovers quickly and store in an airtight container in the fridge for up to 3 days. The rice will firm up as it chills because it absorbs more liquid.
When reheating, add a splash of broth or water to loosen the rice and warm gently on the stovetop covered, or microwave with a damp paper towel to keep the chicken moist. To refresh the skin, finish under a hot broiler for a minute or two, watching carefully so it does not burn.
Oops-Proofing: Common Mistakes and How to Avoid Them
Not searing the chicken well can leave the skin floppy. Take your time and let the thighs brown without moving them until the skin releases easily. This step gives you flavor and texture.
Using unrinsed rice can lead to clumpy grains. Rinse until water runs clear and drain well so the rice can toast and then absorb broth evenly. Also, watch the salt and use low-sodium broth so you can adjust seasoning at the end.
Final Thoughts
Give this One-pan Chicken And Rice Recipe a try on a weeknight when you want a little luxury with minimal cleanup. It rewards small touches like a crisp sear and a squeeze of lemon, and it will likely become one of those dinners you make when you want comfort without effort.
Frequently Asked Questions
- What cut of chicken is best for this recipe? Bone-in, skin-on chicken thighs are best for flavor and moisture; you can use breasts but reduce baking time.
- Can I use brown rice instead of white rice? You can, but brown rice needs more liquid and a longer bake; adjust broth and cook time and expect a chewier texture.
- Do I have to use wine? No, substitute an equal amount of chicken broth if you prefer no alcohol; you lose a little brightness but keep great flavor.
- How do I know the chicken is done? An instant-read thermometer should register 165 F in the thickest part of the thigh without touching the bone.
- Can I make this ahead? You can cook through the baking step, cool, then chill. Reheat gently with a splash of broth and refresh the skin under the broiler.
One-pan Chicken And Rice Recipe
Make One-pan Chicken And Rice Recipe for a golden, one-pan dinner that crisps the skin and cooks the rice in rich broth.
Ingredients
Instructions
Step 1: Season the chicken and let it rest
Pat the six bone-in, skin-on chicken thighs very dry and trim any excess fat, then rub them evenly with 1 teaspoon kosher salt (of the total), 3/4 teaspoon freshly ground black pepper, 1 teaspoon sweet paprika, and 1/2 teaspoon garlic powder. Lay the seasoned thighs skin-side up on a small plate and let them come to room temperature for 10–15 minutes; this brief rest helps the meat cook more evenly and lets the rub sit on the skin so it crisps convincingly later.
Step 2: Sear the thighs until the skin is deeply golden and crisp
Heat 2 tablespoons olive oil and 1 tablespoon unsalted butter in your large 12-inch oven-safe skillet until the fat is shimmering. Place the thighs skin-side down and sear without moving until the skin is a deep golden-brown and visibly crisp, then flip briefly to brown the undersides. Remove the seared thighs to a plate, leaving the rendered fat and browned fond in the pan; the result should be richly caramelized, taut, bronzed skin with visible tiny blistered pores and a small pool of golden fat.
Step 3: Soften the aromatics and toast the rice in the flavored fat
Reduce heat and add the finely chopped yellow onion and the diced carrot to the skillet, stirring and scraping up the brown bits until the vegetables are softened and edged with light gold. Add the minced garlic until fragrant, then stir in the well-drained long-grain rice and the remaining 1/2 teaspoon kosher salt and optional turmeric; toss the rice so every grain is slick with fat and toasted to a pale nutty beige with tiny translucent onion flecks — each grain should look separate, glossy, and slightly toasted.
Step 4: Deglaze and build the simmering broth
Pour the 1/2 cup dry white wine (or extra broth) into the rice, scraping the pan to lift all those caramelized bits, then let the wine reduce by about half so the rice smells wine-bright and nutty. Stir in 2 1/2 cups room-temperature chicken broth, the bay leaf, thyme, and a pinch of crushed red pepper flakes if using; raise the heat just to a gentle boil, taste and adjust seasoning — the liquid should gloss the rice and present visible herbs and a single bay leaf floating in the amber broth.
Step 5: Nest the seared thighs into the rice and seal for the oven
Turn off the heat and nest the seared thighs, skin-side up, into the rice so the skin sits mostly above the liquid; the rice surrounds the thighs like a shallow moat. Seal the skillet tightly with its lid or with a double layer of crimped aluminum foil so steam will cook the rice evenly. The assembled pan on the marble surface should read as a self-contained unit: a round heavy skillet filled with glossy broth-soaked rice, bay leaf and thyme visible, and bronzed thighs peeking out.
Step 6: Finish baking, rest briefly, then add bright accents
After baking and the final uncovered bake, remove the skillet and let it rest uncovered for 5–10 minutes so the rice relaxes and becomes fluffy. Remove the bay leaf, scatter thawed peas if using, then sprinkle 2 tablespoons finely chopped parsley and drizzle 1 tablespoon freshly squeezed lemon juice over the rice; gently fluff with a fork so the grains stay separate and the herbs and peas sit dispersed in the warm golden rice.
Step 7: Taste, adjust, and plate from the same round skillet
Taste and adjust salt, pepper, or more lemon juice to brighten. Serve directly from the same round oven-safe skillet (or a round shallow serving dish that retains the skillet’s geometry) so the presentation preserves the cooking vessel’s shape and the layered textures — crisp skin on top, fluffy shimmering rice beneath, scattered green peas and parsley, and lemon wedges on the side.
Notes
- Let chicken come to room temperature for 10–15 minutes to promote even cooking.
- Rinse rice until water runs clear to avoid gummy grains.
- Use low-sodium broth so you can adjust salt at the end.
- Rest the pan for 5–10 minutes after baking so the rice firms and becomes fluffy.
- Add frozen peas at the end to preserve their bright color and texture.