Onion Rings Recipe has been a go-to for weekend snacks and casual dinner sides in my kitchen for years. I remember the first time I tried to recreate that perfect lacy crust at home; it took a few experiments, but the result became something I’m proud of. These crunchy, airy rings are exactly the sort of food that makes a weeknight feel special and a gathering feel effortless. Every time I say “Onion Rings Recipe” out loud, I picture a platter piled high and a crowd reaching in together.
I love how forgiving this Onion Rings Recipe is. The batter is simple but clever: cold sparkling water keeps it light, a little cornstarch gives extra crispness, and a short rest brings everything into balance. If you enjoy the smell of frying onions and the comfort of something crisp and warm, these onion rings hit all the right notes.
How This Recipe Became My Rainy-Day Favorite
On a rainy afternoon a few years back, I decided to make something comforting with what I had on hand: a couple of large sweet onions and pantry staples. The first batch filled the kitchen with the warm scent of caramelizing onions and paprika, and I remember standing at the counter with a mug of tea, testing one as it came out of the oil. The crunch surprised me, the interior stayed tender and juicy, and the batter had those delicate holes that make each bite sing. It became my rainy-day ritual: slice, soak, batter, fry, and plop the golden rings on a wire rack to cool for a minute. There’s something quietly joyful about sharing a simple plate of food that turns an ordinary evening into a small celebration.
Pantry Stars and What They Do
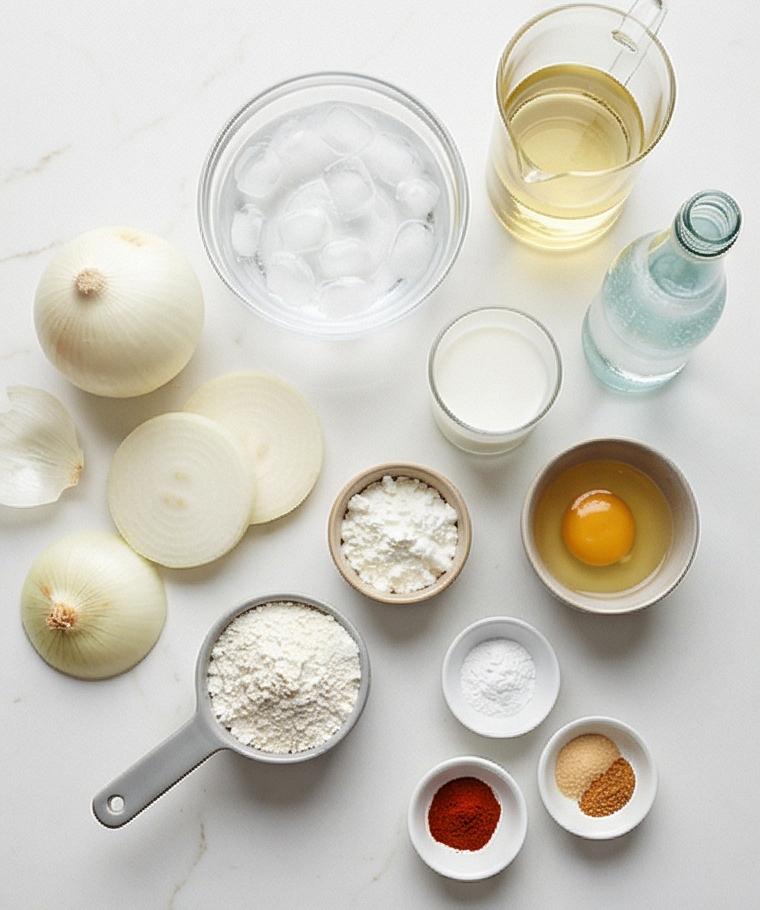
- 2 large yellow or sweet onions: The main event, offering sweetness and size for sturdy rings. Choose firm, dry onions with tight skins. Sub: red onions for color, or sweet Spanish onions.
- All-purpose flour and cornstarch: Flour builds structure, cornstarch keeps the crust extra crisp. Sub: rice flour for a lighter crust.
- Baking powder and salt: Baking powder gives lift; salt amplifies flavors. Use fine sea salt if you prefer.
- Egg, milk, and sparkling water: The egg and milk enrich the batter; the very cold sparkling water makes it light and airy. Substitute club soda if needed.
- Neutral frying oil: Canola or vegetable oil for high heat frying. Peanut oil is good if no allergies.
Essential Tools for Crispy Success
A few reliable tools make this Onion Rings Recipe much easier and safer. A deep, heavy pot or Dutch oven holds oil with stable heat so the rings cook evenly and you avoid large temperature swings. A candy or deep-fry thermometer helps you keep the oil at the right range; without it you can test with a small piece of batter but it is less precise. A wire rack set over a rimmed sheet drains oil and keeps the crust crisp, while a slotted spoon or spider lets you fish rings without splashing. Tongs are handy for handling rings one at a time.
- Deep pot or Dutch oven: Stable heat and capacity for oil.
- Candy or deep-fry thermometer: Maintain consistent frying temperature.
- Wire rack and rimmed baking sheet: Drain and keep rings crisp.
- Slotted spoon or spider and tongs: Safe, effective handling of hot rings.
Step-by-Step Preparation Guide
Step 1: Trim, peel, and slice the onions
Trim the root and stem ends off two large yellow or sweet onions, peel them and slice crosswise into 1/2-inch (1.25 cm) thick rounds. Gently separate each round into individual rings, set aside the very small centers for another use, and arrange the full rings in a shallow stack so they’re ready for the next step.
Step 2: Soak, drain, and dry the rings
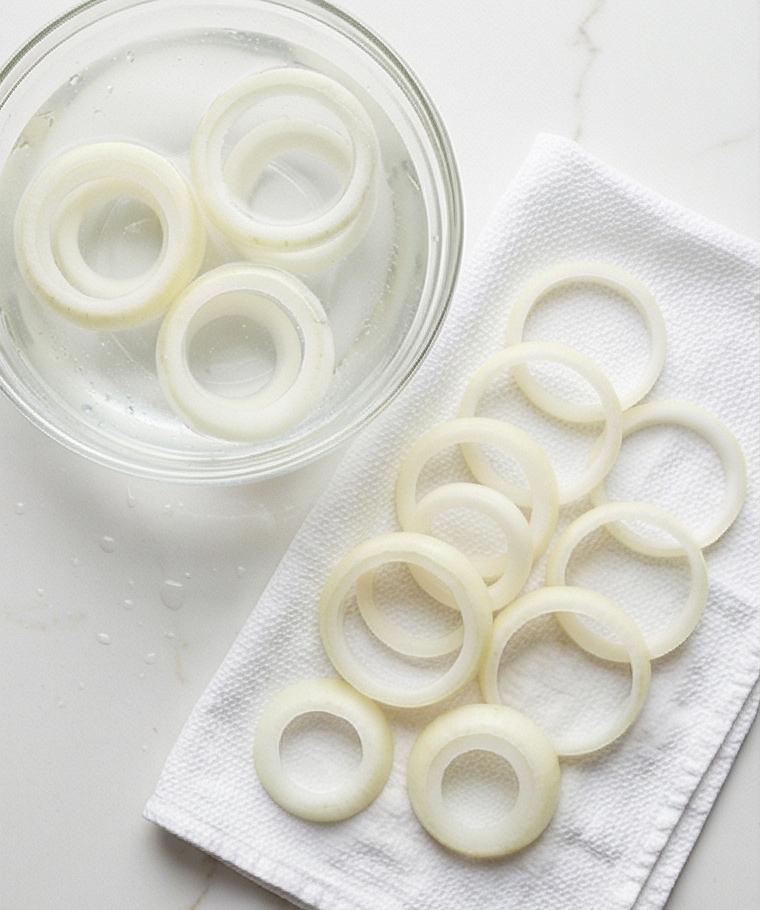
Place the separated rings into a large clear glass bowl and cover with very cold water; let them sit for twenty minutes to mellow the bite and improve juiciness. After soaking, drain the rings and spread them out on a clean kitchen towel or paper towels, patting each ring dry until no visible surface water remains so the batter will cling evenly.
Step 3: Whisk together the dry mix
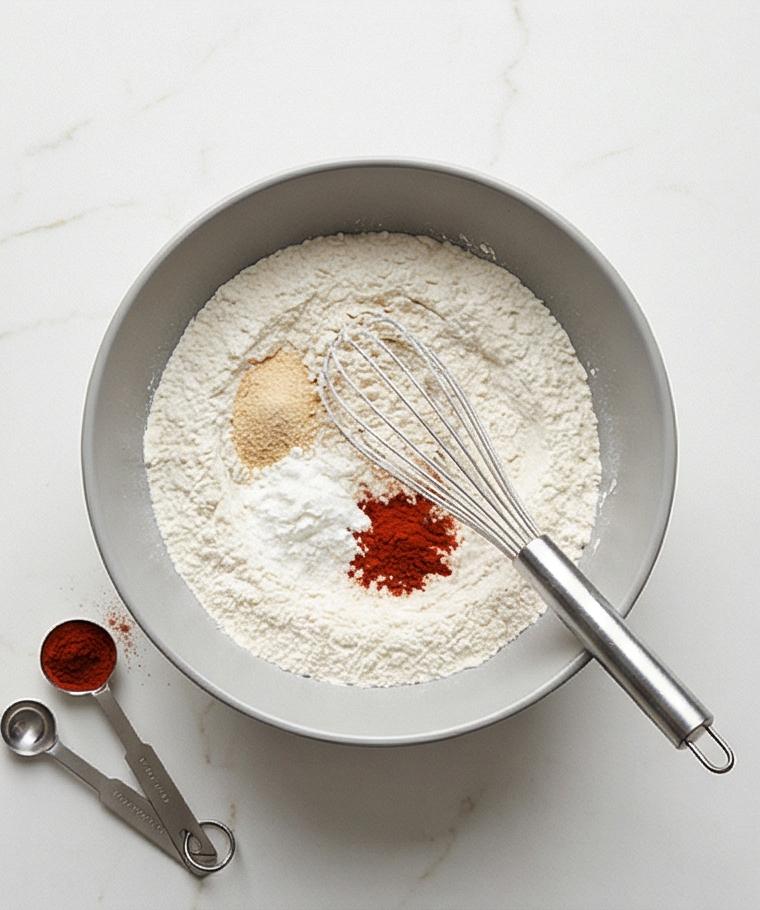
In a modern matte grey ceramic mixing bowl combine the all-purpose flour, cornstarch, baking powder, the first measure of kosher salt, paprika, garlic powder and cayenne (if using). Whisk briskly until the powdery textures are homogenous, the flour looks velvety and there are no lumps of seasoning — the bowl should show a fine, sandy crater where the whisk passed through.
Step 4: Make the wet mix and combine into batter
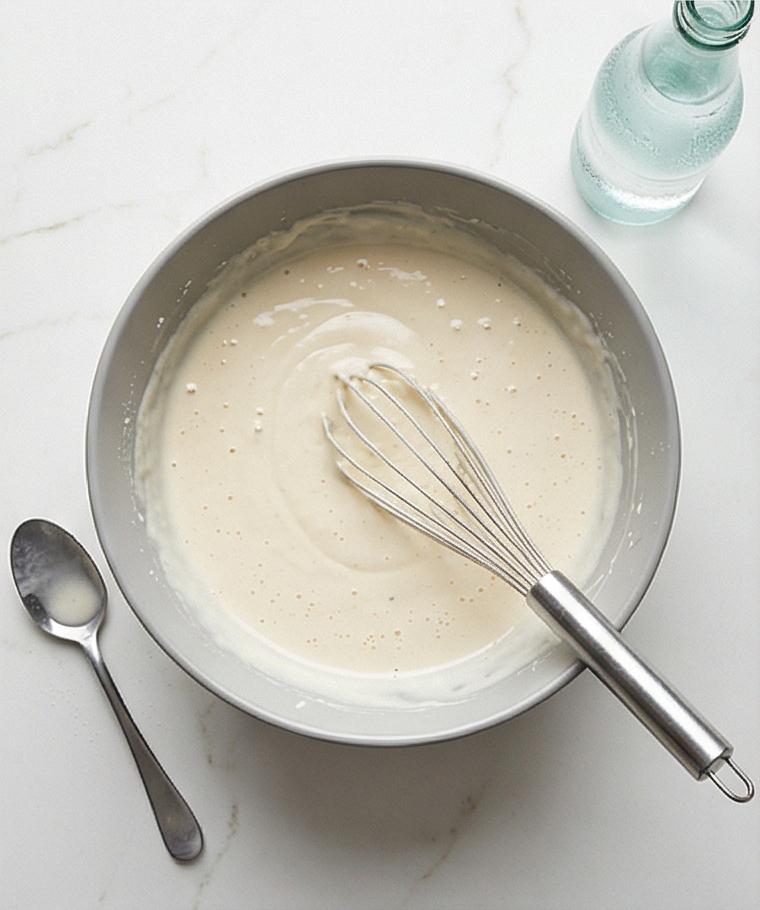
In a small glass bowl lightly beat the egg, whisk in the cold whole milk or buttermilk, then slowly add the very cold sparkling water while stirring just until smooth. Pour the wet blend into the grey mixing bowl over the dry ingredients and whisk gently until a silky, pourable batter forms — thick like heavy cream, with a few small, glossy lumps and a visible ribbon when lifted with a whisk. Chill the bowl briefly so the batter stays very cold.
Step 5: Prepare the frying station and test consistency
Set out a rectangular rimmed baking sheet topped with a wire rack for draining, position the chilled batter next to the drained onion rings, and place tongs and a slotted spoon nearby. Test one ring by coating and lowering it into hot oil; judge the batter by how it sizzles, rises and browns — adjust oil temperature or batter looseners as needed. The station should read as orderly: a batter-coated whisk resting on the grey bowl rim, a small glass jug of sparkling water nearby to refresh the batter if it thickens.
Step 6: Fry in small batches and drain to crisp
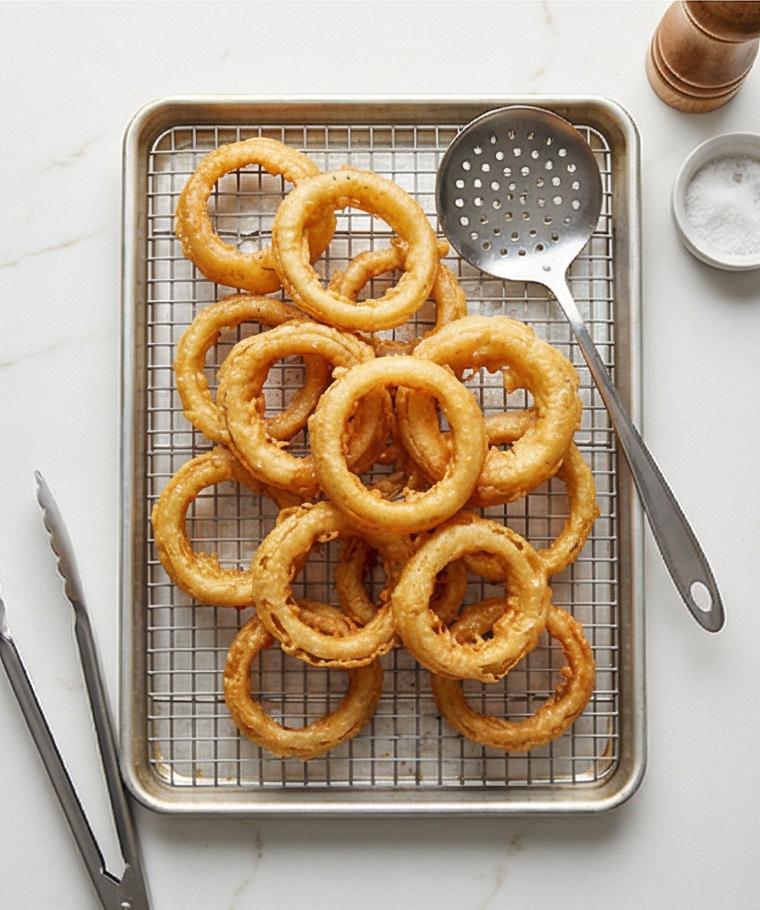
Working in restrained batches, dip rings in the cold batter so each ring is evenly coated, let excess drip back for a couple of seconds, then lower carefully into hot oil (maintain steady heat). After 2–4 minutes the exterior should be deep golden and lacy, the batter full of tiny bubbles and glassy crisp edges. Transfer each batch to the wire rack on the rectangular sheet to drain and rest; immediately season with the remaining kosher salt and a light dusting of freshly ground black pepper while still hot.
Step 7: Make dipping sauce and finish plating
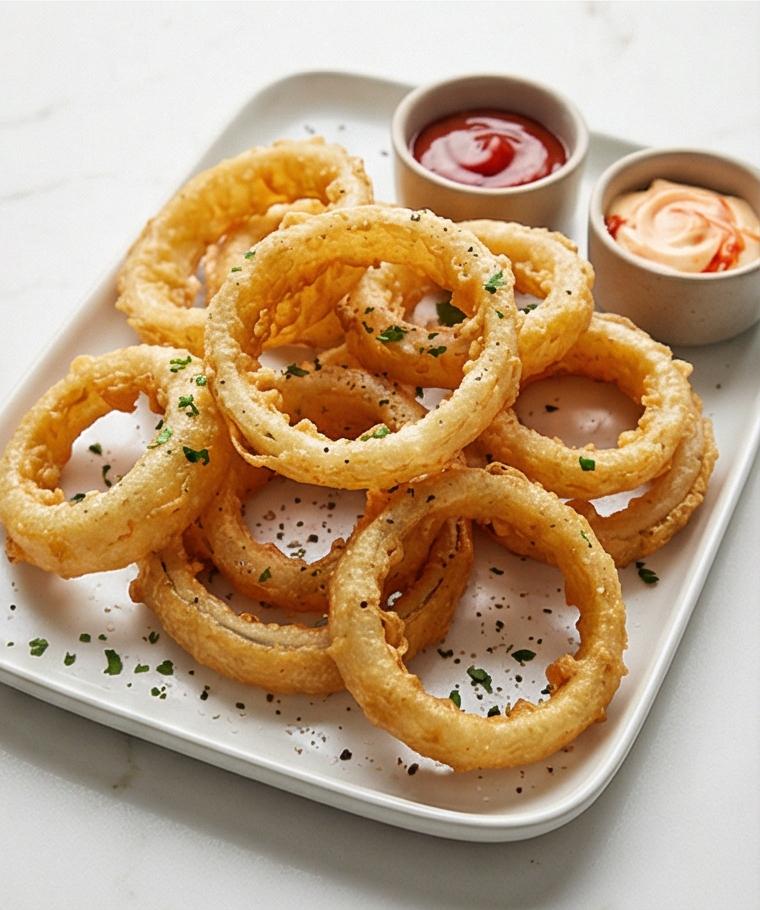
If serving sauces, stir mayonnaise with hot sauce or sriracha in a small ceramic ramekin and set a separate small bowl of ketchup alongside; keep all liquids in vessels. Just before serving, scatter finely chopped fresh parsley over the hot rings for a burst of green and place the piled, golden onion rings on a rectangular matte white serving platter so they maintain the same geometric language as the draining sheet. Serve immediately while piping hot and crisp.
Making It Your Own
I’ve flipped this Onion Rings Recipe several ways to match seasons and diets. Try dusting rings with a little smoked paprika and cumin for a southwestern note. For a gluten-free version, swap the flour and cornstarch for a 1:1 gluten-free flour blend and a tablespoon of rice flour to retain crispness.
If you want less oil, coat rings and bake at 425 F on a wire rack, flipping once, until golden; texture will be different but still delicious. I also love finishing with grated Parmesan and chopped thyme when hosting friends — it adds an herbaceous, savory lift that everyone compliments.
How to Serve
When I host, Onion Rings Recipe becomes the centerpiece of a casual platter. Pile the rings on a warm platter lined with paper to help soak excess oil and arrange small bowls of ketchup, spicy mayo, and mustard around the edges. For a family dinner, serve on a single large sheet so everyone can grab.
Scale up by working in shifts: keep finished batches in a low oven (200 F) on a wire rack for 8 to 10 minutes so they stay crisp but not overcooked. Add a scatter of chopped parsley and a wedge of lemon on the side for brightness. For a party, make extra batter and fry continuously while a friend manages plates.
Storage and Reheating Tips
Leftovers are best treated like a short-lived luxury. Let rings cool completely, then store in a single layer on a paper towel inside an airtight container in the fridge. They keep well for 1 to 2 days but lose peak crispness quickly.
To reheat, use a 400 F oven or toaster oven on a wire rack for 5 to 8 minutes so hot air circulates and revives the crunch. Avoid the microwave unless you accept a limp result; if you must, zap briefly then crisp under the broiler for a minute while watching closely.
Oops-Proofing and Common Mistakes
The biggest mishap is oil that’s too cool. It makes the batter soggy and greasy. Give the oil time to heat and use a thermometer. Another common slip is overworking the batter; mix until just combined and keep it very cold so it fries into light, porous crisps.
Also, crowding the pan drops the oil temperature and yields uneven browning. Fry in small batches, and let the oil come back to temperature between batches for consistently golden rings.
Final Thoughts and Encouragement
Give this Onion Rings Recipe a try even if you think frying is intimidating. Follow the steps, keep the batter cold, and don’t rush the frying station. You’ll end up with crispy, lacy rings that are worth the little effort and perfect for sharing.
Frequently Asked Questions
- Can I make the batter ahead of time? Yes, mix the dry ingredients ahead and keep the wet ingredients chilled, but combine just before frying for best texture.
- What oil temperature should I use? Aim for about 350 to 375 F for even browning and a crisp finish.
- Can I use other onions? Absolutely. Sweet or yellow onions are classic, red onions add color, and Vidalia gives extra sweetness.
- How do I keep rings crisp after frying? Drain on a wire rack and hold briefly in a 200 F oven if needed, avoid stacking them on paper directly.
- Is there a gluten-free option? Yes, use a gluten-free flour blend plus rice flour or cornstarch to mimic the light crunch.
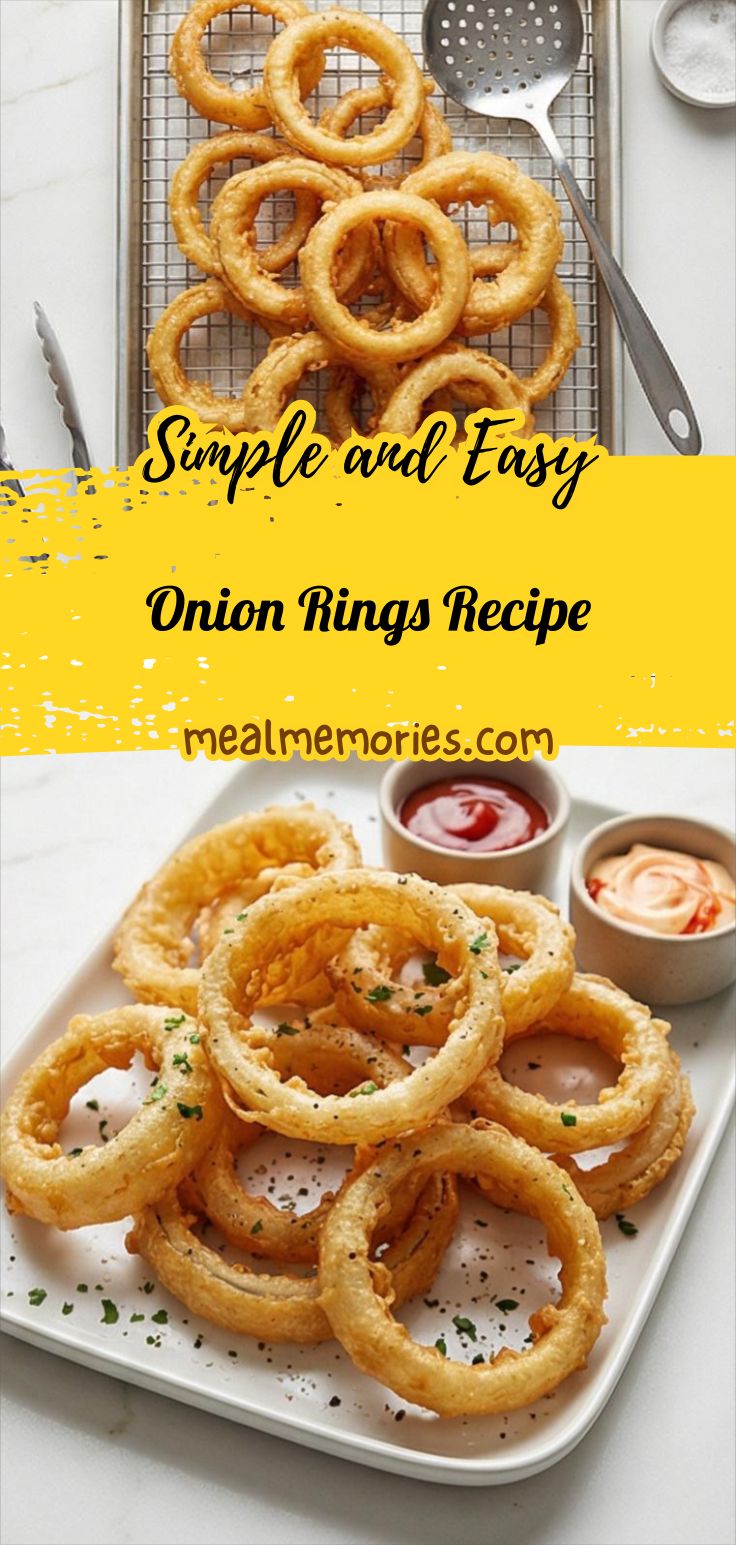
Onion Rings Recipe
Make crispy Onion Rings Recipe with a light, lacy batter and serve hot with spicy mayo.
Ingredients
Instructions
Step 1: Trim, peel, and slice the onions
Trim the root and stem ends off two large yellow or sweet onions, peel them and slice crosswise into 1/2-inch (1.25 cm) thick rounds. Gently separate each round into individual rings, set aside the very small centers for another use, and arrange the full rings in a shallow stack so they’re ready for the next step.
Step 2: Soak, drain, and dry the rings
Place the separated rings into a large clear glass bowl and cover with very cold water; let them sit for twenty minutes to mellow the bite and improve juiciness. After soaking, drain the rings and spread them out on a clean kitchen towel or paper towels, patting each ring dry until no visible surface water remains so the batter will cling evenly.
Step 3: Whisk together the dry mix
In a modern matte grey ceramic mixing bowl combine the all-purpose flour, cornstarch, baking powder, the first measure of kosher salt, paprika, garlic powder and cayenne (if using). Whisk briskly until the powdery textures are homogenous, the flour looks velvety and there are no lumps of seasoning — the bowl should show a fine, sandy crater where the whisk passed through.
Step 4: Make the wet mix and combine into batter
In a small glass bowl lightly beat the egg, whisk in the cold whole milk or buttermilk, then slowly add the very cold sparkling water while stirring just until smooth. Pour the wet blend into the grey mixing bowl over the dry ingredients and whisk gently until a silky, pourable batter forms — thick like heavy cream, with a few small, glossy lumps and a visible ribbon when lifted with a whisk. Chill the bowl briefly so the batter stays very cold.
Step 5: Prepare the frying station and test consistency
Set out a rectangular rimmed baking sheet topped with a wire rack for draining, position the chilled batter next to the drained onion rings, and place tongs and a slotted spoon nearby. Test one ring by coating and lowering it into hot oil; judge the batter by how it sizzles, rises and browns — adjust oil temperature or batter looseners as needed. The station should read as orderly: a batter-coated whisk resting on the grey bowl rim, a small glass jug of sparkling water nearby to refresh the batter if it thickens.
Step 6: Fry in small batches and drain to crisp
Working in restrained batches, dip rings in the cold batter so each ring is evenly coated, let excess drip back for a couple of seconds, then lower carefully into hot oil (maintain steady heat). After 2–4 minutes the exterior should be deep golden and lacy, the batter full of tiny bubbles and glassy crisp edges. Transfer each batch to the wire rack on the rectangular sheet to drain and rest; immediately season with the remaining kosher salt and a light dusting of freshly ground black pepper while still hot.
Step 7: Make dipping sauce and finish plating
If serving sauces, stir mayonnaise with hot sauce or sriracha in a small ceramic ramekin and set a separate small bowl of ketchup alongside; keep all liquids in vessels. Just before serving, scatter finely chopped fresh parsley over the hot rings for a burst of green and place the piled, golden onion rings on a rectangular matte white serving platter so they maintain the same geometric language as the draining sheet. Serve immediately while piping hot and crisp.
Notes
- Keep the batter very cold to ensure a light, lacy crust.
- Fry in small batches and allow oil to return to temperature between batches.
- Drain on a wire rack, not paper, to keep rings crisp.
- Use sparkling water or club soda for the best airy texture.
- If allergic to peanut, use canola or vegetable oil instead.