I still remember the first time I made this Taco Salad Recipe for a weekend game night; the room filled with cumin-scented air and people grabbed bowls before I was ready. I make this Taco Salad Recipe when I want something that feels both celebratory and easy, and it rarely disappoints. It balances crisp romaine, warm seasoned beef, crunchy tortilla chips, and a cool creamy dressing that pulls everything together. You can scale it up for a crowd or keep it simple for two, and it always lands as a winner at the table.
How This Recipe Became My Weeknight Hero
The first time I tossed together the Taco Salad Recipe I was rushing between work and picking up a friend, and the practicality of making a whole meal in one big bowl felt like pure freedom. I remember the sizzle when the beef hit the hot skillet, how the spices toasted and filled the kitchen with that warm, familiar taco smell. I chopped romaine until my fingers cooled from the run of the faucet, and the contrast between the chilled dressing and the warm meat felt like an accidental masterpiece. Friends arrived with drinks in hand and left with their plates clean and smiling faces; that night taught me how small flourishes, like adding a squeeze of fresh lime or finely chopped cilantro, turn a simple salad into something to celebrate. Since then, this Taco Salad Recipe has been my go-to when I want a dish that feels thoughtful but comes together fast.
Key Ingredients and Why They Matter
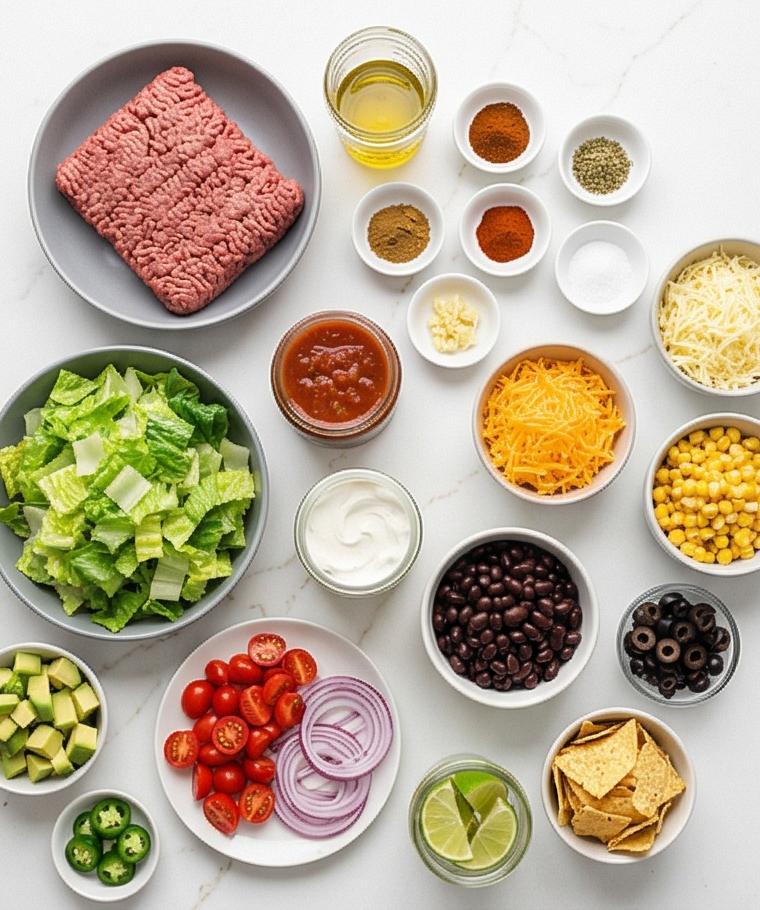
- Ground Beef: The backbone of the salad; buy 85-90% lean for good flavor without too much fat. Substitute ground turkey or crumbled tofu for a lighter or vegetarian option.
- Romaine Lettuce: Adds crisp texture and freshness; choose bright, firm leaves and spin them very dry. Substitute butter lettuce for a tender bite.
- Black Beans: Provide creaminess and protein; rinse well to remove canning liquids. Swap for pinto or kidney beans if preferred.
- Tortilla Chips: Deliver crunch and salt; use sturdy restaurant-style chips so they hold up. For a gluten-free option, check labels.
- Cheeses: Sharp cheddar and Monterey Jack add melting, salty richness; use pepper Jack for extra heat.
Essential Kitchen Tools and Why They Help
A few simple tools keep this Taco Salad Recipe effortless and fun. A sharp chef’s knife speeds prep and makes clean cuts through romaine, onion, and avocado. A large salad bowl or wide, shallow serving dish gives you room to layer and toss without losing chips. A sturdy skillet (cast iron or heavy-bottomed) creates the best fond for browning ground beef and toasting spices. A salad spinner is a tiny miracle for really dry lettuce; it protects crunch and prevents dressing from becoming watery. If you don’t have a spinner, wrap washed lettuce tightly in clean towels to dry. Finally, a whisk and a small jar with a lid make dressing prep and storage easy and mess-free.
Step-by-Step Preparation Guide
Step 1: Prep and chill the components
Wash and spin the romaine until bone-dry and chop it into crisp, even ribbons; drain and rinse the black beans, drain the corn and sliced black olives, halve the cherry tomatoes, thinly slice the red onion, shred the cheeses if needed, and dice the avocado and thinly slice the jalapeño if using. Place each prepared element into its own small bowl or jar and keep everything chilled in the refrigerator while you move through the hot-cooking steps — this keeps the lettuce crisp and the cheese and avocado cool so the salad textures stay bright.
Step 2: Make the creamy taco salad dressing
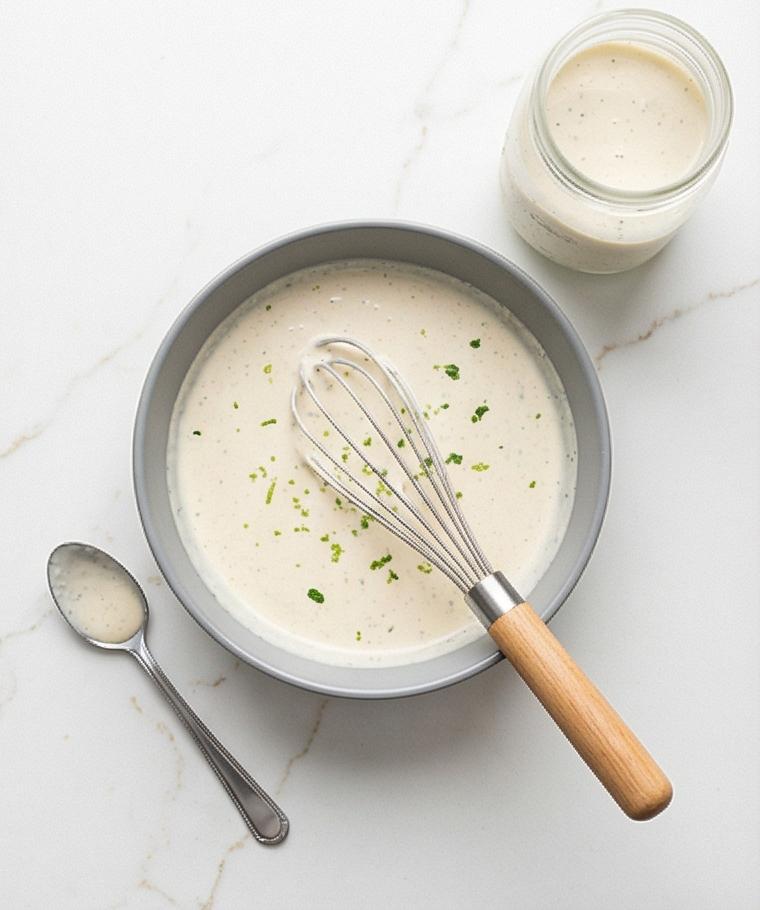
In a medium matte-grey ceramic bowl combine the sour cream, thick-style salsa, fresh lime juice, mayonnaise, finely chopped cilantro, kosher salt, and a touch of ground cumin. Whisk briskly until the dressing is completely smooth and homogenous with no streaks of sour cream, adjusting with a tiny squeeze of lime or a pinch more salt to taste. Scrape into a small covered jar and chill for at least ten minutes so the flavors meld and the texture firms slightly; a chilled, silky dressing contrasts beautifully with warm beef later.
Step 3: Soften aromatics and brown the beef
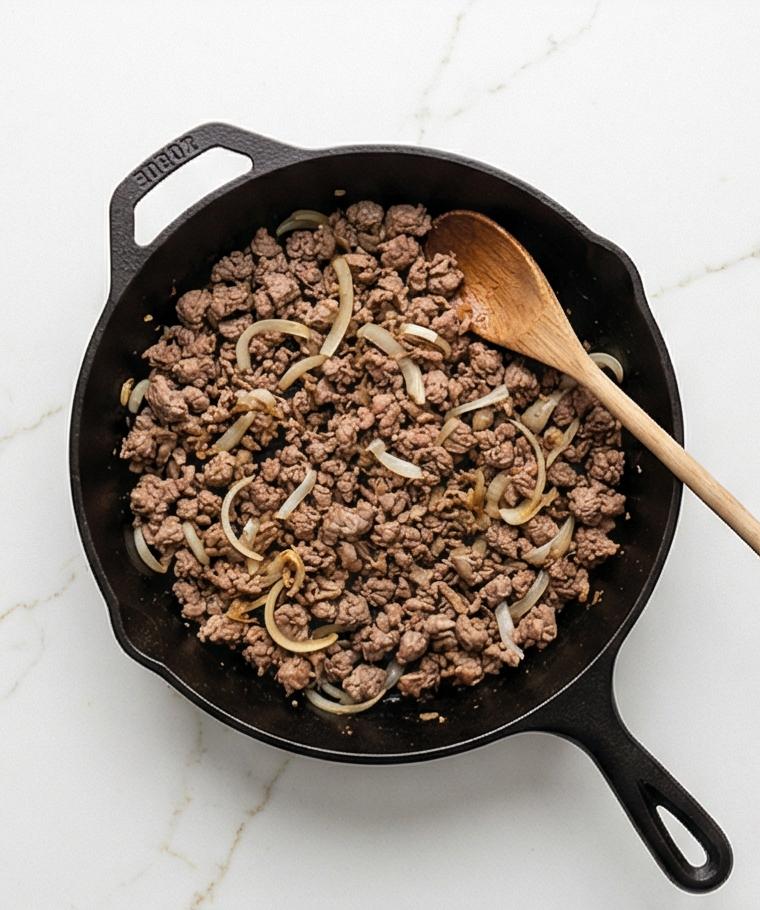
Place a thin film of olive oil in a matte black cast-iron skillet set on the surface; add the finely diced yellow onion and cook until softened and translucent at the edges, then add the minced garlic and cook just until fragrant. Add the ground beef and break it into small crumbles, cooking over medium heat until there is no pink and most moisture has evaporated. Carefully tilt the skillet on the flat surface and spoon off excess fat so a thin glossy sheen remains to carry flavor. This step produces evenly crumbled, textured beef ready for seasoning.
Step 4: Season, simmer, and finish the beef
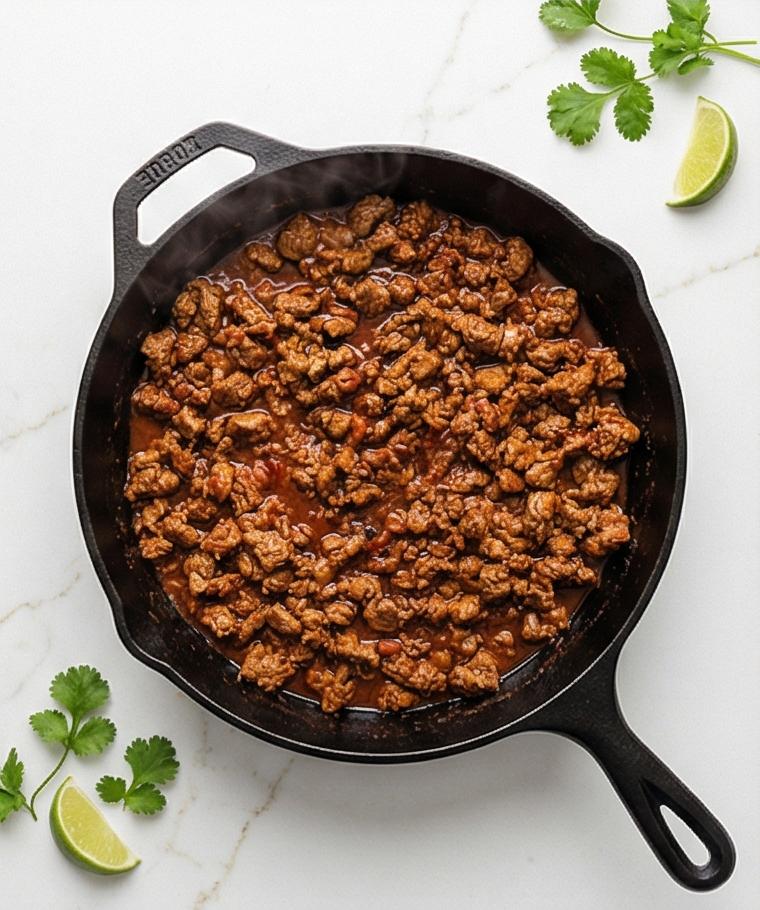
Reduce to medium heat and sprinkle the chili powder, ground cumin, smoked paprika, dried oregano, kosher salt, black pepper, and optional cayenne evenly over the cooked beef. Stir and toast the spices for about a minute until aromatic, then add the low-sodium beef broth (or water) and tomato paste, scraping up the fond until a uniform, thick, saucy coating forms on the meat. Let it simmer gently until the liquid reduces to clingy, saucy crumbles; taste and adjust with a final pinch of salt or a squeeze of lime. Remove from heat and let the meat cool for a few minutes so it is warm but not scorching when added to the salad.
Step 5: Build the salad base
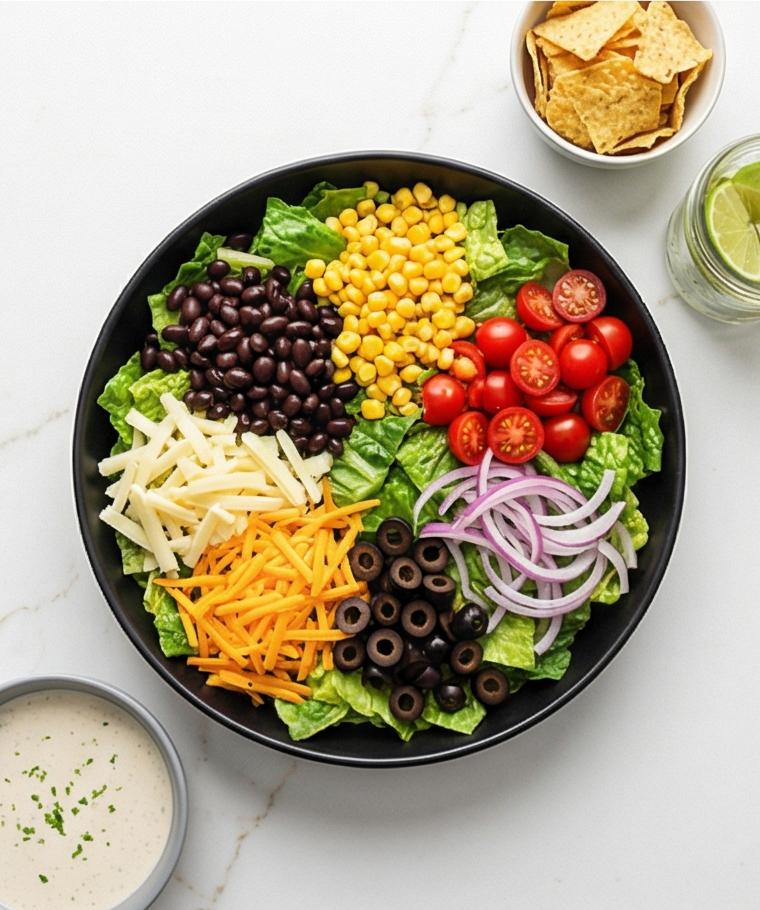
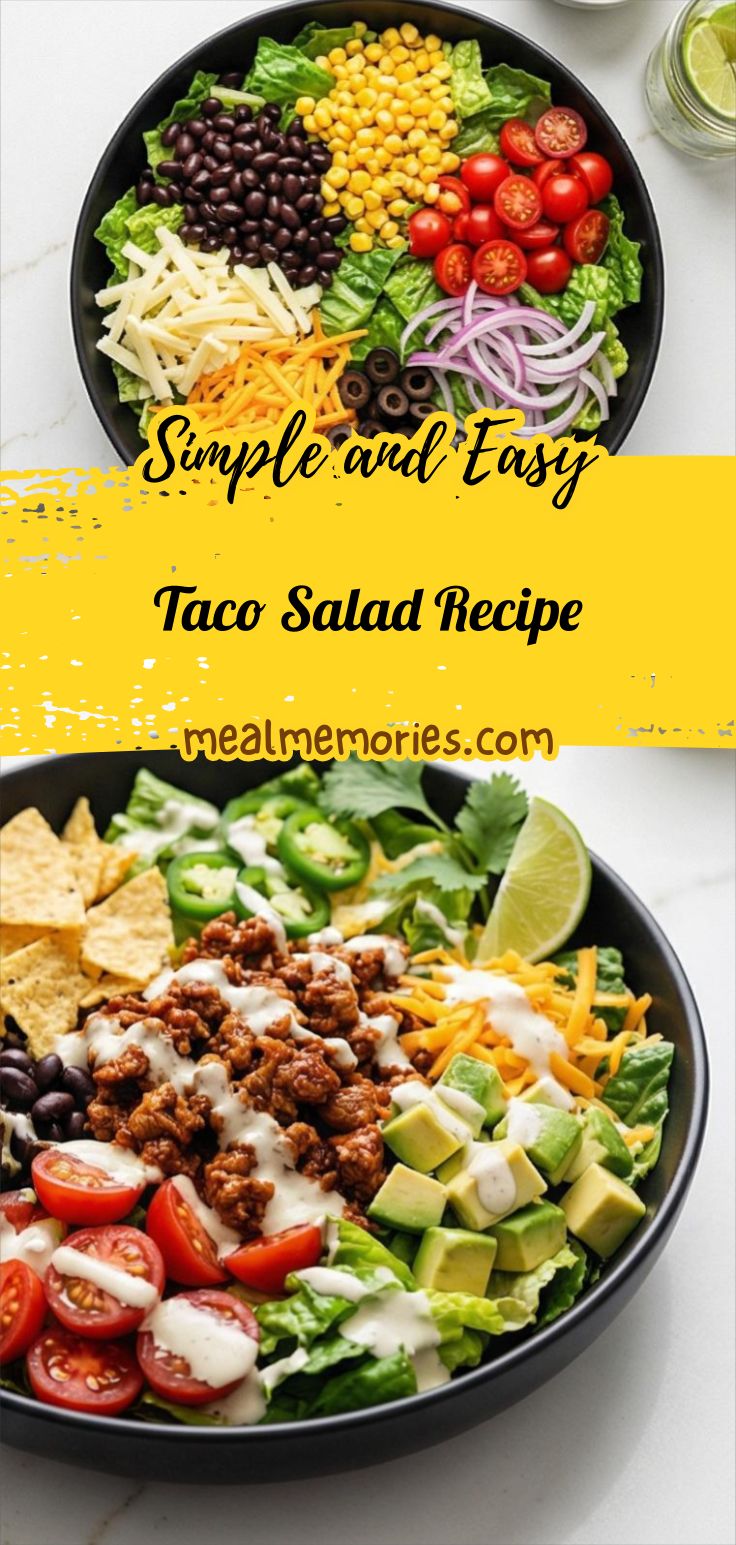
In a wide, shallow matte-black serving bowl layer the chopped romaine as the base, then scatter the drained black beans and corn evenly. Add halved cherry tomatoes, thinly sliced red onion, and sliced black olives across the surface for color contrast. Finish the base with even mounds of shredded sharp cheddar and Monterey Jack so the bright orange and pale ivory cheese peek through the greens — at this stage the salad looks balanced and ready for chips and the warm meat.
Step 6: Finish, toss, and serve immediately
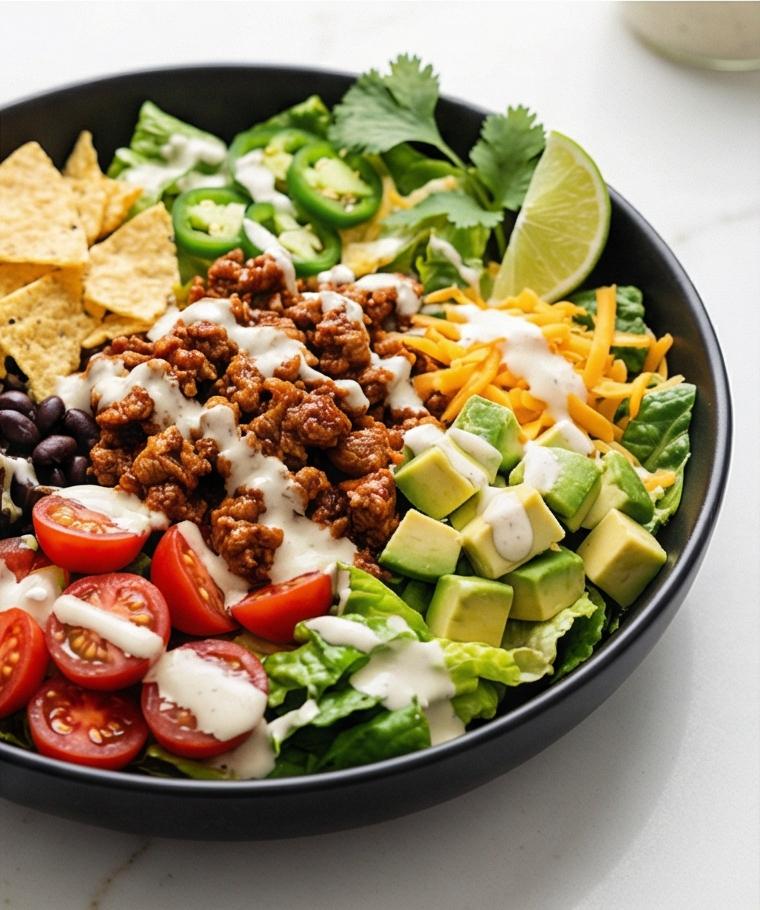
Just before serving, add the lightly crushed tortilla chips (reserve a small handful for garnish), then spoon the warm, seasoned beef evenly over the top so it gently warms the vegetables without wilting them. Drizzle about two-thirds of the chilled dressing over the salad, then use large tongs to toss everything from the bottom up until ingredients are evenly coated and distributed. Taste and adjust with a squeeze of lime or extra salt; scatter diced avocado, sliced jalapeño, and additional chopped cilantro for freshness. Serve immediately with lime wedges and hot sauce on the side so each person can customize their bowl.
Making It Your Own
I often experiment with the Taco Salad Recipe depending on who is coming over. Swap the ground beef for shredded rotisserie chicken and a splash of adobo for a smokier profile; the salad still feels familiar but bright. For a vegetarian variation I swap the meat for spiced lentils or browned crumbled tempeh; both hold the dressing and chips well and add satisfying texture. In late summer I fold in grilled corn and charred peppers for sweetness and depth. For a regional twist, add pickled jalapeños and cotija cheese for a more Mexican street-food vibe. Small swaps keep the core idea intact while letting you match the salad to the season or guest preferences.
How to Serve
When I host, I build this Taco Salad Recipe in a large shallow bowl and set smaller bowls of garnishes around it so guests can customize. For a dinner party of six to eight, double the romaine, beans, and chips and serve the beef in a separate warm dish so people can add as much as they want. For a casual family night, make one bowl and bring it to the table whole; keep extra dressing and lime wedges on the side. If you want a plated presentation, pre-portion lettuce, beans, and cheese in wide shallow bowls and spoon warm beef over each plate, finishing with a dot of dressing and a crisp chip for height.
Storage and Reheating Tips
Store leftover components separately for best texture: keep the cooked beef in an airtight container in the fridge and the chopped vegetables, chips, and dressing in their own containers. The beef will keep well for 3 to 4 days and reheats nicely in a skillet over medium heat with a splash of water to loosen the sauce.
Avoid storing the assembled salad; chips get soggy and lettuce wilts. If you do have a pre-tossed portion, eat it within a few hours for the best crunch and flavor.
Common Mistakes and How to Fix Them
Not drying the lettuce is a classic slip; wet leaves dilute the dressing and make the salad limp. Use a spinner or paper towels to get romaine truly dry. Over-salting the beef early can also be an issue; taste as you go and remember cheeses and chips add salt too.
Adding chips too soon makes them soggy; toss them in just before serving and reserve a few for garnish. If your beef ends up dry, stir in a tablespoon of broth or a spoonful of salsa while reheating to bring back moisture and gloss.
Final Thoughts
I hope you give this Taco Salad Recipe a try soon. It brings together comfort and crunch in a way that feels both casual and festive, and it has become a favorite for weeknights and small gatherings alike. Enjoy making it your own and sharing it around the table.
Frequently Asked Questions.
- What can I use instead of ground beef? You can swap ground beef for ground turkey, crumbled tempeh, cooked lentils, or shredded chicken depending on your diet and taste.
- How do I keep the chips from getting soggy? Add the chips right before serving and reserve a small handful for garnish so some crunch remains after tossing.
- Can I make the dressing ahead? Yes, the dressing can be made up to 3 days ahead and stored in a covered jar in the fridge for easy assembly.
- Is this salad gluten-free? The salad is naturally gluten-free if you use certified gluten-free chips and check salsa labels for additives.
- How do I reheat leftovers? Reheat the beef gently in a skillet with a splash of broth or water, then add it to fresh greens at serving time; avoid reheating the whole assembled salad.
Taco Salad Recipe
Make Taco Salad Recipe tonight: crisp romaine, spiced beef, creamy dressing—quick, crowd-pleasing and easy to customize.
Ingredients
Instructions
Step 1: Prep and chill the components
Wash and spin the romaine until bone-dry and chop it into crisp, even ribbons; drain and rinse the black beans, drain the corn and sliced black olives, halve the cherry tomatoes, thinly slice the red onion, shred the cheeses if needed, and dice the avocado and thinly slice the jalapeño if using. Place each prepared element into its own small bowl or jar and keep everything chilled in the refrigerator while you move through the hot-cooking steps — this keeps the lettuce crisp and the cheese and avocado cool so the salad textures stay bright.
Step 2: Make the creamy taco salad dressing
In a medium matte-grey ceramic bowl combine the sour cream, thick-style salsa, fresh lime juice, mayonnaise, finely chopped cilantro, kosher salt, and a touch of ground cumin. Whisk briskly until the dressing is completely smooth and homogenous with no streaks of sour cream, adjusting with a tiny squeeze of lime or a pinch more salt to taste. Scrape into a small covered jar and chill for at least ten minutes so the flavors meld and the texture firms slightly; a chilled, silky dressing contrasts beautifully with warm beef later.
Step 3: Soften aromatics and brown the beef
Place a thin film of olive oil in a matte black cast-iron skillet set on the surface; add the finely diced yellow onion and cook until softened and translucent at the edges, then add the minced garlic and cook just until fragrant. Add the ground beef and break it into small crumbles, cooking over medium heat until there is no pink and most moisture has evaporated. Carefully tilt the skillet on the flat surface and spoon off excess fat so a thin glossy sheen remains to carry flavor. This step produces evenly crumbled, textured beef ready for seasoning.
Step 4: Season, simmer, and finish the beef
Reduce to medium heat and sprinkle the chili powder, ground cumin, smoked paprika, dried oregano, kosher salt, black pepper, and optional cayenne evenly over the cooked beef. Stir and toast the spices for about a minute until aromatic, then add the low-sodium beef broth (or water) and tomato paste, scraping up the fond until a uniform, thick, saucy coating forms on the meat. Let it simmer gently until the liquid reduces to clingy, saucy crumbles; taste and adjust with a final pinch of salt or a squeeze of lime. Remove from heat and let the meat cool for a few minutes so it is warm but not scorching when added to the salad.
Step 5: Build the salad base
In a wide, shallow matte-black serving bowl layer the chopped romaine as the base, then scatter the drained black beans and corn evenly. Add halved cherry tomatoes, thinly sliced red onion, and sliced black olives across the surface for color contrast. Finish the base with even mounds of shredded sharp cheddar and Monterey Jack so the bright orange and pale ivory cheese peek through the greens — at this stage the salad looks balanced and ready for chips and the warm meat.
Step 6: Finish, toss, and serve immediately
Just before serving, add the lightly crushed tortilla chips (reserve a small handful for garnish), then spoon the warm, seasoned beef evenly over the top so it gently warms the vegetables without wilting them. Drizzle about two-thirds of the chilled dressing over the salad, then use large tongs to toss everything from the bottom up until ingredients are evenly coated and distributed. Taste and adjust with a squeeze of lime or extra salt; scatter diced avocado, sliced jalapeño, and additional chopped cilantro for freshness. Serve immediately with lime wedges and hot sauce on the side so each person can customize their bowl.
Notes
- Keep components separate to preserve texture until serving.
- Dry lettuce thoroughly to prevent a watery salad.
- Reserve some chips for garnish to maintain crunch.
- Reheat beef with a splash of broth to restore moisture.
- Dress the salad only just before serving to avoid sogginess.