BBQ Brisket in Oven – Beef Brisket Recipe has been my go-to when I want that slow-roasted, saucy comfort without firing up a smoker. I stumbled into this version years ago when I had an unexpected dinner party and only an oven to rely on. It delivers a deep bark and tender interior with just a few pantry spices and a patient roast. You’ll love how approachable the method is, and how reliably succulent each slice turns out.
There is something special about the ritual of preparing BBQ Brisket in Oven – Beef Brisket Recipe: the quiet rub, the glossy sauce, and the long wait that rewards you with melting meat and sticky edges. It feels like a celebration of time and attention, and it teaches you to slow down in the best possible way.
How This Recipe Became My Rainy-Day Favorite
I remember the first time I made this BBQ Brisket in Oven – Beef Brisket Recipe on a rainy Saturday. The house smelled like browned pepper and garlic while rain pattered against the windows, and I kept sneaking into the kitchen to peer at the foil-wrapped pan as if checking on a sleeping child. When I finally unwrapped it, the steam hit me with that rich, smoky-sweet scent that makes you close your eyes. Slicing it produced that satisfying pinkish-brown interior and a peppery crust that crackled between the knife and the board. Friends showed up early, drawn by the aroma, and we ate standing around the counter, sauce on the side, plates barely managing to hold the juices. It still feels like comfort every time I make it.
Discuss the primary ingredients
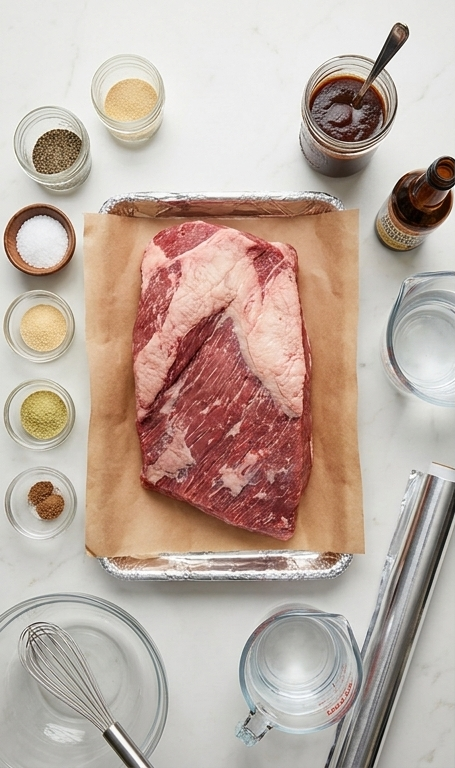
- Beef Brisket (6 pounds point cut with 1/2-inch fat cap): The central player that brings flavor and texture; pick a point cut for more marbling. Substitute with a flat cut for leaner slices but expect less juiciness.
- Kosher Salt: Balances and seasons deep into the meat; use sea salt if you prefer, but adjust quantity.
- Freshly Ground Black Pepper: Adds kick and builds the bark; use coarse grind for texture.
- Garlic, Celery, and Onion Powder: Provide savory backbone; replace with 2 teaspoons each of finely minced fresh if you like brighter notes.
- Ground Nutmeg: A whisper for warmth; omit if you prefer purely savory.
- BBQ Sauce and Liquid Smoke: Create the glossy, smoky coat; swap for your favorite bottled sauce or a homemade version.
- Water: Keeps the cooking environment moist so the brisket steams gently as it roasts.
Essential Kitchen Tools and Why They Matter
A few reliable tools make the difference between guesswork and confidence. A solid thermometer tells you when the brisket hits that melt-in-your-mouth 200°F; don’t rely on time alone. A roomy foil-lined rectangular pan contains juices and makes cleanup easier, and heavy-duty foil locks in moisture while the meat braises. A good sharp carving knife slices cleanly across the grain so each piece looks and tastes great. If you lack any of these, use these alternatives:
- Instant-Read or Probe Thermometer: Ensures doneness; slow cookers can obscure internal temperature so probe anyway.
- Lasagna-Style Rectangular Pan: Holds juices and fits the brisket; substitute with any deep, ovenproof roasting pan.
- Heavy-Duty Aluminum Foil: Prevents leaks during the long roast; use a lid if you have a pan with one.
- Sharp Carving Knife: For neat slices; use a long chef’s knife if you don’t have a carving set.
Step-by-Step Preparation Guide
Step 1: Trim and Season the Brisket
Begin by removing any silverskin and trimming the fat cap to a uniform ½-inch thickness so the meat cooks evenly. Lay the 6-pound point-cut brisket flat in a foil-lined rectangular baking pan (lasagna pan style) and generously season every surface with kosher salt, freshly ground black pepper, garlic powder, celery powder, onion powder and a whisper of ground nutmeg. Press the rub gently into the meat so the coarse textures of the seasonings adhere to the fat and exposed muscle—this crust will become the bark later.
Step 2: Mix Sauce and Marinate
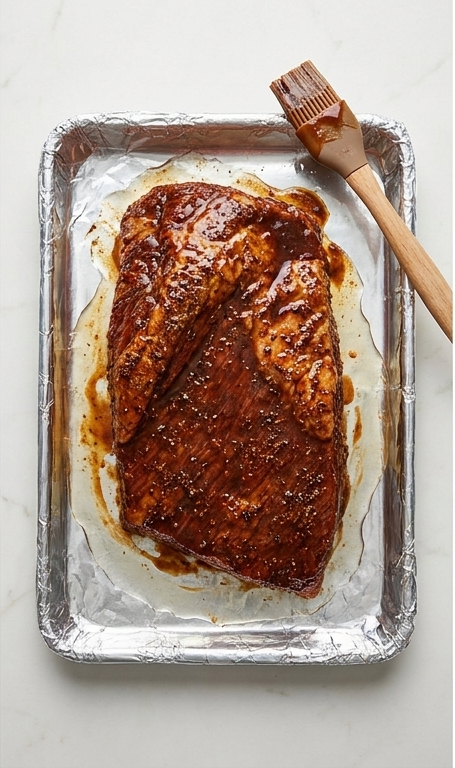
Whisk the BBQ sauce and liquid smoke together in a medium glass bowl until glossy and homogenous; pour this dark, shiny mixture over the seasoned brisket so it kisses the top and sides while leaving the cooking water to be added around the meat. Measure two cups of water into a clear measuring cup and pour it into the pan around the brisket (not over the top) so the interior steams as it cooks. Tuck the pan securely with foil and refrigerate the covered pan for at least 8 and up to 24 hours to let the flavors penetrate and the surface hydrate slightly—this overnight rest rounds and concentrates the textures and aromas.
Step 3: Bring to Temperature and Position
Remove the covered brisket from the refrigerator 30 minutes before cooking so it comes closer to room temperature and can cook more evenly. While you let it rest, preheat your oven to 275°F and make sure the oven rack sits in the middle position. Keep the brisket covered in the same rectangular pan so the moisture and pan geometry remain consistent between prep and cooking.
Step 4: Roast Slowly and Monitor Doneness
Slide the foil-covered rectangular pan into the oven and roast slowly for about five hours, then begin checking internal temperature with a probe thermometer. The target doneness is when the internal temperature registers 200°F and the meat yields easily—when you lift the brisket in the middle with tongs it should bend without breaking. If it’s not there yet, return it covered to the oven and retest every half hour; this extended low-and-slow roast develops a deeply caramelized exterior and a saturated, tender interior.
Step 5: Vent and Rest
When the brisket reaches the desired tenderness and temperature, transfer the entire foil-wrapped piece to a cooling rack set over the rectangular pan, open the foil to let excess steam vent, and allow it to rest for at least 30 minutes. This resting period redistributes juices and firms the bark slightly so slicing produces neat, succulent pieces rather than shredded fragments.
Step 6: Slice, Arrange, and Serve
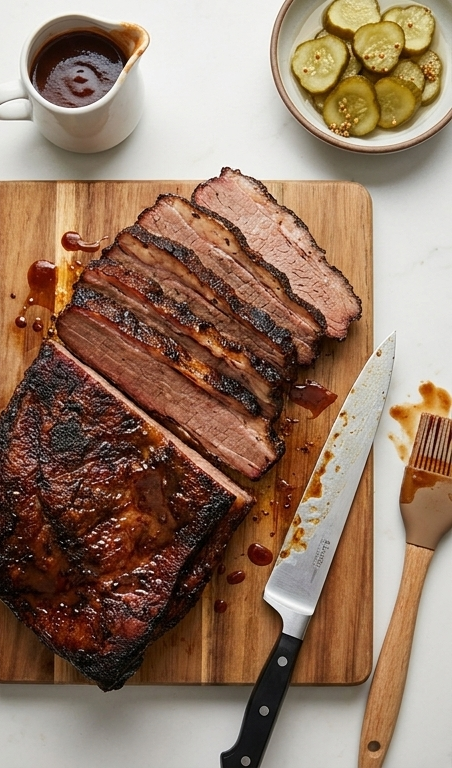
Transfer the rested brisket to a wide rectangular wooden cutting board and slice against the grain into thick, succulent pieces that show a deep brown, peppery crust and a moist pinkish-brown interior. Discard the cooking liquid, arrange the slices neatly, place a sharp carving knife nearby, and serve with a small gravy boat of your favorite BBQ sauce and a shallow bowl of tangy pickles for contrast. Enjoy the tender, smoky richness—slice deliberately and savor each textured bite.
Making It Your Own
Try swapping the point cut for a flat cut if you want leaner slices; I did this once and learned to compensate with a slather of extra sauce after slicing. For a regional twist, add a tablespoon of smoked paprika and a drizzle of molasses to the BBQ sauce to get deeper Southern notes. If you need a low-sodium version, halve the salt and boost herbs like thyme and oregano to keep complexity.
For a brisk, lighter summer plate, slice thin and serve on warm bolillo rolls with crisp slaw. In winter, pair thick slices with roasted root vegetables and a spoonful of the cooking juices reduced into a glaze.
How to Serve
When hosting, slice the brisket just before guests arrive so the plating looks fresh and glossy. Arrange slices on a warm platter in overlapping rows and place a small gravy boat of your favorite BBQ sauce nearby for those who like extra glaze. Provide a shallow bowl of tangy pickles or pickled onions to cut the richness and a basket of sturdy rolls if you want to make barbecue sandwiches.
Scale the recipe: for a larger crowd, keep the cook time similar but roast two smaller pieces in separate pans to maintain even heat circulation. For intimate dinners, use the same brisket and plan for generous leftovers that reheat beautifully.
Storage and Reheating Tips
After serving, cool leftover slices to room temperature for no more than two hours, then wrap tightly in foil or place in an airtight container and refrigerate for up to four days. For longer storage, freeze slices flat on a tray, then transfer to a freezer bag for up to three months.
To reheat, bring slices to room temperature, then warm gently in a low oven at 300°F wrapped loosely in foil with a splash of beef broth or reserved sauce to prevent drying. Microwaving works in a pinch but do it in short bursts and cover to keep moisture.
Common Mistakes and How to Avoid Them
Not trimming the fat to a uniform thickness can cause uneven cooking; take the time to trim to about a 1/2-inch cap so heat penetrates evenly. Skimping on the resting period will let juices run out when you slice; always rest for at least 30 minutes.
Overcooking is another worry if you watch time instead of temperature; rely on a probe thermometer and the bend test for tenderness. Finally, don’t skip the marinate step if you want a glossy, flavorful exterior—an overnight rest really makes the difference.
Ready to Try It?
Give this BBQ Brisket in Oven – Beef Brisket Recipe a spot on your weekend roster and plan for patience; the long cook is where the magic happens. Invite friends, make a simple salad and pickles, and let the oven handle the heavy lifting while you relax and enjoy the smells filling the house.
Frequently Asked Questions.
- What cut of brisket should I use and why?
Use the point cut if you want more marbling and a juicier result; the flat cut is leaner and slices neater but is drier.
- Can I skip the overnight marinate?
You can, but the sauce and seasoning will penetrate less deeply; even a 4-hour rest helps, though overnight is best.
- How do I know when the brisket is done?
Aim for an internal temperature of 200°F and a bend test where the brisket yields and bends without breaking.
- Can I use a smoker instead of the oven?
Yes, adapt temperatures and time for a smoker and expect more pronounced smoke flavor; liquid smoke can be omitted.
- How should I reheat leftovers to keep them moist?
Warm slices in a low oven wrapped in foil with a splash of beef broth or reserved sauce to preserve juiciness.
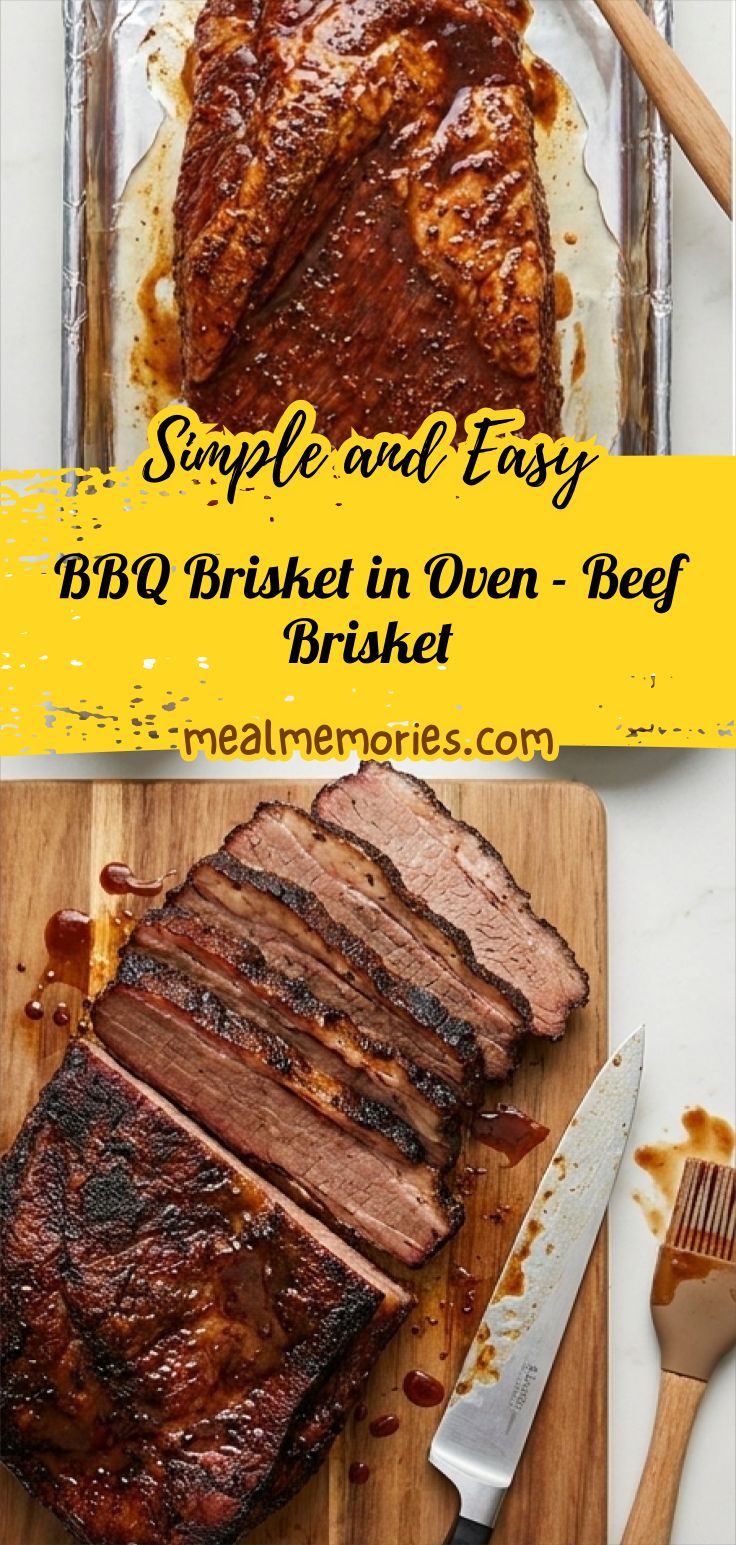
BBQ Brisket in Oven - Beef Brisket Recipe
Make BBQ Brisket in Oven - Beef Brisket Recipe now: roast low and slow for tender, saucy slices.
Ingredients
Instructions
Step 1: Trim and Season the Brisket
Begin by removing any silverskin and trimming the fat cap to a uniform ½-inch thickness so the meat cooks evenly. Lay the 6-pound point-cut brisket flat in a foil-lined rectangular baking pan (lasagna pan style) and generously season every surface with kosher salt, freshly ground black pepper, garlic powder, celery powder, onion powder and a whisper of ground nutmeg. Press the rub gently into the meat so the coarse textures of the seasonings adhere to the fat and exposed muscle—this crust will become the bark later.
Step 2: Mix Sauce and Marinate
Whisk the BBQ sauce and liquid smoke together in a medium glass bowl until glossy and homogenous; pour this dark, shiny mixture over the seasoned brisket so it kisses the top and sides while leaving the cooking water to be added around the meat. Measure two cups of water into a clear measuring cup and pour it into the pan around the brisket (not over the top) so the interior steams as it cooks. Tuck the pan securely with foil and refrigerate the covered pan for at least 8 and up to 24 hours to let the flavors penetrate and the surface hydrate slightly—this overnight rest rounds and concentrates the textures and aromas.
Step 3: Bring to Temperature and Position
Remove the covered brisket from the refrigerator 30 minutes before cooking so it comes closer to room temperature and can cook more evenly. While you let it rest, preheat your oven to 275°F and make sure the oven rack sits in the middle position. Keep the brisket covered in the same rectangular pan so the moisture and pan geometry remain consistent between prep and cooking.
Step 4: Roast Slowly and Monitor Doneness
Slide the foil-covered rectangular pan into the oven and roast slowly for about five hours, then begin checking internal temperature with a probe thermometer. The target doneness is when the internal temperature registers 200°F and the meat yields easily—when you lift the brisket in the middle with tongs it should bend without breaking. If it's not there yet, return it covered to the oven and retest every half hour; this extended low-and-slow roast develops a deeply caramelized exterior and a saturated, tender interior.
Step 5: Vent and Rest
When the brisket reaches the desired tenderness and temperature, transfer the entire foil-wrapped piece to a cooling rack set over the rectangular pan, open the foil to let excess steam vent, and allow it to rest for at least 30 minutes. This resting period redistributes juices and firms the bark slightly so slicing produces neat, succulent pieces rather than shredded fragments.
Step 6: Slice, Arrange, and Serve
Transfer the rested brisket to a wide rectangular wooden cutting board and slice against the grain into thick, succulent pieces that show a deep brown, peppery crust and a moist pinkish-brown interior. Discard the cooking liquid, arrange the slices neatly, place a sharp carving knife nearby, and serve with a small gravy boat of your favorite BBQ sauce and a shallow bowl of tangy pickles for contrast. Enjoy the tender, smoky richness—slice deliberately and savor each textured bite.
Notes
- Trim the fat cap to a uniform 1/2-inch for even cooking.
- Refrigerate covered for at least 8 hours to let flavors penetrate.
- Use a probe thermometer and target 200°F for tenderness.
- Let the brisket rest at least 30 minutes before slicing.
- Reheat wrapped with a splash of broth to retain moisture.