I first made this Strawberry Rhubarb Pie the summer my neighbor handed me a bundle of bright rhubarb stalks and said, “You have to try this together with strawberries.” That simple nudge turned into a ritual: a weekend pie that fills the house with warm, tangy sweetness and that sticky, fruit-scented air you never forget. I love how the tart rhubarb balances the strawberries, and how a scoop of melting vanilla ice cream makes it feel like a small celebration. This Strawberry Rhubarb Pie is my go-to when I want a dessert that feels homemade and a little bit nostalgic.
How This Pie Became My Rainy-Day Companion
One rainy afternoon, I rolled up my sleeves and took on a pile of rhubarb that was almost too bright to ignore. The kitchen was humid and the oven hummed, and I remember the sound of the knife tapping the board as I cut rhubarb into 1/2-inch pieces. The first aroma that rose as the pie baked was sharp and green, then softened into a jammy warmth as the strawberries thawed and released their juices. When I finally lifted the pie from the oven, steam curled out like a small promise. I felt proud, silly, and comforted all at once. That pie trapped the day: the taste of tart and sweet, the messy counters, and the simple good company of a slice and a warm mug. Now, any time the sky looks like rain, I reach for the same recipe and time slows down.
Primary Ingredients and What They Do
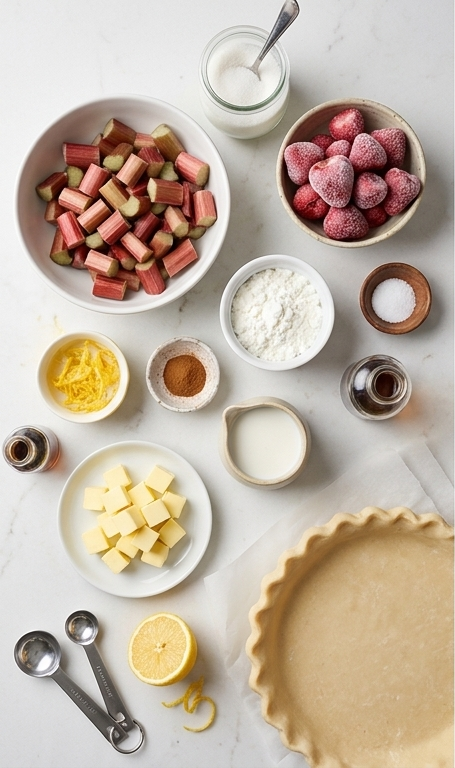
- Rhubarb: The backbone of the filling; its bright acidity cuts through sweetness and gives the pie structure. Substitute with tart green apples for similar tang if rhubarb is unavailable; choose firm stalks with vivid color and avoid any with brown spots.
- Strawberries: Provide natural sweetness and berry flavor. Frozen works great year-round; fresh is lovely in season. If using fresh, halve or quarter larger berries for even cooking.
- Granulated Sugar: Balances the tartness. You can reduce sugar slightly for a tarter pie or swap half for brown sugar for a caramel note.
- Cornstarch: Thickener to keep the filling from running; arrowroot is a good gluten-free alternative.
- Pie Crusts: The vehicle for the filling; pre-made 9-inch crusts save time. Use homemade butter crust for extra flakiness.
Essential Kitchen Tools
A few reliable tools make this Strawberry Rhubarb Pie easier and more fun to bake. Start with a sturdy 9-inch pie pan: metal gives crisp edges, glass helps you watch the bottom for browning; if you don’t have a pie pan, use a deep-dish tart pan with a removable bottom. A sharp chef’s knife and a wooden cutting board make quick work of rhubarb prep. Use a large mixing bowl to toss the filling so juices coat everything evenly; a rubber spatula helps fold gently without mashing. A pastry brush comes in handy for the milk wash; if you don’t have one, use a clean fingertip or folded paper towel. Finally, keep a baking tray under the pie to catch any drips.
Step-by-Step Preparation Guide
Step 1: Preheat and prepare the produce
Preheat the oven to 400°F. While it warms, trim and wash the rhubarb, remove any fibrous bits, and cut the stalks into neat ½‑inch pieces so they cook evenly. Zest and juice half a lemon, dice the butter into small tablespoon-sized pieces, and have the frozen strawberries measured out (no need to fully thaw). Measure the sugar, cornstarch, cinnamon, and salt into small bowls so they’re ready to combine. Unroll the two 9‑inch pre-made pie crusts and let them relax at room temperature on a sheet of parchment.
Step 2: Combine the filling
In a large mixing bowl, toss the rhubarb and frozen strawberries with the granulated sugar, ground cinnamon, and cornstarch. Add the lemon zest and juice, vanilla extract, and a pinch of salt. Gently fold everything together just until evenly coated — you want visible chunks of rhubarb and strawberries suspended in a glossy, thickening syrup without over-mashing the fruit. Set the bowl aside for a few minutes to let the cornstarch start binding the juices.
Step 3: Line the pie pan with the bottom crust
Lightly roll the first crust so it extends slightly beyond a 9‑inch pie pan, then ease it into the pan, pressing gently to fit the bottom and sides. Leave a generous overhang of dough around the rim to allow for crimping and an even seal later. Chill briefly if the dough is getting soft, and have a small plate of diced butter and a pastry brush ready nearby.
Step 4: Fill the crust and dot with butter
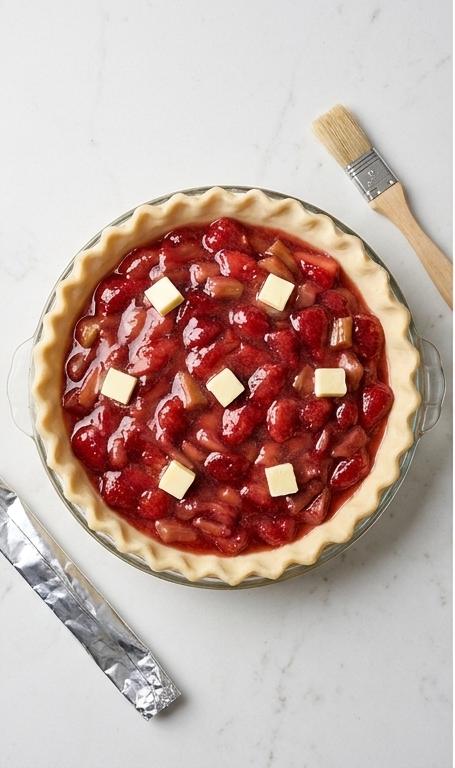
Spoon the ruby-red strawberry–rhubarb filling into the prepared bottom crust, spreading it to the edges so the fruit sits level. Scatter the small butter dice evenly across the top — these will melt into glossy pockets that encourage bubbling and richness. Give the pan a gentle shake to settle the mixture and wipe any juices from the rim before bringing the top crust into play.
Step 5: Top crust placement and sealing
Roll out the second crust to roughly match the pan, place it gently over the filled pie, and tuck the overhang underneath the bottom crust to form a single rim. Pinch the two layers together to seal the filling inside. Keep the edges tidy and even so the pie will bake with a uniform ridge.
Step 6: Crimp, vent, and finish the exterior
Using your fingers or a fork, crimp the pie edge into a decorative, tight seal. Cut several slits in the top crust to vent steam and brush the surface lightly with the tablespoon of milk to encourage an even golden sheen. If the edges look likely to over-brown, loosely wrap 3‑inch strips of foil around the rim to protect them during the first part of baking.
Step 7: Bake then finish baking and cool
Place the prepared pie on an oven-safe tray and bake at 400°F for the initial 30–45 minutes to set the filling and start browning. Carefully remove the foil strips if used and continue baking another 25–30 minutes until the crust is deeply golden and slightly crackled where the filling peeks through. Remove the pie from the oven and let it cool on the counter until the filling has settled enough to slice cleanly.
Step 8: Slice and serve warm
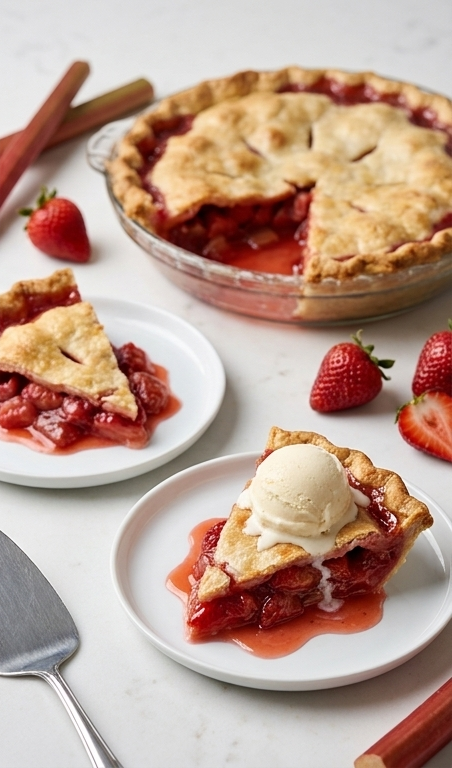
When the pie has cooled to warm (not piping hot), cut a few generous slices. Plate two slices on simple white plates; serve one slice with a generous scoop of vanilla ice cream so it melts slowly into the bright, syrupy filling. Scatter a few fresh strawberries and a short rhubarb stalk nearby for garnish and visual contrast.
Making It Your Own
I like to experiment with the proportions and textures. Try swapping half the strawberries for raspberries for a sharper berry note. For a less sweet version, cut the sugar to 3/4 cup and add a touch more lemon juice to brighten the filling.
If you want a gluten-free pie, use a gluten-free crust and swap cornstarch for arrowroot. For a vegan twist, use a plant-based butter and brush the crust with non-dairy milk. In early summer, use fresh berries and reduce the cornstarch slightly to keep the filling glossy and not too stiff. Each tiny change makes the pie feel like a new, personal experiment.
How to Serve
Serve slices warm for the most nostalgic effect. For a casual gathering, plate the Strawberry Rhubarb Pie with large scoops of vanilla ice cream and a light dusting of powdered sugar. At a dinner party, warm individual slices slightly in a low oven and present them with a spoonful of crème fraîche and a sprig of mint.
To stretch the recipe for a crowd, bake two pies and serve smaller wedges with a dessert plate; one 9-inch pie serves about eight. For a more formal presentation, use a pie server and place each slice on chilled plates so the ice cream doesn’t melt too fast.
Storage and Reheating Tips
Store leftover pie covered loosely at room temperature for up to two days; the crust stays flakiest this way. For longer storage, wrap tightly and refrigerate for up to five days. Reheat individual slices in a 325°F oven for 10 to 15 minutes until warm through.
To freeze, wrap the cooled whole pie tightly in plastic and foil. Freeze up to three months. Thaw overnight in the refrigerator and refresh in a 350°F oven for 15 to 20 minutes to recrisp the crust.
Common Pitfalls and How to Avoid Them
A runny filling usually happens when the filling is under-thickened or the pie didn’t bake long enough. Measure the cornstarch accurately and give the pie enough time in the oven so the filling starts to bubble and set.
Overworked dough can yield a tough crust. Handle the crust gently, chill if it warms, and avoid excessive rolling. If the edges brown too fast, tent with foil as the recipe suggests.
Final Thoughts
If you make this Strawberry Rhubarb Pie, take a moment to enjoy the steam and the first spoonful. It rewards patience and little adjustments, and it tends to bring people together. I hope you find as much joy in baking and sharing it as I do.
Frequently Asked Questions.
-
Can I use fresh strawberries instead of frozen?
Yes, you can use fresh strawberries. If they are very juicy, consider reducing the cornstarch by a tablespoon and patting them slightly dry; fresh berries may cook a bit more quickly than frozen. -
How do I prevent a soggy bottom crust?
Bake the pie on a preheated baking sheet to help the bottom crust brown. Also, avoid overfilling and wipe the rim clean before sealing so the crust bakes evenly. -
Can I make the pie ahead of time?
Absolutely. You can assemble and refrigerate the unbaked pie for a few hours before baking, or bake it and reheat slices later. See storage tips above for freezing options. -
Is there a way to make it less tart?
Increase the sugar slightly or add a tablespoon of honey. Using riper strawberries also adds natural sweetness that offsets the rhubarb. -
What can I use instead of cornstarch?
Arrowroot powder works well and keeps the filling clear; tapioca starch is another good option for a slightly chewier texture.
Strawberry Rhubarb Pie
Bake a classic Strawberry Rhubarb Pie with tender rhubarb and sweet strawberries; serve warm with vanilla ice cream.
Ingredients
Instructions
Step 1: Preheat and prepare the produce
Preheat the oven to 400°F. While it warms, trim and wash the rhubarb, remove any fibrous bits, and cut the stalks into neat ½‑inch pieces so they cook evenly. Zest and juice half a lemon, dice the butter into small tablespoon-sized pieces, and have the frozen strawberries measured out (no need to fully thaw). Measure the sugar, cornstarch, cinnamon, and salt into small bowls so they're ready to combine. Unroll the two 9‑inch pre-made pie crusts and let them relax at room temperature on a sheet of parchment.
Step 2: Combine the filling
In a large mixing bowl, toss the rhubarb and frozen strawberries with the granulated sugar, ground cinnamon, and cornstarch. Add the lemon zest and juice, vanilla extract, and a pinch of salt. Gently fold everything together just until evenly coated — you want visible chunks of rhubarb and strawberries suspended in a glossy, thickening syrup without over-mashing the fruit. Set the bowl aside for a few minutes to let the cornstarch start binding the juices.
Step 3: Line the pie pan with the bottom crust
Lightly roll the first crust so it extends slightly beyond a 9‑inch pie pan, then ease it into the pan, pressing gently to fit the bottom and sides. Leave a generous overhang of dough around the rim to allow for crimping and an even seal later. Chill briefly if the dough is getting soft, and have a small plate of diced butter and a pastry brush ready nearby.
Step 4: Fill the crust and dot with butter
Spoon the ruby-red strawberry–rhubarb filling into the prepared bottom crust, spreading it to the edges so the fruit sits level. Scatter the small butter dice evenly across the top — these will melt into glossy pockets that encourage bubbling and richness. Give the pan a gentle shake to settle the mixture and wipe any juices from the rim before bringing the top crust into play.
Step 5: Top crust placement and sealing
Roll out the second crust to roughly match the pan, place it gently over the filled pie, and tuck the overhang underneath the bottom crust to form a single rim. Pinch the two layers together to seal the filling inside. Keep the edges tidy and even so the pie will bake with a uniform ridge.
Step 6: Crimp, vent, and finish the exterior
Using your fingers or a fork, crimp the pie edge into a decorative, tight seal. Cut several slits in the top crust to vent steam and brush the surface lightly with the tablespoon of milk to encourage an even golden sheen. If the edges look likely to over-brown, loosely wrap 3‑inch strips of foil around the rim to protect them during the first part of baking.
Step 7: Bake then finish baking and cool
Place the prepared pie on an oven-safe tray and bake at 400°F for the initial 30–45 minutes to set the filling and start browning. Carefully remove the foil strips if used and continue baking another 25–30 minutes until the crust is deeply golden and slightly crackled where the filling peeks through. Remove the pie from the oven and let it cool on the counter until the filling has settled enough to slice cleanly.
Step 8: Slice and serve warm
When the pie has cooled to warm (not piping hot), cut a few generous slices. Plate two slices on simple white plates; serve one slice with a generous scoop of vanilla ice cream so it melts slowly into the bright, syrupy filling. Scatter a few fresh strawberries and a short rhubarb stalk nearby for garnish and visual contrast.
Notes
- Use frozen strawberries straight from the freezer to control moisture and texture.
- Chill the crust if it becomes too soft while assembling to prevent shrinking.
- Tent the pie edges with foil if they brown too quickly during baking.
- Let the pie cool until warm before slicing to ensure cleaner slices.
- For a glossier filling, reduce cornstarch by a tablespoon when using very ripe fresh strawberries.