Cold Brew Coffee Recipe is my go-to ritual when the day needs a slow, cool lift. I make a jar every few days and cherish that first pour, the syrupy concentrate that smells like warm toast and midnight conversations. It fits my slow-morning habits and scales up beautifully when friends drop by. If you love coffee with minimal fuss and maximum clarity, this Cold Brew Coffee Recipe will become part of your weekly routine.
How This Recipe Became My Rainy-Day Favorite
I first stumbled into this Cold Brew Coffee Recipe on a rainy afternoon when the power flickered and the espresso machine sat silent. I remember the tactile pleasure of grinding beans by hand, the earthy aroma rising like a memory, and the patient stirring as rain tapped on the windows. Waiting while the jar steeped felt like giving myself permission to slow down; the kitchen smelled rich and calm, and I read a dog-eared novel between checking the clock. When I finally strained and poured the concentrate over ice, the first sip was smooth, chocolatey, and unexpectedly bright, a warm reward that felt both indulgent and earned. That quiet success turned into a habit, and now the ritual of making this cold brew carries the same comfort as a favorite sweater.
Discuss the primary ingredients
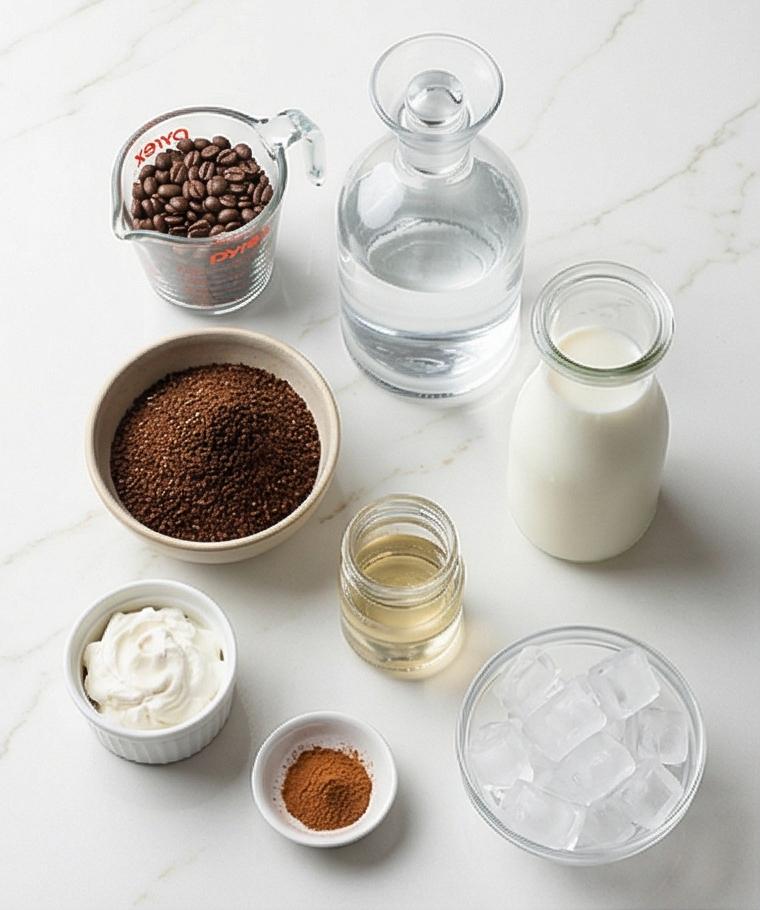
- Coarsely ground coffee (1 cup / 90 g): The star ingredient that defines flavor and body. Use medium- to dark-roast for chocolate and caramel notes. Substitute with a single-origin for floral or a lighter roast for zing. Pick freshly roasted beans and grind just before brewing.
- Cold filtered water (4 cups / 960 ml): Solvent and balance. Use clean, neutral-tasting water; bottled or filtered tap works best. Hard water can mute brightness.
- Chilled water (1 cup / 240 ml) optional: For rinsing or adjusting strength without warming the concentrate. Use chilled filtered water.
- Milk or milk alternative (up to 1 cup / 240 ml) optional: Adds creaminess. Try oat milk for a sweet, silky finish.
- Ice, sweetener, whipped cream, and garnishes: Finishers that personalize each cup.
Essential kitchen tools and why they matter
A few thoughtful tools make this Cold Brew Coffee Recipe easy and repeatable. The right gear preserves clarity and keeps cleanup low.
- Burr grinder: Produces consistent, coarse grounds so extraction is even. Blade grinders create fines and overextraction.
- Large non-reactive jar or pitcher: Glass or stainless lets you see the steep and keeps flavors pure. Avoid reactive metals.
- Fine-mesh sieve and filters: Use a paper filter for a clean cup or a towel/cheesecloth for fuller body. Two-pass straining improves clarity.
- Long spoon and wide-mouth pitcher: For gentle stirring and easy transfer. A funnel helps decant concentrate into storage bottles.
If you do not own a burr grinder, buy pre-ground labeled coarse, or pulse briefly in a clean blender. A mason jar doubles as brew vessel and storage in a pinch.
Step-by-Step Preparation Guide
Step 1: Grind the beans to a coarse texture
Measure 1 cup (90 g) of medium- to dark-roast coffee beans and grind them to a coarse, sandy texture—think raw sugar crystals or coarse sea salt. Use a burr grinder set wide and aim for large, irregular granules that hold their shape; you should be able to see individual particles and feel their grit between your fingers. Place the grounds into a clean, shallow matte ceramic bowl or directly into the brewing jar to avoid extra transfers—this keeps the aroma concentrated and the texture intact as you move into the next step.
Step 2: Load the brew jar with grounds
Pour the coarsely ground coffee into a clear 1.5–2 quart non-reactive glass jar so the dark, matte granules blanket the bottom in an even bed. Gently tap the jar on the surface to level the grounds; you should see a slightly uneven, pebbly landscape of coffee with dry, velvety peaks and fine pockets between the particles. Set a small glass carafe of cold filtered water nearby for the next pour.
Step 3: Saturate the grounds with room-temperature water and stir
Slowly pour 4 cups (960 ml) of cold filtered water (68–72°F / 20–22°C) in a thin, even stream over the grounds to fully saturate them. As the water hits, note the glossy darkening of granules and the way channels form where liquid finds its way—this is the bloom and saturation phase. Use a long, slender stainless spoon to gently stir for 20–30 seconds, scraping the bottom and sides until no dry pockets remain; the mixture should look uniformly moistened, glossy but still granular, with concentrated dark swirls on the surface.
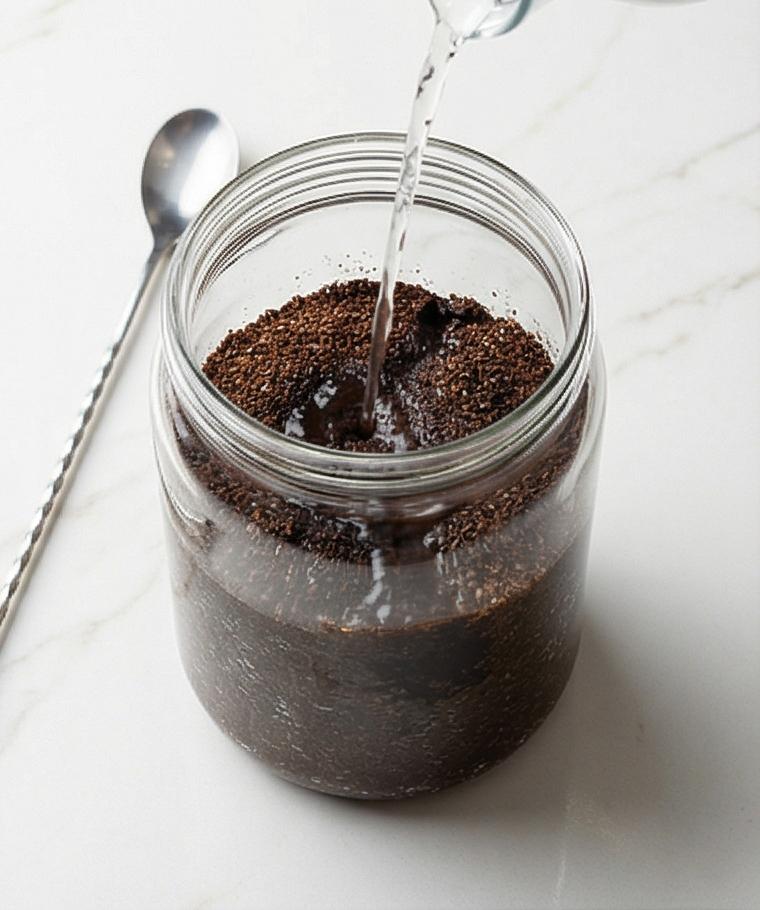
Step 4: Cover the jar to prevent oxidation
Seal the jar tightly with a lid or cling film to block odors and minimize oxidation; the surface of the brew should remain calm and sealed. The texture at this point is a weighted, wet grain bed with a thin film of coffee on top—no foam, just an even, dark-working surface. Let the covered vessel rest undisturbed on the quartz surface while you decide whether to steep at room temperature or chill for a brighter cup.
Step 5: Steep at room temperature or refrigerate for a cleaner profile
For a balanced, smooth extract steep the covered jar at room temperature for 12–16 hours; for a slightly brighter, cleaner profile, place it in the refrigerator and steep 18–24 hours. Visually, after steeping you’ll see a uniform dark concentrate with a subtle separation where fines settle to the bottom and the top stays translucent but richly colored—like liquid mahogany above a softer sediment bed.
Step 6: Prepare the straining station
Set a wide-mouth pitcher on the quartz and place a fine-mesh sieve over it. Line the sieve with a paper coffee filter, a tightly woven kitchen towel, or two layers of cheesecloth—each will visibly alter the texture of the strained concentrate (paper = clear, towel = slightly fuller mouthfeel). Keep a clean jar or second pitcher ready to receive the initial strained coffee.
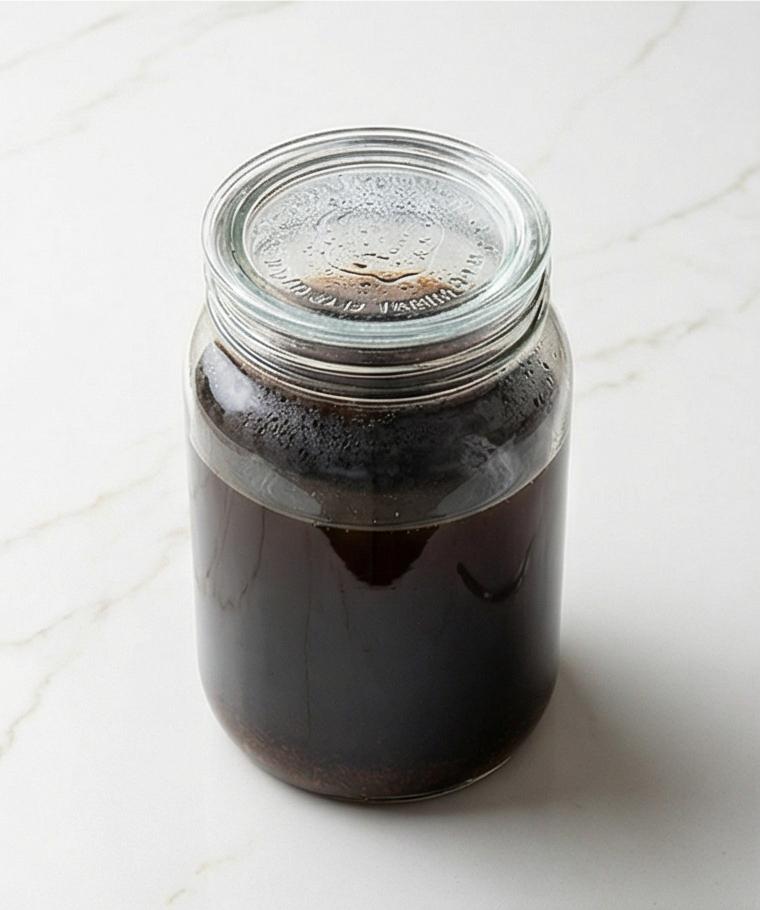
Step 7: Redistribute and begin the first strain
Gently swirl the steeped jar once to re-suspend settled fines, then slowly pour the mixture through the lined sieve into the clean pitcher, allowing gravity to do the work. You should see a steady, viscous drip—deep, glossy concentrate falling through the filter while the spent grounds remain dark and pillowy in the cloth or paper. This first pass removes most of the coarse particles and yields a thick, syrupy concentrate.
Step 8: Perform a second strain if needed for extra clarity
If a noticeable sediment remains in the pitcher, replace the filter or rinse the cloth and strain the concentrate a second time. The second strain will take another 5–10 minutes and will produce a visibly clearer, cleaner liquid—less haze, smoother surface tension, and a more jewel-like liquid when held to the light.
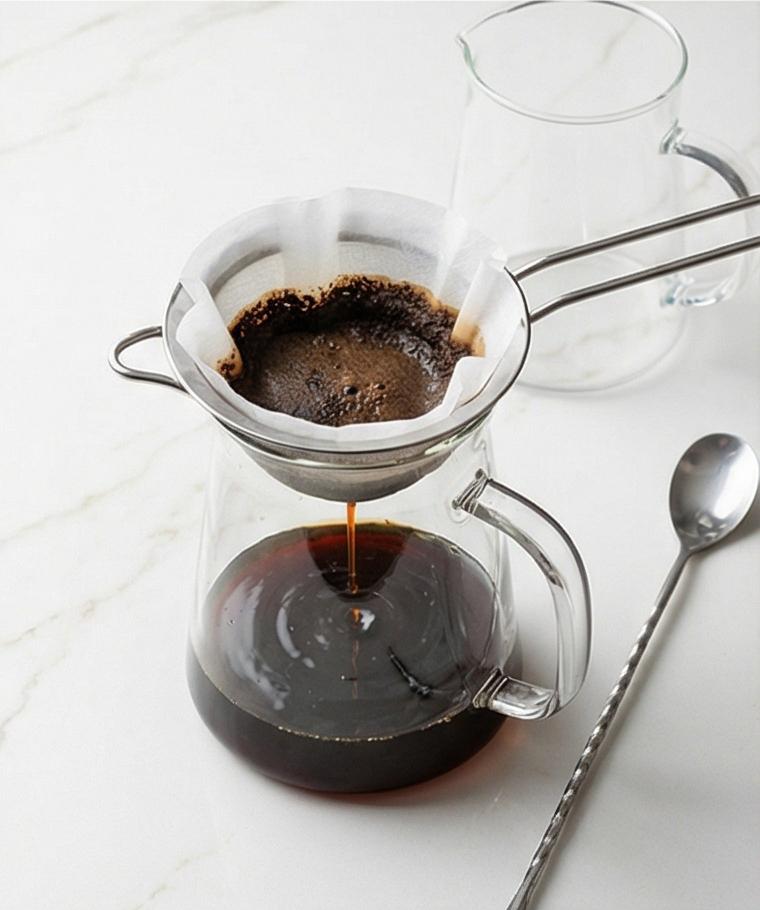
Step 9: Rinse the spent grounds to increase yield (optional)
To coax out every last bit of flavor, pour up to 1/2 cup (120 ml) of chilled filtered water through the used grounds in the filter, letting it drip slowly into the pitcher. This rinse yields a lighter stream that visibly thins the concentrate; taste as you go so you don’t over-dilute. The spent grounds afterward look compressed, darker, and matte—a compacted, coffee-scented puck.
Step 10: Transfer and chill the concentrate
Decant the strained cold brew into a clean glass bottle or jar with a tight-fitting lid. The concentrate should be viscous and glossy with a deep brown color. Refrigerate at 36–40°F (2–4°C) for at least 2 hours if the brew was made at room temperature so the liquid becomes bright and cold—chilled concentrate will look denser, with less surface shimmer and a still, mirror-like top.
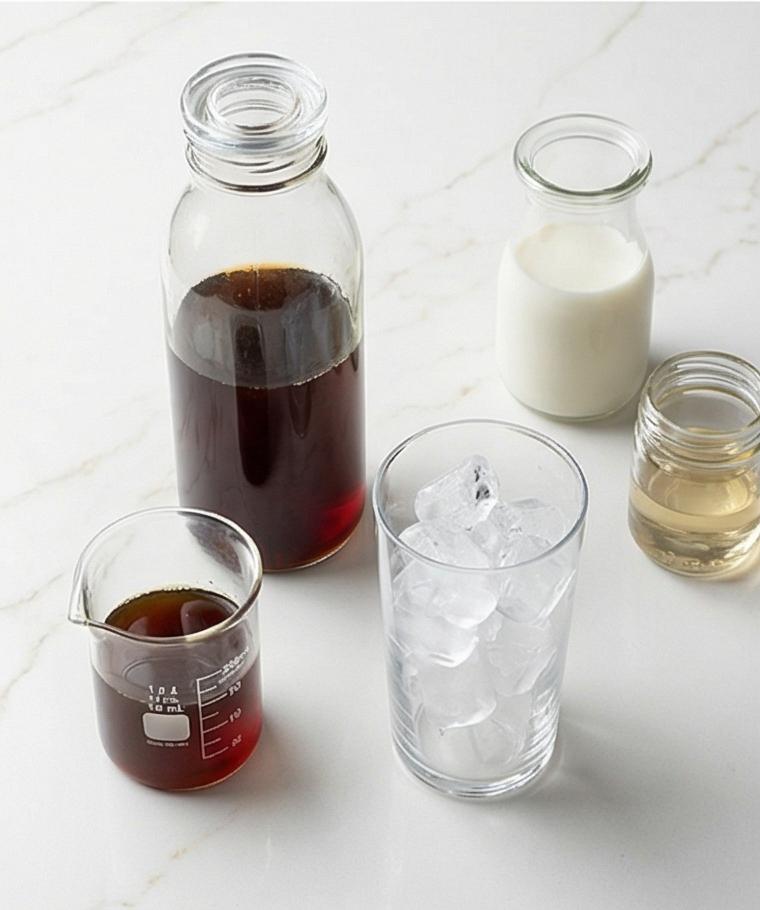
Step 11: Plan dilution and measure your serving ratio
For a typical drinking strength, use a roughly 1:1 dilution—combine 1/2 cup (120 ml) cold brew concentrate with 1/2 cup (120 ml) cold filtered water or chilled milk. Visually the two liquids form a layered gradient as you pour: the dense dark concentrate sinks briefly, then gradually homogenizes into a uniform opaque-brown or creamy tone if milk is used.
Step 12: Assemble the glass over ice
Fill a 12-ounce (355 ml) glass to the brim with clear ice cubes made from filtered water. Pour the concentrate first, then add water and/or chilled milk; stir gently until the drink is homogeneously colored and slightly opaque when milk is included. The final drink should have a cool, silky surface, with tiny bubbles clinging to ice and a pleasing, even color.
Step 13: Sweeten to taste
Add simple syrup or dissolve granulated sugar to taste—start small (1–2 teaspoons) and stir until fully incorporated. The correct sweetness will leave the surface smooth and free of visible crystals; a well-mixed iced cold brew has no graininess and shows a uniform sheen.
Step 14: Optional indulgence with whipped cream and garnish
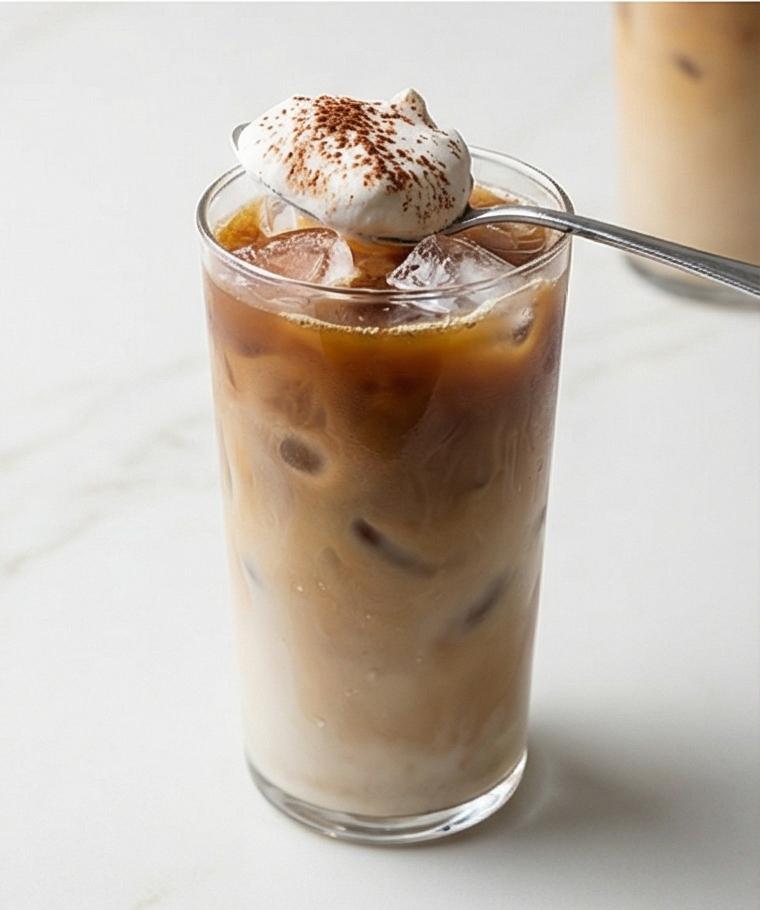
For a richer treat, top the glass with a spoonful of chilled whipped cream and finish with a light dusting of ground cinnamon or unsweetened cocoa powder. The cream will float as a soft, pillowy cap with fine, matte powder speckles on top, creating a contrasting texture to the dark liquid beneath.
Step 15: Store leftover concentrate properly
Keep any remaining concentrate tightly sealed in the refrigerator at 36–40°F (2–4°C) for up to 7–10 days. Stored concentrate looks slightly more settled over time, with fine particles compacted at the bottom of the bottle; freshness is indicated by a glossy, bright liquid and lively aroma.
Step 16: Re-homogenize before each use
Before pouring from stored bottles, give the concentrate a gentle shake or stir to re-suspend settled compounds. The action should briefly cloud the liquid as the particulates lift, then settle into a uniform, drinkable texture.
Step 17: Final tasting notes and adjustments
When you taste the finished drink, note body, acidity, and sweetness; adjust future brews by lengthening or shortening steep time, changing grind coarseness, or varying dilution. Visually, small tweaks will show as changes in clarity, color saturation, and surface gloss.
Step 18: Serve and enjoy
Present the chilled cold brew on the quartz surface in a tall glass over ice, optionally topped with cream and a dusting of cocoa; the final presentation should be cool, glossy, and inviting—no condensation rings on the surface, just a pristine, layered drink ready to sip.
Making It Your Own
I like swapping beans based on the season. In summer I try a lighter roast for brightness; in fall I reach for a chocolatey dark roast. For a dairy-free twist, I replace whole milk with oat milk and add a splash of vanilla syrup.
If you want a bolder concentrate, grind a touch finer and shorten steep time by a few hours; for a gentler cup, coarsen the grind and extend the refrigerator steep. To make a spiced batch, steep a split cinnamon stick with the grounds and strain as usual. Small experiments help you learn how grind, time, and water interact in this Cold Brew Coffee Recipe.
How to Serve
Imagine hosting a small brunch: make a double batch of concentrate the day before and chill bottles in the fridge. Set up an ice bowl, milk options, simple syrup, and small spoons so guests can build their drinks.
For a crowd, one standard batch yields about 8 servings when diluted 1:1. Offer chilled oat milk and whole milk for variety. If you want to spotlight a dessert pairing, serve tiny biscotti or shortbread that accent the chocolate notes in the concentrate. Garnish individual glasses with a light dusting of cocoa or cinnamon for a polished finish.
Storage and reheating tips
Store concentrate in clean, airtight glass bottles in the refrigerator at 36-40°F (2-4°C). It keeps well for 7-10 days; beyond that it loses brightness. Label bottles with the brew date to track freshness.
If you prefer warm coffee, dilute the concentrate with hot water using a 1:1 ratio and heat gently on the stove. Do not boil the concentrate; gentle warming preserves the delicate aromatics.
Common mistakes and how to avoid them
Using too-fine grounds can make the brew bitter and cloudy. Stick to a coarse grind and perform a second strain if clarity matters. Understeeping yields thin flavor; oversteeping can extract bitter notes. Keep times consistent and tweak gradually.
Neglecting clean equipment will introduce off flavors. Rinse jars and filters well and store concentrate in clean bottles to maintain the bright profile you want from this Cold Brew Coffee Recipe.
Let’s Brew
Give this Cold Brew Coffee Recipe a try over a weekend and treat the process like a tiny ritual. With simple tools and small experiments you will dial in a concentrate that fits your taste, and every jar will taste a little better as you learn the variables.
Frequently Asked Questions
- What is the best grind size for cold brew and why?
Coarse, like raw sugar or coarse sea salt. It reduces overextraction and keeps the concentrate smooth while making it easier to filter.
- How long should I steep for the best balance?
Steep 12-16 hours at room temperature for balance, or 18-24 hours in the refrigerator for a brighter cup. Taste and adjust in small increments.
- Can I make this without a burr grinder?
Yes. Buy beans pre-ground coarse or pulse briefly in a blender, then sift out fines. Pre-ground options work, but fresh grinding gives best flavor.
- How long does cold brew concentrate last in the fridge?
Store 7-10 days in a sealed glass bottle at 36-40°F (2-4°C). Freshness shows as a glossy liquid and lively aroma.
- What is the recommended dilution ratio for serving?
Start with 1:1 concentrate to water or milk. Adjust to taste, using more water for a lighter cup and less for boldness.
Cold Brew Coffee Recipe
Make Cold Brew Coffee Recipe: steep coarse coffee in cold filtered water to craft smooth concentrate for easy iced or milk drinks.
Ingredients
Instructions
Step 1: Grind the beans to a coarse texture
Measure 1 cup (90 g) of medium- to dark-roast coffee beans and grind them to a coarse, sandy texture—think raw sugar crystals or coarse sea salt. Use a burr grinder set wide and aim for large, irregular granules that hold their shape; you should be able to see individual particles and feel their grit between your fingers. Place the grounds into a clean, shallow matte ceramic bowl or directly into the brewing jar to avoid extra transfers—this keeps the aroma concentrated and the texture intact as you move into the next step.
Step 2: Load the brew jar with grounds
Pour the coarsely ground coffee into a clear 1.5–2 quart non-reactive glass jar so the dark, matte granules blanket the bottom in an even bed. Gently tap the jar on the surface to level the grounds; you should see a slightly uneven, pebbly landscape of coffee with dry, velvety peaks and fine pockets between the particles. Set a small glass carafe of cold filtered water nearby for the next pour.
Step 3: Saturate the grounds with room-temperature water and stir
Slowly pour 4 cups (960 ml) of cold filtered water (68–72°F / 20–22°C) in a thin, even stream over the grounds to fully saturate them. As the water hits, note the glossy darkening of granules and the way channels form where liquid finds its way—this is the bloom and saturation phase. Use a long, slender stainless spoon to gently stir for 20–30 seconds, scraping the bottom and sides until no dry pockets remain; the mixture should look uniformly moistened, glossy but still granular, with concentrated dark swirls on the surface.
Step 4: Cover the jar to prevent oxidation
Seal the jar tightly with a lid or cling film to block odors and minimize oxidation; the surface of the brew should remain calm and sealed. The texture at this point is a weighted, wet grain bed with a thin film of coffee on top—no foam, just an even, dark-working surface. Let the covered vessel rest undisturbed on the quartz surface while you decide whether to steep at room temperature or chill for a brighter cup.
Step 5: Steep at room temperature or refrigerate for a cleaner profile
For a balanced, smooth extract steep the covered jar at room temperature for 12–16 hours; for a slightly brighter, cleaner profile, place it in the refrigerator and steep 18–24 hours. Visually, after steeping you’ll see a uniform dark concentrate with a subtle separation where fines settle to the bottom and the top stays translucent but richly colored—like liquid mahogany above a softer sediment bed.
Step 6: Prepare the straining station
Set a wide-mouth pitcher on the quartz and place a fine-mesh sieve over it. Line the sieve with a paper coffee filter, a tightly woven kitchen towel, or two layers of cheesecloth—each will visibly alter the texture of the strained concentrate (paper = clear, towel = slightly fuller mouthfeel). Keep a clean jar or second pitcher ready to receive the initial strained coffee.
Step 7: Redistribute and begin the first strain
Gently swirl the steeped jar once to re-suspend settled fines, then slowly pour the mixture through the lined sieve into the clean pitcher, allowing gravity to do the work. You should see a steady, viscous drip—deep, glossy concentrate falling through the filter while the spent grounds remain dark and pillowy in the cloth or paper. This first pass removes most of the coarse particles and yields a thick, syrupy concentrate.
Step 8: Perform a second strain if needed for extra clarity
If a noticeable sediment remains in the pitcher, replace the filter or rinse the cloth and strain the concentrate a second time. The second strain will take another 5–10 minutes and will produce a visibly clearer, cleaner liquid—less haze, smoother surface tension, and a more jewel-like liquid when held to the light.
Step 9: Rinse the spent grounds to increase yield (optional)
To coax out every last bit of flavor, pour up to 1/2 cup (120 ml) of chilled filtered water through the used grounds in the filter, letting it drip slowly into the pitcher. This rinse yields a lighter stream that visibly thins the concentrate; taste as you go so you don’t over-dilute. The spent grounds afterward look compressed, darker, and matte—a compacted, coffee-scented puck.
Step 10: Transfer and chill the concentrate
Decant the strained cold brew into a clean glass bottle or jar with a tight-fitting lid. The concentrate should be viscous and glossy with a deep brown color. Refrigerate at 36–40°F (2–4°C) for at least 2 hours if the brew was made at room temperature so the liquid becomes bright and cold—chilled concentrate will look denser, with less surface shimmer and a still, mirror-like top.
Step 11: Plan dilution and measure your serving ratio
For a typical drinking strength, use a roughly 1:1 dilution—combine 1/2 cup (120 ml) cold brew concentrate with 1/2 cup (120 ml) cold filtered water or chilled milk. Visually the two liquids form a layered gradient as you pour: the dense dark concentrate sinks briefly, then gradually homogenizes into a uniform opaque-brown or creamy tone if milk is used.
Step 12: Assemble the glass over ice
Fill a 12-ounce (355 ml) glass to the brim with clear ice cubes made from filtered water. Pour the concentrate first, then add water and/or chilled milk; stir gently until the drink is homogeneously colored and slightly opaque when milk is included. The final drink should have a cool, silky surface, with tiny bubbles clinging to ice and a pleasing, even color.
Step 13: Sweeten to taste
Add simple syrup or dissolve granulated sugar to taste—start small (1–2 teaspoons) and stir until fully incorporated. The correct sweetness will leave the surface smooth and free of visible crystals; a well-mixed iced cold brew has no graininess and shows a uniform sheen.
Step 14: Optional indulgence with whipped cream and garnish
For a richer treat, top the glass with a spoonful of chilled whipped cream and finish with a light dusting of ground cinnamon or unsweetened cocoa powder. The cream will float as a soft, pillowy cap with fine, matte powder speckles on top, creating a contrasting texture to the dark liquid beneath.
Step 15: Store leftover concentrate properly
Keep any remaining concentrate tightly sealed in the refrigerator at 36–40°F (2–4°C) for up to 7–10 days. Stored concentrate looks slightly more settled over time, with fine particles compacted at the bottom of the bottle; freshness is indicated by a glossy, bright liquid and lively aroma.
Step 16: Re-homogenize before each use
Before pouring from stored bottles, give the concentrate a gentle shake or stir to re-suspend settled compounds. The action should briefly cloud the liquid as the particulates lift, then settle into a uniform, drinkable texture.
Step 17: Final tasting notes and adjustments
When you taste the finished drink, note body, acidity, and sweetness; adjust future brews by lengthening or shortening steep time, changing grind coarseness, or varying dilution. Visually, small tweaks will show as changes in clarity, color saturation, and surface gloss.
Step 18: Serve and enjoy
Present the chilled cold brew on the quartz surface in a tall glass over ice, optionally topped with cream and a dusting of cocoa; the final presentation should be cool, glossy, and inviting—no condensation rings on the surface, just a pristine, layered drink ready to sip.
Notes
- Use freshly roasted beans and grind just before brewing for best flavor
- Use filtered water for a clean cup; avoid hard or heavily chlorinated tap water
- Strain twice if you want an extra clear concentrate
- Label bottles with the brew date and use within 7-10 days
- Adjust steep time and grind coarseness gradually to fine-tune taste