Breakfast Quesadilla Recipe: a melty, crunchy morning fix that always feels like a small celebration. I come back to this Breakfast Quesadilla Recipe whenever I want something that hits savory, creamy, and bright all at once. It started as a way to use leftover bacon and eggs, then quietly became my go-to when friends drop by for weekend brunch. The balance of crisp tortilla, stretchy cheese, and tender scrambled eggs makes it impossible not to smile while you eat.
How This Recipe Became My Rainy-Day Favorite
I remember the first time I made this Breakfast Quesadilla Recipe on a slow, gray Saturday when the rain tapped the windows and the whole house smelled like coffee and bacon. The sizzle of thick-cut bacon in the pan felt like a promise, and the small-diced red pepper and onion added bright, sweet pops as they softened. Folding glossy, custardy scrambled eggs into the cooled peppers felt like tucking a warm blanket around breakfast. When I bit into the first wedge and the cheese stretched in long, satisfying strings, I laughed out loud. It was comfort and celebration in one bite, and from then on this quesadilla meant relaxed mornings, good company, and a kitchen that smelled like home.
Main Ingredients and Why They Matter
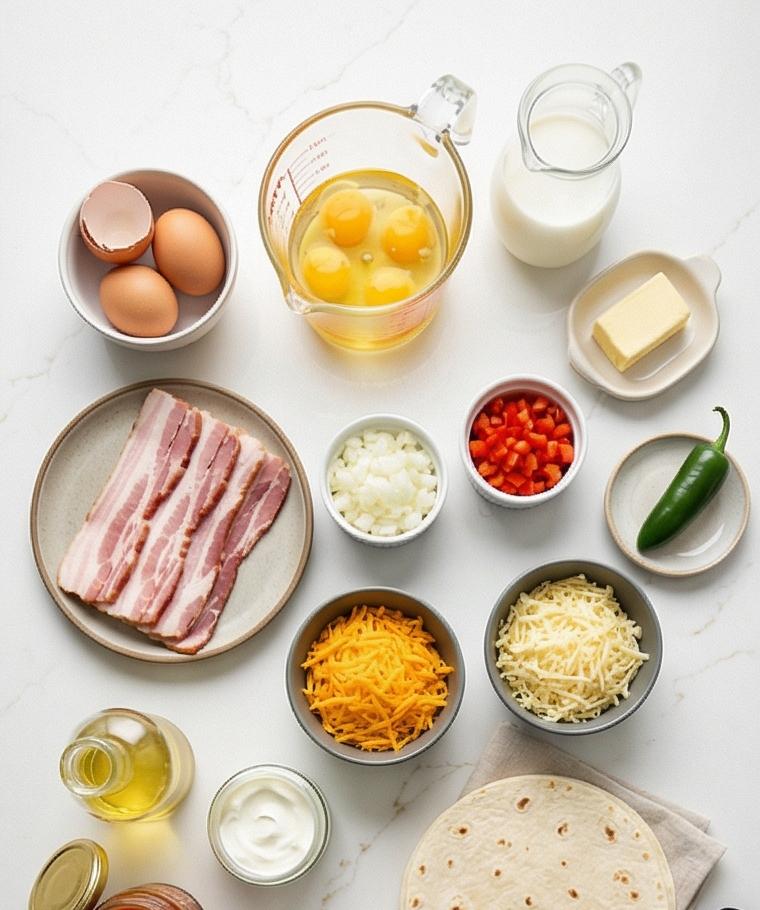
- Bacon: The salty, smoky backbone that adds crunch and fat for flavor. Substitute with thick-cut turkey bacon or smoked tempeh for a lighter or vegetarian option. Look for evenly marbled slices.
- Eggs: Create the soft, custardy interior. For fluffier curds, use room-temperature eggs and gentle, low-heat cooking. Egg whites or a 50/50 egg-to-white mix can reduce richness.
- Tortillas: The structural shell. Use flour tortillas for pliability; swap for large corn tortillas for a rustic twist but expect less foldability.
- Cheeses: Sharp cheddar gives punch, Monterey Jack adds cream and stretch. Try Pepper Jack for heat or a mix of cheddar and mozzarella for milder melt.
- Vegetables and aromatics: Onion, red bell pepper, and jalapeño add sweetness, color, and a hit of brightness. Use milder peppers or roasted vegetables for different flavor profiles.
Essential Kitchen Tools and Why They Help
A few simple tools make the Breakfast Quesadilla Recipe effortless and repeatable. A heavy skillet gives even browning and helps render bacon fat without burning. A heatproof spatula or wooden spoon makes gentle folding of the eggs easy and keeps curds intact. A small bowl for mixing cheeses speeds assembly and prevents clumping. A wire rack and baking sheet are optional for keeping wedges warm and crisp while you finish cooking the rest. If you do not have a heavy skillet, a nonstick pan will work fine for eggs and quesadilla toasting. A small whisk and a sharp knife for slicing veggies finish the minimal but effective kit.
- Heavy skillet or cast iron: for bacon rendering and even browning.
- Nonstick skillet or frying pan: an alternative for eggs and toasting.
- Spatula: to fold eggs and flip quesadillas safely.
- Mixing bowls and whisk: for eggs and cheese prep.
- Wire rack and baking sheet: optional for holding wedges warm.
Step-by-Step Preparation Guide
Step 1: Warm the oven (optional)
If you want to keep finished quesadillas warm and crisp while you finish cooking, preheat the oven to 200°F (95°C) and set a wire rack on a baking sheet. Place the rack in the oven so it’s ready – this small, optional step quietly guarantees every finished wedge stays crisp without additional handling.
Step 2: Render and crisp the bacon
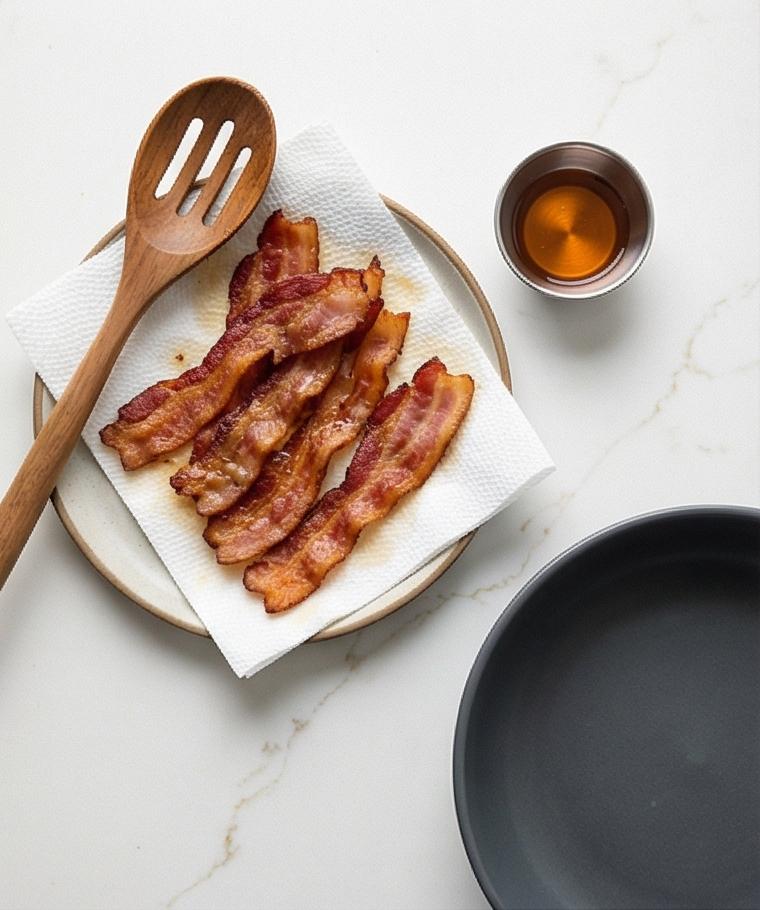
Warm a heavy skillet and cook the thick-cut bacon pieces until the fat renders and the slices are browned and crisp. Transfer the bacon to a paper towel-lined plate to drain, leaving roughly a tablespoon of rendered fat behind; if there’s more, carefully pour off the excess. The result should be evenly browned, caramelized bacon pieces with glossy rendered fat captured separately for flavor.
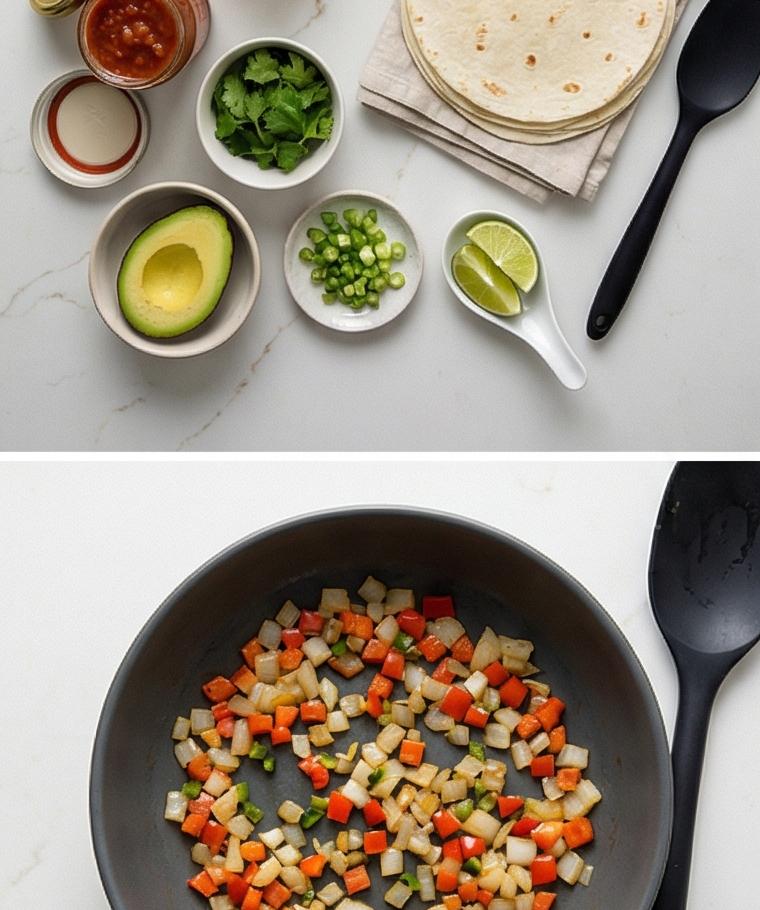
Step 3: Soften the aromatics and peppers
Return the reserved fat to the hot pan briefly to coat, then saute the small-diced yellow onion and red bell pepper until softened and edges begin to turn translucent. Add the minced jalapeno for the last minute to wake up the aromatics, then turn off the heat and transfer the vegetables to a medium bowl to cool slightly – tender, glossy vegetable pieces with bright red and golden highlights.
Step 4: Whisk the eggs to a uniform batter
In a separate bowl, crack the eggs and whisk vigorously with the milk, sea salt, and black pepper until completely homogeneous and faintly frothy. You’re aiming for an even, pale yellow mixture with no streaks of white – the smoother the mix, the silkier the scrambled curds will be.
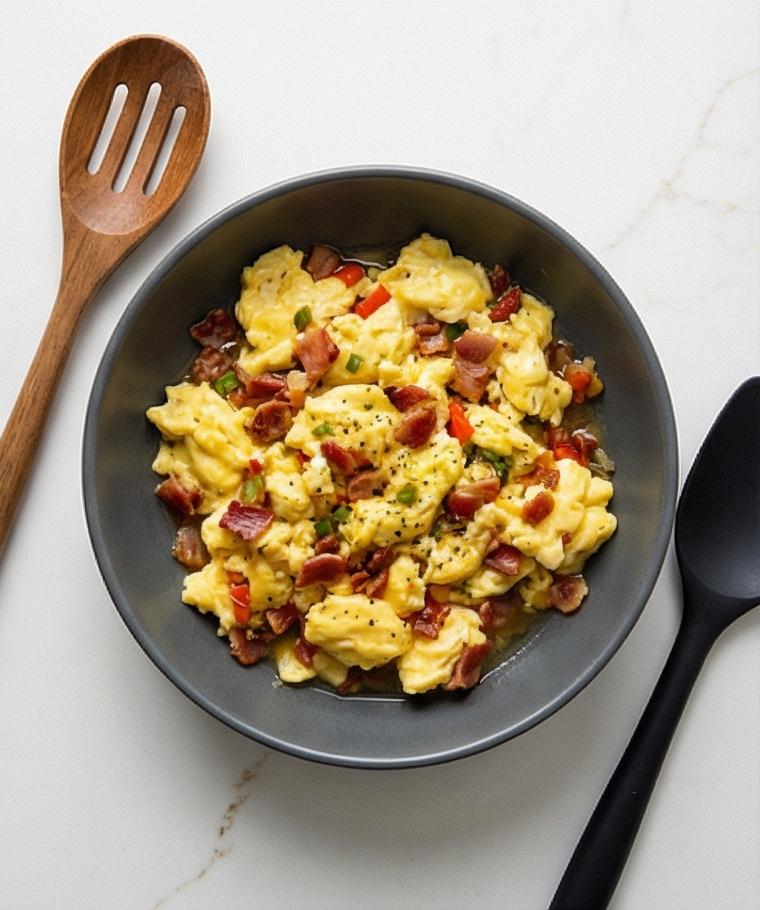
Step 5: Cook soft custardy scrambled eggs and fold with the veg and bacon
Melt butter in a clean skillet over medium-low and gently cook the egg mixture to soft, moist curds – glossy, slightly underdone, and custardy rather than dry. Remove the eggs from the heat and immediately fold them into the cooled sauteed vegetables along with the crisp bacon, tasting and adjusting seasoning. The filling should read as a warm, colorful mash of tender curds, sweet peppers and onions, and salty, crisp bacon bits.
Step 6: Blend the cheeses
Toss the shredded sharp cheddar and Monterey Jack together in a small bowl so the melt profile is even; the cheddar’s bold orange will provide punch and the Jack will add creamy stretch. Keep this mixed bowl of cheese handy for rapid assembly so melts are consistent.
Step 7: Assemble the quesadillas
Lay one 8-inch flour tortilla flat, sprinkle an even layer of the mixed cheeses leaving a slim 1/4-inch border, then spoon half the warm egg-bacon-vegetable filling across the center and top with another quarter cup of cheese. Place a second tortilla on top and press gently with a plate or flat tool to compact; repeat for the second quesadilla. You should see neat layers of pale tortilla, orange cheese, and the warm, textured filling.
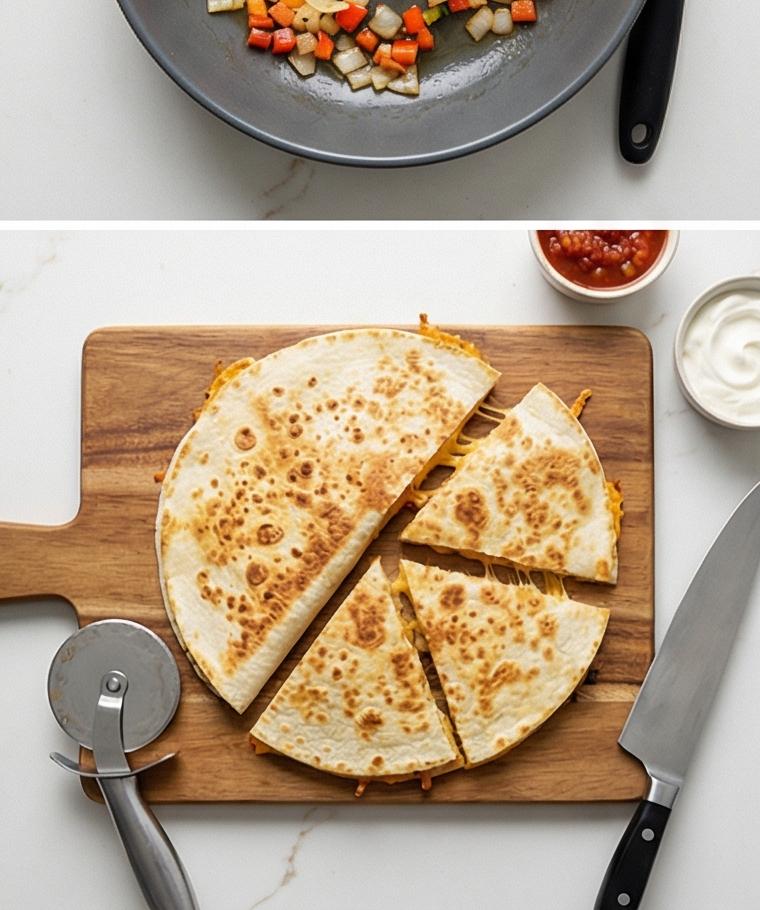
Step 8: Crisp until golden and melty, then rest and slice
Brush the skillet with a thin layer of neutral oil and cook each assembled quesadilla until the tortillas are golden brown with crisp edges and cheese begins to ooze; flip and finish until both sides are evenly bronzed and the interior is hot. Transfer to a cutting board to rest briefly so the cheese sets, then slice each into four wedges – molten cheese pulling slightly at the cut edges with a crunchy, browned exterior.
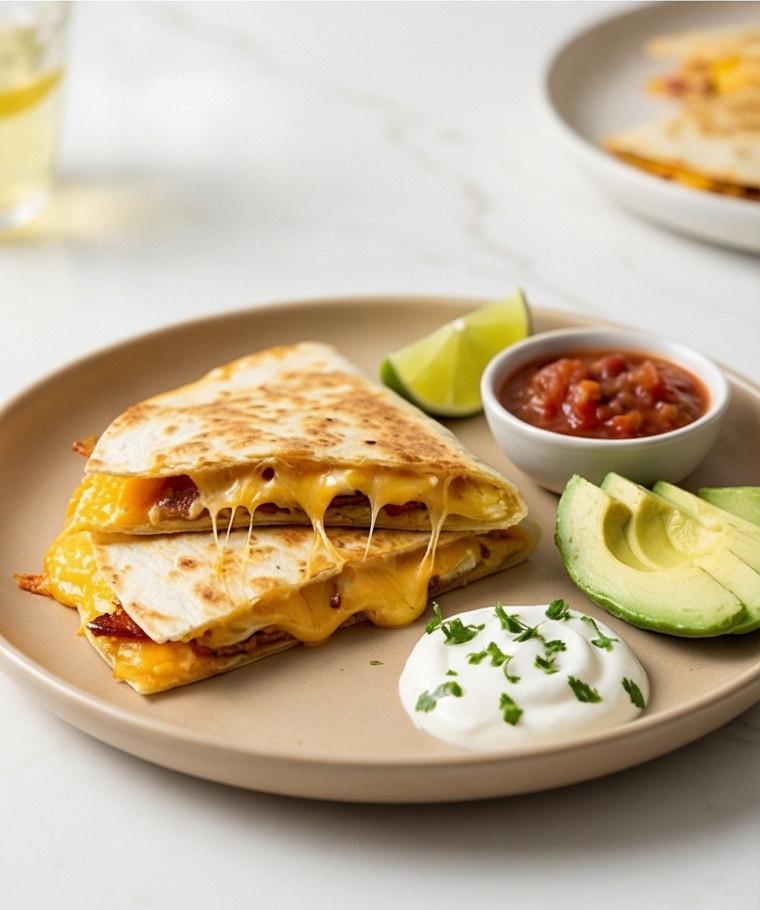
Step 9: Plate and garnish for serving
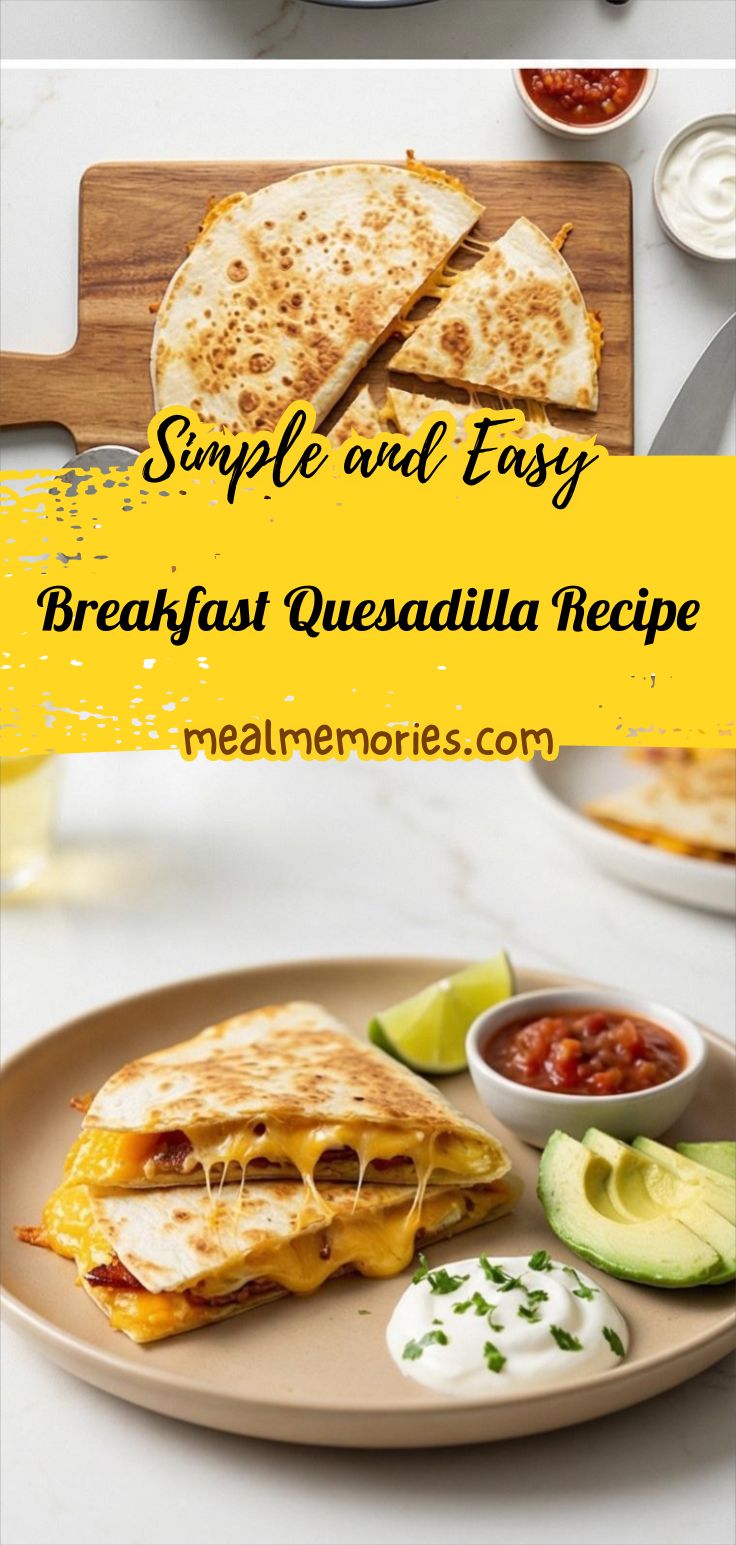
Arrange the warm quesadilla wedges on a shallow serving plate and accompany with a small jar of salsa and a chilled spoonful of sour cream. Fan thin avocado slices beside the wedges, scatter chopped cilantro and thinly sliced green onion over the top, and tuck lime wedges at the side for squeezing. Serve immediately while everything is hot, crisp, and fragrant.
Making It Your Own
I like to tinker with the Breakfast Quesadilla Recipe depending on mood and season. For a lighter version, I swap turkey bacon and use half the cheddar, adding a handful of baby spinach wilted into the filling for green color and extra vitamins. In the heat of summer, roasted corn and charred poblano feel bright and add texture. When guests come over, I make a batch of fillings and set up an assembly line so everyone can customize. For vegetarian friends, I try smoked tofu crumbles with smoked paprika and a little tamari to mimic bacon’s umami.
How to Serve
If I’m hosting, I slice each cooked quesadilla into four wedges and arrange them on large platters, alternating wedges and avocado fans so plates look generous. For a crowd, double the recipe and keep finished wedges in a warm oven on a wire rack so they stay crisp. Offer small bowls of salsa, chilled sour cream, lime wedges, and extra cilantro so guests can personalize each slice. For a lighter brunch, pair each plate with a simple mixed greens salad and a citrusy vinaigrette.
Storage and Reheating Tips
Leftover quesadilla wedges store well for 1 to 2 days in the fridge tucked into an airtight container. Keep condiments separate to avoid sogginess. Reheat single wedges in a dry skillet over medium-low for 2 to 3 minutes per side until cheese melts and the tortilla is crisp again.
For longer storage, freeze cooled wedges in a single layer on a baking sheet, then transfer to a freezer bag for up to one month. Reheat from frozen on a baking sheet at 350°F (175°C) for about 12 to 15 minutes, flipping halfway through, until heated through and crisp.
Common Mistakes and How to Avoid Them
A common mistake is overcooking the eggs so the filling becomes dry. Cook eggs slowly over low heat and remove them while still glossy; residual heat will finish them. Another trap is assembling quesadillas with too much filling, which prevents even toasting and makes flipping messy. Keep a modest amount of filling and press gently during assembly to get good contact between tortillas and filling.
Final Thoughts
Give this Breakfast Quesadilla Recipe a try on your next relaxed morning or busy brunch. It rewards a little attention with big, delicious results and is easy to adapt to whatever you have on hand. Share a batch with friends and watch how quickly the plate empties.
Frequently Asked Questions.
- Can I make the Breakfast Quesadilla Recipe ahead of time? Yes, you can prepare fillings a few hours ahead and assemble and toast just before serving for best texture.
- What can I use instead of bacon? Try turkey bacon, smoked tempeh, or seasoned and crisped tofu for vegetarian or lighter options.
- How do I keep quesadillas from getting soggy? Keep salsa and sour cream separate until serving and rest cooked wedges briefly on a wire rack to let steam escape.
- Can I freeze cooked quesadillas? Yes, freeze cooled wedges in a single layer and reheat in a 350°F (175°C) oven until crisp and warmed through.
- Is there a way to make this less spicy? Omit the jalapeno or use a milder pepper, and choose a mild Monterey Jack instead of Pepper Jack.
Breakfast Quesadilla Recipe
Make the Breakfast Quesadilla Recipe for a quick, melty morning meal - crispy bacon, custardy eggs, and cheesy tortillas.
Ingredients
Instructions
Step 1: Warm the oven (optional)
If you want to keep finished quesadillas warm and crisp while you finish cooking, preheat the oven to 200°F (95°C) and set a wire rack on a baking sheet. Place the rack in the oven so it’s ready — this small, optional step quietly guarantees every finished wedge stays crisp without additional handling.
Step 2: Render and crisp the bacon
Warm a heavy skillet and cook the thick-cut bacon pieces until the fat renders and the slices are browned and crisp. Transfer the bacon to a paper towel–lined plate to drain, leaving roughly a tablespoon of rendered fat behind; if there’s more, carefully pour off the excess. The result should be evenly browned, caramelized bacon pieces with glossy rendered fat captured separately for flavor.
Step 3: Soften the aromatics and peppers
Return the reserved fat to the hot pan briefly to coat, then sauté the small-diced yellow onion and red bell pepper until softened and edges begin to turn translucent. Add the minced jalapeño for the last minute to wake up the aromatics, then turn off the heat and transfer the vegetables to a medium bowl to cool slightly — tender, glossy vegetable pieces with bright red and golden highlights.
Step 4: Whisk the eggs to a uniform batter
In a separate bowl, crack the eggs and whisk vigorously with the milk, sea salt, and black pepper until completely homogeneous and faintly frothy. You’re aiming for an even, pale yellow mixture with no streaks of white — the smoother the mix, the silkier the scrambled curds will be.
Step 5: Cook soft custardy scrambled eggs and fold with the veg and bacon
Melt butter in a clean skillet over medium-low and gently cook the egg mixture to soft, moist curds — glossy, slightly underdone, and custardy rather than dry. Remove the eggs from the heat and immediately fold them into the cooled sautéed vegetables along with the crisp bacon, tasting and adjusting seasoning. The filling should read as a warm, colorful mash of tender curds, sweet peppers and onions, and salty, crisp bacon bits.
Step 6: Blend the cheeses
Toss the shredded sharp cheddar and Monterey Jack together in a small bowl so the melt profile is even; the cheddar’s bold orange will provide punch and the Jack will add creamy stretch. Keep this mixed bowl of cheese handy for rapid assembly so melts are consistent.
Step 7: Assemble the quesadillas
Lay one 8-inch flour tortilla flat, sprinkle an even layer of the mixed cheeses leaving a slim 1/4-inch border, then spoon half the warm egg–bacon–vegetable filling across the center and top with another quarter cup of cheese. Place a second tortilla on top and press gently with a plate or flat tool to compact; repeat for the second quesadilla. You should see neat layers of pale tortilla, orange cheese, and the warm, textured filling.
Step 8: Crisp until golden and melty, then rest and slice
Brush the skillet with a thin layer of neutral oil and cook each assembled quesadilla until the tortillas are golden brown with crisp edges and cheese begins to ooze; flip and finish until both sides are evenly bronzed and the interior is hot. Transfer to a cutting board to rest briefly so the cheese sets, then slice each into four wedges — molten cheese pulling slightly at the cut edges with a crunchy, browned exterior.
Step 9: Plate and garnish for serving
Arrange the warm quesadilla wedges on a shallow serving plate and accompany with a small jar of salsa and a chilled spoonful of sour cream. Fan thin avocado slices beside the wedges, scatter chopped cilantro and thinly sliced green onion over the top, and tuck lime wedges at the side for squeezing. Serve immediately while everything is hot, crisp, and fragrant.
Notes
- Use room-temperature eggs for silkier scrambled curds.
- Keep condiments separate until serving to avoid soggy quesadillas.
- Reserve a tablespoon of bacon fat for sautéing veggies for extra flavor.
- Reheat in a skillet or oven to restore crispiness rather than the microwave.
- Freeze cooled wedges on a baking sheet before bagging to prevent sticking.