Nachos Recipe is my go-to crowd-pleaser whenever friends drop by or the weekend stretches long and lazy. I learned to build this version when I wanted something honest, loud, and comforting without too much fuss. It hits that sweet spot of crunchy chips, melty cheese, and a savory beef-and-bean filling that keeps everyone reaching for more. You can dress it up or keep it simple, but this Nachos Recipe has stayed a favorite because it balances texture and flavor every time.
How This Recipe Became My Rainy-Day Favorite
The first time I made this Nachos Recipe it was pouring outside and I needed something to warm the kitchen and the mood. I remember the sound of rain on the roof and the way steam curled from the skillet as onions and garlic softened in hot oil. The house filled with a smoky, spiced aroma as chili powder and smoked paprika bloomed in the pan. When I pulled the tray from the oven, the cheese glistened and the edges of the chips were perfectly toasted. I invited a neighbor in with a bowl and, between bites, we traded stories and laughter. That evening, the simple act of sharing nachos felt like a small celebration—a reminder that good food can be an easy, reliable comfort.
The Ingredients That Make This Nachos Recipe Sing
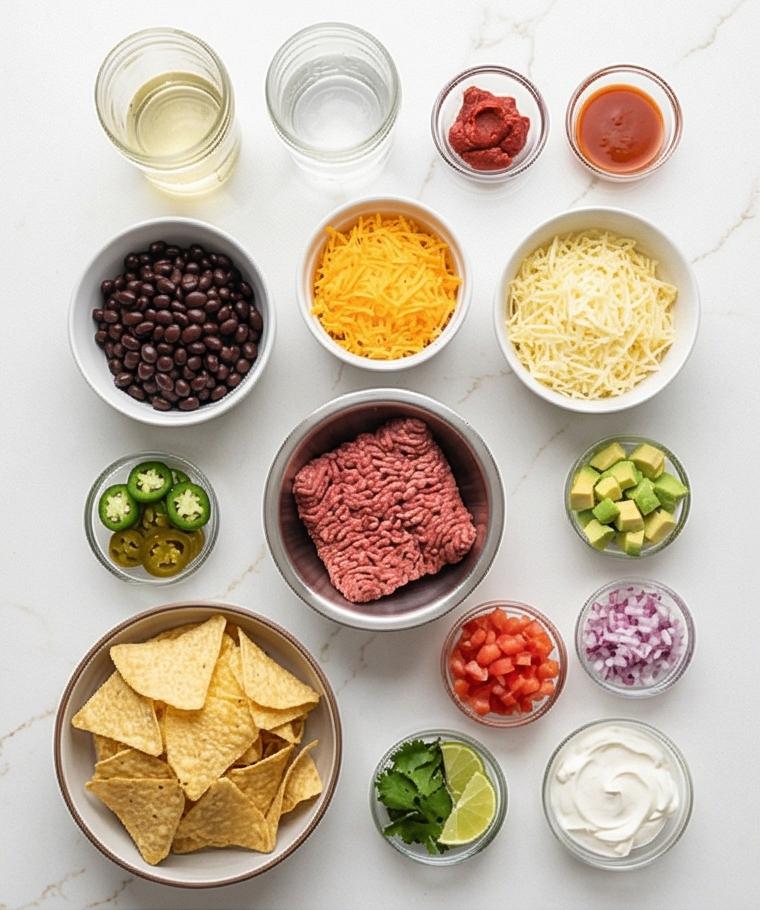
Every ingredient here plays a role in texture or flavor, and a few swaps still keep the spirit intact. Choose fresh, ripe produce and sturdy chips that can stand up to toppings. Pick lean ground beef for a clean savory base or substitute ground turkey for a lighter take. Canned black beans add creaminess and fiber, and you can use pinto beans instead. Sharp cheddar brings tang and melt; aged or mild cheeses will change the richness. Fresh jalape no rings give a crisp bite; use pickled jalape nos for tang if you prefer.
- Lean ground beef: The savory foundation; swap ground turkey for a lighter version.
- Tortilla chips: Provide crunch and structure; choose thick, restaurant-style chips.
- Sharp cheddar: Adds tang and melt; try a smoked cheddar for extra depth.
- Monterey Jack: Smooth melting cheese; pepper Jack adds a spicy note.
- Black beans: Give body and texture; rinsed and drained to avoid excess liquid.
- Tomato paste & spices: Concentrated flavor and warmth; adjust chili powder to taste.
Essential Tools That Make It Easier
A few reliable tools cut down on stress and keep the workflow smooth. A sturdy rimmed baking sheet gives the nachos a broad, even surface so chips heat uniformly. A good skillet browns meat and aromatics with predictable control, and a flexible spatula scrapes up browned bits for deeper flavor. A box grater or food processor shredder keeps cheese light and fluffy when it melts. Sharp knives and a stable cutting board make quick work of toppings, and small bowls for mise en place keep ingredients organized. If you do not have a baking sheet, use a shallow ovenproof dish; a cast-iron skillet can be used for baking and serving.
- Rimmed baking sheet: Even heat and lots of real estate for layering.
- Skillet: For browning beef and softening onions.
- Spatula: To break up meat and scrape the fond.
- Box grater: For freshly shredded cheese that melts beautifully.
- Sharp knife and cutting board: For fast, safe prep.
- Small prep bowls: Keep toppings ready and tidy.
Step-by-Step Preparation Guide
Step 1: Preheat oven and prepare the pan
Preheat the oven to 400°F (200°C) and line a large rectangular rimmed baking sheet with parchment or foil; set it on the Calacatta-style surface so it’s ready for assembly. This step is practical and simple—the pan sits empty, clean, and geometric, its cool metal edge contrasting with the honed white marble imitation. Make sure the sheet is fully flat and the parchment lies smooth so your layered nachos will bake evenly.
Step 2: Soften aromatics then add the beef
Warm neutral oil in a shallow matte-black skillet until shimmering, then add the finely diced yellow onion and cook until soft and translucent; stir in minced garlic just long enough to become fragrant but not browned. Add the room-temperature lean ground beef and break it into coarse crumbles, seasoning with kosher salt and freshly ground black pepper; continue until the meat is fully browned and most moisture has evaporated, the onions now settled and glossy against the meat.
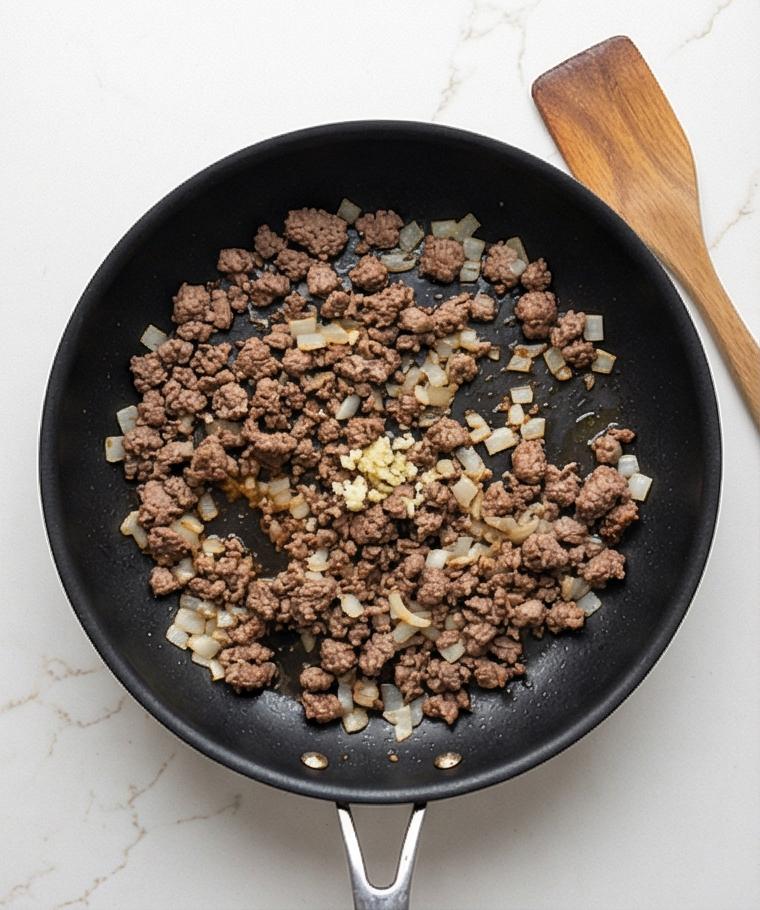
Step 3: Toast spices and deepen the mixture
Evenly sprinkle chili powder, ground cumin, smoked paprika, dried oregano, and a touch of cayenne over the browned beef; stir briefly so the spices bloom and smell toasty. Mix in the tomato paste and let it caramelize until the meat looks thicker and glossy, then pour in a small amount of water and scrape up the fond so the mixture becomes saucy and cohesive. Reduce gently until it holds together in dense, moist spoonfuls.
Step 4: Finish the filling with beans and seasoning
Fold in the drained, rinsed black beans and continue cooking briefly until heated through and the whole mixture thickens into a chunky, savory filling; taste and adjust salt. Transfer the finished beef-and-bean mixture off heat into the same matte-black skillet or a shallow ceramic bowl so the spoon can rest there—this preserves utensil continuity and keeps the textured, glossy filling contained and easy to dollop.
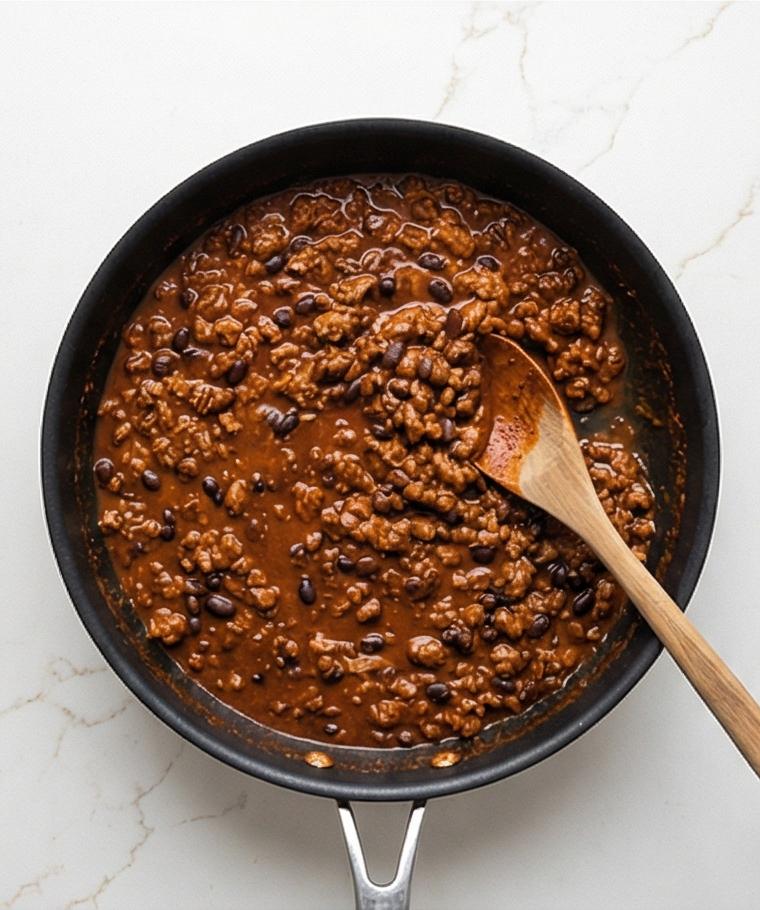
Step 5: Layer the chips, cheeses, and filling on the sheet
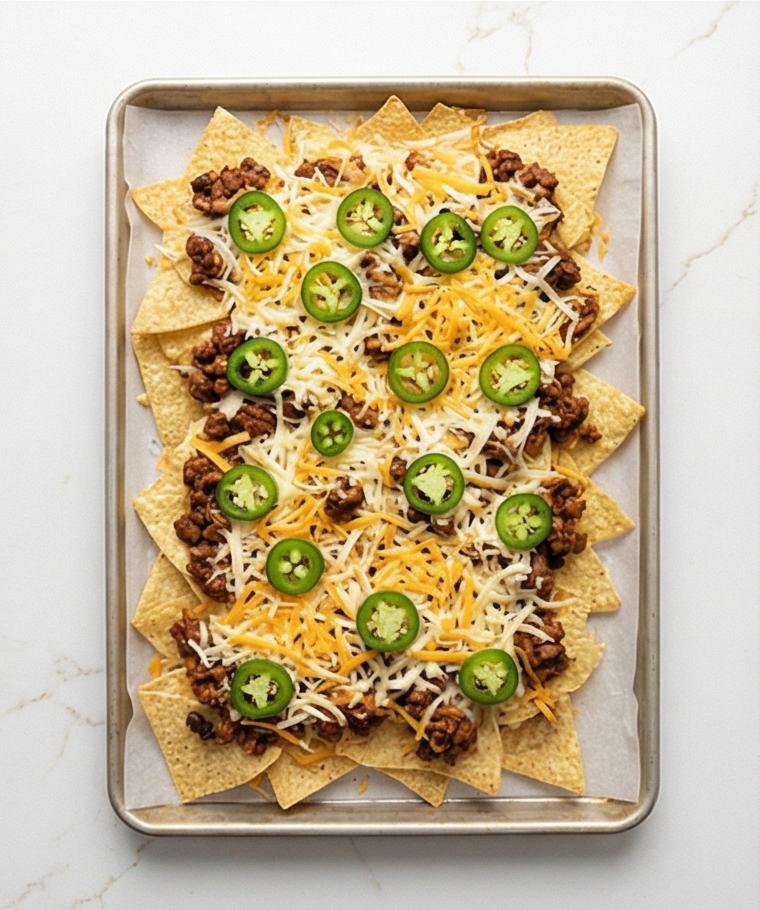
Spread half the restaurant-style tortilla chips in an even single layer on the prepared rectangular baking sheet, then scatter half the sharp cheddar and Monterey Jack over them. Spoon half the warm beef-and-bean mixture in small mounds so most chips pick up some topping; repeat with the remaining chips, cheeses, and filling to form a stacked, even rectangular assembly. Scatter fresh jalape no rings and optional pickled slices across the top so the unbaked tray reads tidy, layered, and ready for heat.
Step 6: Bake until the cheese melts and becomes bubbly
Place the assembled tray in the preheated oven (no oven visible in photos) and bake until the cheese is fully melted, glossy and bubbling with tiny browned spots, and the exposed chips at the edges turn a delicate golden. Remove the tray and let it rest for a couple of minutes so the cheese sets slightly while the chips stay crisp—this pause preserves contrast between molten cheese and crunchy chip edges.
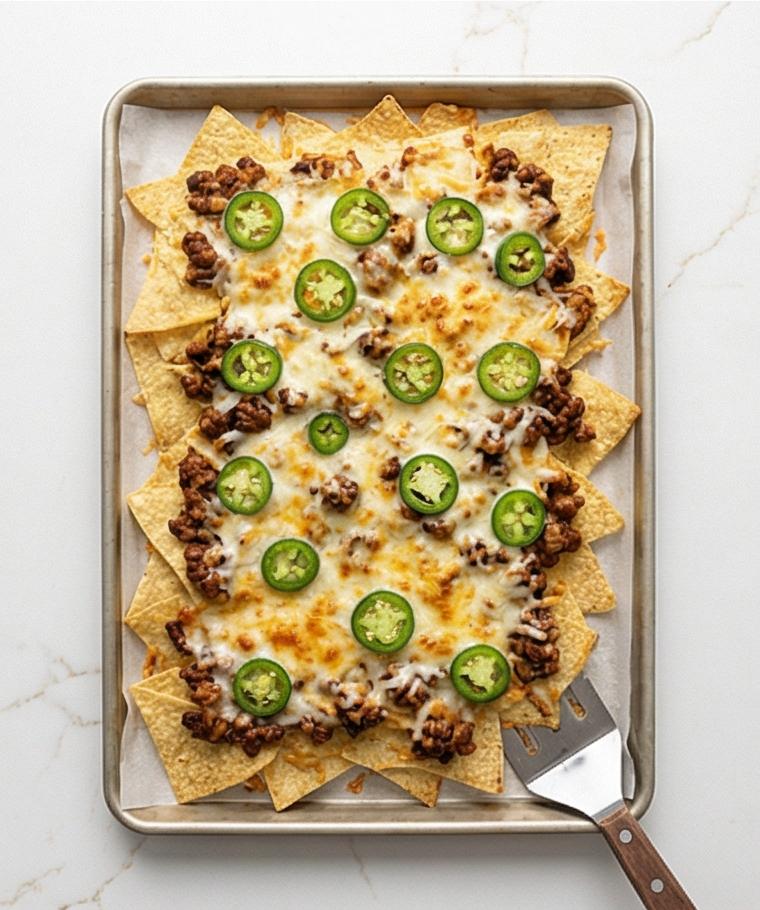
Step 7: Prepare fresh toppings and finish the tray to serve
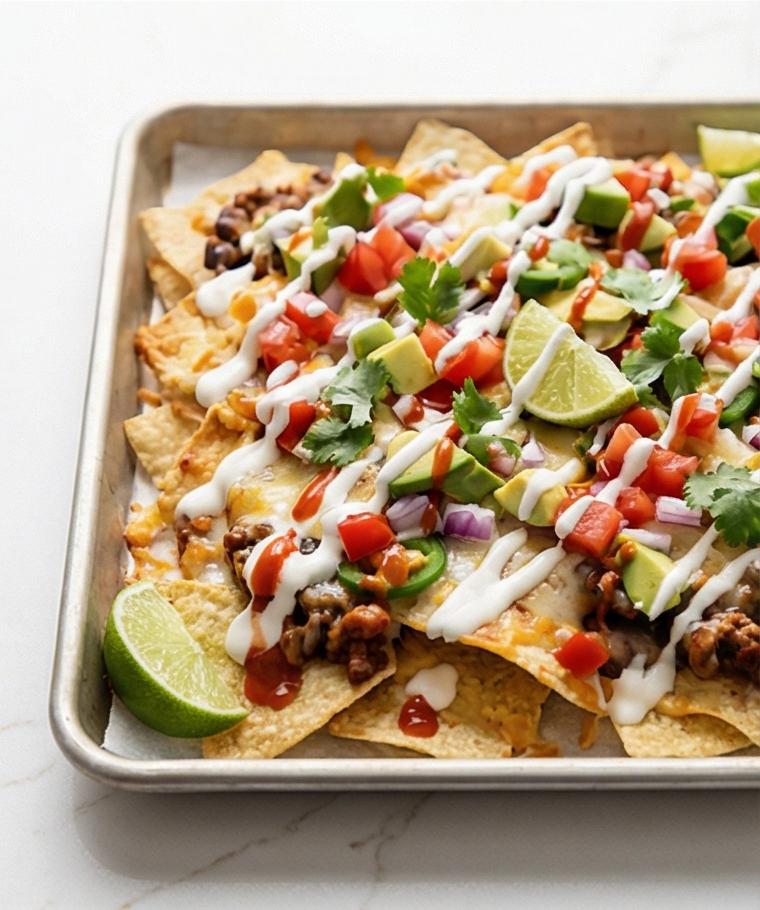
While the tray rests, dice Roma tomato and avocado, finely dice red onion, coarsely chop cilantro, and whisk chilled sour cream with a little cold water until silky and just pourable. Finish by scattering the diced tomato, red onion, avocado, and cilantro over the hot nachos and delicately drizzling the thinned sour cream in glossy zigzags. Arrange lime wedges and a small dish of hot sauce beside the rectangular tray and serve immediately while textures remain contrasting—melty cheese, crisp chips, creamy avocado, and bright citrus.
Making It Your Own
I like to experiment by swapping one element at a time so I can track what changes the most. For a vegetarian version I replace the beef with seasoned crumbled tempeh or a mix of sautéed mushrooms and lentils, keeping the spices and tomato paste for familiar depth. When late-summer tomatoes are at their peak, I add extra diced Roma and a spoonful of fresh corn. For a smoky regional twist I use chorizo or smoky paprika and finish with pickled red onions. To make it kid-friendly, skip the cayenne and serve hot sauce on the side.
How to Serve
If you are hosting, set the tray on a large board and offer small plates and napkins so guests can graze. For a dinner party of six, use the full recipe and plan for it to be part of a shared starter spread alongside guacamole and a simple bean salad. For a family movie night, halve the recipe and use a smaller sheet so flavors stay concentrated. Garnish with cilantro and lime wedges right before serving so the herbs and bright citrus stay fresh. Provide small bowls of extra pickled jalape nos, salsa, and hot sauce so everyone can customize.
Storage and Reheating Tips
Leftover nachos can be stored in an airtight container in the refrigerator for up to 2 days. Keep the chips separate from wet toppings like avocado and sour cream when possible; transfer those fresh before serving again.
To reheat, spread leftovers in a single layer on a baking sheet and warm in a 350°F (175°C) oven just until cheese is melted and chips regain a little crispness, about 8 to 10 minutes. If chips have become soggy, you can also spoon the filling over fresh chips instead.
Common Mistakes and How to Avoid Them
A common mistake is overloading chips so nothing crisps; stagger toppings and keep most chips exposed. Use a single-layer base and add a second layer rather than piling everything into one soggy heap.
Another pitfall is under-seasoned beef; taste and adjust salt after the beans are added so the final filling is balanced. Avoid adding too much water when finishing the meat mixture; you want a cohesive, not soupy, filling.
Ready to Dig In?
Give this Nachos Recipe a try this week and invite someone to share the tray. It is forgiving, fast, and endlessly adaptable, and it rewards small adjustments that match your taste. Once you make it a few times, you will have a go-to method for every gathering.
Frequently Asked Questions.
- Q: Can I make this Nachos Recipe vegetarian? A: Yes, swap the beef for crumbled tempeh, sautéed mushrooms, or lentils and keep the spices; beans add protein and texture.
- Q: How can I prevent soggy nachos? A: Use sturdy restaurant-style chips, drain beans well, and layer toppings so chips remain exposed. Serve soon after baking.
- Q: Can I assemble ahead of time? A: You can prepare the beef-and-bean filling up to 2 days ahead and store it chilled; assemble and bake when ready to serve.
- Q: Is there a gluten-free option for this Nachos Recipe? A: Most tortilla chips are naturally gluten-free but check labels; the rest of the ingredients are typically gluten-free.
- Q: How do I keep cheese from clumping? A: Use freshly shredded cheese rather than pre-shredded, which often has anti-caking agents; distribute cheeses evenly for consistent melting.
Nachos Recipe
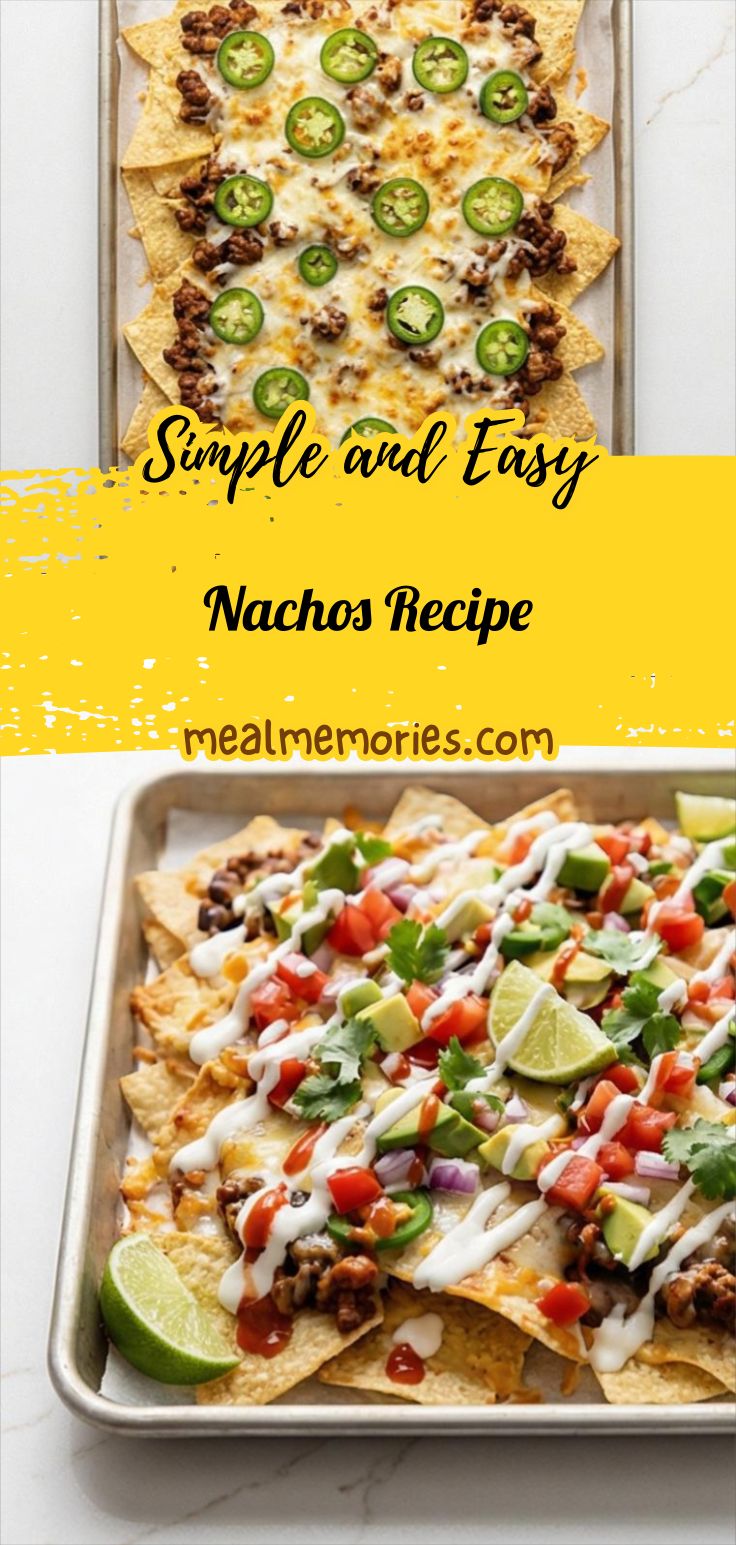
Make Nachos Recipe now: crunchy chips topped with seasoned beef, black beans, and melted cheddar for an easy shareable feast.
Ingredients
Instructions
Step 1: Preheat oven and prepare the pan
Preheat the oven to 400°F (200°C) and line a large rectangular rimmed baking sheet with parchment or foil; set it on the Calacatta-style surface so it’s ready for assembly. This step is practical and simple—the pan sits empty, clean, and geometric, its cool metal edge contrasting with the honed white marble imitation. Make sure the sheet is fully flat and the parchment lies smooth so your layered nachos will bake evenly.
Step 2: Soften aromatics then add the beef
Warm neutral oil in a shallow matte-black skillet until shimmering, then add the finely diced yellow onion and cook until soft and translucent; stir in minced garlic just long enough to become fragrant but not browned. Add the room-temperature lean ground beef and break it into coarse crumbles, seasoning with kosher salt and freshly ground black pepper; continue until the meat is fully browned and most moisture has evaporated, the onions now settled and glossy against the meat.
Step 3: Toast spices and deepen the mixture
Evenly sprinkle chili powder, ground cumin, smoked paprika, dried oregano, and a touch of cayenne over the browned beef; stir briefly so the spices bloom and smell toasty. Mix in the tomato paste and let it caramelize until the meat looks thicker and glossy, then pour in a small amount of water and scrape up the fond so the mixture becomes saucy and cohesive. Reduce gently until it holds together in dense, moist spoonfuls.
Step 4: Finish the filling with beans and seasoning
Fold in the drained, rinsed black beans and continue cooking briefly until heated through and the whole mixture thickens into a chunky, savory filling; taste and adjust salt. Transfer the finished beef-and-bean mixture off heat into the same matte-black skillet or a shallow ceramic bowl so the spoon can rest there—this preserves utensil continuity and keeps the textured, glossy filling contained and easy to dollop.
Step 5: Layer the chips, cheeses, and filling on the sheet
Spread half the restaurant-style tortilla chips in an even single layer on the prepared rectangular baking sheet, then scatter half the sharp cheddar and Monterey Jack over them. Spoon half the warm beef-and-bean mixture in small mounds so most chips pick up some topping; repeat with the remaining chips, cheeses, and filling to form a stacked, even rectangular assembly. Scatter fresh jalapeño rings and optional pickled slices across the top so the unbaked tray reads tidy, layered, and ready for heat.
Step 6: Bake until the cheese melts and becomes bubbly
Place the assembled tray in the preheated oven (no oven visible in photos) and bake until the cheese is fully melted, glossy and bubbling with tiny browned spots, and the exposed chips at the edges turn a delicate golden. Remove the tray and let it rest for a couple of minutes so the cheese sets slightly while the chips stay crisp—this pause preserves contrast between molten cheese and crunchy chip edges.
Step 7: Prepare fresh toppings and finish the tray to serve
While the tray rests, dice Roma tomato and avocado, finely dice red onion, coarsely chop cilantro, and whisk chilled sour cream with a little cold water until silky and just pourable. Finish by scattering the diced tomato, red onion, avocado, and cilantro over the hot nachos and delicately drizzling the thinned sour cream in glossy zigzags. Arrange lime wedges and a small dish of hot sauce beside the rectangular tray and serve immediately while textures remain contrasting—melty cheese, crisp chips, creamy avocado, and bright citrus.
Notes
- Keep chips in their original bag until assembly to preserve crunch.
- Use freshly shredded cheese for better melting and creaminess.
- Store beef-and-bean filling separately from chips to avoid sogginess.
- Thin sour cream with cold water a tablespoon at a time until just pourable.
- Taste and adjust salt after beans are added to the filling.