Omelette Recipe has been my go-to for quick, satisfying breakfasts and lazy brunches for years. I keep a simple set of ingredients on hand so I can pull together a warm plate in minutes. This Omelette Recipe feels elegant enough for guests yet unfussy enough for everyday mornings. I like how the technique rewards a little patience and attention with a tender, custardy interior and a soft, pale exterior.
I still remember the first time I learned to make this Omelette Recipe: it was a rainy Saturday and I had just enough eggs and one lonely wedge of cheese in the fridge. The kitchen smelled like toasted bread and butter as I warmed the eggs and whisked until they were airy. When the omelette folded over melty cheese and bright chives, I felt small but satisfied, like I had conjured comfort from a few humble things. That morning taught me to trust the process: low heat, gentle motion, and timing that leaves the center slightly creamy. Now, whenever I cook this omelette, I can almost hear the soft sizzle and taste the herb flecks before I even take a bite. The memory of that first perfect fold makes the routine feel a little like ceremony.
How This Recipe Became My Rainy-Day Favorite
I still remember the first time I learned to make this Omelette Recipe: it was a rainy Saturday and I had just enough eggs and one lonely wedge of cheese in the fridge. The kitchen smelled like toasted bread and butter as I warmed the eggs and whisked until they were airy. When the omelette folded over melty cheese and bright chives, I felt small but satisfied, like I had conjured comfort from a few humble things. That morning taught me to trust the process: low heat, gentle motion, and timing that leaves the center slightly creamy. Now, whenever I cook this omelette, I can almost hear the soft sizzle and taste the herb flecks before I even take a bite. The memory of that first perfect fold makes the routine feel a little like ceremony.
Primary Ingredients and Why They Matter
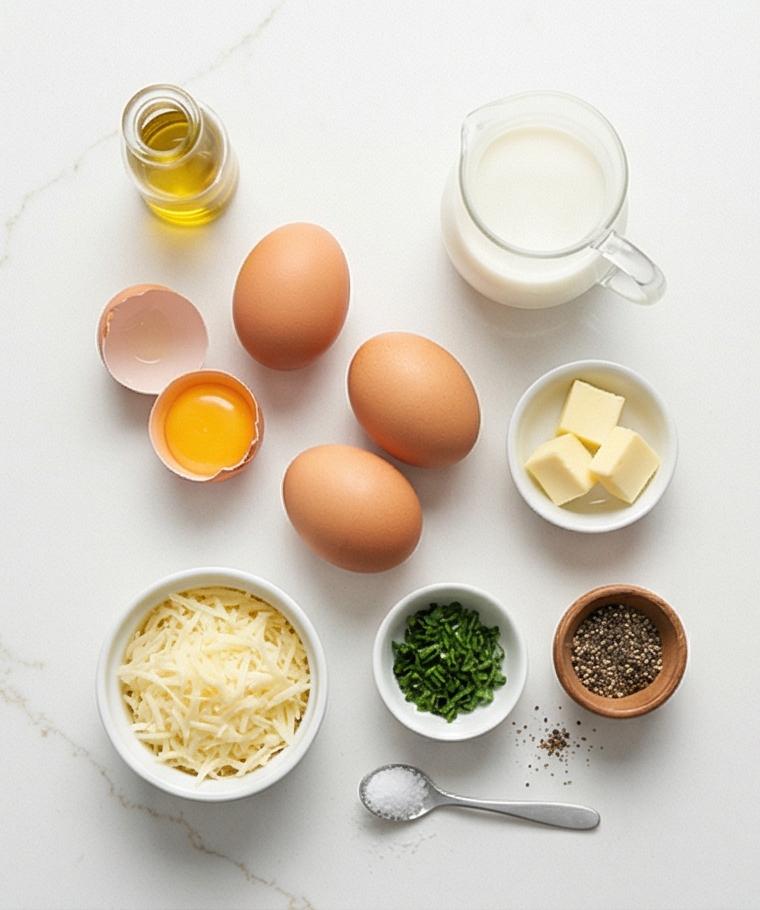
- Eggs: The foundation. Use the freshest large eggs you can find; room temperature helps them cook evenly. Substitute with pasteurized egg products if needed.
- Milk or Heavy Cream: Adds silkiness and helps create small curds; whole milk keeps it light, cream gives extra richness. Use a dairy-free milk for a lighter texture but expect different custardiness.
- Butter: For flavor and gentle cooking. Chilled butter pieces control the melt and prevent overheating. Clarified butter or olive oil work if you want a higher smoke point.
- Cheese: Gruyere, Cheddar, or Swiss melt well and add savory depth. Try a milder cheese like Fontina for a softer flavor or a sharper cheddar for punch.
- Fresh Herbs: Chives, parsley, or dill brighten the dish; add them at the end for fresh aroma. Dried herbs can be used sparingly but are not ideal.
Essential Kitchen Tools Youll Want
A few simple tools make this Omelette Recipe effortless and repeatable. Use a mid-sized nonstick skillet for consistent heat and easy folding; an 8-inch pan is ideal for a three-egg omelette. A heatproof silicone spatula lets you coax curds without scratching your pan. A stainless whisk blends the eggs quickly and adds air for a tender texture.
- 8-inch nonstick skillet: Even cooking and easy release.
- Silicone spatula: Gentle on the pan, precise for stirring and folding.
- Stainless whisk: Fast, effective mixing for a uniform batter.
- Mixing bowl: Room to whisk without spills; a medium ceramic or glass bowl is perfect.
- Sharp grater: For finely shredding cheese so it melts quickly.
Step-by-Step Preparation Guide
Step 1: Bring ingredients to temperature and whisk
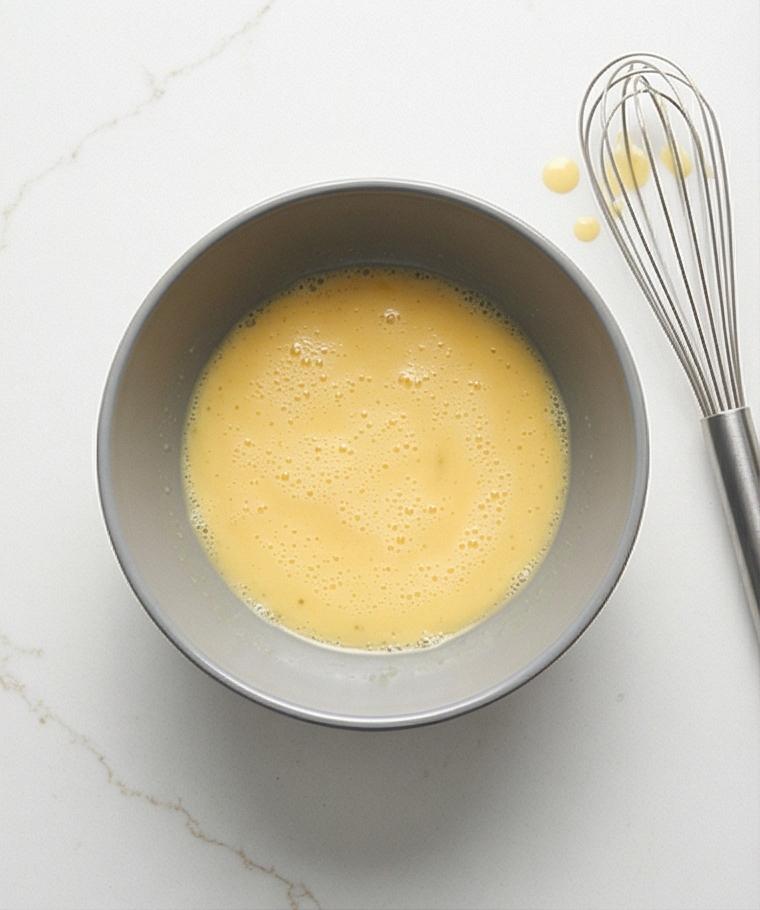
Warm the eggs, milk (or cream), and shredded cheese to room temperature for a gentle, even cook; then crack the 3 large eggs into a modern matte grey ceramic mixing bowl, pour in 2 tablespoons of room-temperature milk, sprinkle 1/4 teaspoon fine sea salt and 1/8 teaspoon freshly ground black pepper. Whisk vigorously with a stainless whisk until the mixture is completely homogeneous, slightly frothy on top, and no streaks of white remain — the texture should be smooth, pale yellow, and airy, with tiny bubbles on the surface that promise a tender omelette.
Step 2: Melt butter, pour eggs, and coax soft curds
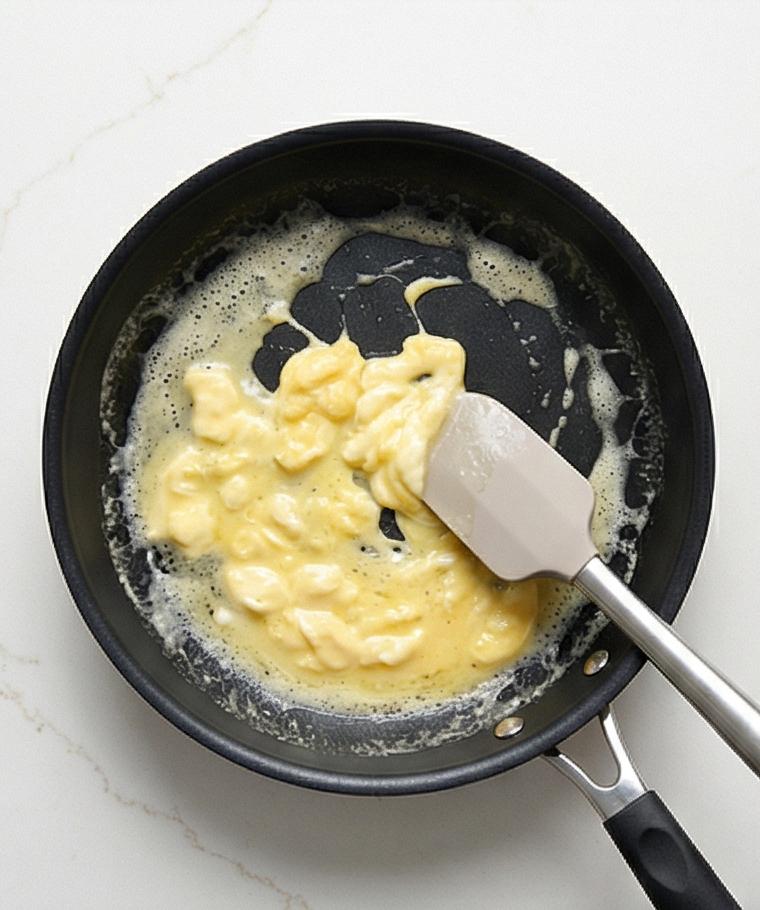
Add chilled butter pieces into an 8-inch matte black nonstick skillet (resting on the quartz surface — removed from any appliance) and imagine the butter just melted and foaming across the pan; immediately pour the whisked eggs into the center, tilt and swirl so an even film forms. With a heatproof silicone spatula, gently stir in small circular motions, scraping the bottom to form very small, glossy curds while keeping the top still slightly wet — the pan should show a pale, uniform yellow curd texture, no browning, and a few wet glossy strands where the egg is still custardy.
Step 3: Add cheese and herbs, finish cooking and fold
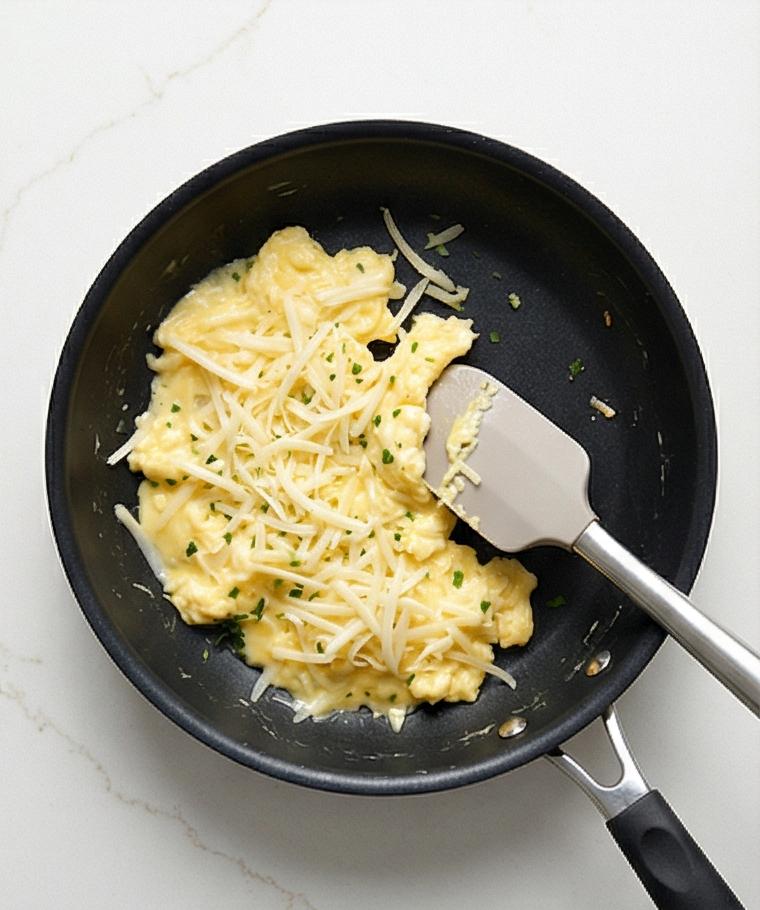
When the eggs are about 70–80% set and soft curds are visible across the pan, sprinkle the finely shredded cheese over the center and one side, and scatter the finely chopped fresh herbs atop; continue briefly until the cheese begins to soften and the surface remains slightly creamy. Turn off the heat and, using the spatula, gently lift the cheese side and fold the omelette inward, then fold the opposite side to form a neat, slightly oval roll — the exterior should be smooth and pale, the seam tidy, and the interior still yielding to light pressure.
Step 4: Plate, rest briefly, garnish and serve
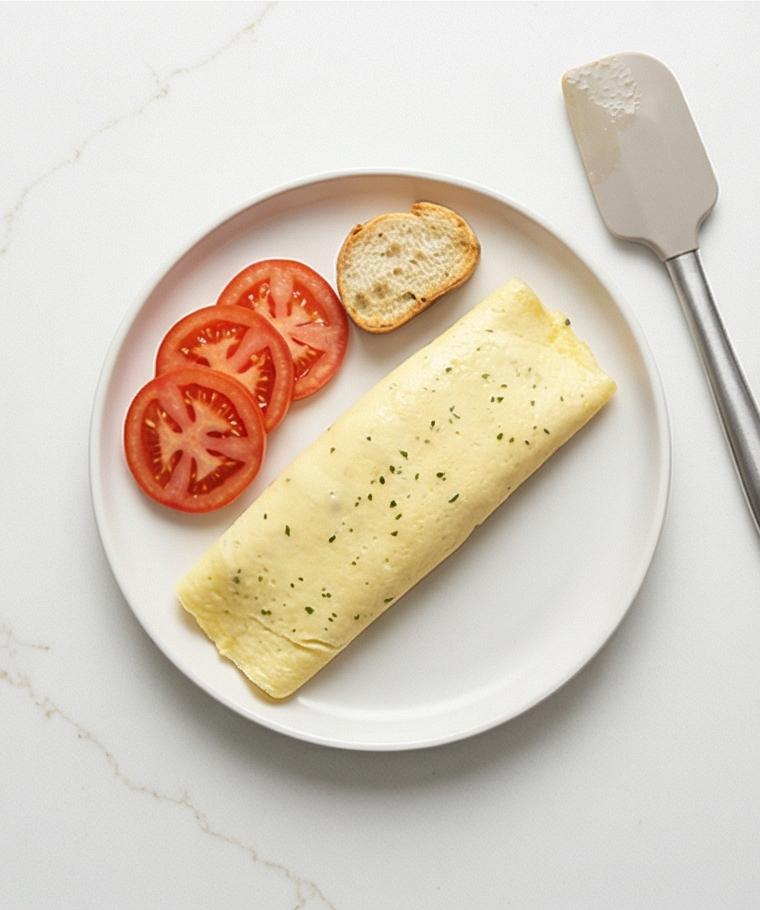
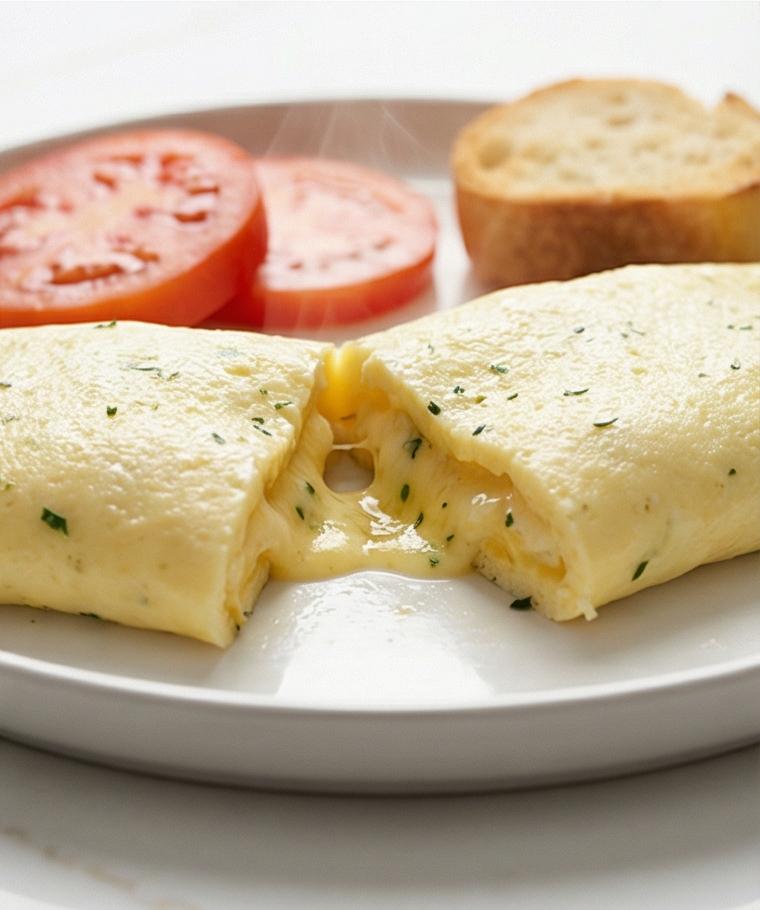
Tilt the pan toward a warm, shallow white ceramic plate and slide the omelette seam-side down so it sits smooth and slightly springy; let it rest for one minute so residual heat finishes melting the cheese and sets the interior to a tender, creamy texture. Garnish with extra chopped herbs, arrange 2–3 ripe tomato slices and a warm slice of toasted baguette beside it for contrast — the final composition should read as soft melted cheese peeking inside, tiny herb flecks, and bright tomato color next to the pale omelette body.
Making It Your Own
I like to experiment with fillings depending on the season. In spring, I fold in tender asparagus tips and lemon zest for brightness. In autumn, sautéed mushrooms and a sprinkle of thyme make the omelette feel cozy.
For dietary twists, try a dairy-free milk and omit butter; use an olive oil finish and a nutty dairy-free cheese for a vegan-style take. If you want more protein, add a few slices of smoked salmon or cooked diced ham before folding. For a spicy regional touch, mix in a pinch of smoked paprika and serve with pickled peppers. Small changes in cheese or herbs transform the mood of this Omelette Recipe without changing technique.
How to Serve
When I host, I make a batch and keep the pan warm in very low oven heat so each omelette goes from skillet to plate still soft. For a brunch of four, double the eggs and make two omelettes in separate pans so each stays tender.
Serve on warm plates with a simple green salad dressed in lemon vinaigrette, a few tomato slices for color, and warm toast or baguette. Garnish with extra herbs and a dusting of freshly ground pepper. For a more formal presentation, trim the edges gently and place the omelette seam-side down on a long platter with toast slices tucked alongside.
Storage and Reheating Tips
This Omelette Recipe is best eaten fresh, but you can refrigerate leftovers wrapped tightly in plastic or foil for up to 24 hours. Keep any accompaniments, like toast or tomatoes, separate to avoid sogginess.
To reheat, warm gently in a low oven (275 F) for 6 to 8 minutes or refresh in a nonstick skillet over low heat for a couple of minutes. Avoid the microwave if you can, as it tends to make the eggs rubbery. Add a tiny pat of butter when reheating to restore creaminess.
Common Mistakes and How to Avoid Them
Cooking too fast often leads to browning and a dry interior. Keep heat low, be patient, and stir gently to form small curds. If your pan smokes, you are cooking too hot.
Overfilling with cheese or fillings can tear the omelette during folding. Use modest amounts and allow the eggs to set just enough before folding. Practice makes the timing feel intuitive.
Final Thoughts
Give this Omelette Recipe a try the next time you want something quick, elegant, and deeply satisfying. With a little attention to temperature and timing, youll get a soft, creamy omelette every time.
Frequently Asked Questions.
- Q: Can I make this omelette ahead of time? A: You can prepare elements like shredded cheese and chopped herbs ahead, but cook the omelette just before serving for best texture.
- Q: What cheese melts best for this omelette? A: Gruyere, Swiss, and Cheddar all melt beautifully; choose based on how sharp or creamy you want the flavor.
- Q: Can I use more eggs to serve more people? A: Yes, scale ingredients proportionally and cook in separate pans or larger pans in batches to keep texture consistent.
- Q: How do I avoid a rubbery omelette? A: Cook on low heat, avoid overcooking, and stop when the center is still slightly creamy; residual heat will finish it.
- Q: Is it okay to use dried herbs? A: You can, but fresh herbs provide brighter flavor and aroma; use dried sparingly and add earlier in the cooking.

Omelette Recipe
Make the Omelette Recipe now: whisk, cook low and fold for a tender, creamy omelette with melty cheese and fresh herbs.
Ingredients
Instructions
Step 1: Bring ingredients to temperature and whisk
Warm the eggs, milk (or cream), and shredded cheese to room temperature for a gentle, even cook; then crack the 3 large eggs into a modern matte grey ceramic mixing bowl, pour in 2 tablespoons of room-temperature milk, sprinkle 1/4 teaspoon fine sea salt and 1/8 teaspoon freshly ground black pepper. Whisk vigorously with a stainless whisk until the mixture is completely homogeneous, slightly frothy on top, and no streaks of white remain — the texture should be smooth, pale yellow, and airy, with tiny bubbles on the surface that promise a tender omelette.
Step 2: Melt butter, pour eggs, and coax soft curds
Add chilled butter pieces into an 8-inch matte black nonstick skillet (resting on the quartz surface — removed from any appliance) and imagine the butter just melted and foaming across the pan; immediately pour the whisked eggs into the center, tilt and swirl so an even film forms. With a heatproof silicone spatula, gently stir in small circular motions, scraping the bottom to form very small, glossy curds while keeping the top still slightly wet — the pan should show a pale, uniform yellow curd texture, no browning, and a few wet glossy strands where the egg is still custardy.
Step 3: Add cheese and herbs, finish cooking and fold
When the eggs are about 70–80% set and soft curds are visible across the pan, sprinkle the finely shredded cheese over the center and one side, and scatter the finely chopped fresh herbs atop; continue briefly until the cheese begins to soften and the surface remains slightly creamy. Turn off the heat and, using the spatula, gently lift the cheese side and fold the omelette inward, then fold the opposite side to form a neat, slightly oval roll — the exterior should be smooth and pale, the seam tidy, and the interior still yielding to light pressure.
Step 4: Plate, rest briefly, garnish and serve
Tilt the pan toward a warm, shallow white ceramic plate and slide the omelette seam-side down so it sits smooth and slightly springy; let it rest for one minute so residual heat finishes melting the cheese and sets the interior to a tender, creamy texture. Garnish with extra chopped herbs, arrange 2–3 ripe tomato slices and a warm slice of toasted baguette beside it for contrast — the final composition should read as soft melted cheese peeking inside, tiny herb flecks, and bright tomato color next to the pale omelette body.
Notes
- Use room-temperature eggs and cheese for more even cooking and better texture.
- Keep heat low and stir gently to form small curds for a creamy interior.
- Avoid overfilling to make folding easier and prevent tearing.
- Warm plates and toast separately to keep the omelette from getting soggy.
- Reheat gently in a low oven or skillet to preserve texture.