I fell for this Key Lime Pie Recipe the first time I tasted that perfect balance of tang and creaminess on a hot summer afternoon. I make this Key Lime Pie Recipe whenever friends drop by because it is quick to assemble and always looks like you spent way more time on it than you did. The bright lime flavor wakes up the senses and the silky filling feels celebratory without being fussy. If you love citrus desserts that are both simple and sophisticated, this Key Lime Pie Recipe will become one of your reliable party tricks.
How This Pie Became My Porch-Party Staple
There is a memory tied to the first time I made this pie: a sticky July evening, a small group of neighbors gathered on lawn chairs, and the air thick with the smell of cut grass and grilling. I remember zesting limes until my fingers smelled like a citrus grove, the sound of cans being opened, and the nervous excitement of trying a new dessert in front of people. When I sliced the pie and watched faces turn from polite to delighted surprise, I felt a warmth that had nothing to do with the humid air. The whipped cream softened the tart lime in such a comforting way that someone asked for seconds before everyone had even finished their first piece. That night taught me two things: the easiest recipes can make the biggest impressions, and good food becomes a memory. The texture, the bright tiny bursts of zest, and the smooth filling all felt like sunshine on a plate, and I have kept returning to this recipe ever since.
The Ingredients That Do the Heavy Lifting
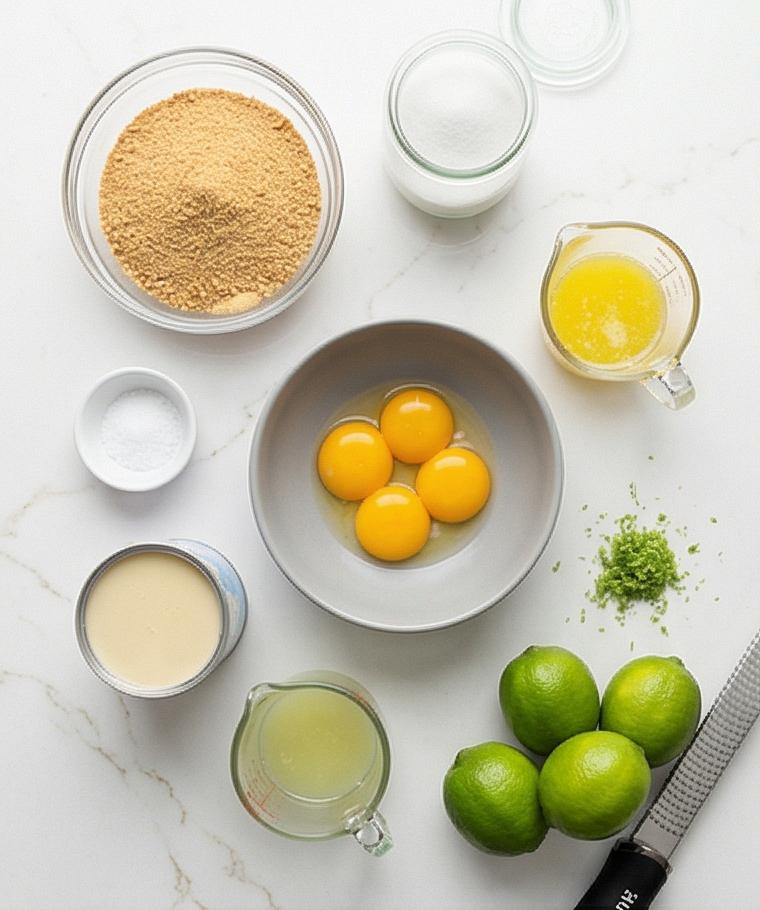
- Graham cracker crumbs: The crunchy foundation for the crust. Use finely crushed crackers for an even press; for a gluten-free option try gluten-free graham or crushed digestive biscuits.
- Granulated sugar: Sweetens the crust and balances the lime. Brown sugar will give a deeper flavor but change the color.
- Unsalted butter: Binds the crust and adds richness. Use melted and slightly cooled; swap for coconut oil in a dairy-free twist but expect a looser texture.
- Egg yolks: Provide structure and silkiness to the filling. Room temperature yolks incorporate more smoothly.
- Sweetened condensed milk: The creamy, sweet base that sets with lime juice. It is crucial to the classic texture; a dairy-free condensed milk can work but will slightly alter flavor.
- Key lime juice: The soul of the pie. Freshly squeezed is best for brightness; bottled juice works in a pinch but loses some floral notes.
- Heavy whipping cream: For the topping. Chill it well for the best volume when whipped; coconut cream is an option for a vegan take.
Essential Kitchen Tools and Why They Matter
A few honest tools will make this Key Lime Pie Recipe feel effortless and give you the best results. A 9-inch pie dish is the obvious choice; it gives the filling the right depth. A rimmed baking sheet makes moving the pie in and out of the oven simple and saves spills. Use a medium mixing bowl for the crust and a separate chilled metal bowl for whipping cream to get better volume.
- 9-inch pie dish: Holds the crust and filling in the ideal proportion; glass or ceramic both work.
- Rimmed baking sheet: Prevents drips and helps you transfer the pie safely.
- Medium and small mixing bowls: One for crumbs and crust, one for the filling. Glass or ceramic are fine.
- Whisk and spatula: For smooth filling and scraping every last bit into the pie.
- Electric hand mixer or stand mixer: Makes whipping the cream quick and stable; use a chilled bowl for best results.
If you are without a mixer, a sturdy whisk and cold hands will still get the job done, though it takes more elbow grease.
Step-by-Step Preparation Guide
Step 1: Preheat and ready the pie dish
Preheat your oven to 350°F (175°C) and position a rack in the center. Place a clean 9-inch (23 cm) pie dish on a rimmed baking sheet so it’s easy to move later; this is the simple prep that makes everything smooth. Keep the pie dish and baking sheet together on the Calacatta-like surface so they become part of the same visual story as you work.
Step 2: Combine dry crumbs and sugar
In a medium matte grey ceramic bowl, stir 1 1/2 cups finely crushed graham cracker crumbs, 1/3 cup granulated sugar, and 1/8 teaspoon fine sea salt with a fork until evenly distributed. The mixture should read as uniformly grainy and dry — think fine, pale sand ready to accept butter. Keep a small clear glass jar of extra sugar and a tiny ramekin of salt nearby for visual balance.
Step 3: Add melted butter and form the crust
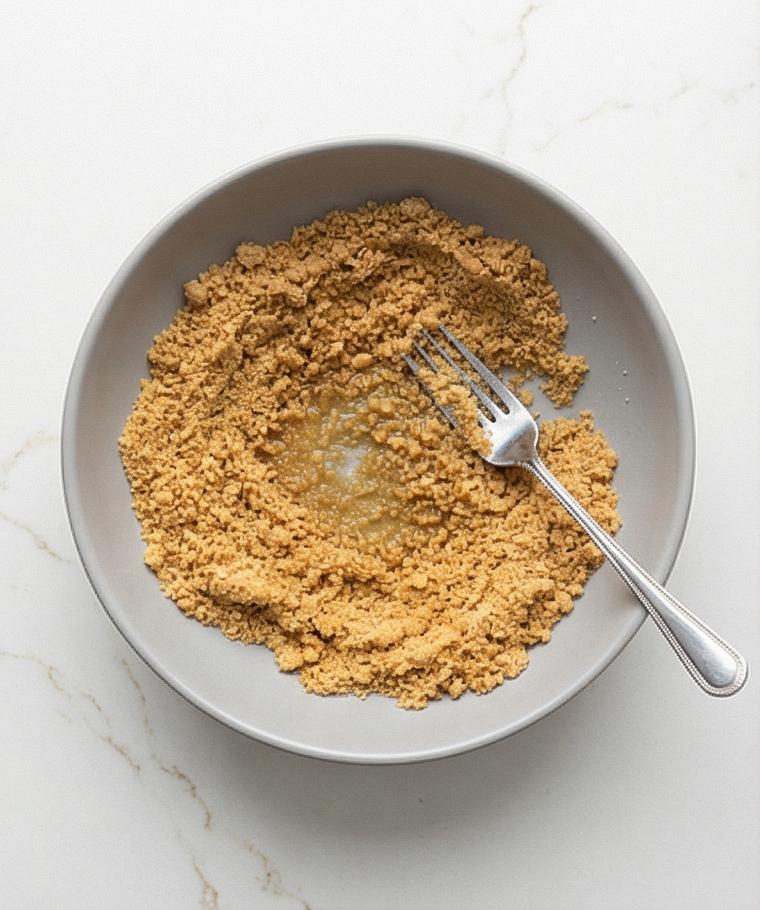
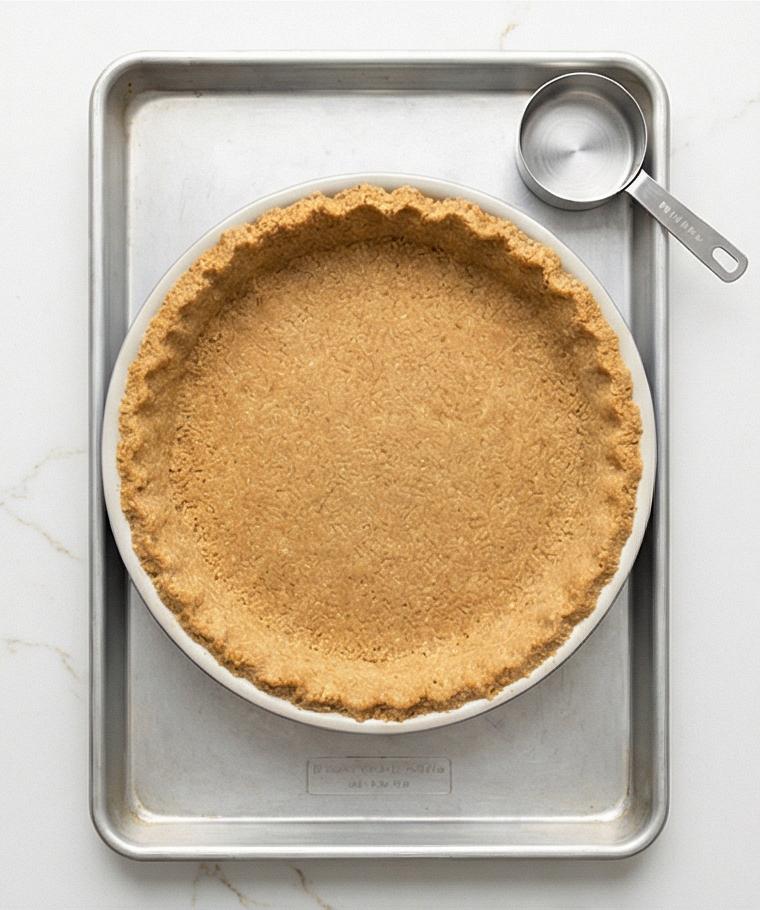
Pour 5 tablespoons melted, slightly cooled unsalted butter into the crumb bowl and stir with the same fork until every crumb looks moistened and the texture resembles damp sand that clumps when pressed. Transfer the crumb mix to the 9-inch pie dish and use your fingers then the flat bottom of a measuring cup to press an even layer up the sides and across the base, smoothing and compacting without any bare spots. Set the filled pie dish on its baking sheet ready to par-bake.
Step 4: Par-bake and cool the crust
Slide the baking sheet with the pie dish (no oven visible) into the preheated space implied, and par-bake until the crust is fragrant and just beginning to darken at the edges — the surface should look set but not browned. Remove and let the crust rest on a wire rack for about 10 minutes; tip the oven temperature down to 325°F (165°C) for the later bake so it’s ready. The cooled crust should hold together when tapped and show a slightly firmer surface.
Step 5: Whisk yolks and lime zest into a pale base
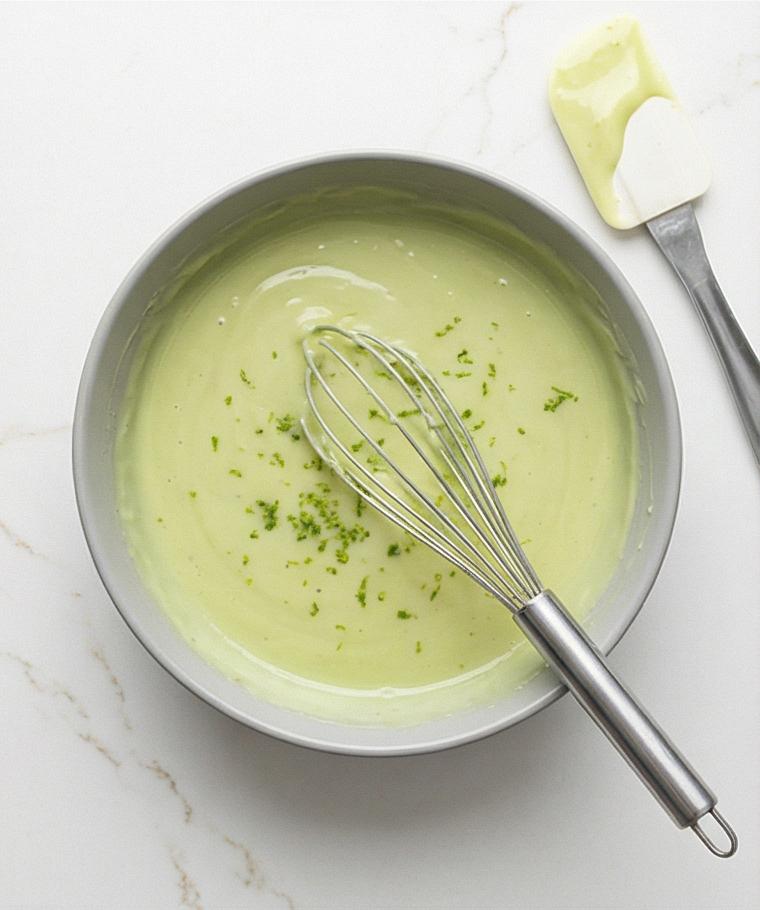
In the same matte grey ceramic bowl, vigorously whisk together 4 large room-temperature egg yolks and 1 tablespoon finely grated key lime zest until the mixture thickens slightly and turns pale and creamy, releasing fragrant oils from the zest. The surface should look satin-smooth and slightly fluffier — a bright yellow base turning toward creamy as it aerates. Add the condensed milk and whisk again until completely glossy and uniform.
Step 6: Finish the lime filling
Slowly pour in 2/3 cup key lime juice while whisking constantly, along with 1/8 teaspoon fine sea salt, until the filling is perfectly smooth and slightly thickened with no streaks or separation. Let the mixture rest for about 5 minutes so air bubbles rise, then tap the bowl to release excess bubbles; the final filling should be thick, glossy, and pale green, emulsified and homogenous.
Step 7: Fill the crust and bake until set
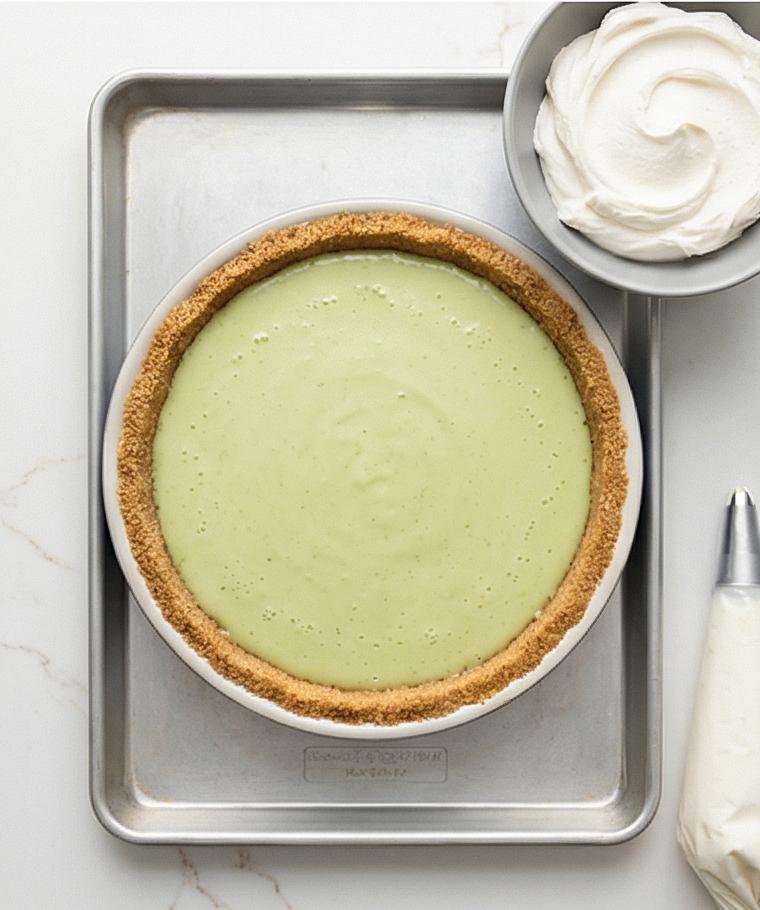
Pour the lime filling into the still-warm par-baked crust, using a flexible spatula to scrape the bowl and smooth the top into an even layer. Gently jiggle the pie dish to level the surface and remove any residual bubbles. Return the pie on its baking sheet to the reduced 325°F environment for 12–15 minutes until the edges are set and tiny pin-sized bubbles appear around the perimeter while the very center retains a slight wobble. Remove and transfer to a wire rack to cool.
Step 8: Chill and whip the cream
After the pie cools to barely warm, refrigerate uncovered for at least 3–4 hours to fully set. Near the end of chill time, place the same matte grey mixing bowl and the beaters in the refrigerator to chill. Pour 1 cup very cold heavy cream into the chilled bowl with 2 tablespoons sifted powdered sugar, 1/2 teaspoon vanilla, and a tiny pinch salt. Beat until medium-soft to medium-stiff peaks form — smooth, billowy, and glossy, ready to pipe or spread.
Step 9: Top, garnish, and serve
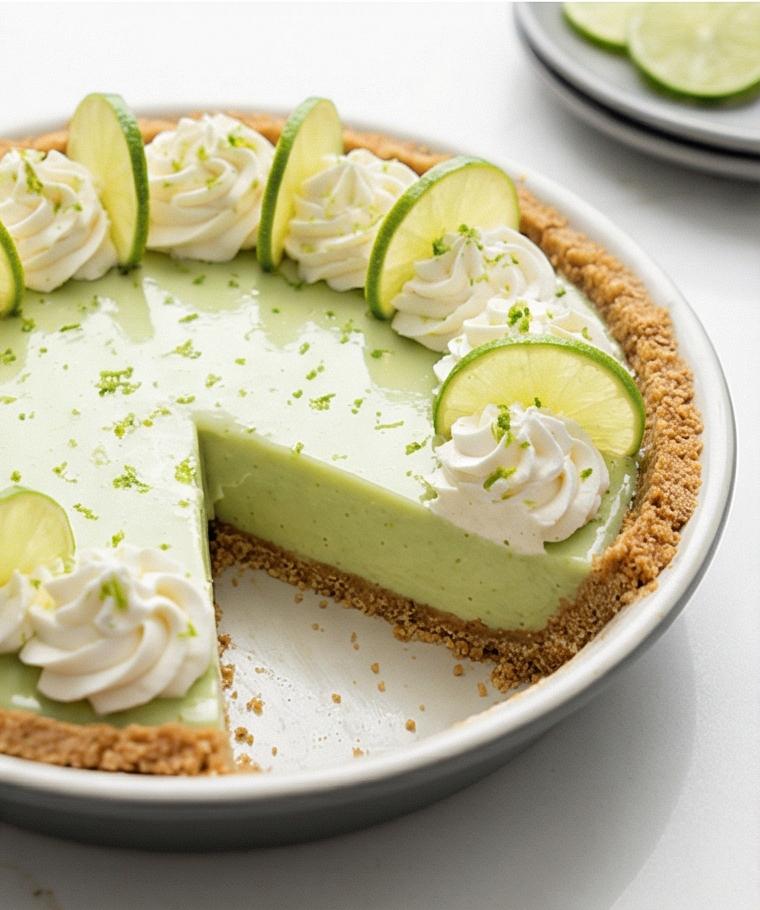
Either spread the whipped cream into an even layer over the thoroughly chilled pie or transfer it to a piping bag and pipe rosettes around the edge, leaving some lime filling visible in the center. Finish with about 1 teaspoon finely grated lime zest and 4–6 very thin lime slices arranged evenly. For the cleanest slices refrigerate an extra 20–30 minutes before cutting. Store leftovers covered in the refrigerator for up to 3 days.
Making It Your Own
Try a coconut-tinged version by swapping half the graham crumbs for toasted coconut flakes; it leaned tropical and made the crust sing at a summer brunch.
For a lower-sugar option, reduce the sugar in the crust slightly and use unsweetened coconut condensed milk carefully if you need a dairy-free swap; the texture changes but the result is still satisfying.
I once added a teaspoon of finely grated ginger to the crust for a spicy lift. It was unexpected and delightful when paired with the lime zest on top.
If you like an extra citrus punch, fold in a tablespoon of orange or lime marmalade with the filling for a glossy, slightly different flavor profile.
How to Serve
If I am hosting a dinner party, I slice the pie into 8 clean wedges and serve on chilled plates so the filling feels luxuriously cool. For larger gatherings, you can double the recipe and bake two pies; they store and travel well.
To make smaller portions for a tasting menu, use small tart pans or a muffin tin lined with crust for individual servings. For a show-stopping centerpiece, pipe taller rosettes of whipped cream and finish with extra lime zest and a few thin lime wheels.
Adjust plating by pairing slices with a small spoonful of macerated berries or a sprig of mint for color contrast and a fresh aroma.
Storage and Reheating Tips
This Key Lime Pie Recipe keeps best in the refrigerator. Cover it lightly with plastic wrap or a pie dome to protect the whipped cream topping; it will stay fresh for up to 3 days but tastes best within 48 hours. I always chill it for at least 3 hours before serving so the filling sets perfectly.
If you need to make it ahead, bake and chill the pie fully, then add whipped cream and garnishes shortly before serving to preserve texture. Do not freeze the finished pie with whipped cream on top, but you can freeze the filling in an airtight container and thaw in the refrigerator, then rewhip fresh cream to top.
Common Slip-Ups and Simple Fixes
Overwhipping the cream is the most common mistake; stop when peaks are medium-stiff and glossy. It is easy to go too far and end up with grainy, buttery bits.
Another misstep is using bottled lime juice exclusively. It works, but fresh key lime juice delivers brighter, fresher notes. If your filling looks curdled, whisk gently and let it rest; small bubbles and slight separation usually smooth out before baking.
Final Encouragement
Give this Key Lime Pie Recipe a try the next time you want a dessert that feels both effortless and special. It brightens up any table, travels well to potlucks, and is one of those recipes you will keep making again and again.
Frequently Asked Questions.
- Can I use regular limes instead of key limes? Yes. Regular limes work fine; you may need fewer or more depending on size. The flavor will be slightly less floral but still delicious.
- How long should I chill the pie before serving? Chill at least 3 hours, though 4 hours is ideal for the creamiest texture and clean slicing.
- Can I make the pie ahead of time? Absolutely. Bake and chill the pie, then add whipped cream and garnishes just before serving for the freshest look.
- Is there a dairy-free alternative for the filling? You can try a dairy-free condensed milk and coconut cream for topping, but texture and flavor will vary from the classic.
- My filling is a little too loose after baking. What now? Let it cool and then chill longer; the filling firms up as it cools. If it never sets, a shallow re-bake at a slightly lower temperature for a few minutes can help.
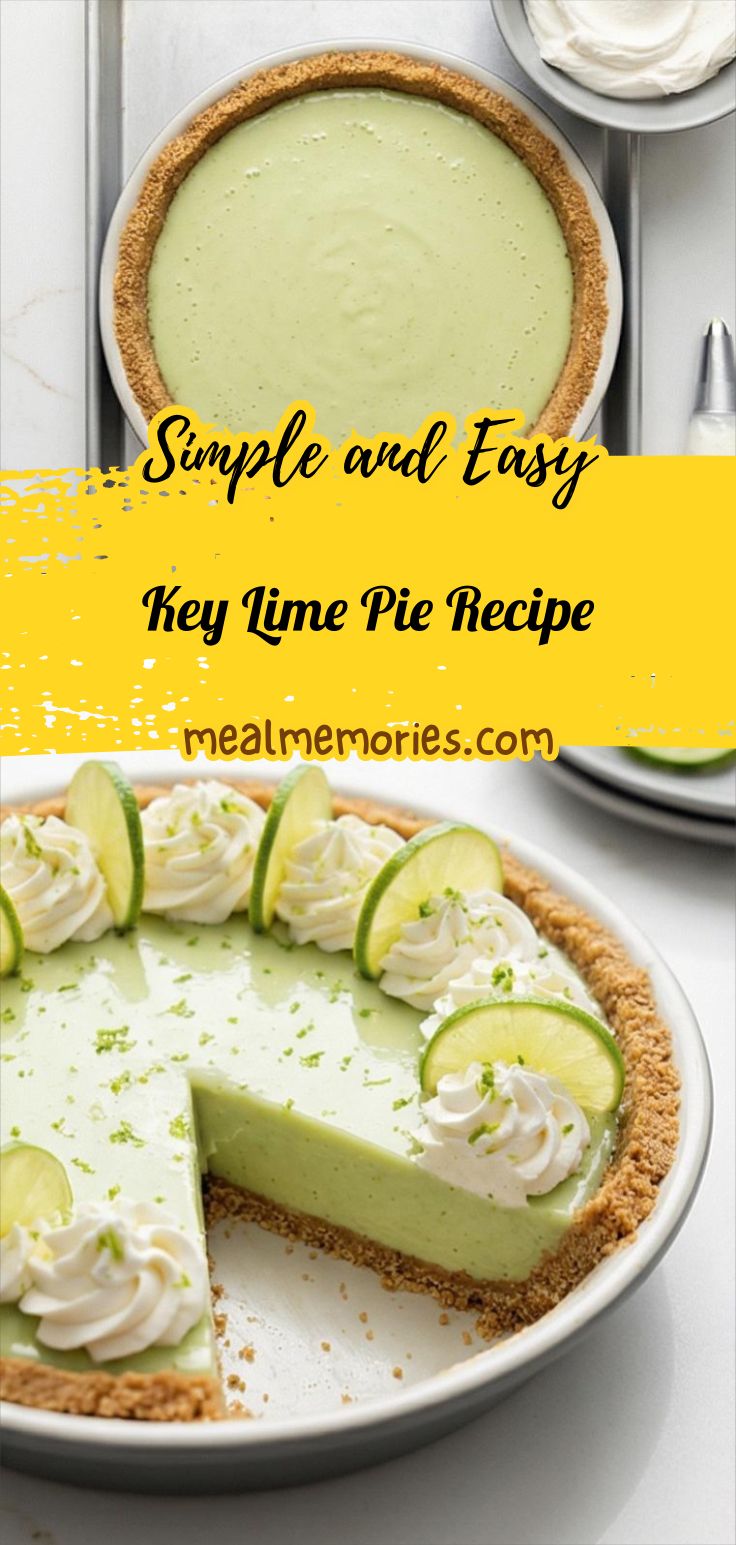
Key Lime Pie Recipe
Make this Key Lime Pie Recipe today: creamy, tart, and easy to assemble for sunny gatherings.
Ingredients
Instructions
Step 1: Preheat and ready the pie dish
Preheat your oven to 350°F (175°C) and position a rack in the center. Place a clean 9-inch (23 cm) pie dish on a rimmed baking sheet so it's easy to move later; this is the simple prep that makes everything smooth. Keep the pie dish and baking sheet together on the Calacatta-like surface so they become part of the same visual story as you work.
Step 2: Combine dry crumbs and sugar
In a medium matte grey ceramic bowl, stir 1 1/2 cups finely crushed graham cracker crumbs, 1/3 cup granulated sugar, and 1/8 teaspoon fine sea salt with a fork until evenly distributed. The mixture should read as uniformly grainy and dry — think fine, pale sand ready to accept butter. Keep a small clear glass jar of extra sugar and a tiny ramekin of salt nearby for visual balance.
Step 3: Add melted butter and form the crust
Pour 5 tablespoons melted, slightly cooled unsalted butter into the crumb bowl and stir with the same fork until every crumb looks moistened and the texture resembles damp sand that clumps when pressed. Transfer the crumb mix to the 9-inch pie dish and use your fingers then the flat bottom of a measuring cup to press an even layer up the sides and across the base, smoothing and compacting without any bare spots. Set the filled pie dish on its baking sheet ready to par-bake.
Step 4: Par-bake and cool the crust
Slide the baking sheet with the pie dish (no oven visible) into the preheated space implied, and par-bake until the crust is fragrant and just beginning to darken at the edges — the surface should look set but not browned. Remove and let the crust rest on a wire rack for about 10 minutes; tip the oven temperature down to 325°F (165°C) for the later bake so it's ready. The cooled crust should hold together when tapped and show a slightly firmer surface.
Step 5: Whisk yolks and lime zest into a pale base
In the same matte grey ceramic bowl, vigorously whisk together 4 large room-temperature egg yolks and 1 tablespoon finely grated key lime zest until the mixture thickens slightly and turns pale and creamy, releasing fragrant oils from the zest. The surface should look satin-smooth and slightly fluffier — a bright yellow base turning toward creamy as it aerates. Add the condensed milk and whisk again until completely glossy and uniform.
Step 6: Finish the lime filling
Slowly pour in 2/3 cup key lime juice while whisking constantly, along with 1/8 teaspoon fine sea salt, until the filling is perfectly smooth and slightly thickened with no streaks or separation. Let the mixture rest for about 5 minutes so air bubbles rise, then tap the bowl to release excess bubbles; the final filling should be thick, glossy, and pale green, emulsified and homogenous.
Step 7: Fill the crust and bake until set
Pour the lime filling into the still-warm par-baked crust, using a flexible spatula to scrape the bowl and smooth the top into an even layer. Gently jiggle the pie dish to level the surface and remove any residual bubbles. Return the pie on its baking sheet to the reduced 325°F environment for 12–15 minutes until the edges are set and tiny pin-sized bubbles appear around the perimeter while the very center retains a slight wobble. Remove and transfer to a wire rack to cool.
Step 8: Chill and whip the cream
After the pie cools to barely warm, refrigerate uncovered for at least 3–4 hours to fully set. Near the end of chill time, place the same matte grey mixing bowl and the beaters in the refrigerator to chill. Pour 1 cup very cold heavy cream into the chilled bowl with 2 tablespoons sifted powdered sugar, 1/2 teaspoon vanilla, and a tiny pinch salt. Beat until medium-soft to medium-stiff peaks form — smooth, billowy, and glossy, ready to pipe or spread.
Step 9: Top, garnish, and serve
Either spread the whipped cream into an even layer over the thoroughly chilled pie or transfer it to a piping bag and pipe rosettes around the edge, leaving some lime filling visible in the center. Finish with about 1 teaspoon finely grated lime zest and 4–6 very thin lime slices arranged evenly. For the cleanest slices refrigerate an extra 20–30 minutes before cutting. Store leftovers covered in the refrigerator for up to 3 days.
Notes
- Chill the mixing bowl and beaters before whipping cream for better volume.
- Use room-temperature egg yolks to help the filling emulsify smoothly.
- Fresh key lime juice gives the brightest flavor; bottled juice works in a pinch.
- Press the crust firmly and evenly to avoid crumbly slices.
- Add whipped cream and garnishes just before serving for the best presentation.