I have been making this Scrambled Eggs Recipe so often that the rhythm of whisking and the smell of butter has become morning comfort. Mornings with this Scrambled Eggs Recipe are simple, bright, and kind of celebratory for no reason at all. I love how a few good ingredients and gentle technique turn ordinary eggs into something memorable. If you want a fast, reliable breakfast that feels special, this is the one I reach for again and again.
How This Scrambled Eggs Recipe Became My Rainy-Day Go-To
There was a rainy Saturday when I first learned to slow-cook my eggs the way this Scrambled Eggs Recipe asks. The window steamed up, and the kitchen smelled like butter and warm bread. I remember the small, steady motion of folding the eggs with a silicone spatula and how the curds gradually became custardy and glowing. Friends came by, and we ate the eggs on toast, laughing about how something so plain could feel like a hug. That day taught me that patience and a few simple details make a routine morning into a ritual. Whenever a gray sky hangs low now, I make this Scrambled Eggs Recipe and it turns the whole day gentler.
What Makes the Ingredients Sing
Each ingredient here plays a quiet but vital role. The eggs are the foundation, giving structure and richness; use the freshest you can or substitute with pasteurized eggs if needed. Whole milk or cream adds silk and body; for a lighter version try low fat milk or a splash of non-dairy creamer though texture will change. Butter adds flavor and glossy mouthfeel; you can use olive oil for dairy free cooking but aim for a similar fat amount. Cheese brings savory depth; swap with a sharp alternative or nutritional yeast to keep it nutty. Bread anchors the dish; pick a sturdy, good-quality loaf that toasts well.
- Eggs: The foundation of texture and flavor; choose fresh, room-temperature eggs for even cooking.
- Whole milk or heavy cream: Adds silk and tenderness; milk makes it lighter while cream makes it richer.
- Butter: For cooking and finishing; provides flavor and glossy curds, replace with olive oil if avoiding dairy.
- Cheese: Optional but luxurious; finely grated Cheddar, Gruyere, or Parmesan melt into little pockets of flavor.
- Bread: Good-quality toasted bread supports the soft eggs and adds contrast.
Essential Kitchen Tools
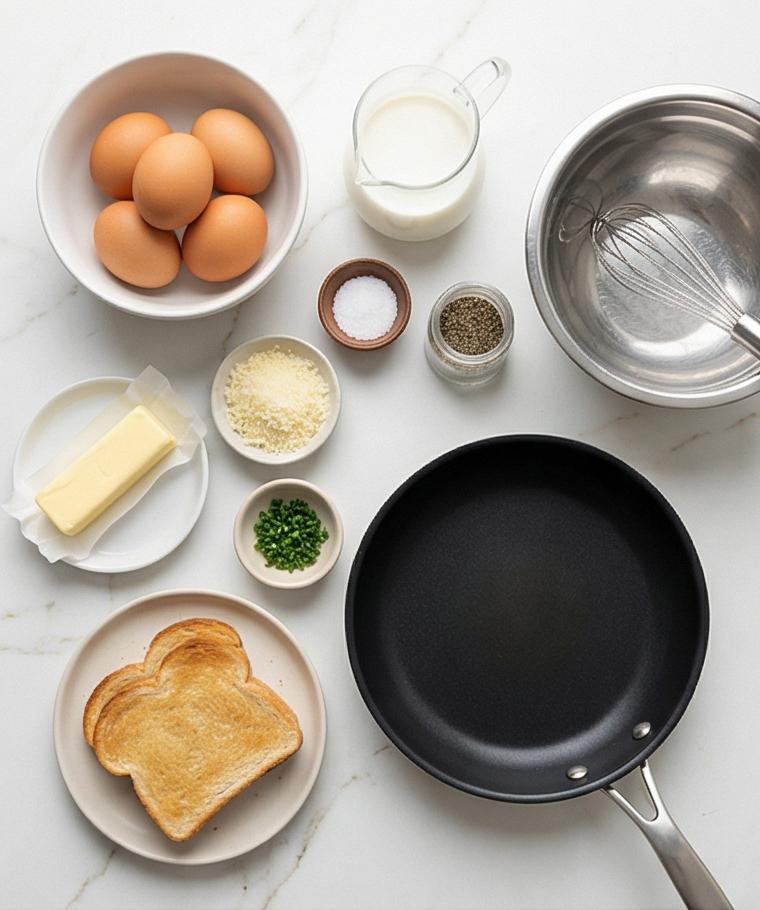
A few simple tools make this Scrambled Eggs Recipe easy and repeatable. The right pan and spatula help you coax soft curds without overworking them, and a reliable whisk accelerates the mixing. If you do not have a nonstick skillet, pick a well seasoned small stainless pan and use low heat. The silicone spatula is gentle and flexible; a wooden spoon can work in a pinch though it may not scrape as smoothly. A small mixing bowl keeps the eggs contained when whisking, and a toaster or broiler helps you serve warm, crisp toast alongside the eggs.
- Medium nonstick skillet: Ensures even heat and easy release, substitute with a well seasoned stainless pan.
- Heatproof silicone spatula: For gentle folding and scraping, use a wooden spoon if needed.
- Small mixing bowl: Keeps the eggs together for whisking, any bowl will do.
- Whisk or fork: For aerating the eggs; a fork works fine when a whisk is not available.
- Toaster or broiler: For crisp toast, or use a skillet to pan-toast slices.
Step-by-Step Preparation Guide
Step 1: Toast and Set Up the Workstation
Begin by setting out your medium nonstick skillet, a heatproof silicone spatula, a small mixing bowl, and a whisk or fork on the cool quartz surface. If you plan to serve with toast, put two slices of bread into the toaster or broiler and toast until lightly golden; keep them warm on a small plate beside the workspace. This step is about rhythm and readiness—everything you need arranged neatly on the Calacatta-like surface so the sequence flows smoothly.
Step 2: Crack, Season, and Whisk the Eggs
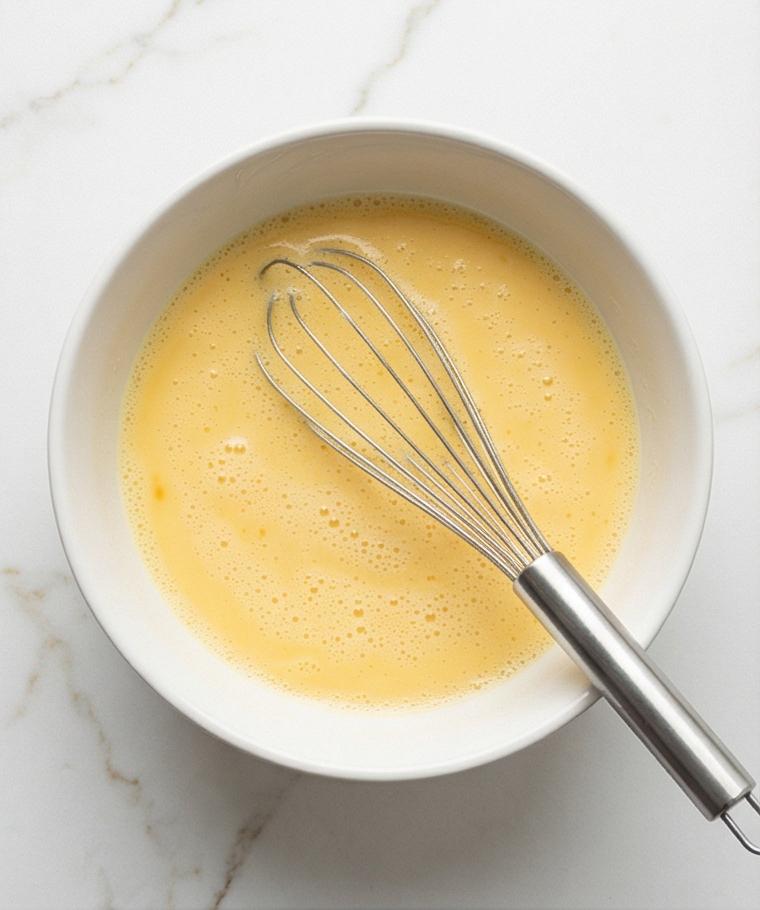
Crack all four large eggs into the small mixing bowl, check for any shell fragments, then add the whole milk (or cream), the fine sea salt, and a few grinds of black pepper. Whisk vigorously for 30–45 seconds until the mixture is fully combined, slightly frothy, and uniformly pale yellow with no white streaks—well-aerated eggs will give you the softest, creamiest curds. Keep the whisk resting in the bowl when you’re done to show the recent action.
Step 3: Melt Butter and Add the Egg Mixture to the Skillet
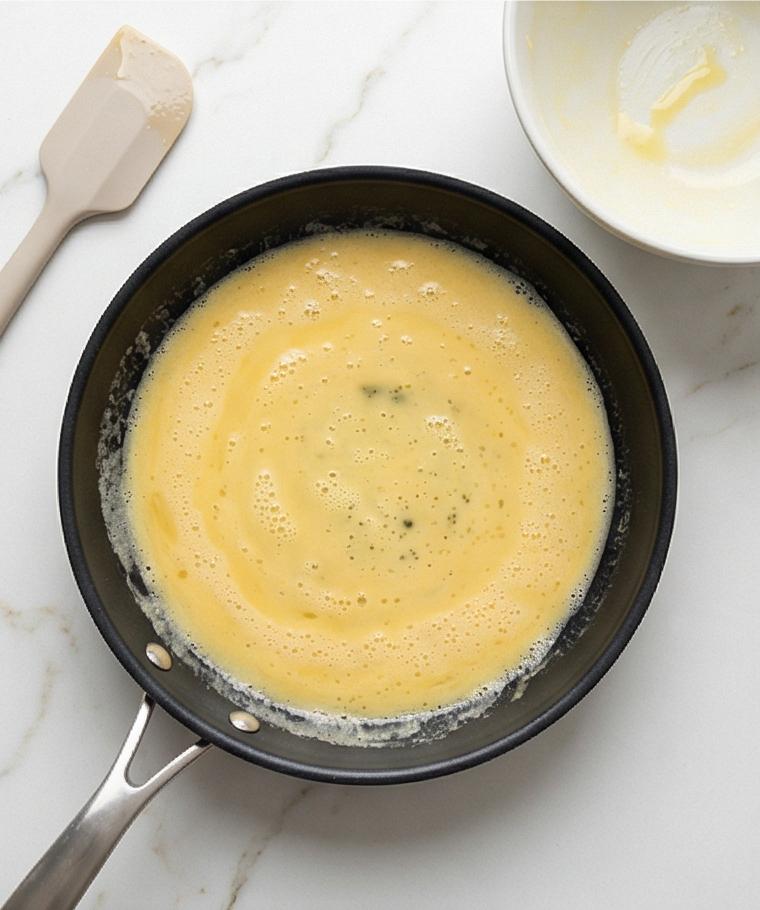
Place the 8-inch nonstick skillet on the surface (no stove visible) and add the cold tablespoon of butter so it melts slowly and foams gently across the pan base. Pour the whisked egg mixture into the buttery pool, scraping the mixing bowl so nothing is left behind. Let the eggs sit undisturbed just long enough for the very edges to become opaque while the center remains glossy and liquid—this is the quiet moment before curds form.
Step 4: Slow Folding to Form Soft Curds
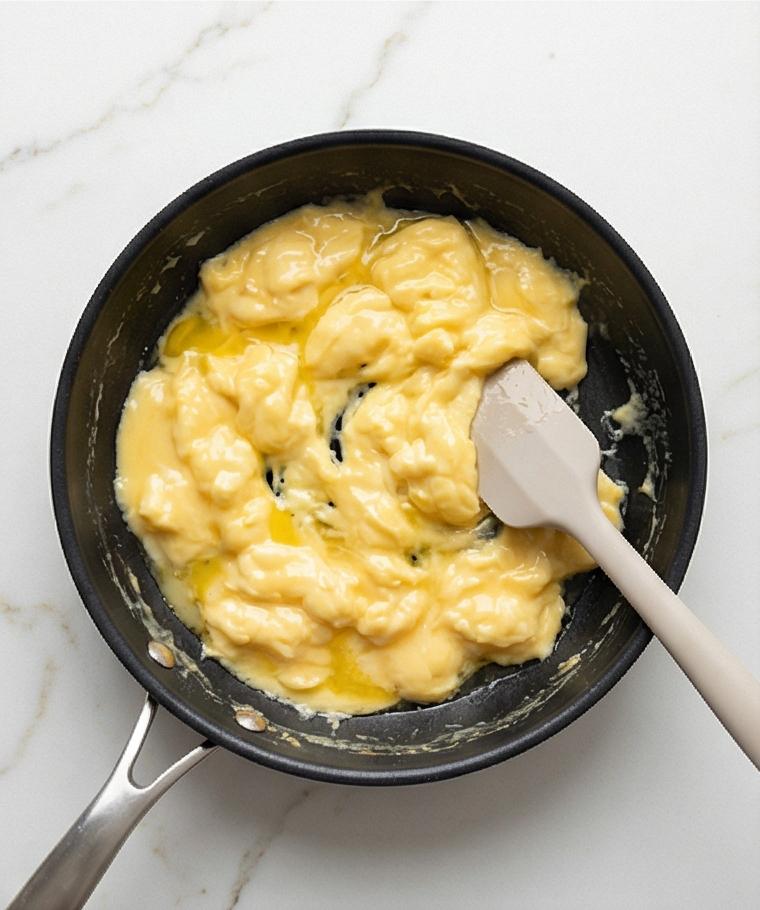
Using the silicone spatula, push slowly from the edges toward the center in long, gentle strokes, tilting the skillet so the still-liquid egg flows into cleared areas. Continue this slow folding and tilting motion, maintaining a gentle heat (the skillet sits on the work surface for photography—no burner visible). Over 3–5 minutes the mixture resolves into soft, pillowy curds that are mostly set but still glossy and slightly runny in places—texturally custardy rather than dry.
Step 5: Finish Off-Heat with Butter and Cheese
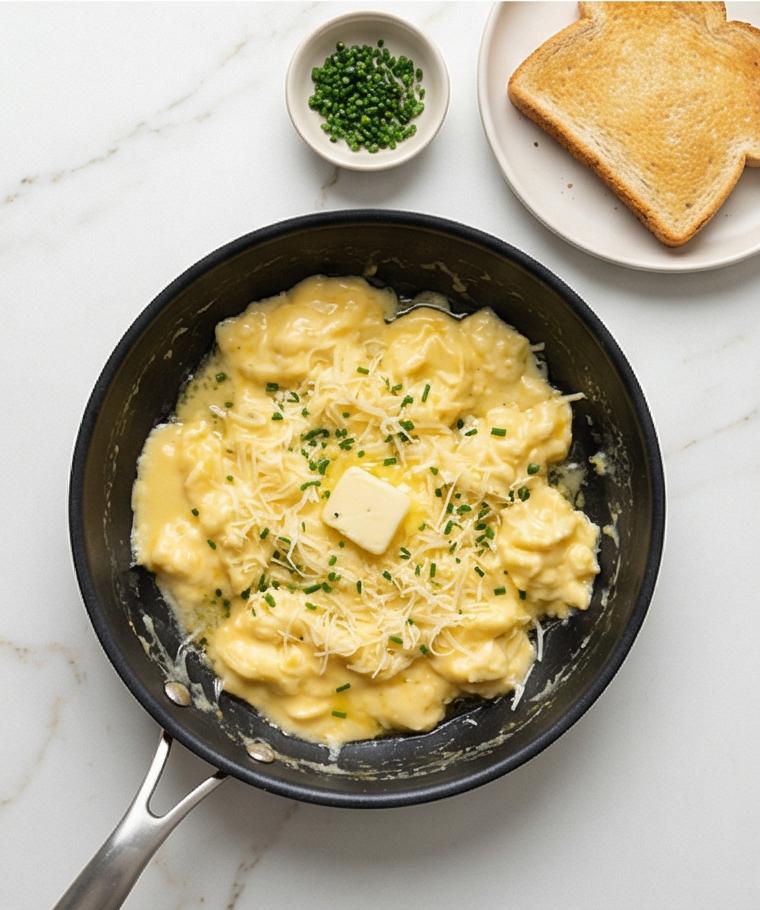
When the eggs are about 90–95% set, remove the skillet from any heat source (depicted simply sitting on the surface) and add the room-temperature finishing butter and the finely grated cheese. Gently fold for 10–20 seconds until the butter and cheese just melt into the curds, creating pockets of silk and delicate, melted threads of cheese. Taste and adjust seasoning with a tiny pinch more salt and black pepper if needed.
Step 6: Plate and Garnish
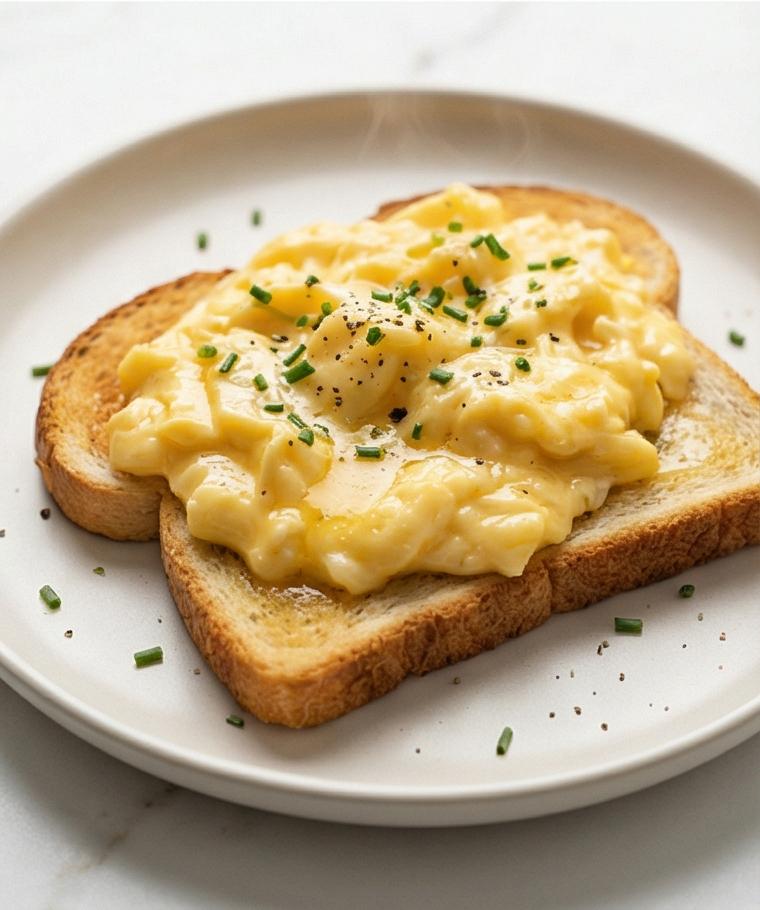
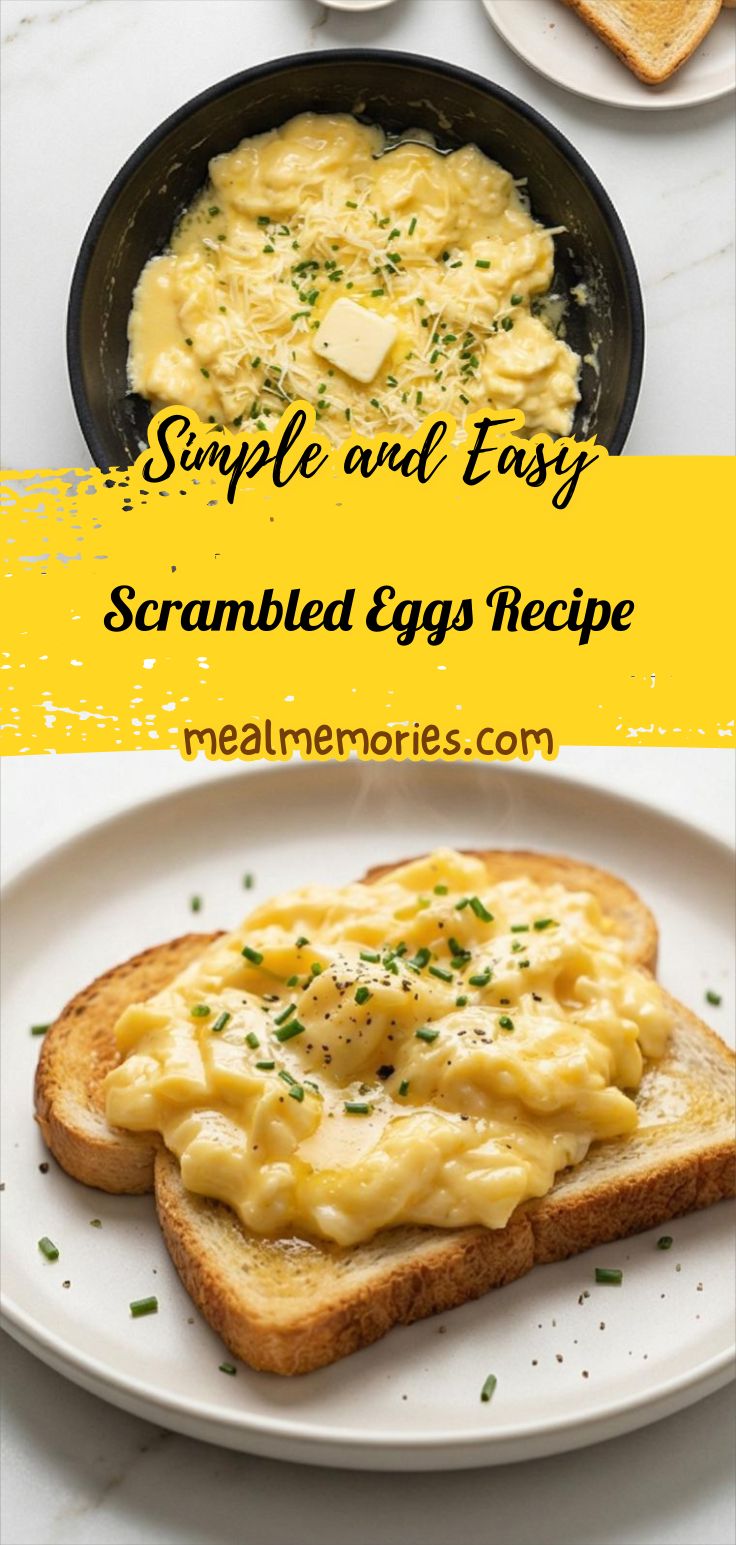
Immediately transfer the soft, custardy scrambled eggs onto the warm, buttered toast (or onto a plate alongside toast if preferred). Finish with a scattering of finely snipped fresh chives and a few fresh grinds of black pepper. The eggs should look glossy, moist, and custard-like with no browned spots—serve at once.
Making It Your Own
Try small experiments to tune this Scrambled Eggs Recipe to your taste. Add a spoonful of creme fraiche or Greek yogurt at the end for tang and silk. For a herb-forward version, fold in chopped dill, tarragon, or basil right before serving. If you want a smoky note, try a sprinkle of smoked paprika or fold in tiny pieces of smoked salmon or crisp pancetta. For dairy free, use olive oil and omit cheese; for a richer finish swap milk for cream. Each tweak changes the mood but keeps the technique intact.
How to Serve
When I serve this Scrambled Eggs Recipe for guests I focus on rhythm and contrast. Lay warm toast on long plates, pile the eggs gently in the center, and finish with a bright scattering of chives and a grind of pepper. For a brunch spread, offer small bowls of pickled vegetables, roasted tomatoes, and avocado so guests can build bites.
Scaling is simple: multiply eggs and dairy in proportional amounts and cook in batches in the same skillet to keep control. If serving a crowd, keep finished eggs warm briefly in a low oven and give each portion a quick flourish of finishing butter.
Storage and Reheating Tips
Leftovers are best kept for just one day. Store the cooled eggs in an airtight container in the refrigerator. They will firm up as they chill, so expect a change in texture.
To reheat, warm gently in a low skillet with a little butter or water to loosen the curds, stirring until just heated through. Avoid high heat which will dry them out. For best quality, eat reheated eggs the same day you made them.
Common Mistakes and How to Avoid Them
The most common error is cooking over too high heat which makes the eggs dry and grainy. Keep the temperature low and be patient; gentle folding makes tender curds. Another mistake is over-whisking or under-whisking. Aim for a uniform pale yellow with no white streaks so curds form evenly.
Also watch salt timing. Salt added too early can disrupt texture slightly; seasoning as you go and finishing with a small pinch works well.
Final Thoughts
This Scrambled Eggs Recipe is tiny daily luxury made from humble parts. It rewards a little patience and a soft touch, and it scales to busy mornings or relaxed brunches. Try it once and you may find it becomes part of your comfort repertoire.
Frequently Asked Questions
- Can I make this without dairy? Yes, use a splash of water or a plant milk and cook in olive oil; texture will be a bit different but still tasty.
- Can I use frozen eggs or egg substitute? I do not recommend frozen eggs; liquid egg substitutes work but will alter flavor and texture.
- How do I know when the eggs are done? Take them off when they are mostly set but still glossy and a tiny bit runny; carryover heat will finish them.
- Can I add vegetables? Yes, cook tender vegetables first and fold them in at the end to avoid releasing too much moisture.
- Is it okay to make these ahead for guests? Make the eggs shortly before serving for best texture; you can prepare toast and garnishes beforehand.
Scrambled Eggs Recipe
Make the Scrambled Eggs Recipe for silky, custardy eggs on buttered toast in about 10 minutes.
Ingredients
Instructions
Step 1: Toast and Set Up the Workstation
Begin by setting out your medium nonstick skillet, a heatproof silicone spatula, a small mixing bowl, and a whisk or fork on the cool quartz surface. If you plan to serve with toast, put two slices of bread into the toaster or broiler and toast until lightly golden; keep them warm on a small plate beside the workspace. This step is about rhythm and readiness—everything you need arranged neatly on the Calacatta-like surface so the sequence flows smoothly.
Step 2: Crack, Season, and Whisk the Eggs
Crack all four large eggs into the small mixing bowl, check for any shell fragments, then add the whole milk (or cream), the fine sea salt, and a few grinds of black pepper. Whisk vigorously for 30–45 seconds until the mixture is fully combined, slightly frothy, and uniformly pale yellow with no white streaks—well-aerated eggs will give you the softest, creamiest curds. Keep the whisk resting in the bowl when you’re done to show the recent action.
Step 3: Melt Butter and Add the Egg Mixture to the Skillet
Place the 8-inch nonstick skillet on the surface (no stove visible) and add the cold tablespoon of butter so it melts slowly and foams gently across the pan base. Pour the whisked egg mixture into the buttery pool, scraping the mixing bowl so nothing is left behind. Let the eggs sit undisturbed just long enough for the very edges to become opaque while the center remains glossy and liquid—this is the quiet moment before curds form.
Step 4: Slow Folding to Form Soft Curds
Using the silicone spatula, push slowly from the edges toward the center in long, gentle strokes, tilting the skillet so the still-liquid egg flows into cleared areas. Continue this slow folding and tilting motion, maintaining a gentle heat (the skillet sits on the work surface for photography—no burner visible). Over 3–5 minutes the mixture resolves into soft, pillowy curds that are mostly set but still glossy and slightly runny in places—texturally custardy rather than dry.
Step 5: Finish Off-Heat with Butter and Cheese
When the eggs are about 90–95% set, remove the skillet from any heat source (depicted simply sitting on the surface) and add the room-temperature finishing butter and the finely grated cheese. Gently fold for 10–20 seconds until the butter and cheese just melt into the curds, creating pockets of silk and delicate, melted threads of cheese. Taste and adjust seasoning with a tiny pinch more salt and black pepper if needed.
Step 6: Plate and Garnish
Immediately transfer the soft, custardy scrambled eggs onto the warm, buttered toast (or onto a plate alongside toast if preferred). Finish with a scattering of finely snipped fresh chives and a few fresh grinds of black pepper. The eggs should look glossy, moist, and custard-like with no browned spots—serve at once.
Notes
- Use room-temperature eggs and dairy for more even cooking.
- Keep heat low and fold gently to achieve custardy curds.
- Finish off-heat with butter and cheese for silk and shine.
- Reheat gently in a skillet with a splash of water or butter to restore texture.
- Serve immediately on warm, buttered toast for best contrast.